
DIY Rustic Wood Church Outdoor Christmas Decoration
One of my favorite Christmas traditions is driving around to look at the lights. We went every year when I was little, then I took my sons, and now we take my granddaughters. Those memories are part of why I still love creating outdoor Christmas decor of our own. This wooden church Christmas decoration was made from old reclaimed lumber and has become one of my favorite pieces in the front yard.
I bet right now you can remember a pretty outdoor Christmas display that thrilled you.
As soon as I moved out on my own, I created a small outdoor display with lights, and over the years I have made all kinds of outdoor Christmas decor. It changes from year to year depending on what stage the children are in. We used to have 6-foot plywood Santas, small reindeer, a couple of giant candy canes by the front door, and of course all sorts of Christmas lights. We also made plywood snowmen that looked like each family member, including the dog.
It’s such a fun part of the festive season that I don’t think I could skip it entirely. Now that we are getting older, I prefer all-white joyous Christmas lights (Hubs disagrees), so we have colored lights on the house and white lights on the Christmas displays.
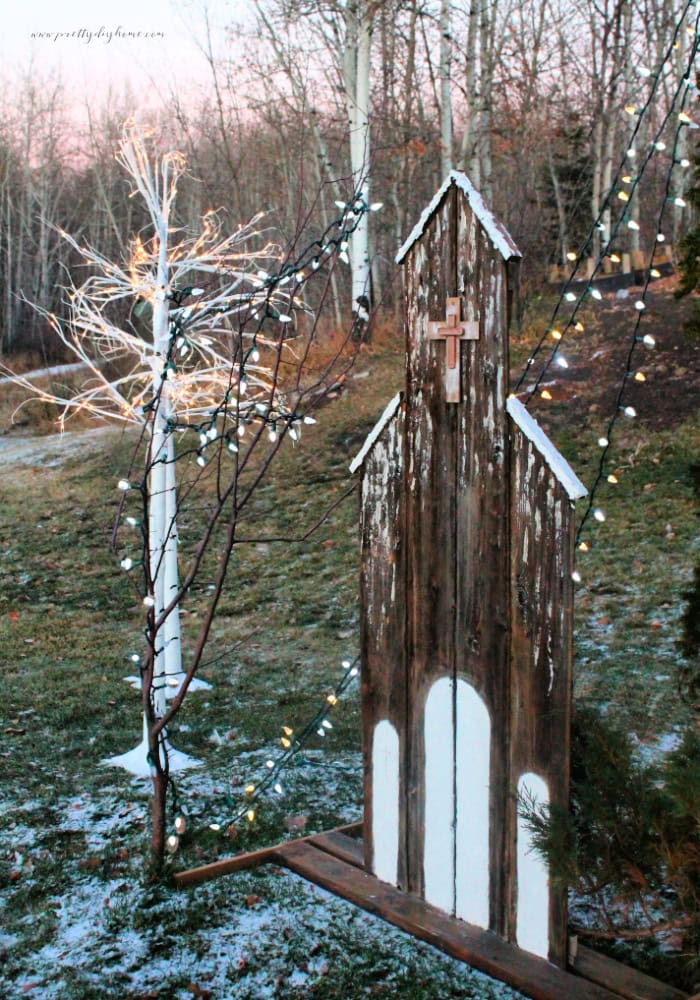
This rustic old wooden church is traditionally joyous; it brings a quiet holiday spirit to our front yard. I love having it and the nativity scene we built more than a decade ago when we bought our first home.
How to Make a Wooden Church Christmas Decoration
Wooden Church Christmas Decoration Supplies
We made this church for free, using the gifted wood and scrap wood we had on hand. It’s a great project for a weekend. We had so much fun making this beautiful old church and digging around to see what we could use without buying anything.
If we didn’t have 1 by 2, we sliced up 3/4 inch plywood; instead of a two-by-four, we used a leftover piece of 4-inch-wide trim. The 2 by 12 is from an old step we took apart, etc. In the images, you can see what we used, and I want you to use whatever you have on hand as well. It’s a great repurposing project, but make sure your wood is unfinished.
If you don’t have reclaimed or scrap wood, you can still make this church with new lumber from the hardware store. Choose rough or unfinished boards where possible, then stain or distress them to give the wood a more aged, rustic look. The tutorial guide below gives the commercial lumber sizes you can use for the project.
Before you begin, download the general woodworking pattern. It is not full size, but it includes the measurements and layout you need for this project.
For the Wooden Church
- 4 seven-inch-wide pieces of shiplap or lumber, preferably reclaimed wood
- 3 pieces of 1 by 2, cut 28 inches long (cross pieces)
- 1 piece of 1 by 2, cut 12 inches long (top cross piece)
- 2 pieces of 1 by 2, cut 11 1/2 inches long with a 47-degree angle at one end (upper peaked roof)
- 2 pieces of 1 by 2, cut 11 inches long with a 47-degree angle at one end (lower sloped roof)
Note – If I couldn’t source old wood, I would buy rough lumber and stain it walnut.
Wooden Church Base
- 1 piece of 2 by 12, cut 48 inches long
- 2 pieces of 1 by 2, cut 32 inches long (cross pieces)
- 1 piece of 1 by 2, cut 28 inches long (vertical back brace)
- 1 piece of 1 by 4, cut 28 inches long with 45-degree angled ends (horizontal back brace)
- 120-grit sandpaper for removing slivers
- Good-quality wood glue
- 1 1/2-inch wood screws
- Drywall compound or Spackle for the snow effect
Tools We Used
- Electric screwdriver
- Miter saw
- Router
- Assorted wood clamps
- Wire brush
- Paint spatula
- Sawhorses
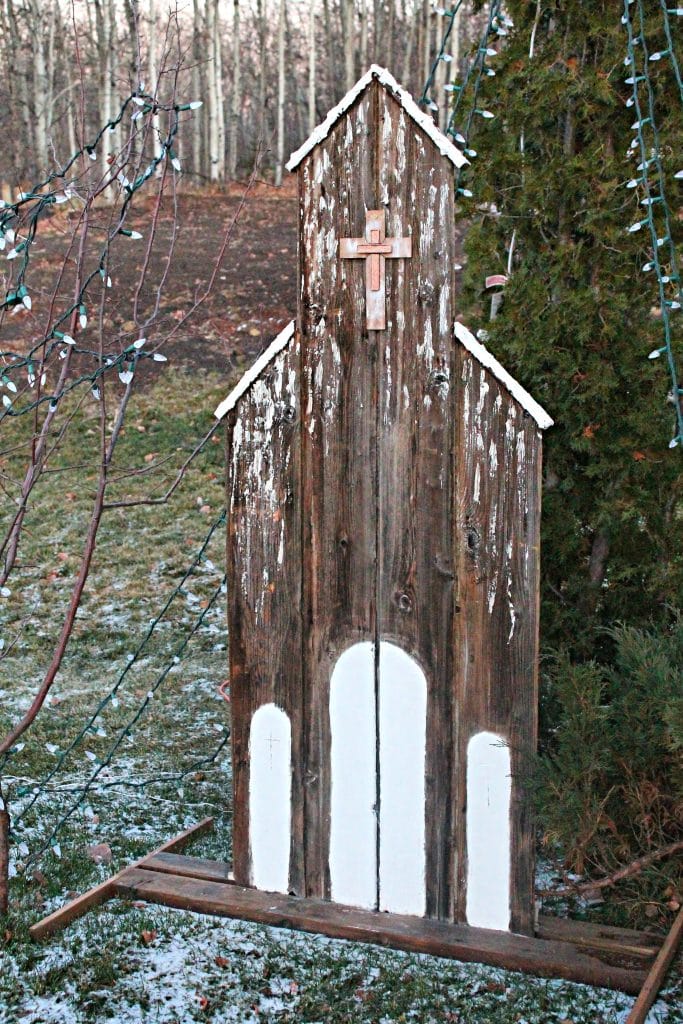
How to Build the Wooden Church
I am providing the written instructions first, with a video tutorial farther down the post.
Step 1: Clean and Repair Old Wood
Hubs’ son did me a favor and found these old tongue-and-groove boards from a shed on the back of his property that was falling apart. This wood has likely been weathering outdoors since the 1930s or 40s in the cold Canadian climate, so it is very rustic and exactly what I wanted for this project. I was thrilled with his gift.
You don’t need to use tongue-and-groove wood. I chose it for the striped look it gives the church, but you can use old 1 by 6 boards or fence boards as well.
How much cleaning and repairing you need depends on the condition of the reclaimed wood. Our wood is gloriously old, so the first step was to glue any cracks and then clean it with a wire brush to remove spiderwebs, dirt, and loose debris.
To glue the cracks, place wood glue into the crack and then use a clamp to hold it in place while the glue dries. While going through your reclaimed wood, sort the longer, stronger pieces from the shorter ones. The long pieces will be used for the steeple, while the shorter pieces can be used for the sides.
Step 2: Use the Pattern to Cut the Wood
Once you have the wood cleaned, use the template and line up the boards beside each other in the order you plan to use them. Then cut each piece to length.
Before gluing the pieces together, clean the contact areas again with a wire brush.
Step 3: Glue and Clamp the Boards
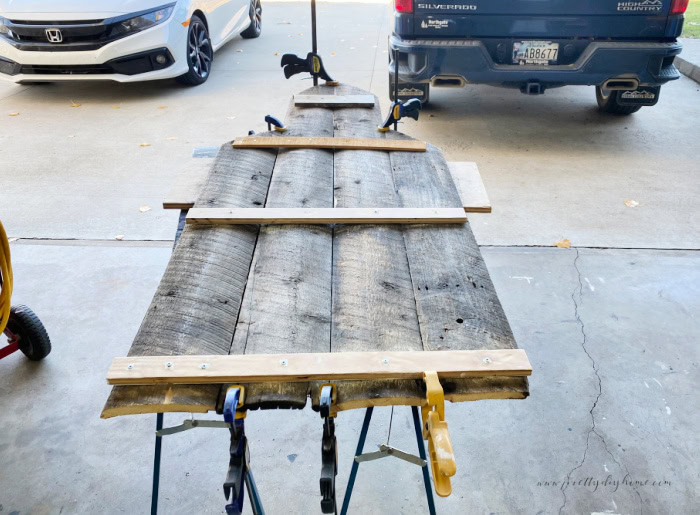
Glue all the tongue-and-groove slats together and wipe off any excess glue. Then clamp them into place. Working with gorgeous old, brittle wood had its challenges, including twists and bows, so we clamped the church from the top to the underside, making sure the slats fit together as closely as possible.
We also took two pieces of scrap wood, laid them across the entire width of the church, and clamped them in place. This snugged the edges together and helped straighten some of the curvature in the reclaimed wood.
Step 4: Add the Cross Braces
Once the boards are clamped well, measure across and cut the cross pieces from scrap wood. Predrill the wood to help prevent cracking, add a little wood glue to the hole, and then screw the cross pieces in place as shown. Let everything dry overnight.
Step 5: Make the Wood Church Base
Because reclaimed wood is often twisted or bowed, expect the church not to fit into the groove perfectly at first. That is normal. We want the base to fit as tightly as possible, so start with a snug groove and adjust it gradually until the church fits securely.
The base consists of five pieces of wood.
For the main base, you will need a 2 by 12 cut two feet wider than the church. Ours is 48 inches long. Using a router, cut a one-inch-wide square groove in the center of the 2 by 12. If you don’t have a router, make several cuts with a circular saw and use a wood chisel to remove the remaining wood.
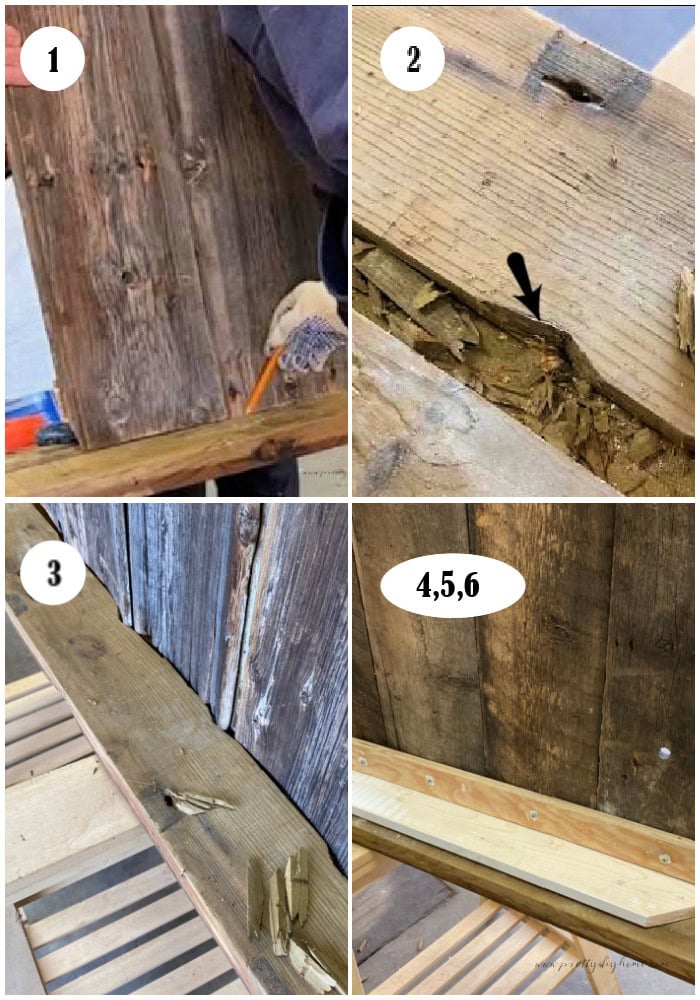
- Place your church on top and mark any areas that don’t fit using a pencil mark.
- Use a wood chisel to cut out the remaining pieces.
- Place the church back in. You may need to hammer and wedge the church into the groove.
- Use the existing cross piece or cut at least a 2-inch-wide piece of wood the full width of the church for the vertical back brace.
- Take a four-inch piece of wood and cut the ends into 45-degree angles as shown so it doesn’t show from the front.
- This will be the horizontal back brace. Screw the horizontal back brace into the 2 by 12, and the vertical into the back of the church.
Adding Horizontal Wind Braces
It helps to have the church up on sawhorses to attach the cross supports. Cut two pieces of 1 by 2, each 32 inches long. Find the center, and align each piece with the center of the groove on both sides of the base.
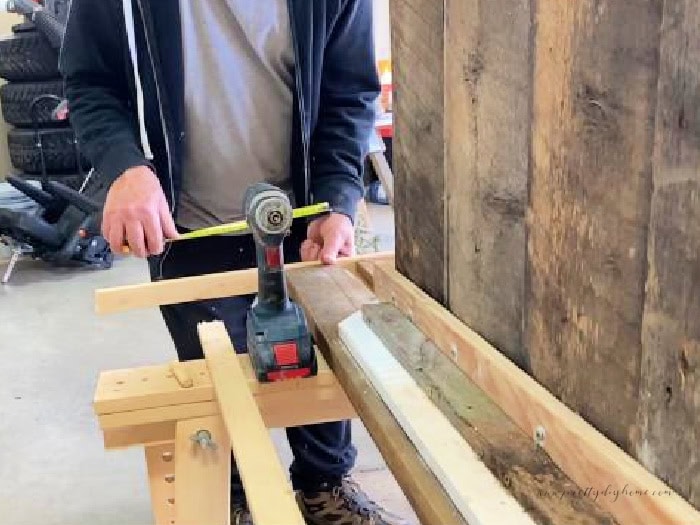
Predrill and then screw in the cross pieces to the ends of the 12 by 8. When storing, you can remove these to save room, but they are necessary because of the wind.
Use the 120-grit sandpaper to sand off any rough edges on your church.
Step 6: Add the Door and Windows
With the church lying on a flat work surface, draw out the windows and doors using chalk. Because I am not good at drawing, I made a pattern on newspaper using chalk, cut the patterns out, and then traced the outline onto my church.
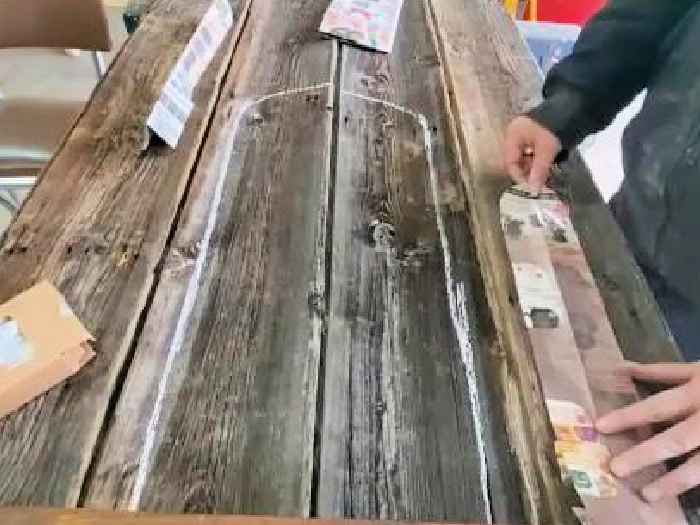
Using chalk and a measuring tape, measure the placement of the doors and windows and mark them with chalk. Double-check your measurements before adding the spackle.
Fill in the doors and windows with spackle, applying it as smoothly as possible. Then run the edge of a folded piece of paper over the surface to smooth it out.
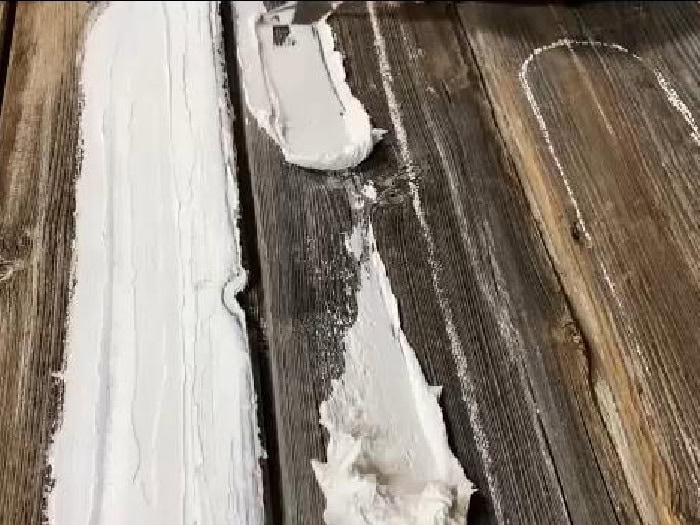
Once you have the spackling as smooth as you can make it, don’t worry about getting a perfectly smooth finish. Then, using a stick or knife, make a cross at the top of each window and draw a line down the center of the tall door.
Adding Faux Snow
This was fun to do and very easy. I placed the church on its base and started to add the snow. Think about which direction you want your pretend snow to be falling from. If it is falling from above, cover the top edges of the church with spackle, letting it pile up along the edges and trail down the front.
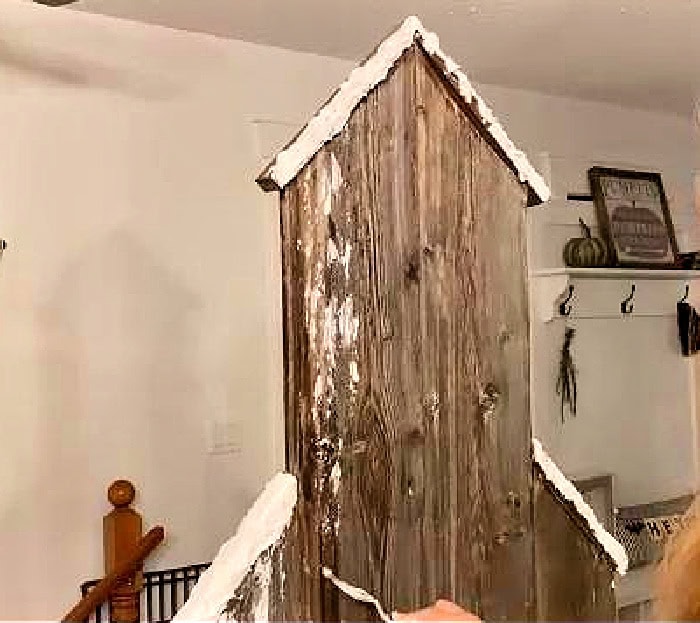
To make the church look cold, run the paint spatula with a little bit of spackle down the front. You can watch how I did it in the video tutorial. Adding the snow is an easy project; it adds texture to the church and makes it more rustic-looking.
The Cross
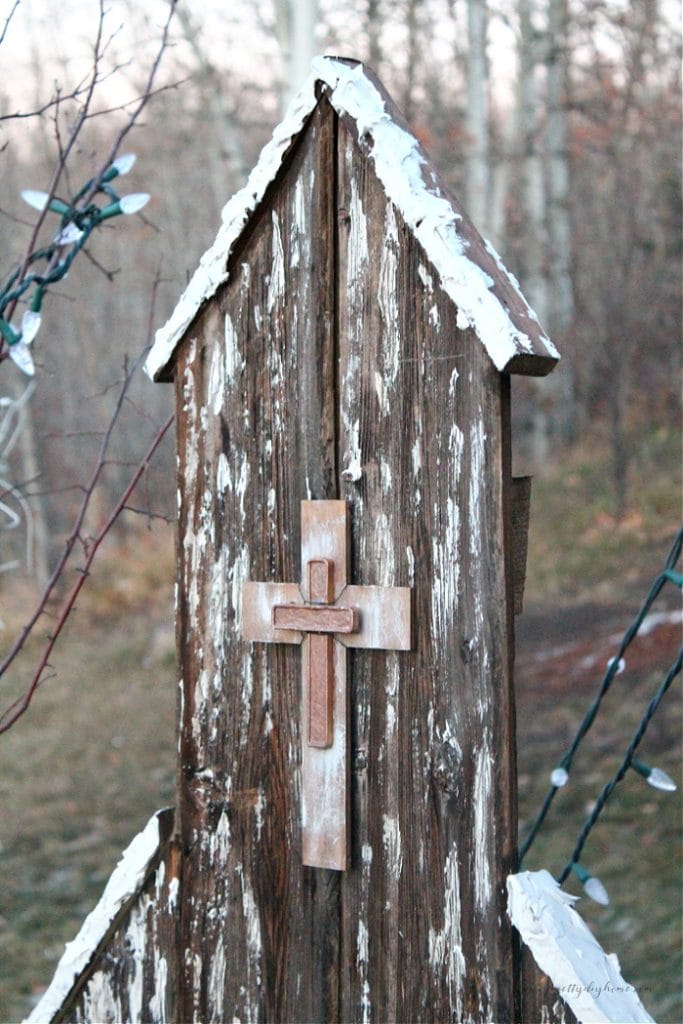
Our cross is from a local thrift store that I painted before placing it on the church. If you can’t locate a thrifted cross, use a Dollar Tree wooden cross and paint it the same way. I gave the cross a metallic shine with copper spray paint.
Step-by-step Video Tutorial
The latest on Youtube:
Displaying the Wooden Church as Outdoor Christmas Decor
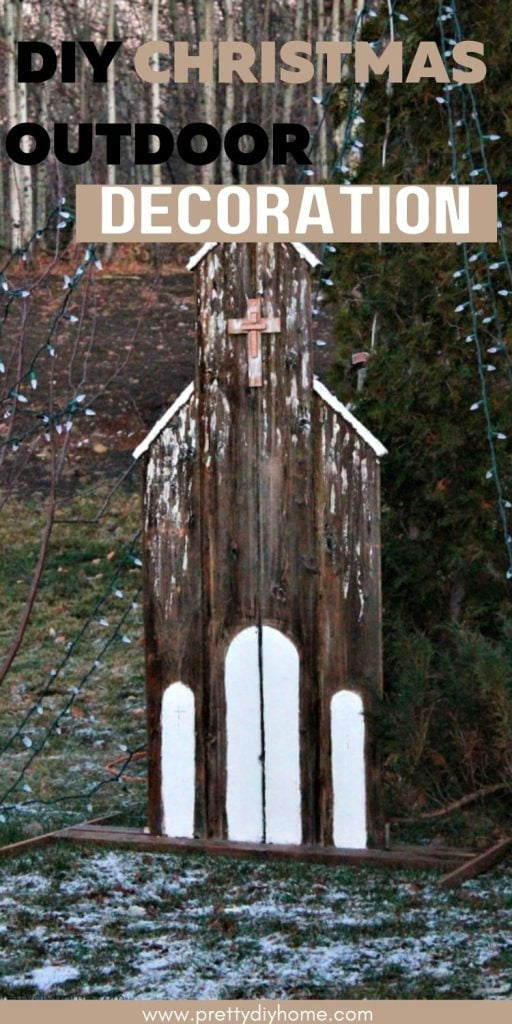
Our home sits at the end of a dark driveway without a streetlight, so having lots of Christmas lights is necessary. For the old church, we placed white branched artificial Christmas trees on both sides of our little church and then used the real wood trees and shrubs for the bright star and light strings. We used wooden stakes and twine to hold all the trees and light strings in place. The church we left standing just as it is.
Merry Christmas, Leanna and Herman
Other DIY Outdoor Christmas Decoration Ideas

DIY Outdoor Pallet Wood Christmas Trees
These DIY pallet Christmas trees come in two sizes, and there are two styles to choose from. I am sure you will love having them, and then you can flatten the bases for storage.