How to Make Pom Poms with the Clover Pom Pom Maker
There are numerous ways to make pom poms; using the Clover pom pom makers, cardboard cutouts, and forks. Your choice depends on the different sizes of pom poms you need, your budget, and ease.
The easiest way to make perfect pom poms is with the Clover pom pom maker. These pom pom makers are inexpensive but they do add an extra cost. I have two larger ones I purchased years ago, and two (not Clover brand) smaller pom pom makers I found at Dollar Tree.
What Makes the Perfect Pom Pom?
What does a perfect pom pom consist of? A top-notch pom pom is all about being thick, fluffy, and very full without any spare spots! The center is tied tightly so that the stands stay in place. The goal is a nice dense pom pom in a nice round shape with evenly cut strands.
Here’s the secret to keeping your pom pom from falling apart: dental floss tape (or double strands of regular dental floss). Yep, you heard me! Floss can be pulled super tight without snapping, it’s much better than yarn for securing the center. Most tutorials will tell you to use a long piece of yarn to tie it off but trust me—grabbing some dental floss is a game-changer. Your pom poms will be secure, fluffy, and fabulous!
Supplies
Clover Pom Pom Makers
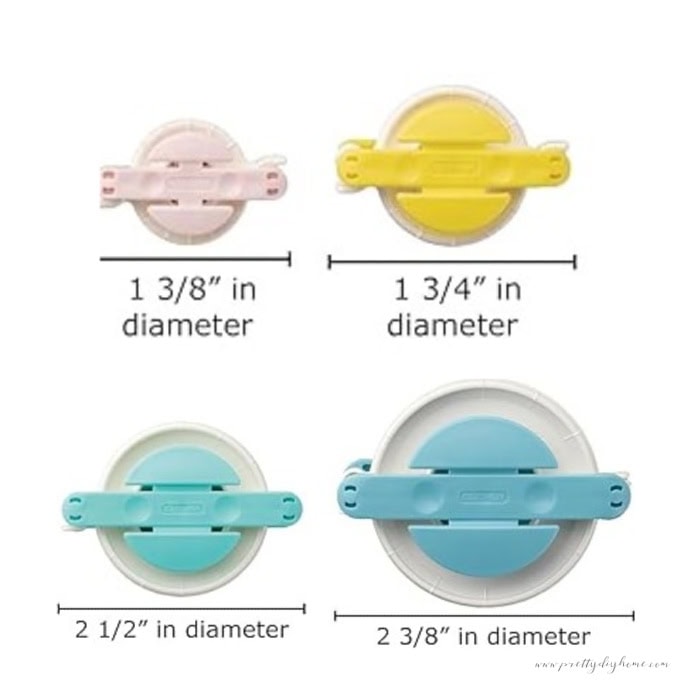
I am not an Amazon affiliate, but am including links for your information. The Clover pom pom makers come in various sizes, 4 1/2, 3.38 inches, 2 1/2 inches, 1 5/8 inches, 1 3/8 inches, 1 inch, and 3/4 inch sizes. You can also find similar pom pom makers at the Dollar Tree and Temu.
Here is a link to Amazon for the Clover Pom Pom Makers
Choosing Yarn
Crafting pom poms is a fun and creative way to use up leftover yarn in different colors. You can use almost any yarn, but when choosing the yarn consider the weight of the yarn. Lightweight yarns like cotton or baby yarn may be impractical for a large pom as you would need excessive amounts of wool. I would reserve these fine yarns for the small pom poms. Medium-weight yarn works very well for larger pom poms, although not my favorite chunky can be used as well. Whether you’re working with cotton, polyester, or real wool yarn any type of yarn will result in a gorgeous pom pom.
How Many Wraps
The amount of yarn wraps you place on your pom pom maker depends on the thickness of the wool you use and how large your pom pom is. I don’t count the wraps when making pom poms, I wrap it until it looks full. But, to give you a general guide, I made a variety of sizes with the clover pompom maker and counted the wraps. Here is how they turned out.
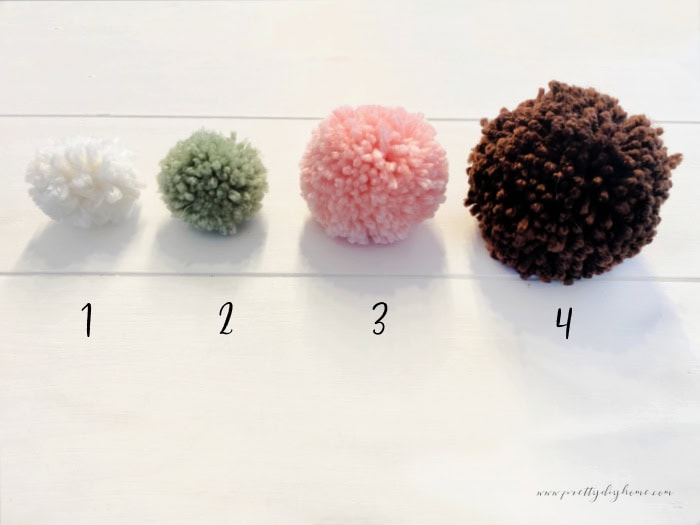
- 1/2 inch 60 wraps (30 each arm)
- 3/4 inch 120 wraps (60 each arm)
- 2 1/2 inch 240 wraps (120 each arm)
- 3 3/8 inch 400 wraps (200 each arm)
So after all that let’s start making some perfect pom poms.
How to Make Pom Poms
Materials Needed
- Clover Pom-Pom Maker (any size)
- Yarn (any color and thickness)
- Dental floss tape
- Scissors
When working with yarn, it’s helpful to roll your skein into a ball first to prevent knots before you start wrapping the yarn around the arms of the pom-pom maker
When I first saw a pom pom maker I was so confused at how this thing works exactly. It seems like a weird contraption, but it does the job and does it well. So let’s get started.
Open the Pom Pom Maker
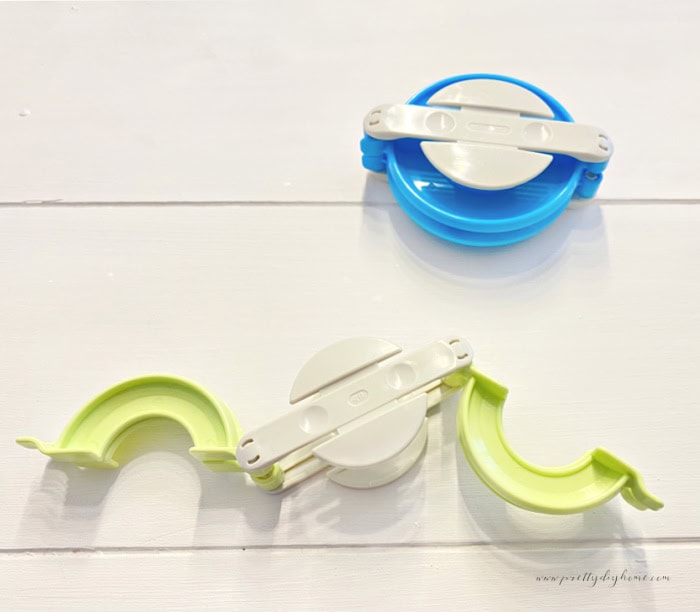
Choose whatever size of pom pom maker you want. Fold out the arms of the pom pom maker. The Clover pom pom has two sides that open up, each one is like an arm. These pivot in and out from the center. There are four arms in total. The center piece stays together. Open up one side and keep the other side closed.
Wrap the Yarn
Starting at the right end, wrap the yarn around one set of arms. Continue wrapping the yarn as evenly as possible. Once you reach the other end chan at the outermost edge and then wrap the yarn around as evenly as possible from the one end working towards the center. I like to work back and forth across the arms. You want to wrap the yarn until the sides of the arms are filled and don’t easily hold the yarn in place anymore.
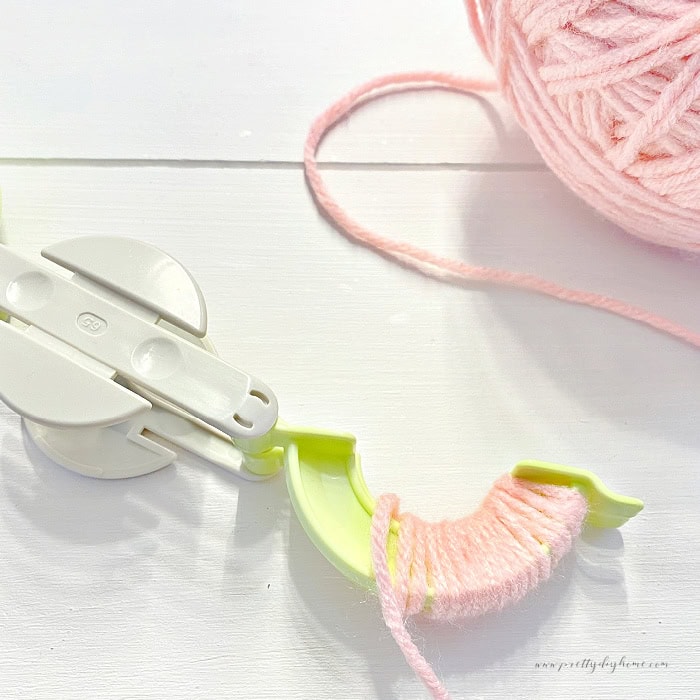
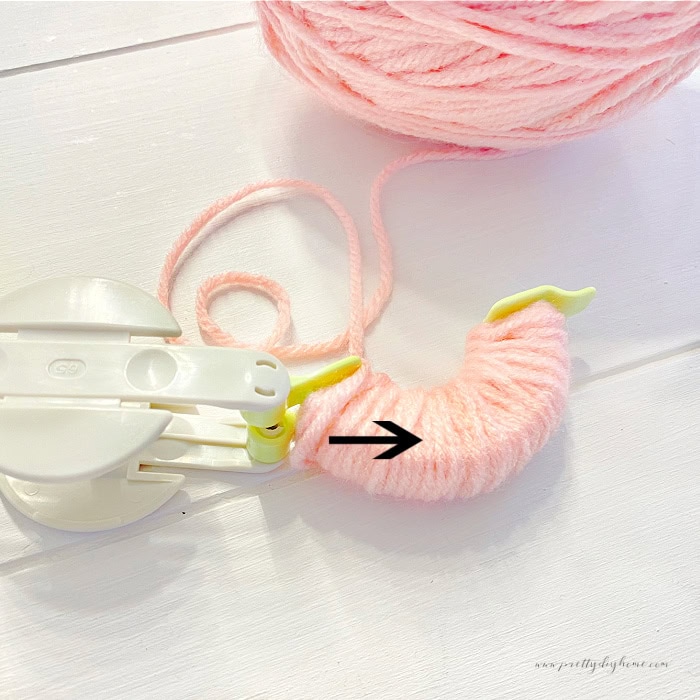
You want to wrap the yarn until the sides of the arms are filled and don’t easily hold the yarn in place anymore.
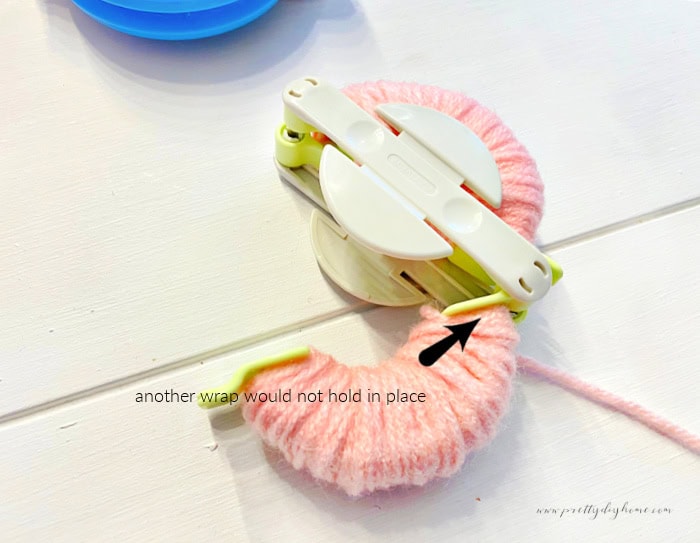
Once you’re done with the first side, close the arms, move the yarn to the other side, and repeat the wrapping process around the second set of arms.

Snip off the yarn still attached to the ball of yarn.
Cut the Yarn
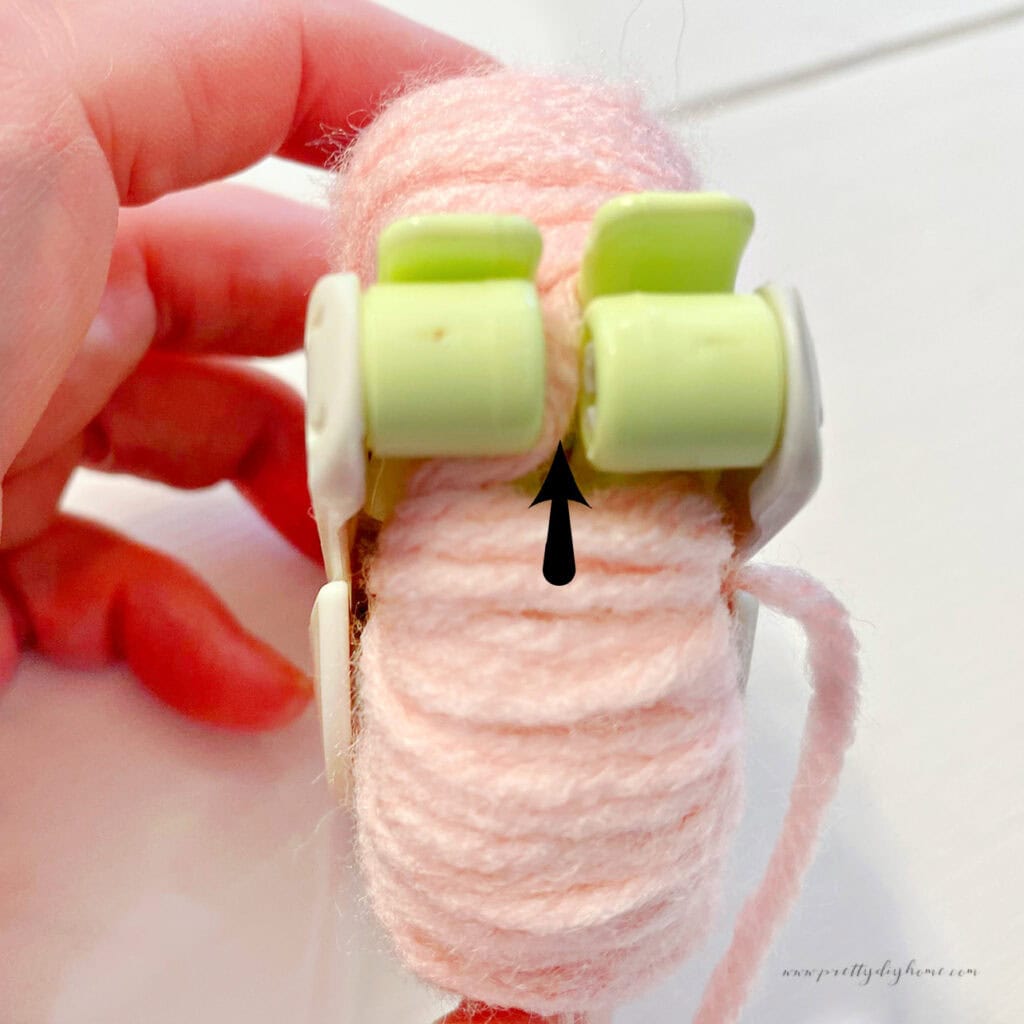
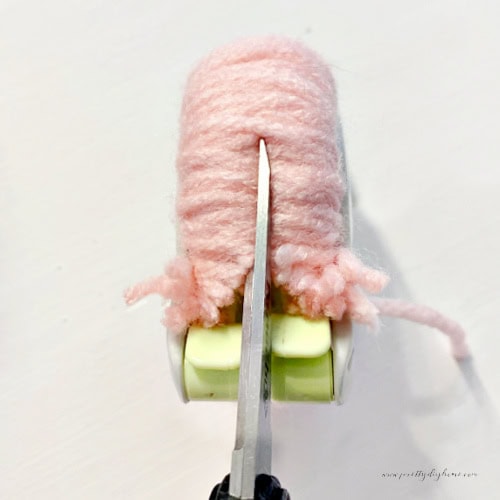
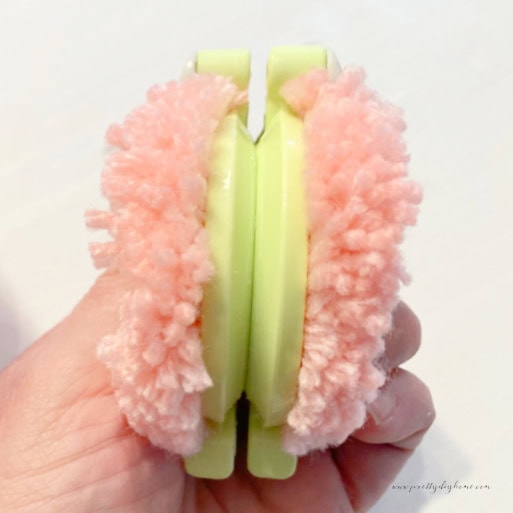
Turn the maker so that you see the side of the pom pom maker. There is a little slot between the two arms. Using sharp scissors cut along the little grooves of the two halves. This will create all those fun little strings. (It’s a good idea to push the center together to make sure it’s in place and holds. We don’t want all those separate pieces of yarn everywhere.)
Tie the Center
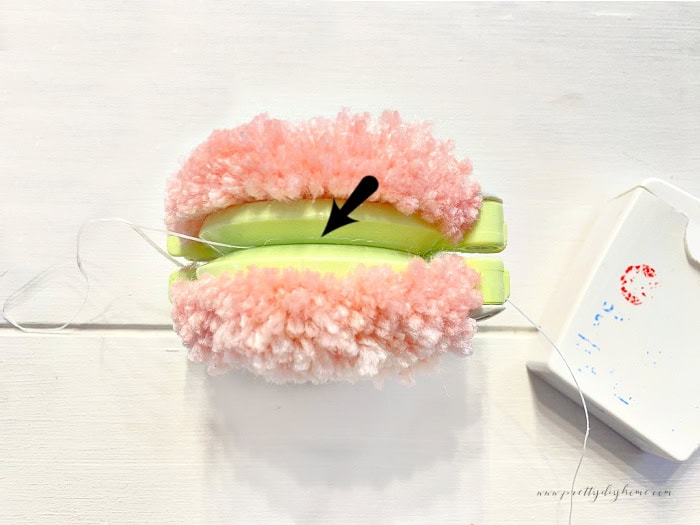
Cut a strip of dental floss and slide it into the groove between the arms. Pull it very tight, the floss will disappear between the two haves of the pom pom maker. Double knot it to make sure it’s secure.
Open the Pom Pom Maker
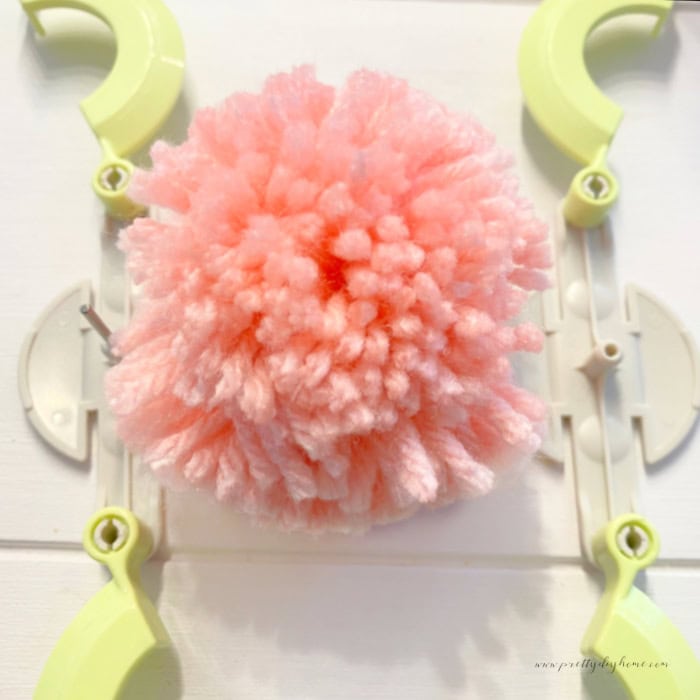
To release your newly fluffy pom pom, open up all four arms. Then gently grab the center halves of the pom pom maker and pull it apart. Then immediately put the maker back together.
Fluff and Trim
Your round pom pom just needs a little bit of a haircut to trim off any ends of the yarn that stick out too much.

You can trim your pom pom to various shapes, heart shapes, etc. You can also play with wrapping the pom pom maker in various colors of wool to create patterns in your pom pom.
How to Make Pom Pom Video Tutorial
If you prefer to watch a step-by-step video tutorial I have created one for you.
The latest on Youtube:
Other Ways to Make Pom Poms
Dollar Tree’s pom pom makers are very similar to the brand name Clover pom pom makers, so that is an easy alternative. But you can also make them using cardboard cutouts or forks. The pom pom makers are the easiest to use but are a bit complicated for young children. Secondly, you have to buy them, and what if you have three kids looking for a pastime? I will add the links to the other methods along with a couple of pom pom projects you can make using pom poms. I just need to get them written first.
