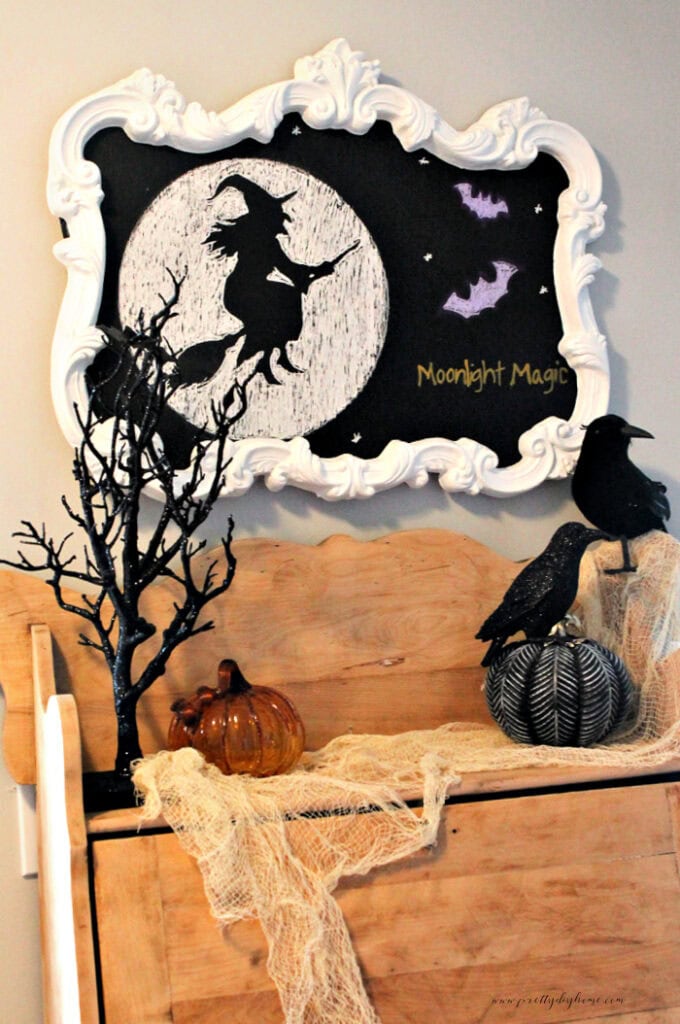
DIY Halloween Chalkboard with Witch & Moon (Free Template)
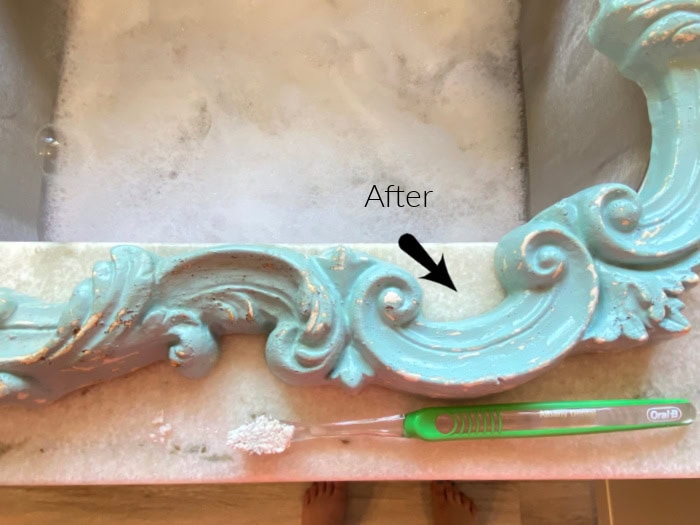
Today’s DIY Halloween chalkboard started out as another one of my impulse garage sale buys. This time it was an ornate frame with no backing, lightweight foam, and painted bright blue. Not exactly beautiful, but I loved the shape enough that I didn’t even notice the foam until later, and I snagged it to take home. It evolved into a striking Halloween chalkboard idea that’s budget-friendly, customizable, and perfect for spooky season decorating.
What you’ll love about this craft:
This kind of chalkboard Halloween project is the perfect mix of thrifting and crafting. Whether you’re new to DIY or love making decorations from scratch, this project is quick, affordable, and one-of-a-kind.
Here’s how it started. Do you see the potential?

How to Make a Halloween Art Chalkboard
Supplies You’ll Need
- Ornate thrifted frame (mine is any size)
- 1/4-inch plywood cut to fit the frame
- Zinsser 123 primer
- Fusion Mineral Paint in Picket Fence (or any white paint)
- Martha Stewart chalkboard paint (or your favorite brand)
- E6000 glue and hot glue gun
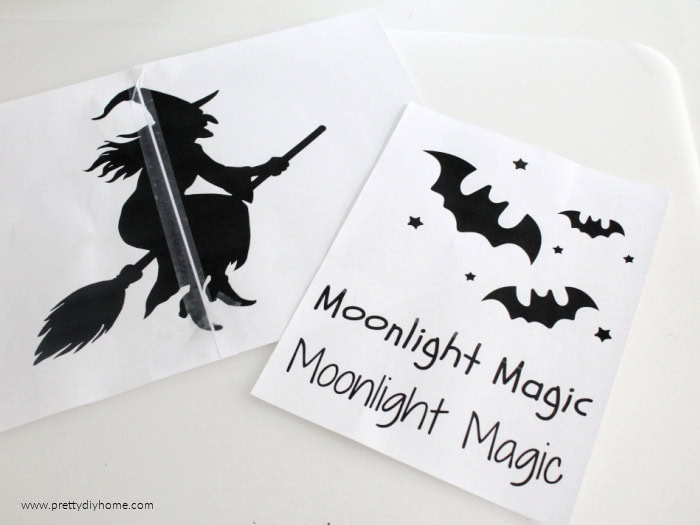
- Free printable witch and bat template → Download the free template here
- Scissors and tape for assembling the witch template
- White wax chalk pen (Dollar Tree)
- Colored chalk pens (gold, purple, or your choice)
- Regular school chalk (white and colored)
- 12-inch wood bowl, lid, or pan (for tracing the moon)
- Damp rag and cotton swabs (for cleaning up chalk dust)
Chalk Tools Tip – If you want bold colors, chalk pens are ideal; they’re the same kind used on restaurant menu boards. For classic black-and-white, Dollar Tree’s white wax chalk pens work great, and regular chalk is perfect for filling in larger areas like the moon.
Tip: If you already have a chalkboard, you can skip ahead to Step 3.
Step 1 – Prep the Frame
My frame was filthy, so I began by scrubbing it clean with a toothbrush and bartender’s friend. Once clean, I washed the frame with Dawn and hot water and set it aside to dry.
Prime with Zinsser 123 primer in white.
Paint with two coats of Fusion Mineral Paint in Picket Fence.
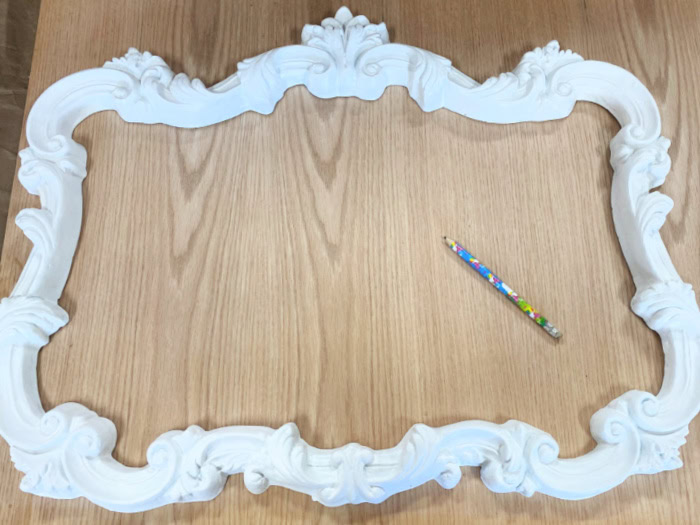
The white frame feels fresh and elegant, and paired with the deep black chalkboard, the contrast is eye-catching and perfect for Halloween.
Step 2 – Make the Chalkboard Backing
Trace both sides of the shape of your frame onto 1/4-inch plywood.
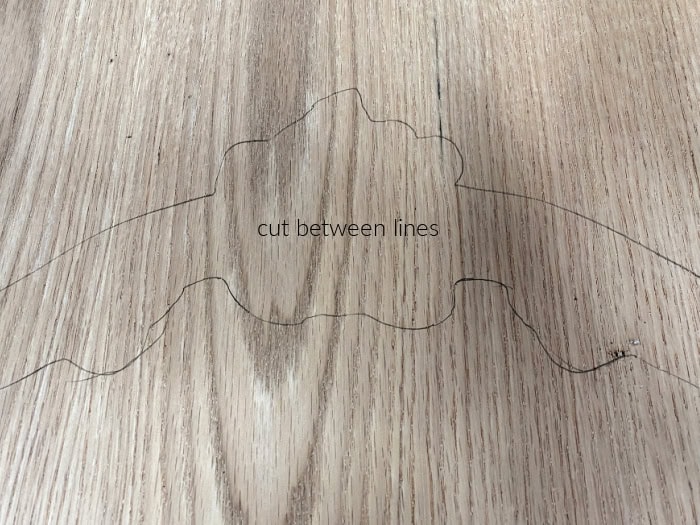
Cut the shape with a jigsaw to fit snugly inside the frame. Hubs was doing the cutting for me, and since there are so many curves and crevices, I suggested he get as close as he could to the outside mark, but not to go over the inside.
Paint the plywood with three coats of black chalkboard paint, letting each coat dry completely.
Now you have a custom chalkboard insert ready to slide behind your thrifted frame.
Step 3 – Create the Halloween Chalkboard Art
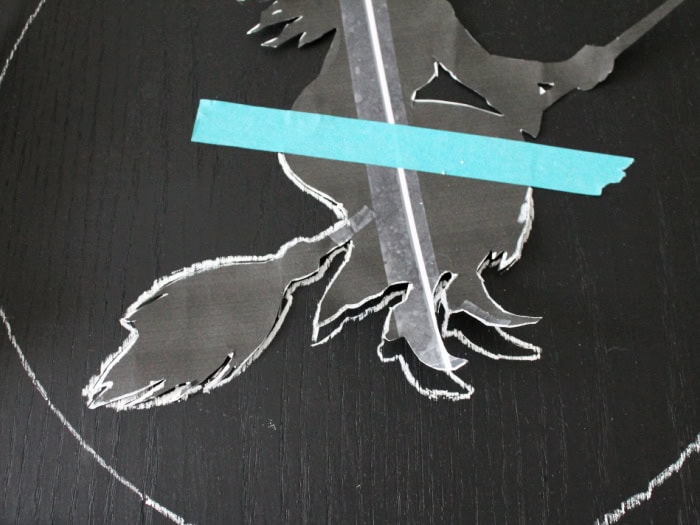
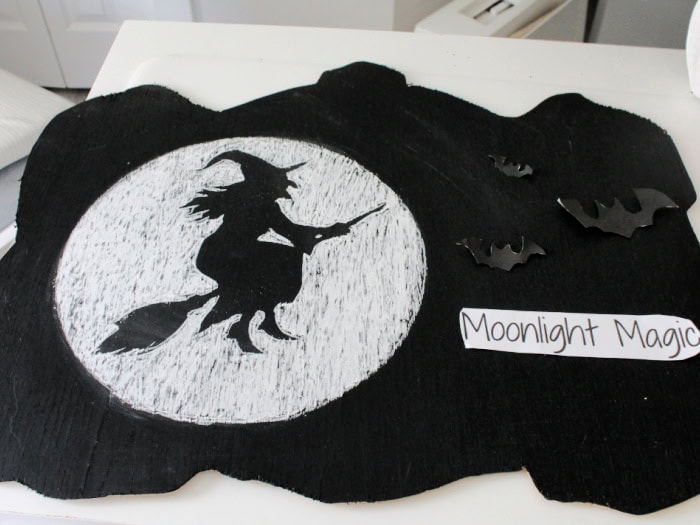
Arrange the Templates
Print the witch design across two pages, tape them together, and cut along the edges.
Cut out the moon, bats, and wording as well.

Arrange all of the templates on the chalkboard first to check spacing and placement before tracing. Since the frame glue needs time to cure overnight, I completed the Halloween art first and attached the frame as the final step.
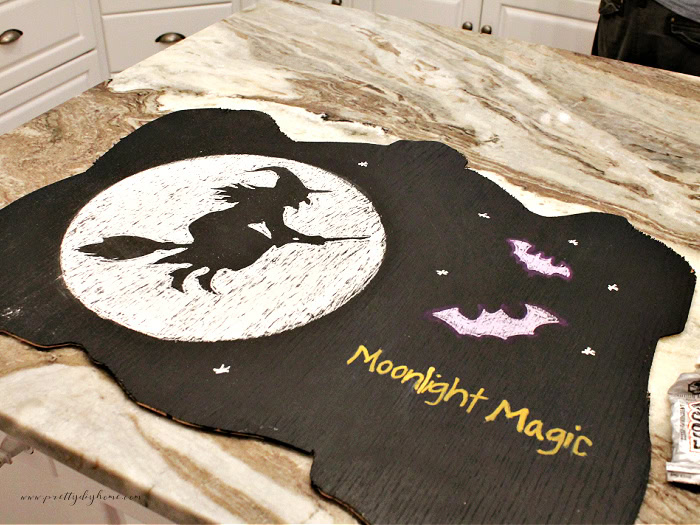
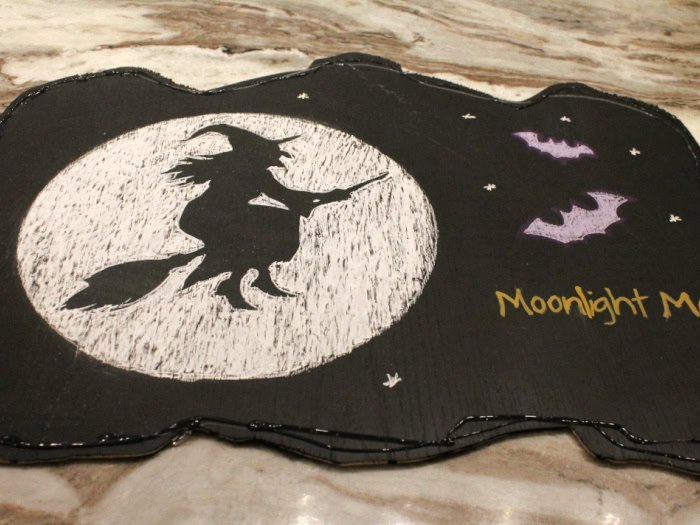
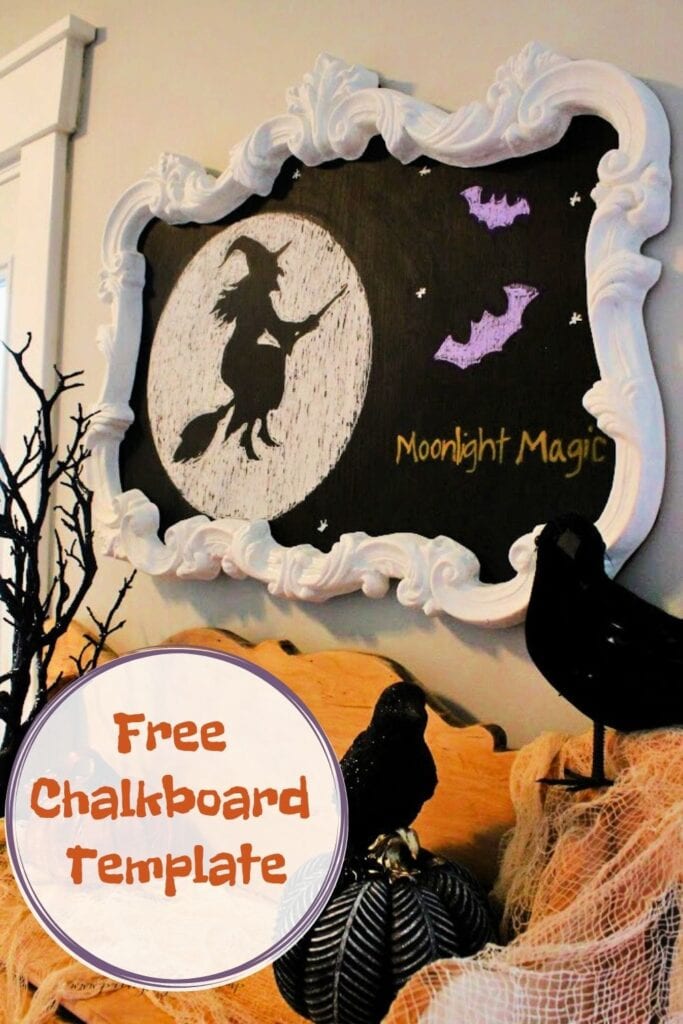
Draw the Moon and Witch
Trace around a 12-inch bowl with a Dollar Tree white wax chalk pen to create the full moon.
Center the witch cutout inside the moon and trace around it with the chalk pen.
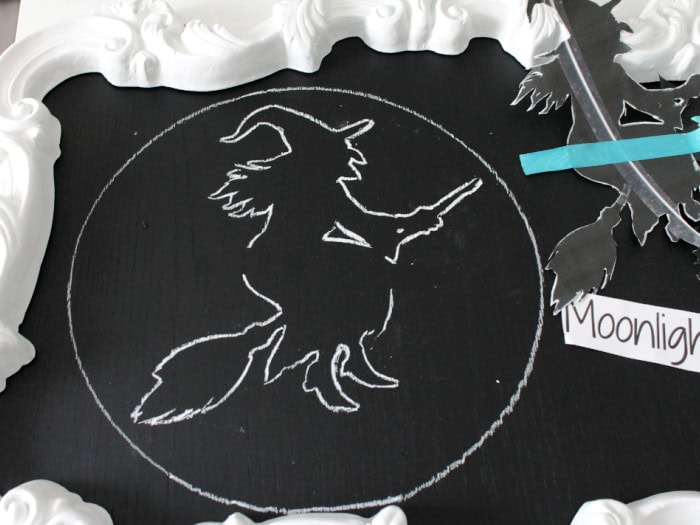
Fill in the moon with regular white chalk, dragging it across in lines until the moon is solid. This makes the witch silhouette stand out. Wipe any chalk dust away with a slightly damp cloth.
Transfer the Letters
Flip the printed wording face down.
Rub chalk over the back of the letters. (If it’s hard to see, hold the paper against a window — it works like a light table.)

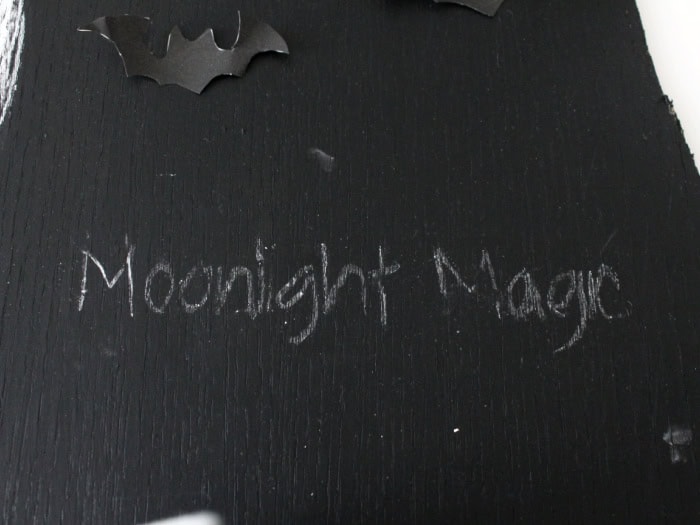
Place the paper chalk-side down on the chalkboard.
Rub over the letters with your fingertip to leave a faint outline.
Retrace the letters with a chalk pen for crisp, clear lines. Clean up smudges from the original chalk with a damp cotton swab.
Add the Bats
Select the bat sizes you prefer from the template.
Outline them with a purple chalk pen.
Fill them in with purple chalk so they pop against the black background.
Step 4: Attach the Frame
Once your chalkboard art is complete, use a combination of E6000 glue and hot glue to attach the frame securely to the chalkboard backing.
After applying the glue, I placed a large board and a weight on top of the frame and let it dry overnight.

Ways to Use Your Chalkboard Halloween Decoration
- Prop it on your entryway table with a bowl of candy.
- Hang it above your mantel or console table.
- Pair it with pumpkins, black candles, and faux spiderwebs for a spooky vignette.
- Add it to a work cubicle for a little Halloween fun during the work day.

If you love saving Halloween DIY inspiration, make sure to pin this post for later. The free downloadable templates make this so easy to create. I hope it inspires you to try your own version.
More Halloween Chalkboard Ideas
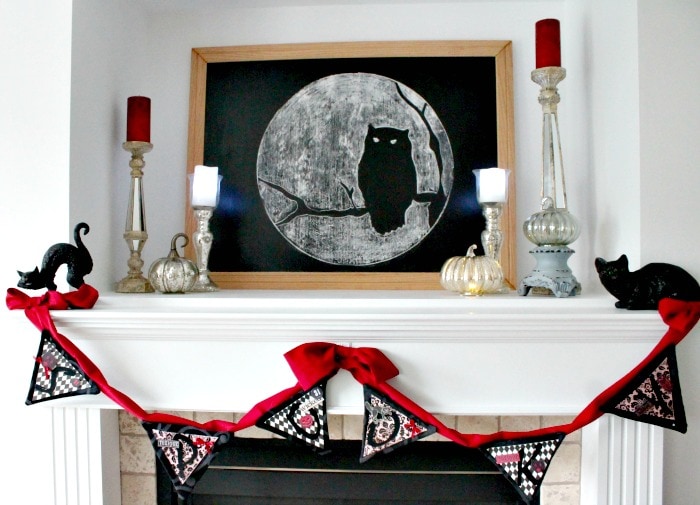
If you enjoyed this Halloween chalkboard art DIY, I also created an earlier design with an owl perched in front of the moon. That project has been a longtime reader favorite, and it’s another easy way to add spooky charm with chalkboard art. You can find the full tutorial here: Halloween Owl Chalkboard Art.