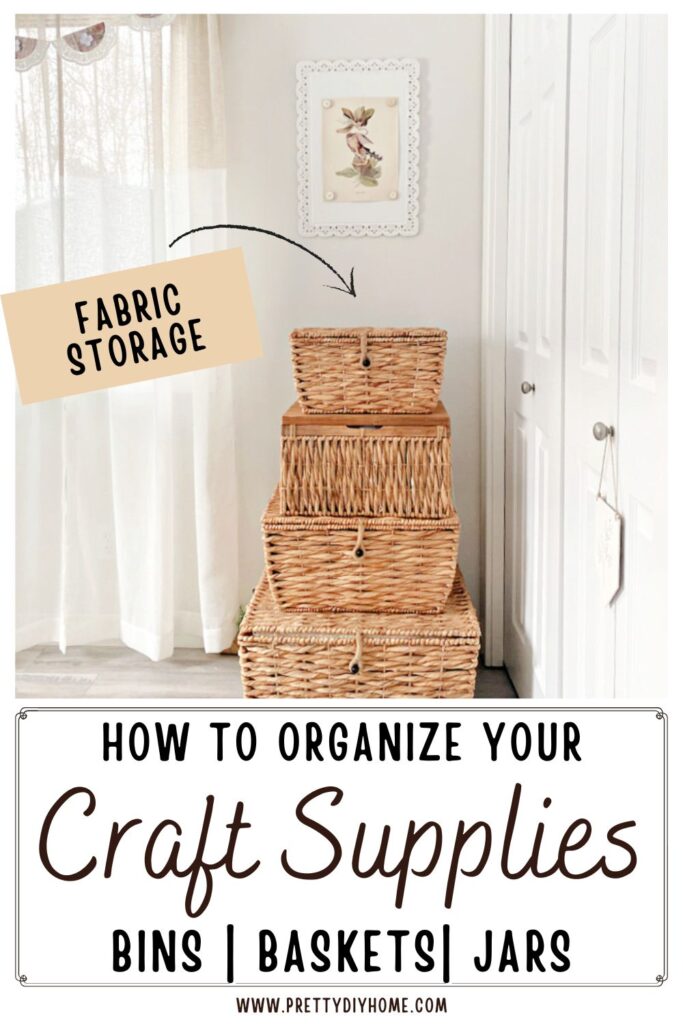
Craft Room Organization – Bins, Baskets, and Jars
Although it’s wonderful to have a large stash of craft supplies, if I was rich, I’d donate all the leftovers to the neighbor school and buy all new supplies for the next craft project. Unfortunately, that is not our reality, so I have to master controlling the clutter monsters in every way I can dream up. I have a few posts about my craft room, and I will link them below, but today I want to just talk about craft room organization with bins, craft room bins, baskets, and jars.
The Difficulties
The biggest challenge with a craft room is always deciding what to toss and what to store. But once that’s settled, the next step is figuring out how to store it all.
- Tiny supplies getting lost
- Fabric remnants and balls of yarn
- Messy ribbon and washi tape
- Paper and sticker chaos
- Finding what you want when you want it
Store by Category
Being able to find what you want in your craft room is the biggest time and money saver there is while crafting. We’ve all been there; you know you’ve got some vintage wood thread bobbins you round garage saling, that would make the cutest little legs….but where are they?
Will sorting and organizing your craft supplies mean you’ll never have to search for something again? Probably not. But it definitely helps. I don’t mind digging through a forgotten bin for a few minutes, it can be kind of fun to see what hidden treasures I’ve got. But what if I’m hunting for half an hour? Nope, I’m over it. Categorizing craft supplies puts an end to this. Let me share how I do it that I know works very well.
I organize my craft supplies by holiday/season and by type. Here’s how that looks.
Book pages and music sheets stay in their original books on my bookshelf until I use them.
If I cut those pages into something, for example, like leaves, I move them to the Fall box.
Black glittery craft paper stays with the cardstock, but once it’s cut into bats, it goes with the Halloween box.
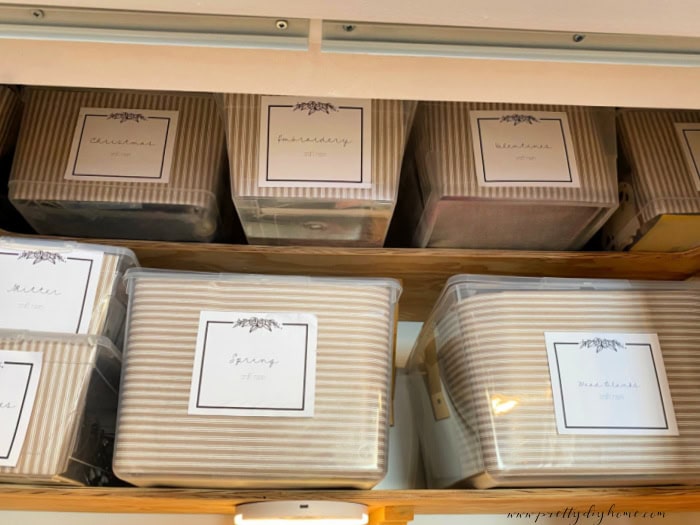
Each season gets my largest clear bins. Christmas has two bins – one for supplies and one for unfinished projects from the holiday rush I didn’t finish in time
In my craft closet, I use the two top shelves for “my seasonal bins”. I rotate them so that the current season is the easiest to access. I leave the rest up above until their season comes around. Once the season rolls around, I look just in that particular season box to get inspired. Right now, it’s Spring, so that bin is on the bottom shelf, the Christmas ones are above it, and it’s bunny season, not snowflake season.
My Categories
Your categories will be different, depending on what you love to do, but these are the main categories I have that I keep in the plastic bins.
Seasonal Holiday
- Christmas
- Easter/Spring
- Halloween
- Fall
- Valentine’s
General Craft Supplies
- Chalk and Stencils
- Cricut Supplies
- Cricut Tools
- Embroidery
- Glitter
- Ink Stamps
- Modeling Clay
- Molds and Resin
- Printer Paper
- Redesign (IOD)
- Ribbons
- Sewing
- Styrofoam
- Wood Beads
- Wood Blanks
Using Clear Bins
I have gone through several different “systems” for my craft supplies.
I have painted old boxes I had with lids, wrapped other boxes with muslin, sewed muslin baskets, and used various coffee cans and heavier plastic bins, but in the end, I like these clear plastic bins the best.
I chose clear bins years ago because they were inexpensive and easy to find at the Dollar Store. I waited a year, and they didn’t change in style. I started with $100 worth about ten years ago and still use them today, occasionally adding more. After our move and downsizing, I have a stack of empty ones in storage, but since they are all identical, stackable, lidded, and affordable, it’s easy if I need one for a new craft. I loathe having 4 baskets that match and being unable to find a 5th one when I need it. You’ll see what I mean when I talk about fabric storage.
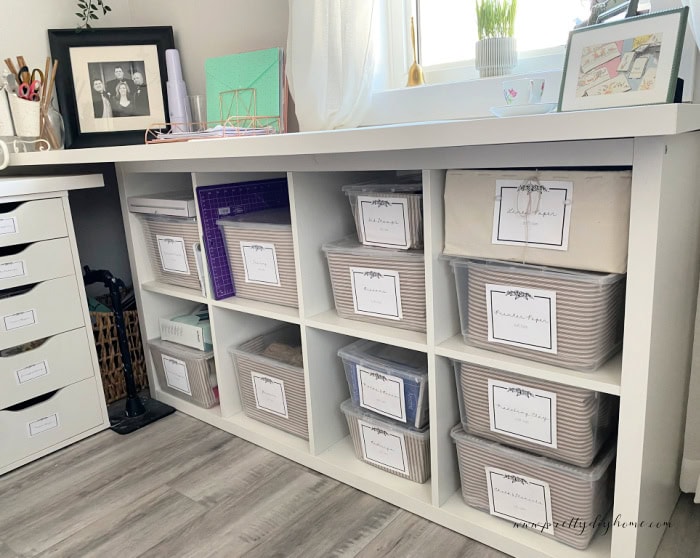
Lots of creatives like to have their supplies out where they can see them; these are not my people. I am the total opposite, I need things hidden as much as I can. Although the clear bins are readily available, being able to see the jumble of things inside the box stresses me out. Because of that, I line all my bins and jars with pretty wrapping paper so they match. At least on the parts I can see, the good news is it’s quick, cheap to do, and drastically reduces the clutter.
Another idea is a simple curtain to cover it, but I have bins in both the Kallax shelf and the craft closet, so I went this route instead.
Lining Plastic Craft Bins
You don’t need anything fancy to do this:
- Ruler
- Scissors
- 2 rolls of wrapping paper (one for now and one if need more later)
- Adhesive tape
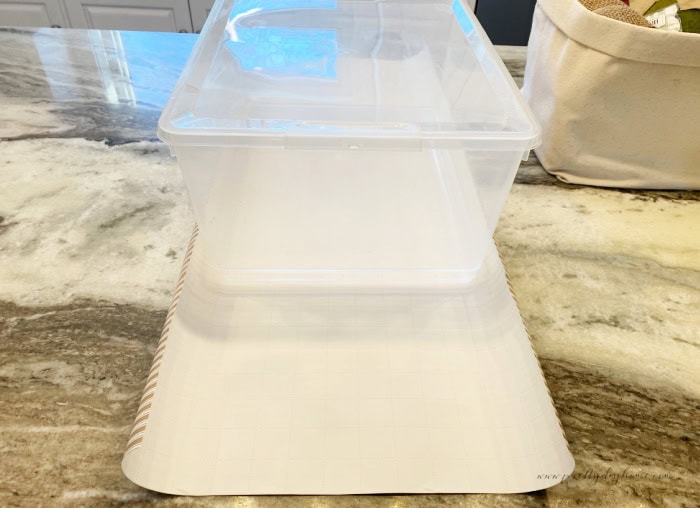
Roll out the paper. Use the plastic bin to measure how much paper you need. Place the clear box over the paper so there are about 3 inches on each side.
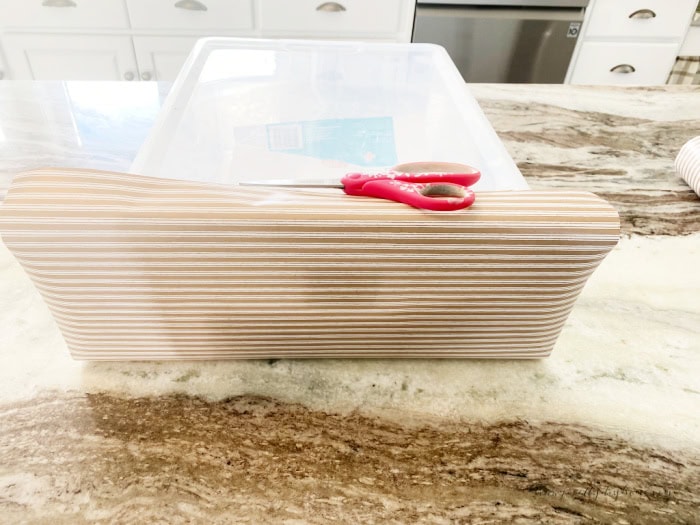
Fold paper over the top of the bin 2 inches, mark at about two inches for under the bin. Cut and save the excess. (I could do 2 bins or a top with each length of paper.)
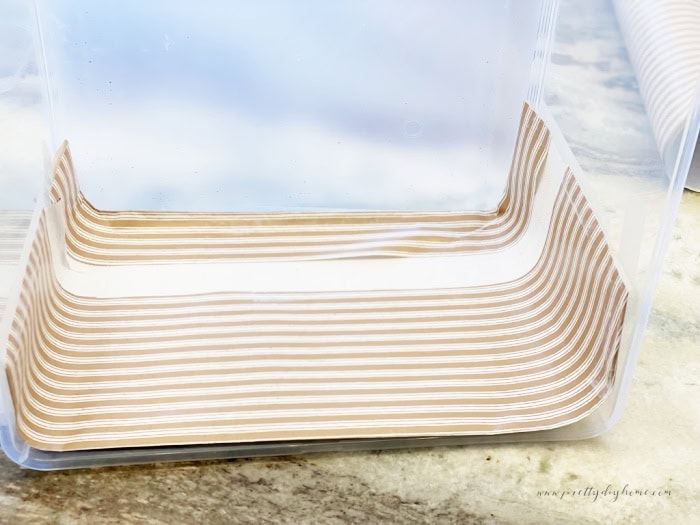
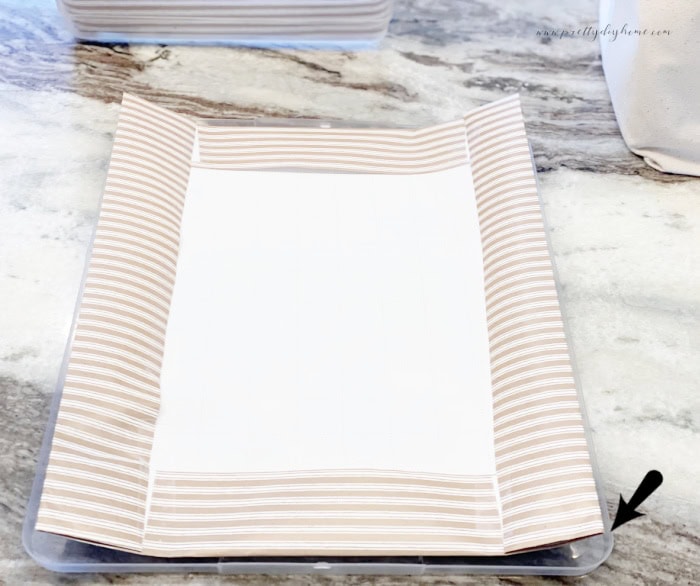
Place about two inches under the bin. Fold the paper up and trim it at two inches for the top. Fold the top and bottom to form a rectangle.
Place inside of the bin and tape well along the paper edges from the folds. Then, tape along the outer edges to attach the paper to the plastic.
Please note that some bins can be narrower at the bottom than the top, but it still works just push in the corners and tape into place.
If the bins are kept up in the craft closet, I save the paper and don’t bother lining the lids. You don’t see the stuff inside anyway. But I do line the bins I keep in the Kallax, I prefer it to be hidden when I look down, if that makes sense.
In some of the bins for example sewing I have items further divided inside the bin, pins in one jar, thread in another. For larger items like blank wood, I just toss them in.
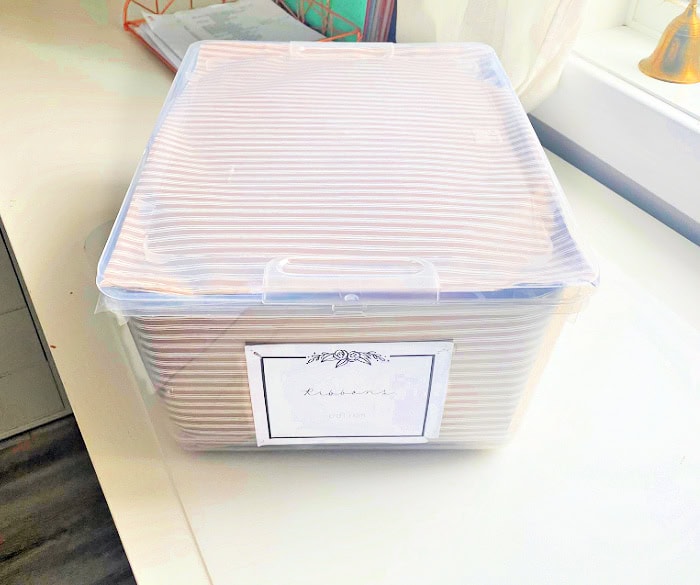
Labels
The only downside of hiding all the clutter behind a nice neat paper front is that we’ve got to label it. I use my circuit and a simple square cut file to do that. I made the file years ago, saved it in Cricut design space, and it’s lived there ever since. Super easy to do, it’s just a print-and-cut design I do on letter-sized white cardstock.
The drawing file is from Angele Kamp Number M47E8C652, and the text is called Yours Truly.
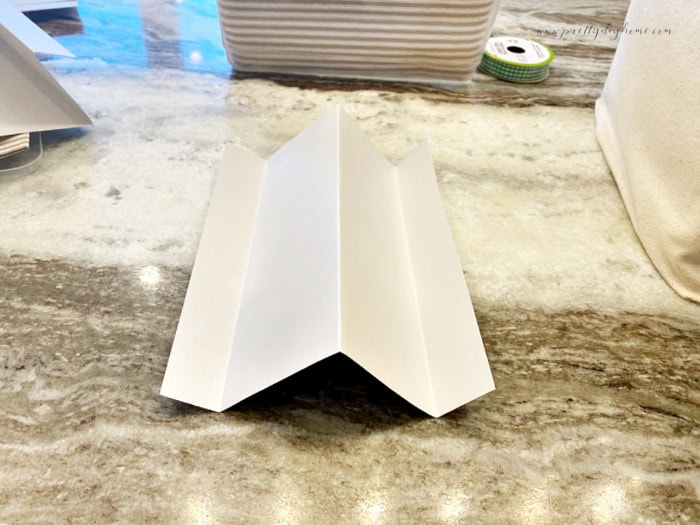
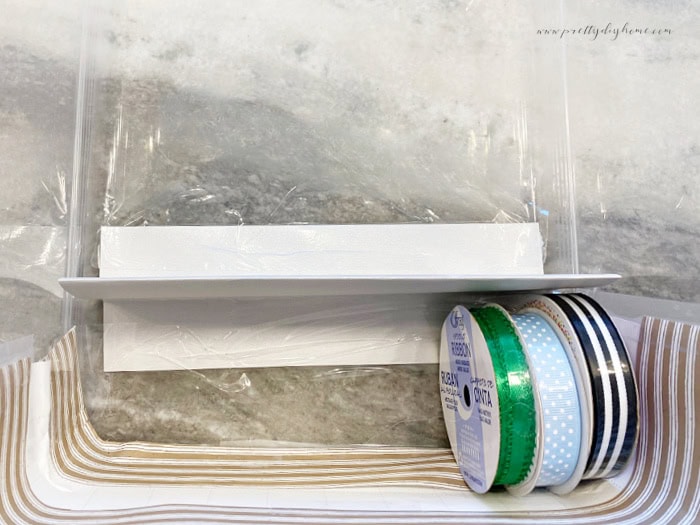
Storing Ribbons
I use a bin to store all my ribbons, but I fold pieces of cardstock as dividers and place them in the ribbon box. You don’t have to do it (blush it’s kind of unnecessary), but if you like, your rolls of ribbon to stay in place it works. The loose pieces of ribbon I put in ziplog bags and place them on top.
Fabric Storage in Matching Baskets
Long story short, I have more fabric than I need, except that it’s hard to find where I live, so I stock up when I go to the USA. Lately, I have been able to purchase them at Temu, which means that going forward, I won’t shop ahead.
I sort by things as follows: bottom is large bolts, and the small bolts I make using cut-up Dollar Tree poster board. The next one has Halloween fabric I didn’t get too for fun witchy cushions. The second from the top holds interfacing, stuffing, and quilt batting. The top holds fabric quarters and rolls of Dollar Tree fabric and felt. I can see what I already have, but don’t have to look at it.
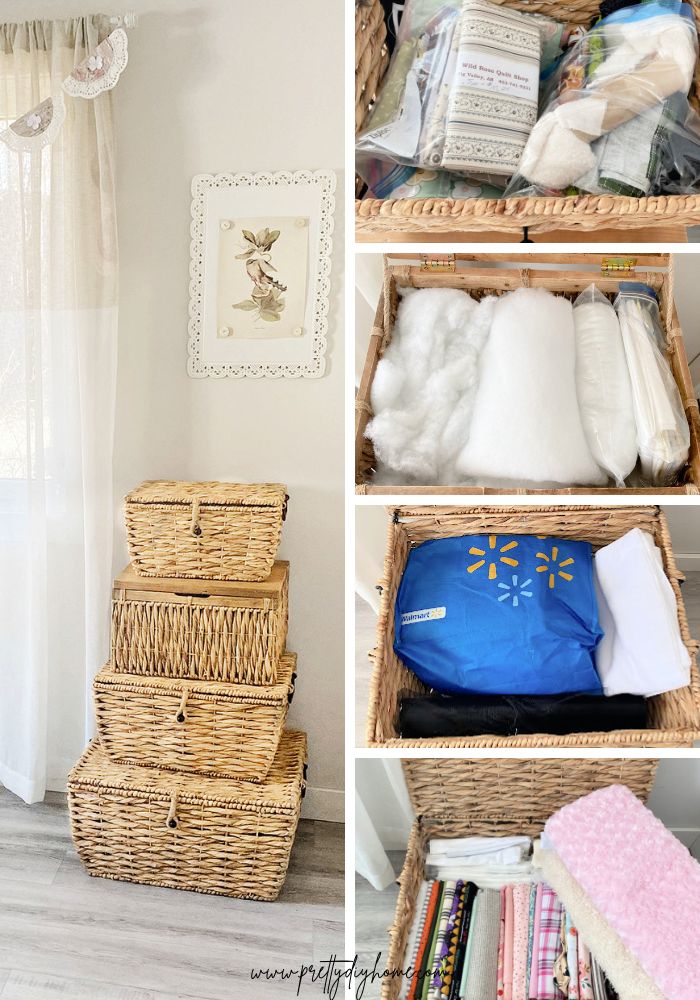
I bought the two larger baskets first and found the small one on top since. I will buy a second large one if I ever see a matching one at Home Sense.
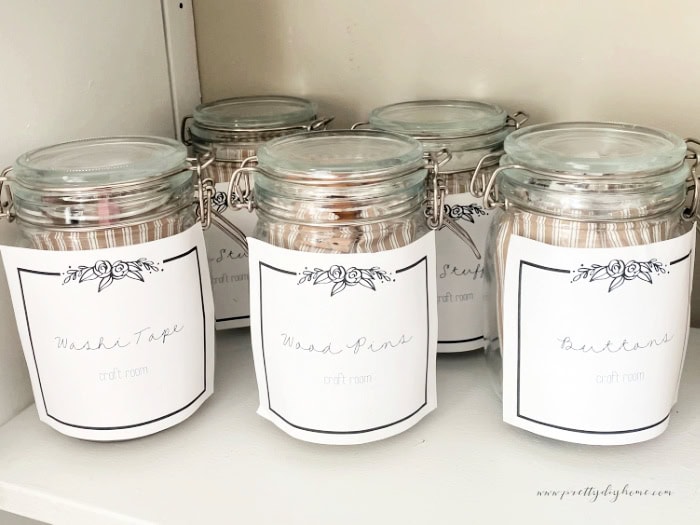
Storing Small Items in Jars
I use mostly IKEA snap-lid jars for my bits and bobs like pellet stuffing, washi tape, dried lavender, buttons, and twine. I just fold a piece of paper inside the jar and add labels. I did start using coffee cans for this, but they discontinued the cans I liked, so I slowly purchase IKEA jars whenever I go shopping.
I hope you enjoyed all the cheap and coordinated craft room storage ideas. I have some other craft posts about how to build a DIY craft closet and how I decorated and organized the craft room. I will link them to this post soon.
I also have a Raskog cart from Ikea that I use to store all sorts of everyday craft supplies and tools. It’s hidden away in my DIY craft closet.

Happy Crafting,
Leanna