How to Make a DIY Fabric Star Ornament with a Cricut
It’s finally the season to start Christmas crafting again. Our house renovations are finally coming to a close and I can once again make some easy fun projects. I plan to make a few fabric Christmas tree ornaments with my Cricut which I haven’t had time to do all year. Making beautiful ornaments is a great way to begin getting ready for the holiday season, and it’s exciting to start playing with glitter and sparkles again.
These fabric Christmas ornaments are cut with a Cricut and then sewn. It’s a great project for the Cricut but if you don’t have one, I have an easy pattern you can print and cut out with scissors. You can also share a no-sew version if you like.
I used bits of fabric I had on hand for my handmade ornaments but purchased some nice velvet ribbon from Temu, and tiny Dollar Tree pinecones and picks. I am very much enjoying quiet time crafting away in my office and I expect you want to do that too. So let’s begin.
How to Make Adorable Fabric Ornaments for Christmas
Supplies
To make six fabric stars you will need the following supplies. You can use scrap fabric, or a mix of fabrics to make the ornaments, it doesn’t matter what fabric you use. I had some leftover heavy cotton fabric and chose homespun in brown as I want a cottage look, but a more traditional Christmas fabric is a great idea as well.
- Cricut Design – Free Star File
- Printable Star Pattern (no Cricut)
- Background fabric – 2 pieces 12 by 24 inches
- Homespun fabric – 1 piece 12 by 24 inches
- Heat n Bond interfacing – 3 pieces 12 by 24 inches
- Cricut pink fabric mat, and a Cricut rotary blade
- Iron, scissors, sewing machine
- Dollar Tree polyester fiber fill
- Twine,
- Glue gun and assorted ribbon, embroidery floss, embellishments
Step 1 – Iron on the Interfacing
I first tried making these cute ornaments without the Heat n Bond interfacing, leaving the raw edges to fray. It didn’t give me the desired look I wanted, the raw edges were too raggedy for my taste and I had to stitch the homespun fabric on top. I decided to start over using interfacing, it was easier and I love how they turned out.
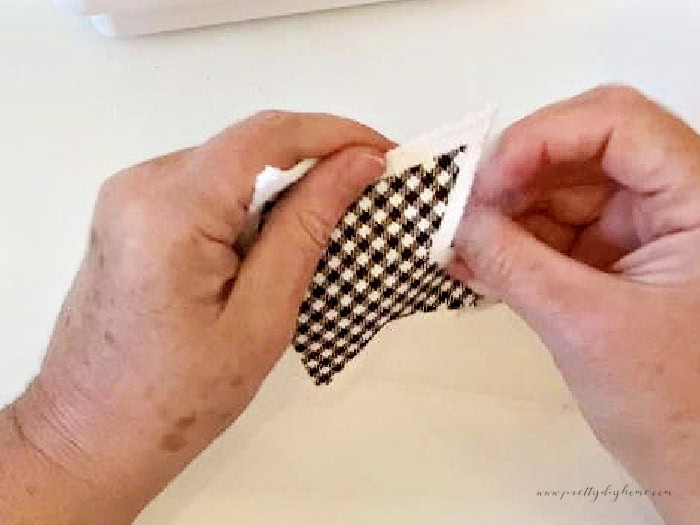
Follow the instructions on your iron on interfacing. Lay the wrong side of the fabric so it faces up, cover it with the interfacing paper side up, and iron it for 10 seconds in each spot. Then remove the paper backing. Do this for all the fabric before cutting.

Step 2 – Cut out the Fabric Stars
With Cricut Design Space
In Cricut design space, I used a 12 by 24-inch pink fabric cutting mat and the free star pattern. The white stars are 5 inches and the handspun is 4 inches. I was able to cut 6 out at a time. My fabric is heavy cotton with a heat N bond interfacing on the back. I chose canvas for my material and default pressure. The blade is a rotary cut blade.

Place the first piece of fabric right side up onto your pink fabric mat. Use a brayer to roll out all the wrinkles and adhere the fabric to the mat. I was very excited at how well this pattern cut out using the Cricut. It’s a fantastic way to cut out several small items at the same time.

With Printed Pattern
The pattern is a free PDF download on letter-size paper. Click the link, download and print. The pattern outline is thick, to get the required amount of space around the small star, cut the large star on the outer edge of the line, and the small star on the inner edge of the line. Once printed place your pattern piece on the fabric, pin, and cut out. Then move the pattern piece and cut again until you get 12 large stars, and 6 small ones.
Step 3 – Add the Hanging Loop
To Sew – Cut a 6-inch piece of either a thin twine or embroidery floss. Make a 1-inch loop and tie a knot. The long threads that are left will hang down inside the star. You may glue the threads if you like using hot glue, just ensure the glue is not near the knot as it makes it harder to sew. We will attach the hanger when we sew the star together.

No Sew – Add the hanger when you’ve finished the ornament. Thread the twine on a large-eyed needle, Pass the needle through the top of the ornament. Tie a loop with a knot at the end, secure the knot with a dab of hot glue, and then trim the twine.
Step 5 – Sew and Stuff the Fabric Star
Now that the fabric stars are cut we can put our easy Christmas ornaments together.
Lay the first white star, the good side up, center the homespun star over the white star, and iron to make the interface fuse the two stars together.

(If you want you can hand stitch around the homespun star, with my fabric it didn’t stand out enough, so I skipped it.)
Next, take the second white star, place it with the wrong side up, and add the hanger to the middle of the top star point. Cover it with the second finished star.

I like to seal in the raw edge of the stars so I chose a zig-zag stitch and sewed along the fabric edges to seal them. If you prefer a more shabby look use a straight stitch and 1/4 inch seam allowance. Whatever stitch you choose, sew around all the edges of the star except for the last section.
Stuff with a couple of tablespoons of polyfil fiber stuffing, pushing the stuffing down into all the points with your finger.

Once stuffed sew the last section, and trim any threads.
No Sew – If you don’t want to sew these stars, skip the stuffing and iron the two white stars with the glued sides sandwiched in the middle. Then center the homespun star on top and iron it as well. I would then attach the hanger from the back with hot glue.
Step 6 – Embellish
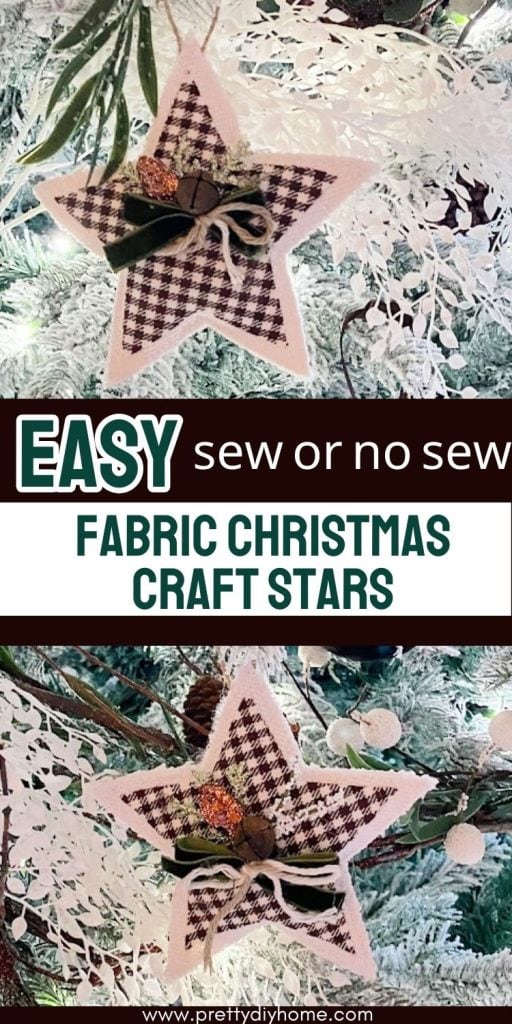
Use an assortment of small embellishments to add a touch of color and some sparkle to your Christmas star ornaments. I used some Dollar Tree picks in sparkling green, green velvet ribbon, a rusty jingle bell (Temu), and scraps of greenery from an old wreath.

I used some foam board and stick pins as a work surface to hold the ribbon and twine. Then, I added simple embellishments from my craft stash in my Christmas theme colors.

