How to Make a Large Romantic Fabric Bow
Valentine’s Day and winter always seem to go hand in hand for me. It is the season for snuggling, thinking about pretty things, and quietly dreaming of spring, all while staying indoors. Around here, all it takes is stepping outside to remember exactly why we have been hibernating. The cold sends you right back inside, where everything feels warm and comfortable.
Warm and comfortable and snuggly sounds a lot like Valentine’s Day, doesn’t it?
That meandering winter thought process is exactly how I ended up making some fabric bows. I had fabric, I had a sewing machine, and most importantly, I had absolutely no desire to go outside. A large, romantic muslin bow felt like the perfect winter project, and once I made one, I knew it was worth sharing.

This bow is soft, slightly droopy, and imperfect in the best way. It works beautifully on wreaths, gifts, seasonal decor, and even chair backs. Best of all, it is made in three simple pieces, which makes it easy to adjust until it looks just right.
Why I Make Fabric Bows in Three Pieces
One of the things I love most about making fabric bows is how versatile they are. Once you understand the basic method, the process stays the same every time. The only thing that changes is the length and width of the fabric strips.
Fabric bows do not need special materials. I used inexpensive muslin for this project, but almost any soft fabric will work. An old blouse, a skirt that no longer fits, or even a shower curtain can be turned into something pretty. Lightweight cottons and blends are especially forgiving and easy to sew.
This makes fabric bows a great project for using what you already have. A small amount of fabric goes a long way, and the results always feel a little special, even with simple on hand materials.
Choosing the Right Fabric
For a romantic, slightly droopy bow, softer fabrics work best. Muslin is perfect because it is light, affordable, and easy to sew. Other good options are cotton, cotton blends, old sheets, lightweight curtains, or a thrifted blouse.
I would avoid anything too heavy or stiff, like denim, canvas, or thick upholstery fabric. Those fabrics tend to hold their shape and can make the bow look more structured than soft.
Supplies You Will Need
All you really need to make this bow is fabric and a sewing machine. Everything else is optional and based on what you already have on hand.
- Fabric (muslin or another soft, lightweight fabric)
- Sewing machine and thread
Optional but helpful
- Scissors or rotary cutter
- Pins
- Turning tool or safety pin
- Hand sewing needle
- Hot glue gun
- Lace ribbon
How to Make a Large Romantic Fabric Bow
This bow is made in three simple pieces: the bow loops, the ties, and the center wrap. Making each piece separately makes the bow easy to adjust and gives it that soft, slightly droopy look.
Step 1: Iron the Fabric
Begin by ironing your fabric first. We will not iron the fabric after sewing the bow, because pressing it flat would remove the soft, flowing look we are going for. That said, it is a good idea to start with fabric that has been ironed before cutting. There is a difference between soft and flowing and downright wrinkled, after all.
Step 2: Cut the Fabric
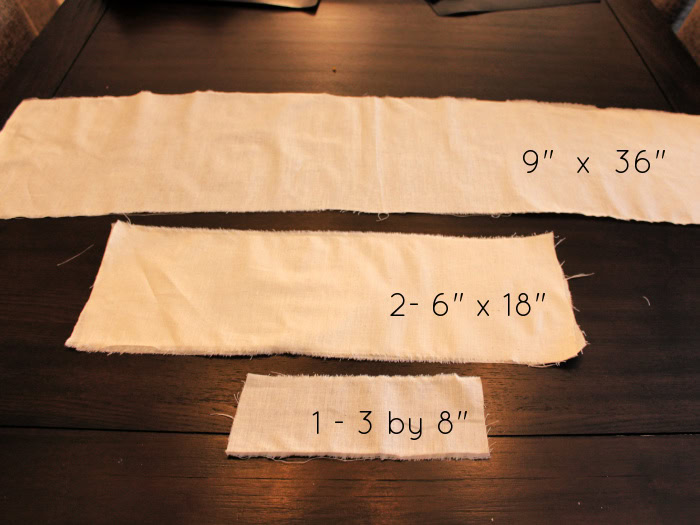
Cut the following pieces:
- Bow loops: one piece, 9 inches by 36 inches
- Tails: two pieces, 6 inches by 18 inches
- Center wrap: 3 inches by 8 inches
Step 3: Optional – Cut the Lace
I added lace to my fabric bow. If using lace, cut the lace pieces the exact same size as the fabric pieces.
The lace will be layered with the fabric and treated as one piece during assembly.
Step 4: Sew the Pieces into Tubes
At this stage, sew all the individual components so they are ready to assemble.
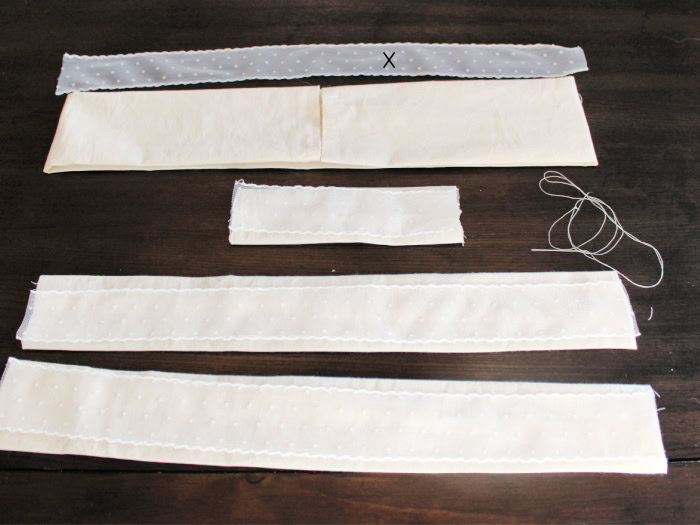
Bow Loops:
Fold the fabric lengthwise with right sides together. Sew a ½-inch seam along the long edge to create one long tube. Leave both short ends open. Turn right side out and hand-flatten only.
Tails:
Fold each tie piece lengthwise with right sides together. Sew along the long edge to form tubes. Then sew one short end closed. Turn right side out and hand-flatten.
Center Wrap:
Fold the center wrap lengthwise with right sides together. Sew along the long edge to form a narrow tube. Turn right side out and hand-flatten.
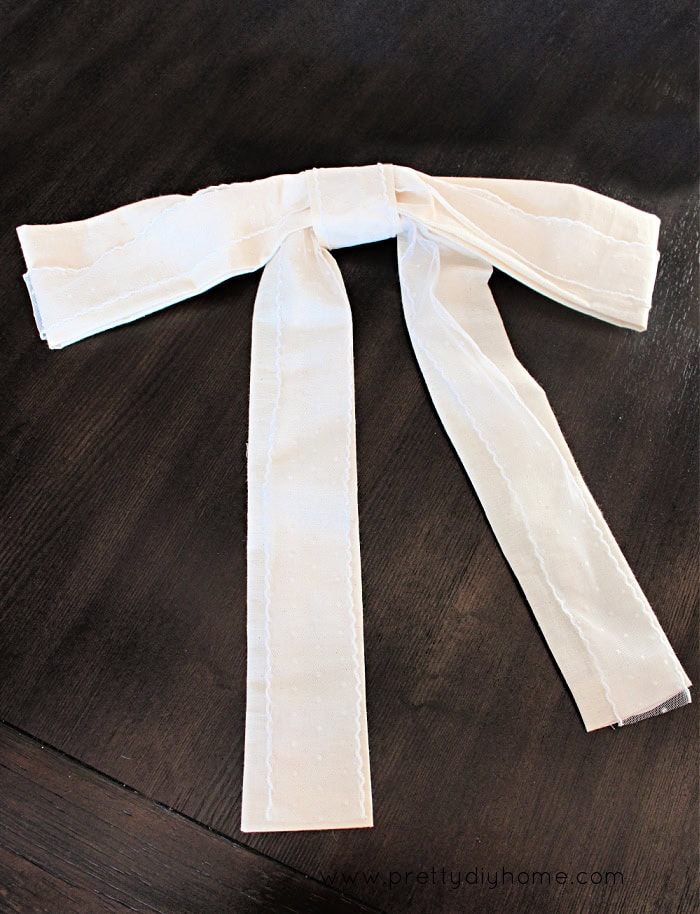
Step 4. Assemble the Bow
Assemble your bow on a flat surface before attaching it. Working flat makes it easier to adjust the size, shape, and droop.
Begin by fiddling and adjusting your fabric bow pieces. Start by laying the two ties on your work surface, then place the bow loops on top. Take your time adjusting the size and balance until it looks right.
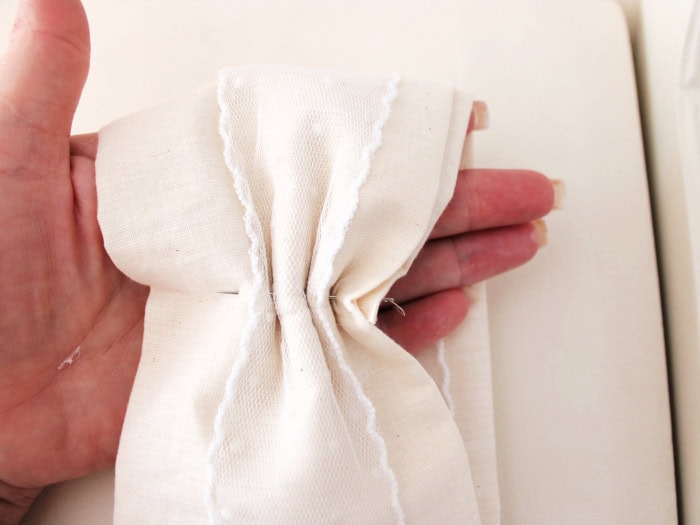
Once you are happy with the placement, gather the layers and then secure them together. I prefer to do this with a few hand stitches through the center, but a small amount of hot glue also works. This step holds the bow together permanently and prevents it from shifting later.
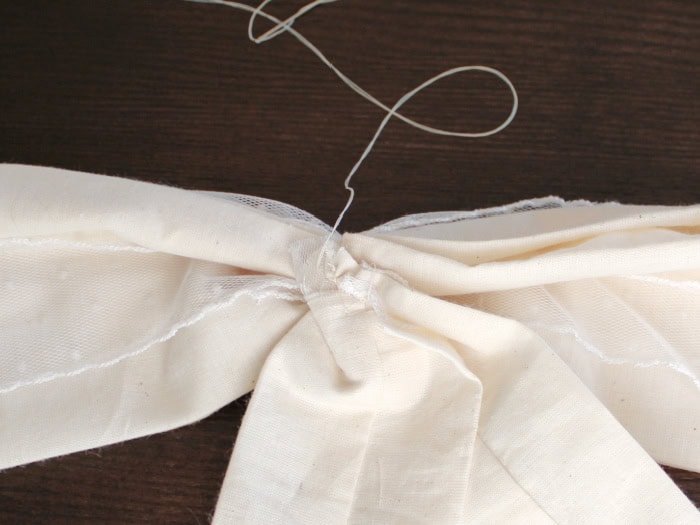
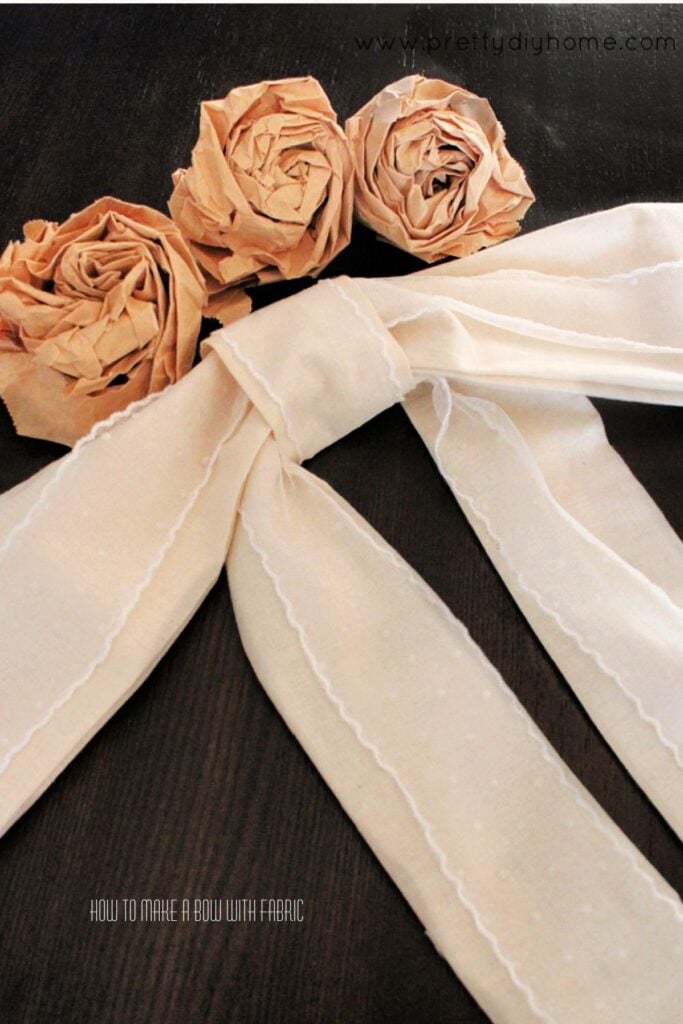
After the bow is secured, wrap the center strip around the middle to cover the stitching and finish the bow. Secure the center wrap at the back with hand stitches. or glue.
How to Attach a Fabric Bow
Fabric bows can be attached in different ways depending on whether they need to be removable for washing or will stay in one place.
For a ribbon that will stay in one place and will not be washed, such as a wreath or wall accent, the finished bow can be secured with a few stitches or a small amount of hot glue. Attaching it to the back of the center wrap keeps everything neat and hidden.
For home decor that may need to be removed or washed, like chair backs or baskets, it works better to design the ties longer while sewing them so they can be used to attach the bow. The ties act as both the attachment and part of the design, allowing the remaining length to cascade naturally.
Fabric bows are everywhere right now, and I love the trend. They add feminine softness, charm, and a handmade touch that feels both nostalgic and fresh at the same time. A simple bow can dress up a wreath, soften a room, or make an everyday project feel special without much effort.
This muslin version fits right into that trend. While it feels feminine, it is also neutral, which makes it easy to use in everyday home decor. The style is relaxed and imperfect, and it is easy to adapt using fabric you already have. If winter is keeping you indoors, this is a lovely way to stay warm, make something pretty, and enjoy a creative afternoon
If you love saving creative ideas for cozy afternoons, pin this fabric bow tutorial for later. It’s an easy project to come back to when you’re in the mood to sew, decorate, and spend an afternoon doing easy crafts.
Other Simple Valentine Crafts
If you like to decorate for Valentine’s Day but don’t necessarily want lots of pink, here are some neutral Valentine wreaths you can try.

Heart Shaped Eucalyptus Wreath
A simple Valentine wreath made with eucalyptus leaves for a soft, neutral look that still celebrates Valentine’s Day.