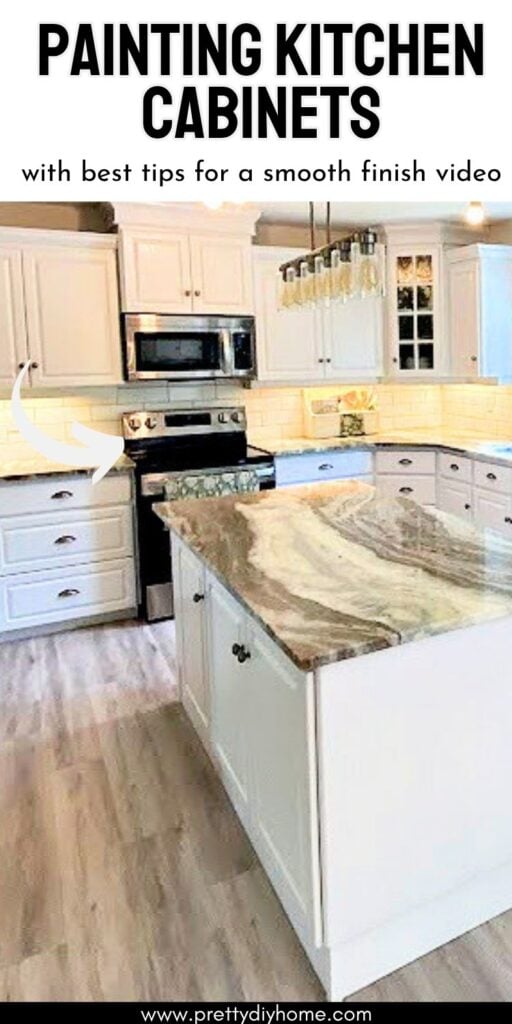
How to Paint Kitchen Cabinets
Painting cabinets is a lot of work, between the prep, the priming, and the multiple coats of paint, it takes both time and patience. But painting old kitchen cabinets white is the easiest and most cost-effective way to make a huge impact on the look and brightness of your kitchen.. While white kitchens might not be the trendiest look right now, white is the brightest and will give you the most light. White cabinets never go out of style either. They’re timeless, clean, and they give off that fresh, cottagey feel that works with just about anything else you want to layer in later. Although our kitchen is quite large, you will find that white paint makes a small kitchen appear larger. Of course, you can use any color you prefer. I considered painting just the island a soft cream, but in the end, I went with all white.
The Before
Here is our kitchen, the day we moved in, it’s so dark and dreary. Check out how many kitchen cabinets there are, with all those lovely drawers.
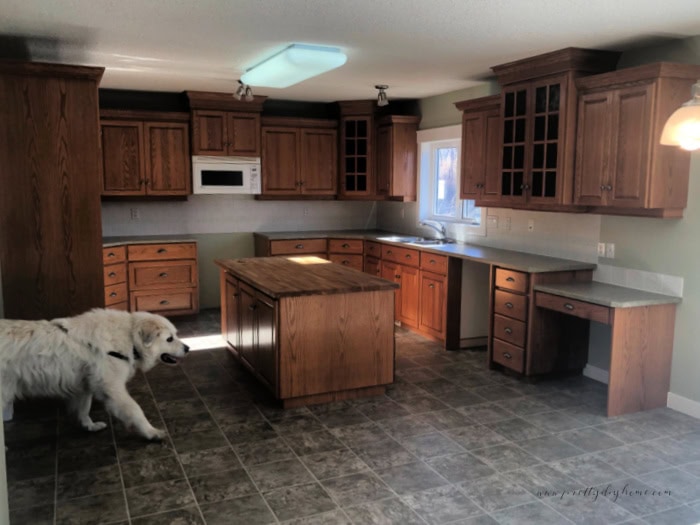
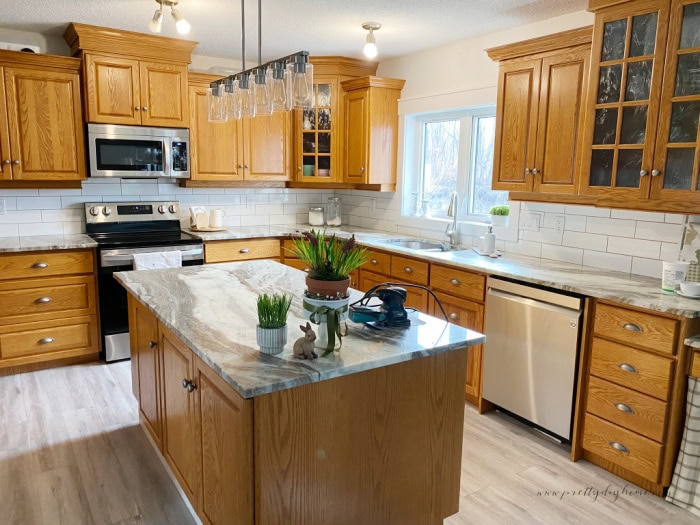
We immediately ordered granite, which I love, but it ate up a huge portion of our budget. We had to DIY the floors, new light fixtures, backsplash, and wall paint. We thought it would be bright enough. Here is our kitchen before painting the cabinets.
Why We Chose Paint Over a Full Reno
Replacing the cabinets entirely would have cost around $60,000. Our next idea was to take out a section of the oak kitchen cabinets and add a window to bring in more light, but that quote came back at $10,000. Between the electrical work, removing cabinetry, installing the window, and redoing the siding, it added up fast. In the end, even with using the best paint and primer, we were able to refresh the kitchen cabinets for under $1,000. That being said, I want to be honest about the time and effort involved. This wasn’t a quick weekend makeover. It took me six weeks of working on it every single day to get it all done. The savings were huge, and the transformation was so rewarding, but you need to be prepared to put in the time.
We Need to Paint it the Right Way, No Shortcuts
I went through several professional painters’ videos and tutorials, and they all emphasized the importance of completing all the steps. If you’re going to paint your kitchen cabinets, taking shortcuts might save time in the moment, but a bad paint job won’t look right, and it won’t last. A rushed job can devalue your home, especially in a space as important to the home value as the kitchen.
All painted cupboards will eventually show a bit of wear around the handles and high-use spots, but a careful, thorough paint job means those little chips will be fewer and farther between. The better the foundation, the easier it is to keep your cabinets looking fresh for years.
Supplies You’ll Need
The Best Paint
One of the biggest factors in how your cabinets turn out is the paint. A high-quality paint isn’t just easier to work with; it won’t chip as easily or yellow over time.
Oil-based paint (enamel paint) is harder to find in Canada; it’s also known to yellow, has a strong smell, and can be hard to clean up. Water-based latex paint is readily available, has fewer fumes, and is easy to clean up.
I did a lot of research before choosing my white paint. Benjamin Moore ADVANCE was consistently recommended as the top choice. It is a latex paint that acts like an oil-based paint; it’s a hybrid formula that gives us the best of both bases, reduced brush strokes, wears better, and is easy to clean up. It does have a longer drying time than regular latex paint, about five hours. Sherwin-Williams was another popular choice, and it dries much faster. But from the start, I knew I wanted to prioritize quality, so I went with Benjamin Moore. The extra drying time was worth the peace of mind.
When picking a white paint color, you can choose a color that leans towards blues or creamy yellows. Take into consideration your backsplash and countertop colors.. Semigloss or satin finishes are best for durability and easy cleaning. I chose Simply White in the less glossy satin finish.
Paint Sprayer or Roller Brush
Professional painters most often use a paint sprayer, but a good sprayer is very expensive, I have no idea how to use one properly, and not all paints work well. Lacking experience with a sprayer, I chose a small roller, a paintbrush, and sandpaper to get my beautiful paint finish.
Why You’ll Need Two Types of Sandpaper
For the best results, you’re going to need both 120 grit and 220 grit sandpaper. The 120 grit is perfect for scuffing up the old finish so the primer has something to grip. The 220 grit helps smooth out any little bumps or brush marks between coats. You want the final surface to feel as smooth and finished as possible, and that extra sanding step helps get it there.
Don’t Skip the Primer
Primer might be the most important step in painting your wood cabinets white. It helps the paint stick, blocks stains, and creates a nice even surface for your color to go on smoothly. If your original cabinets are a dark color, it can help with the number of coats of paint you need as well. My go-to primer is Zinsser 123, and this project was no exception. I’ve used it on all sorts of surfaces over the years, and it never lets me down. It goes on easily, dries quickly, and gives me a solid base that I can trust. If you’re painting cabinets, especially darker wood ones like oak, you want a good primer.
A Few Tools That Make a Big Difference
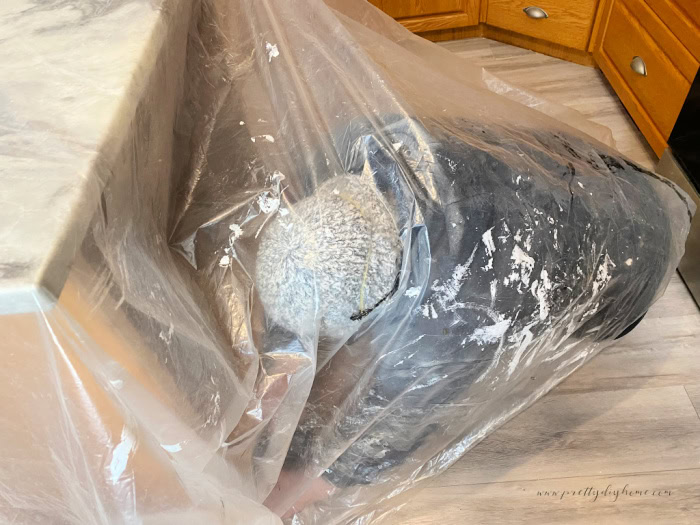
You don’t need any large, fancy tools to paint your cabinets, but there are a few essentials that help. An electric sander is necessary to save your arms and get an even surface. A shop vacuum is just as important for keeping dust under control as you go. You’ll also need a ladder to reach the higher cabinets, plenty of plastic sheeting to catch drips and contain sanding mess, and loads of painter’s tape paired with brown paper to protect your counters and floors. You also want to use inexpensive Dollar Tree clear sheeting and masking tape to create dust barriers. Trust me, that fine dust is downright mean. If you don’t stay on top of it, it will float into every room of your home. I learned that the hard way years ago while sanding drywall compound. It even made its way into the furnace ducts, what a nightmare. Now I always prep for dust.
Basic Supply List for Painting Kitchen Cabinets
- Electric sander – for removing old finish and scuffing surfaces
- 120 grit sandpaper – for sanding down the wood before priming
- 220 grit sandpaper – for smoothing between coats of paint
- Tack cloth for dusting (or damp cloth)
- Shop vacuum – to clean up dust between sanding sessions
- Goggles and a dust mask – for safety to keep the sand from my eyes and lungs
- Plastic sheeting – to protect floors and contain dust and drips
- Painter’s tape and brown paper – to cover countertops, floors,
- Ladder or step stool – to reach upper cabinets safely
- Zinsser 123 primer – reliable and sticks well to oak
- High-quality cabinet paint – I used Benjamin Moore Advanced Simply white in Satin
- Mini roller and paint tray – for even coverage on flat surfaces
- Angled paint brush – for corners and detailed areas
- Saw horses and plywood or a folding table – to create a drying and work surface
- Dollar Tree plastic tablecloths – to create dust barriers
- Brown craft paper – for lining the work surface and easy cleanup
- Dollar Tree Jenga blocks – perfect for lifting cabinet doors off the surface while painting
A Few Final Thoughts Before You Start
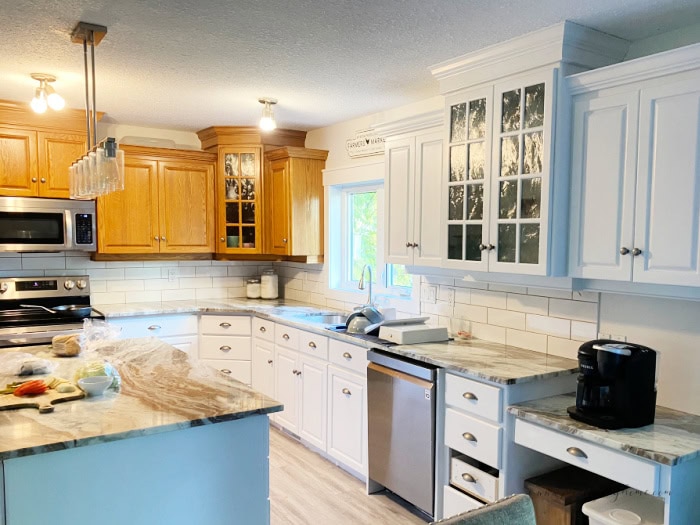
Before jumping into the step-by-step, I want to share one more tip. Depending on the size of your kitchen, it might make sense to break the project into smaller parts. You can either do all the prep work across the entire kitchen first or, like I did, tackle one section at a time and move through the full process in stages. My kitchen was far too big to manage all at once, so I split it into manageable areas and completed each section fully before moving on to the next. In the tutorial below, I’ll walk you through how I handled one section. You can then repeat those same steps until your whole kitchen is done.
The Painting Steps I Followed
To keep things manageable, I broke the project into a few simple steps: cleaning, dismantling, organizing and labelling, sanding, priming, painting, and finally reassembling. Each section of the kitchen followed this same process. Let’s start with the first step. Cleaning.
Step One: Cleaning
Before anything else, everything needs a good cleaning. I emptied the cupboards completely, put the dishes in bins, and took them out of the kitchen away from the upcoming dust and mess. I then wiped down all the surfaces inside and out. This includes the doors, shelves, sides, and cabinet frames. To cut through the grease, I used Vim spray, followed by a wipe-down with hot water and a bit of Dawn dish soap. TSP is always another good option. Grease builds up more than you think, especially near the stove, and removing it is key to making sure the paint sticks properly. A clean surface is the first step to a long-lasting finish.
Step Two: Dismantling
Once everything was clean and dry, I removed all the cabinet doors, pulled out the drawers, and took off the drawer fronts. I also removed all the hardware from the doors and drawers. As I worked, I labeled everything by location and number so I could put it back exactly where it came from. For example, I used labels like “Right Upper, Section 1” on both the door and its matching hardware. Taking the time to do this kept everything organized and made reassembly much easier later on.
The minute we took the doors off, and could see the clean white cupboard inside. The section got brighter, which excited me as I could guess how much brighter my kitchen would be in white.
Cleaning the Hardware
You can choose to clean the hardware now or wait until just before reassembly. I cleaned mine after removing each section. I sprayed the handles and hinges with Vim, scrubbed them with a small tool brush, and then let them soak in a plastic container. Doing it section by section helped keep everything organized and manageable.
Step Three: Organizing and Labelling
To keep everything straight, I used green painter’s tape and small plastic zip-top bags from the dollar store. As I removed the hardware, I placed each set into its own bag and wrote the section number and door number right on it. Then, I taped the same number onto the inside of the corresponding door or drawer front, right where the hardware had been. This way, everything stayed matched and went back exactly where it came from later.
Step Three: Sanding
I split the sanding into two parts. The cabinet frames were sanded in place, and the doors, drawer fronts, and any dark wood shelves were taken out to the garage. There, I used 120-grit sandpaper to sand everything down. Once sanded, I brought them into the basement painting area to prep for priming.
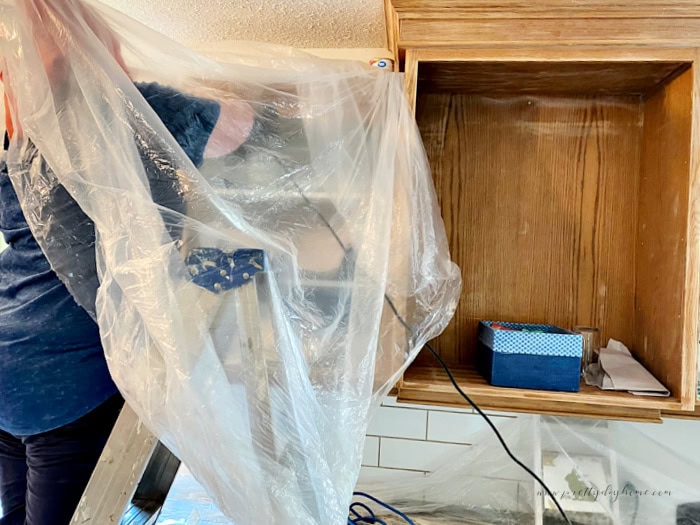
For sanding the cupboards themselves, I taped off the area using green painter’s tape and plastic sheeting to control the dust. I wore work goggles and a dust mask, then sanded one section at a time. After sanding, I vacuumed everything thoroughly to pick up the fine dust. Then I followed up with a slightly damp rag to wipe down all the surfaces. Getting rid of every bit of dust is important because it helps the primer go on smoothly and stick properly.
Set Up a Dedicated Painting Area
When you’re tackling cabinet painting, having a designated space is key. You need a clean area where your pieces can dry, well away from the sanding zone. Be sure your work area is well-ventilated during both painting and drying.I set up a painting station in my basement.
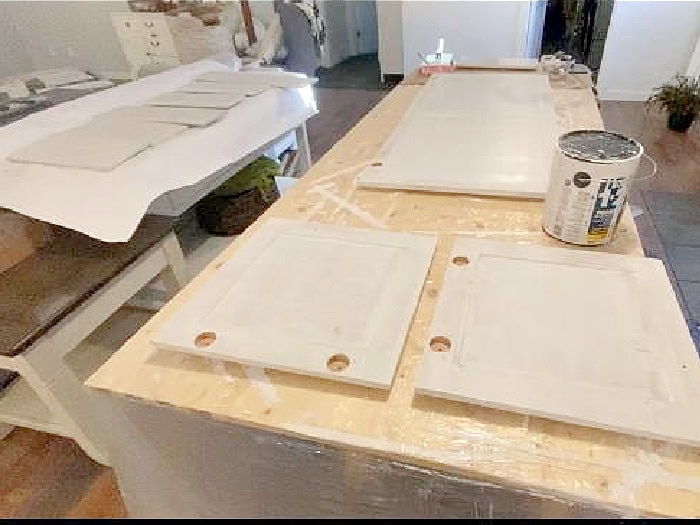
First, I covered the floor with plastic sheeting, then laid a piece of plywood across two sawhorses to make a makeshift table. I layered that with another sheet of Dollar Store plastic, then added a layer of brown kraft paper on top so I could tear off and replace sections when they got messy. That became my drying zone for the cupboard doors. I also set up a separate spot for actual painting, using more brown paper as a base. I kept my mini roller, paint brush, and a small paint tray there, and used a box of Dollar Tree Jenga blocks to lift the cabinets off the surface while painting. It didn’t cost much to set up, but it made the whole process smoother and less frustrating.
Step Four: Priming
Priming takes a bit more effort than painting, and it’s easy to underestimate just how important it is. Primer is thicker than paint, and it doesn’t glide on as smoothly. It also tends to show every brush stroke and can look patchy as it dries, which makes it a bit trickier to work with. But even though it’s not the most glamorous step, it’s absolutely worth doing right.
A good primer seals the wood, blocks stains, and gives your paint something solid to grip onto. And the best part? Once the primer goes on, you get your first real glimpse of how much brighter the kitchen is going to look. Even with just one coat, the change is already encouraging. It’s that first moment where you can start to imagine the finished result. It gives you the motivation to keep going.
I kept a separate set of brushes and rollers just for priming. After each use, I cleaned them thoroughly and set them aside. This helped keep the primer and paint from mixing and gave the final finish a cleaner, more professional look.
Step Five: Painting
Painting the cabinets is where the transformation truly begins, but it’s also a step that requires careful attention to detail to avoid issues like drips and pools. These can occur when paint accumulates in corners, crevices, or along edges, leading to an uneven finish.
To prevent this, start by applying thin, even coats of paint. thinner is better for smooth, long-lasting results. Overloading your brush or roller can cause excess paint to collect and drip. Using a high-quality, short-nap roller or a good brush designed for trim work can help control the amount of paint applied.
When painting cabinet doors, it’s beneficial to lay them flat on a stable surface. Elevating them slightly using items like Jenga blocks allows you to paint the edges without the door sticking to the surface beneath. This setup also helps prevent paint from pooling underneath the door.
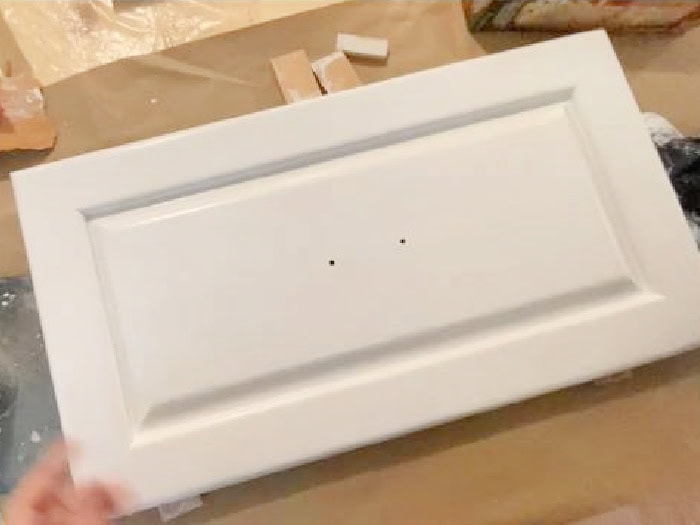
Pay special attention to areas with molding or intricate details. These spots are prone to paint buildup. After applying paint to these areas, gently brush over them to remove any excess and ensure a smooth finish.
For the cabinet frames, work in manageable sections, especially if you’re painting in place. Use painter’s tape and plastic sheeting to protect adjacent surfaces and contain any dust or paint splatters. Always keep a damp cloth nearby to quickly wipe away any accidental drips before they dry.
Remember, patience is key. Allow each coat to dry thoroughly before applying the next. This approach not only prevents drips and pools but also contributes to a durable, professional-looking finish.
Each cabinet door and drawer front needs to be painted and dried individually. To give everything enough space and airflow, I laid them flat on my work table with a Jenga block propped under one edge. This helped prevent paint from pooling along the edges and allowed the paint to dry more evenly. I recommend painting the back side first. That way, once it’s dry, you can flip it over and paint the front while keeping an eye out for any drips that might sneak around the edges. This method really helps avoid surprises and keeps the finish looking clean on both sides.
Video Tutorial
I created a video tutorial that shows how I prepared for painting, how to reduce flaws, and how I fixed them as they occurred. The final sections show me painting two different-sized cupboard doors. The process is the same for any part you paint, I think you will find my tips helpful.
The latest on Youtube:
Step Six: Reassembly
Reassembly is much easier when everything is labeled properly. Cabinet doors and frames might look identical, but they’re not always perfectly square. A door that fit well in one spot may not hang quite the same in another. That’s why matching each door and set of hardware to its original location helps. Most cupboard hinges allow for some adjustment, so take the time to make sure each door is hanging straight, opening smoothly, and not rubbing against anything. If you’re not loving your original hardware, this is a great time to give it a quick refresh with spray paint in a color you like. It’s an easy way to tie everything together without replacing it all.
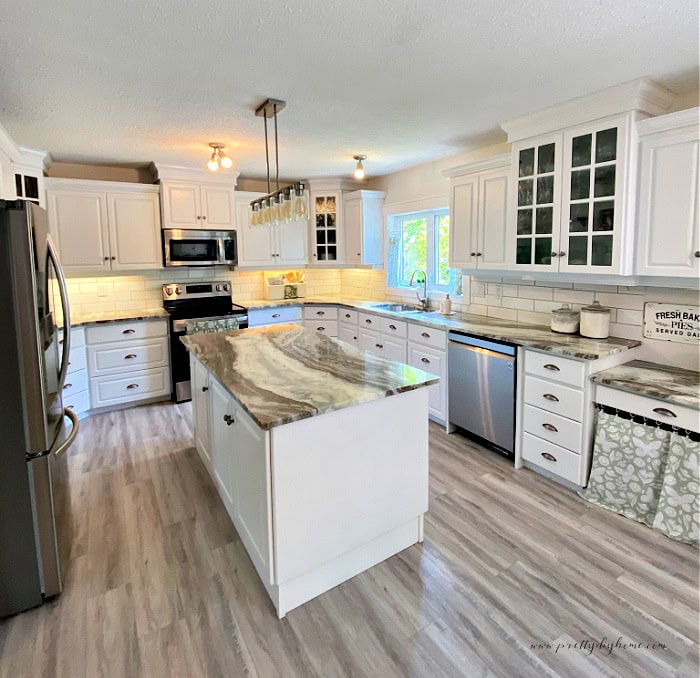
I was shocked to see the granite that the granite stands out better with the white cabinets than it did with the oak.

I still want to attach a hanging rail beside the coffee pot.
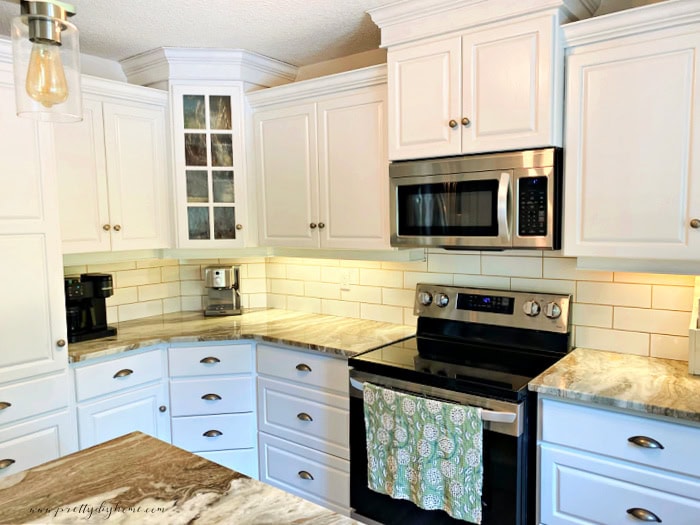
I made some 10-minute kitchen curtains in a soft green to add some color.

I don’t want any of this to scare you off from painting your cupboards. Yes, it’s a lot of work and it takes time, but the results are truly worth it. The difference it made in my kitchen was night and day. It feels brighter, cleaner, and so much more updated, without the price tag of a full renovation. If you take it one step at a time and stay organized, you absolutely can do this. This project pays off every single day when we walk into our kitchen, and it’s been a year since I finished it.
Thank you, and enjoy. Leanna
Other Kitchen Cabinet Makeovers
In our previous home, with lighter oak cabinets. Here is how we upgraded them.

How to Install DIY Backsplash Tiling
We installed our own backsplash after getting a granite countertop. The post shows you everything you need to finish a DIY backsplash.

How to Add Moulding to Cabinets
Our cupboards were really plain, and adding this DIY moulding along the top gave them the extra charm they were lacking.