Paper Bag Rose Wreath for Valentine’s Day
Valentine’s is coming, and I usually celebrate it by crafting something sweet without spending much. It’s still winter here, which means I’m bundled up indoors and enjoying the chance to be creative. I’ve wanted to make a paper bag rose wreath for years, but I could never quite figure out the twisting steps in a way that felt clear.
I didn’t come up with this idea originally. I’ve seen some gorgeous paper bag rose wreaths online, but I found many of the tutorials a bit vague and hard to follow. In the end, I worked out a method of twisting the bags into roses that worked for me, and I’m sharing it here with a clear description and a video so you can follow along easily.
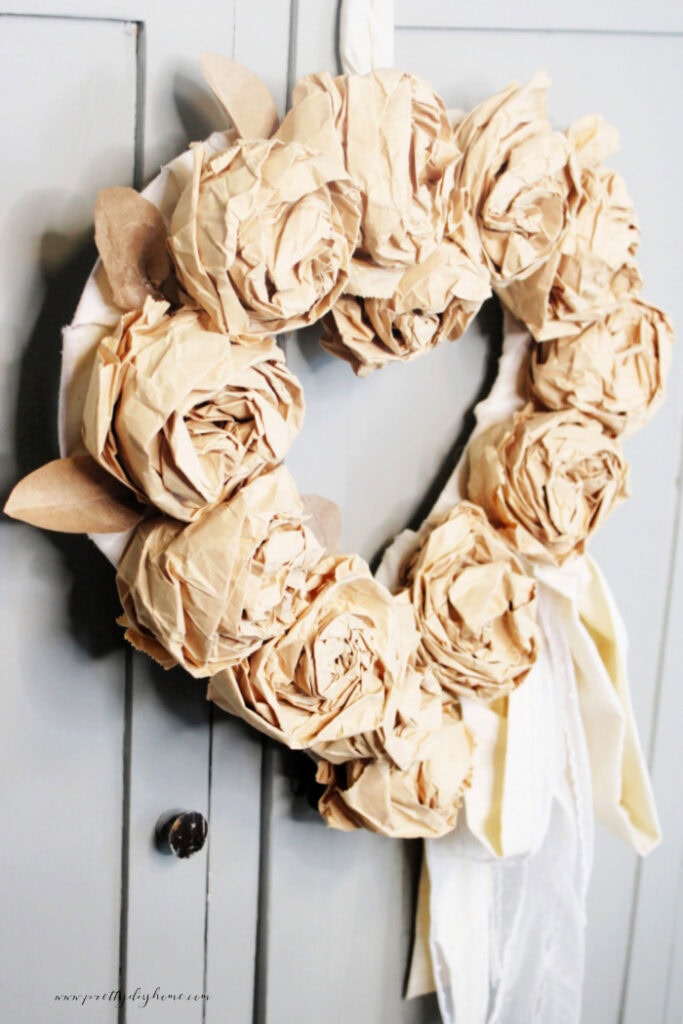
I kept this wreath soft and neutral, skipping paint and glitter and finishing it with a bow. I love how it turned out, and I hope you do too.
This is a beginner-friendly project, and the design is kept simple on purpose so the roses can be a little shabby and imperfect without the wreath looking too
Supplies for a Paper Bag Valentine Wreath
- Heart-shaped wire wreath form (14-inch, dollar store)
- Lunch size brown paper bags (about 15 for a 14-inch frame, plus a few extra in case of tearing)
- Scrap fabric or muslin (for wrapping the frame and making the hanger)
- Finished bow or ribbon for tying a simple bow
- Pipe cleaners (for the hanger)
- Hot glue and glue gun
Amounts may vary slightly depending on wreath size and fullness.
How to Make a Paper Bag Rose Wreath
Step 1: Prepare the Wreath Frame
Start with a dollar store heart shaped wire wreath frame, the kind with three rounds of wire. Since my frame was a bright red, I knew it would be hard to hide using just the paper bag roses, so I covered it first.
To cover the wreath, I cut several strips of inexpensive muslin about 3 inches wide. I wrapped the strips around the frame, overlapping them slightly for full coverage and securing the ends with hot glue. Once wrapped, I double-checked that everything was covered. If I spotted any areas showing through, I added a small strip of muslin to fill in the gap.


If it helps to see the process in action, I’ve included a short video showing how I twist the paper bags into roses. Watching it once before you start can make the steps feel much clearer, especially if you’re a visual learner.
Step 2: Make the Paper Bag Roses
Once I figured out a few clear steps, the process became surprisingly simple.
The latest on Youtube:
The first step is to soften the paper. Open one paper bag fully and gently crumple it to loosen the paper. The paper bags are stiff but fragile, so work slowly and gently. If you twist too hard, the bags will tear. I ripped a few before learning to slow down.
Once the bag feels softer and wrinkled, open it back up completely, including the bottom, and lightly reshape it so it stands upright again.
Next, look at the bottom of the bag. You will see pointed corners. Grab two opposite corners and pinch them together firmly. This pinched spot will become the center of your rose, so try to hold it as securely as you can.
With that center pinched, place your other hand inside the bag to help support it. Keeping a firm hold on the center, begin twisting the bag from the bottom. Use the hand inside the bag to keep it open and guide the paper so it twists smoothly instead of collapsing.
Depending on how strong your hands are, some of the roses may turn out larger or more loosely twisted. That’s not a problem. If I wanted a rose to be smaller or tighter, I held the center with needle-nose pliers and gently twisted the outside of the rose. This made it easy to tighten the roses later, especially where the heart shape curves and comes to a point.
For a 14-inch frame, I used fifteen paper bag roses. I strongly suggest making at least two extras.

Step 3: Create or Choose a Bow
You can make a fabric bow like I did in another post, or you can simply tie a pretty lace or ribbon bow. I don’t recommend anything too full or messy, since the roses already add a lot of texture.
Step 4: Arrange the Roses and Bow
Before attaching anything permanently, I placed the roses and the bow onto the wreath to do a trial layout. The roses will tumble around a bit at first, but this step makes it much easier to decide where you want everything to go.

Step 5: Attach the Roses to the Wreath
Before attaching the roses to the wreath frame, I added a few small dots of hot glue to the backs of some of the roses to help them hold their shape. I did this only in spots that wouldn’t be seen once the roses were attached.
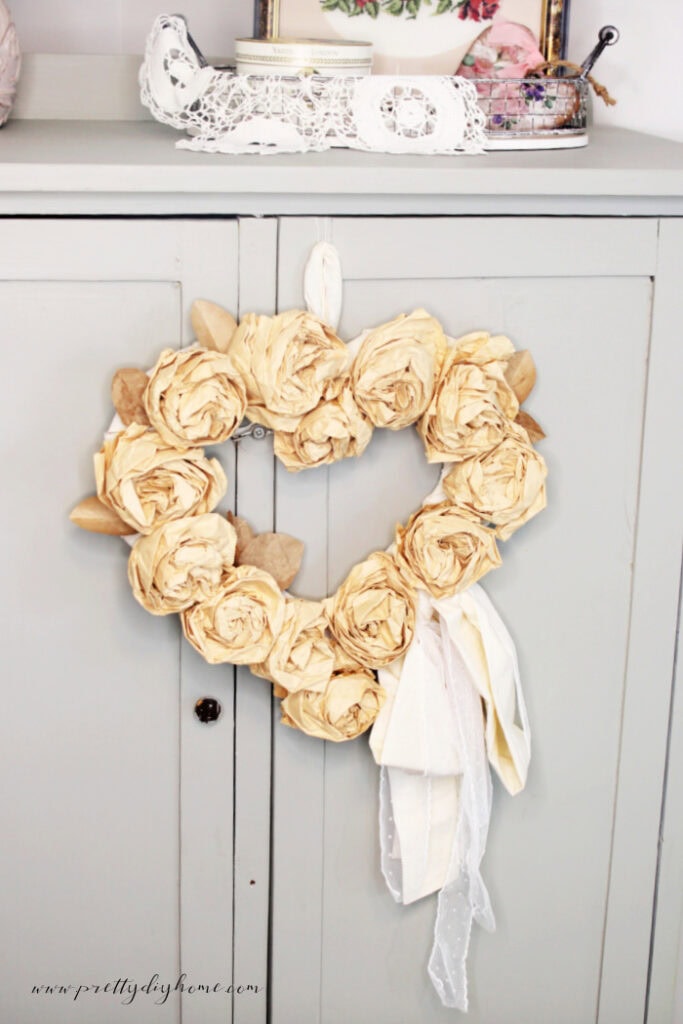
I began by hot gluing a small rose at the top point of the heart, then added another rose at the bottom point. After that, I worked outward, adding the remaining roses in pairs, placing one on each side, until the wreath was evenly filled.
Step 6: Attach the Bow and Finish Filling Gaps
I attached the bow to the lower side of the wreath using wire, twisting it securely onto the frame. Once the bow was in place, I adjusted the nearby roses around it and glued a few roses to each other where needed to cover any open spaces.

Step 7: Make a Hanger
To make a hanger, I wrapped fabric around two pipe cleaners and used hot glue to close the fabric into a tube. I let it cool completely, then twisted the pipe cleaners together inside the fabric. After that, I folded them in half to create a loop and hot glued the hanger securely to the back of the wreath.

Step 8: Final Shaping and Valentine Touch
The wreath was easy to shape at this stage. I tucked any loose paper flaps back into place and secured them with a small amount of hot glue. If I noticed too much fabric showing behind the roses, I glued the roses to each other to help close the gapsand cut out some small paper leaves.
For a soft Valentine touch, you can lightly mist the paper roses with a favorite perfume. One or two light sprays is plenty.
Pin It for Later
If you love simple, budget-friendly crafts, be sure to save this paper bag rose wreath for later. It’s an easy Valentine project that uses inexpensive supplies and simple steps, making it perfect for a cozy afternoon of crafting. Pin it now so you can come back to it when you’re ready to decorate or make one of your own.

Other Neutral Valentine Decor Projects

Easy Valentine’s Day Wreath with Dollar Store Supplies
If you want a more natural Valentine wreath, you might enjoy my Valentine eucalyptus wreath with its soft greenery and simply grainsack bow.

DIY Wood Craft for Valentine’s Day Decor
Here is a simple DIY wood craft for Valentine’s Day banner for a neutral Valentine look.