Easy Vertical Pallet Planter Project for Adding Color
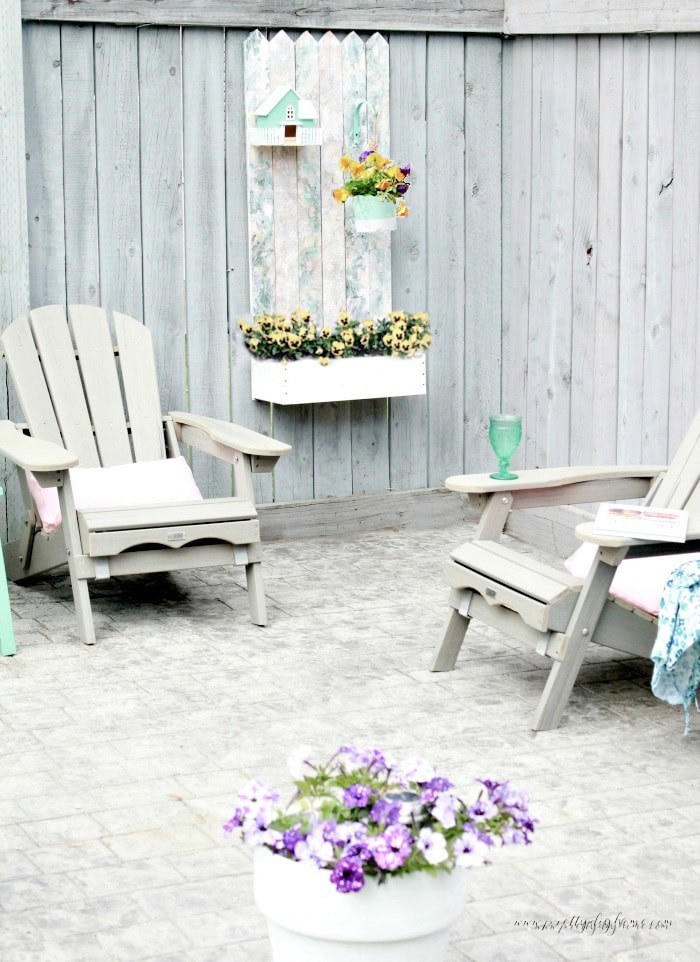
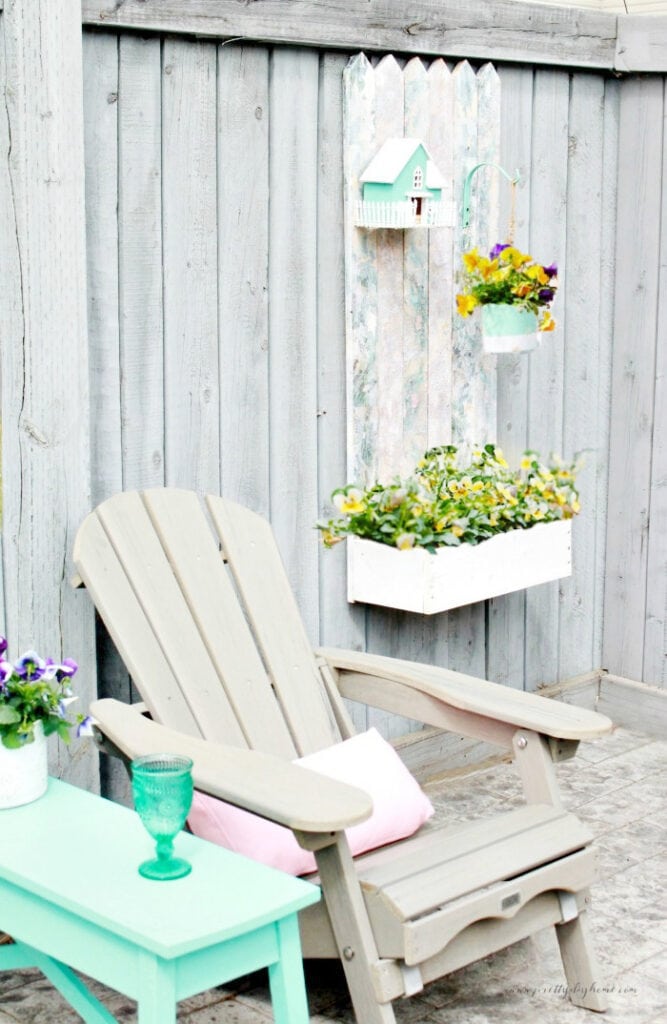
This backyard vertical planter is quite a bit different than the regular DIY pallet planter boxes we see online. It’s designed to add color to the dark and boring corner of a run-of-the-mill fence. If you have a boring run-down looking piece of fence that needs something, try this DIY project. It will also work in a small space where you want to add some color and interest. You can even customize it and turn it into a vertical garden combined with a privacy wall. You don’t need to make it with the decoupage on the back, but it instantly adds color, while you’re waiting for those garden beds to grow.
Why You’ll Love this Project.
- Pallet DIYs are super quick and easy – the pallet itself acts as the frame or structure, so you don’t need fancy woodworking skills or fancy tools.
- Perfect for reusing materials – wooden pallets are a great way to upcycle and create something custom for your garden.
- Custom planter boxes made simple – You have a need in your yard, you can design a planter like this one to fit a specific need. Mine instantly gave me much needed color even before the flowers grew.
- Budget-friendly project – free pallets are often available at local stores, so it’s an easy, low-cost project for beginning woodworkers to learn on.
- Eco-friendly and gorgeous – you’ll end up with a unique planter box that’s practical and exactly what you need.
Our tiny backyard is a work in progress. As you likely know, I love our house, but the teeny tiny yard not so much. Our backyard was a sea of grey with a grey fence, grey concrete patio, an old deck and not one tree or flower. We have planted shrubs, and flowering trees, and added a fountain and some flower pots, but they all need time to grow. I wanted something to add instant color to the back corner and this pallet wood garden project is what I came up with. The sweet peas still need time to grow up the pickets.
Where to Find Pallet Boards
The first thing you need to do is find free pallets. My husband snagged these old pallets by asking his old boss at a concrete factory. You’ll often see them listed for free on Facebook Marketplace, but they go fast—if you miss out, note the spot and check back in a couple of weeks. You can also post a “wanted” ad on Facebook or Reddit. Another solid trick is driving around warehouse and industrial sites, and garden centers—just stop and ask! Liquor stores, hardware stores, and grocery stores are also great places to check, especially if you’re a regular and chat with the staff. Although big box stores like Home Depot have large stacks of old wooden pallets, I haven’t found one who shares.
Avoid Methyl Bromide
Take a look at your pallet before using it in a garden project. Heat treated, debarked, and kiln dried pallets are all safe. But you need to check for a label to see if it is marked as being treated with MB (Methyl Bromide), they are toxic and should be avoided.
How to Dismantle a Pallet
Like with any pallet project, the first step is taking them apart. We started with three free pallets, broke them down, and saved as much wood as possible. Some pieces end up being too damaged to use, so having a few extra pallets is always a good idea.

Instead of struggling to pry off each board, try this shortcut: first, cut off both ends of the pallet using a jigsaw, circular saw, chop saw, or even a hand saw. Make sure to cut inside the nails and crossbar. Once that’s done, use a hammer and/or pry bar to carefully lift off the remaining center boards. This method saves time and keeps more of the wood pieces intact!
Flip the pallet over and repeat the process on the other side.
Once cut, each pallet strip will be about 36 inches long.
Cleaning the Pallet Wood
You never really know where pallets have been, and ours were covered in dust and grime. To clean them up, we spread all the planks of wood out on the lawn and gave them a good rinse with a pressure washer. After letting one side dry, we flipped them over and repeated the process. For the final drying, we stood them up on their ends along the fence to make sure they dried completely.
Now that the wood is clean and organized, it’s time for the fun part!
How to Make a Vertical DIY Pallet Garden Planter
To make this vertical pallet garden planter, you will need to cut the following lengths from your pallet.
To make this flower box, you will need the following materials, and cut lengths.
- 6 – 4 foot lengths of 1″ by 4″ boards, pallet boards work well.
- 1 – 4 foot length of 2″ by 6″ lumber
- 1 – 4 foot length of 1″ by 2″ lumber
- 8″ by 40″ piece of plywood (any thickness, or a scrap of pegboard)
- Mod Podge and a foam brush
- Napkins in coordinating colors (Mine came from the dollar store)
- Paint
- 150 grit sandpaper
This is a scrap wood project, everything came from a pallet and scrap lumber. We used trim ends for our flower box. The flower box can be made of whatever size lumber you have on hand.
The Flower Pot Fence Background
Cut 6 1″ by 4″ inch boards into 4-foot lengths. Sand them all very well to avoid slivers. I cannot emphasize this enough, especially if using pallet wood.
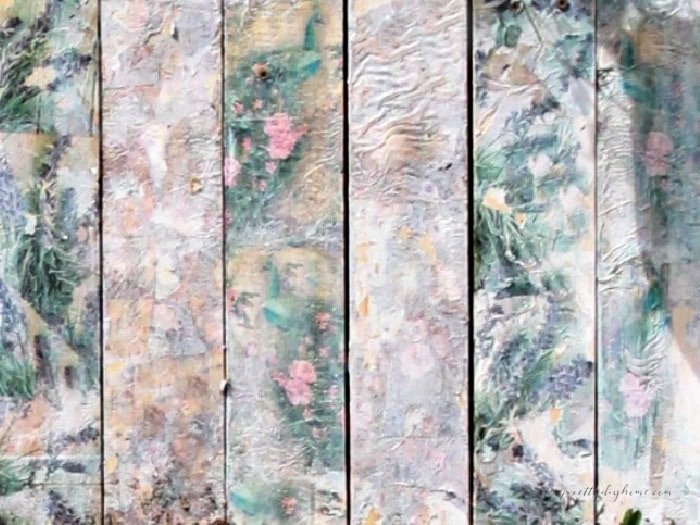
Separate the layers of the napkins, keeping the top dyed layer only. Tear the dyed layer into large raggedy edged pieces.
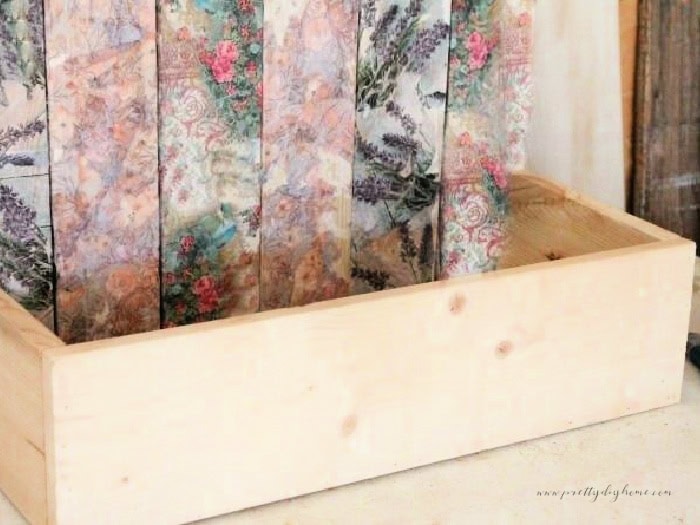
On each board, start with one side, at the top, apply a thick layer of Mod Podge. Layer the torn napkins on top, and lightly press them into place. Make sure the entire surface is covered. Let dry for several hours.
Flip over and do the other two remaining sides. Let dry for several more hours.
Once dry, hand sand the napkin-covered wood with 220 grit sandpaper. This removes the little bits of loose paper and lightens the color. Sand lightly until the wood is as distressed and shabby as you like. Mine took about 15 minutes. I love the subtle look of all the different colors.
Once you have all the wood sanded, cut the top of the boards to resemble fence pickets.
Lay the six pieces of wood squarely next to one another. Cut a 1 by 2 20″ long and nail it across the back to hold the top portion of the pickets together. Make sure each picket is well attached using short nails so they don’t poke through.
Making the Flower Box
Confirm the width of your flower box by measuring the width of the wood pickets attached together. Cut a 1″ by 6″ to the same dimension. Ours measured and was cut to 21″. Cut two pieces of 1″ by 6″, 9 inches long.
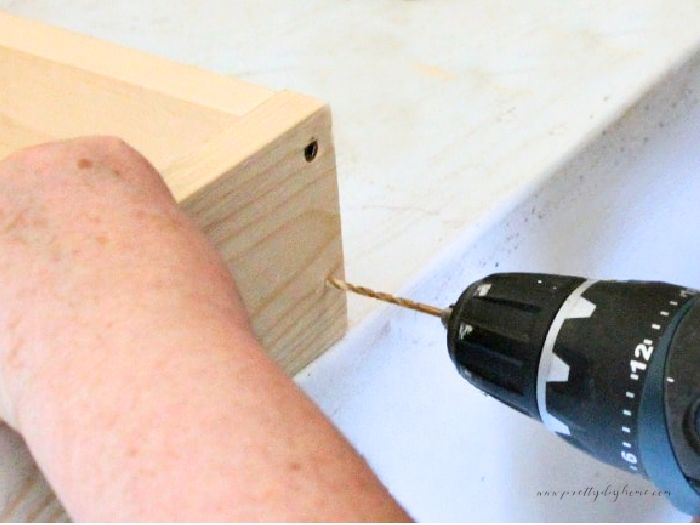
To attach the sides of the planter, attach the long front piece of the flower pot to the other two short sides using screws. Drill holes first and then using 1 3/4 screws attach everything together, forming a 3-sided box.
Once you have the box made, attach it to the picked fence portion. Screw from the back side of the picket portion into the upright portion of the flower box.
Make your own project in any colors you like. I love how the next images show how pretty and colorful the upcycled pallets have become with just a little bit of paper and mod podge.
Hubs helped me figure out how to brace the bottom of the planter box so it was strong enough to hold the weight of the potting soil. Measure out the inside opening of your planter box. Cut four pieces of the 1 by 2″ lumber to the same dimensions. Nail these along the bottom edge of the planter, making sure the bottom edges are flush with each other. This makes a bracket to hold the bottom in place without showing from the outside.
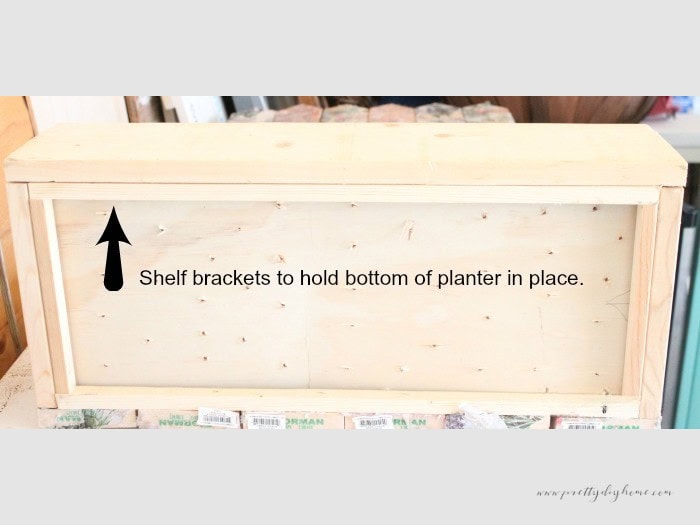
Using whatever plywood or pegboard you have, cut it to match the inside dimensions of your flower box. Ours was cut to 8″ by 19 1/2 inches.
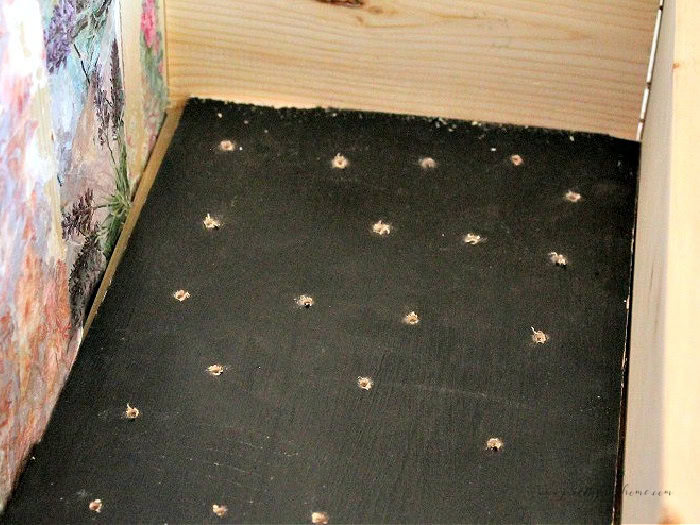
Fill the bottom of it with holes using a drill to provide drainage and line the bottom of your planter with landscape fabric. If you don’t have landscape cloth, you can line the bottom with plastic bags instead.
Finishing and Hanging the Flower Box
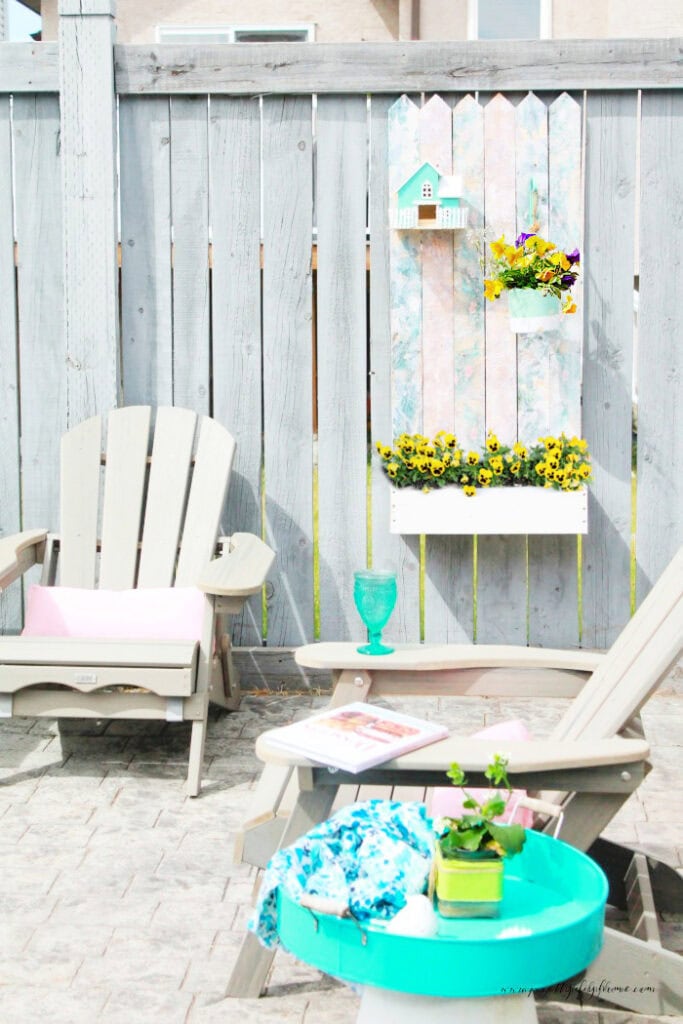
The final step was to paint the flower box portion white. We painted ours inside and outside.
The little pansies were started indoors in egg shells in March. Unfortunately, our Winter lasted right through Spring so these little guys had to wait indoors until a couple of weeks ago. I will add some photos once they are in bloom.
The last step was adding a little birdhouse using a dollar store house and fairy accessories.
To attach it to the fence Hubs simply added four large screws through the picket section into our fence boards.

That’s a cute planter, thanks for sharing!
I love this idea. The color is wonderful. The birdhouse with the picket fence is everything, lol! Thanks for sharing on Sunday’s Best.
This turned out so great! I love the idea of the napkins, they created such a neat look on the boards.
Great use of scrap wood and I love that you used napkins to add the color. Can’t wait to see what you do with the rest of your backyard.
Thanks Denise. I planted some vines this year for around the fountain, and this planter. I think in a year or two it’s going to be a nice little sunny spot.
Those napkins are so cute for distressing and adding color. I really need to try that! That whole planter looks beautiful. 🙂
Thank you Stephanie. I was surprised how strong the mod podge held the napkins. I will find out how it survives the Canadian winter, but using scrap wood and dollarstore napkins its worth risking.
Love the addition of the napkins to the backing of your planter box! I bet you will be having a lot of faeries popping by for a visit! Such a lovely spot to relax and enjoy!
When we first moved in I asked Hubs to remove this patio. He just laughed at me, so I have learned to work with it. Surprisingly because of the constant sun, I really enjoy hanging out there. I am always very cold so I sit out there and thaw. It’s also the most private part of the yard because you’re snuggled in the corner.
Oh my goodness! I absolutely love this and the entire space is so inviting! I love the look of the decoupaged napkins! Great job!
Thank you Michelle. You can see in the photo how everything was so greyish, we planted an apple tree that is slowly growing and a lilac right beside the patio. Unfortunately, my puppy waters the lilac regularly and an apple tree is hard to grow here, so we need to be patient.
This is so adorable. The decoupage treatment is so pretty.
Thank you Debra. I wanted something colourful without it being simply painted. You are so great for me, always commenting and providing feedback. Its very much appreciated.
Decoupaging napkins onto the planter added so much charm and the birdhouse is a darling addition. I love this idea for growing sweet peas (I haven’t had any success growing them in the garden). Pinned
In our yard almost everything needs to be full sun. I am hoping the sweetpeas do alright in this corner. They are my favorite climber.