
Chocolate Thumbprint Cookies with Ganache
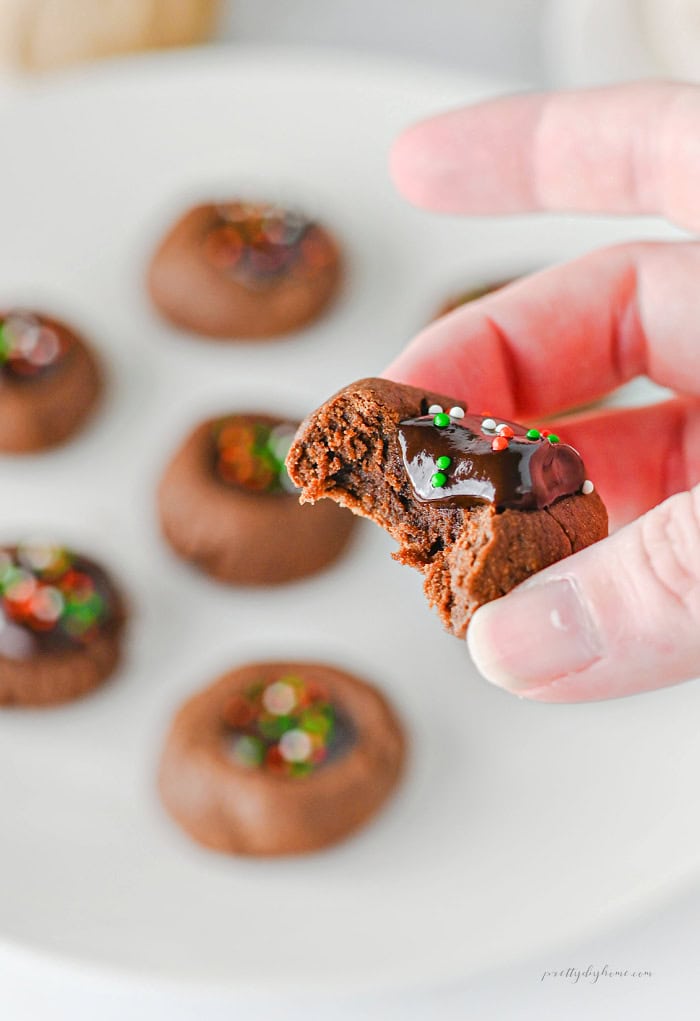
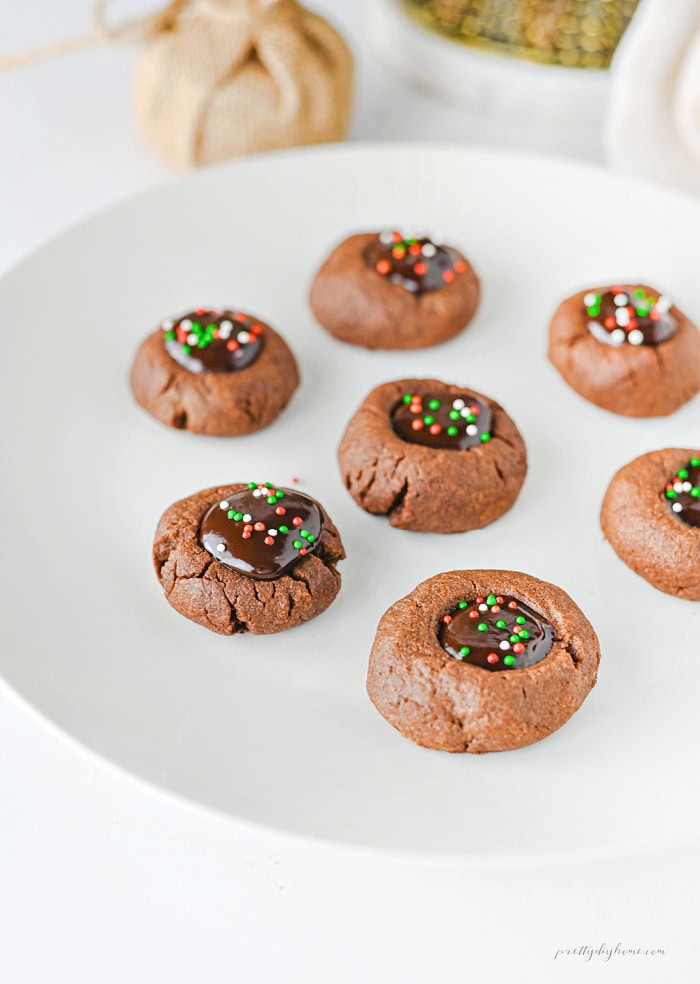
These soft and chewy chocolate thumbprint cookies are made for chocolate lovers. Each cookie has a rich chocolate base with a little well in the centre filled with creamy chocolate ganache. Add a few colourful sprinkles, and you have a delicious homemade cookie that’s perfect for Christmas baking, cookie exchanges, or enjoying any time of year.
Or you can swap out the sprinkles for Valentine’s Day, Easter, or any other special occasion when you’re treating the chocolate lovers in your life.
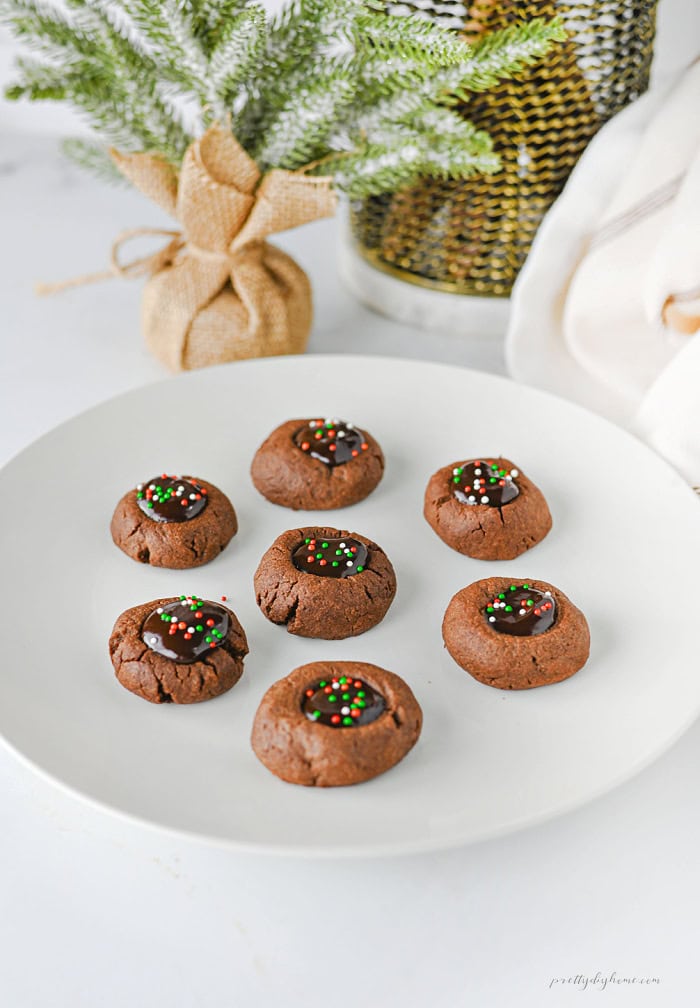
How to Make Chocolate Thumbprint Cookies with Ganache
Ingredients for Chocolate Thumbprint Cookies
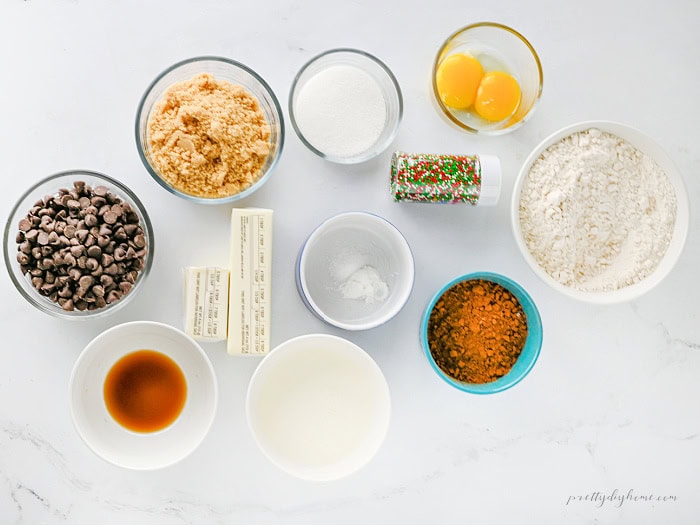
For the Chocolate Cookies
- 1 1/2 cups all-purpose flour
- 1/2 cup unsweetened cocoa powder
- 1/2 teaspoon salt
- 1/2 teaspoon baking powder
- 3/4 cup unsalted butter, softened
- 3/4 cup light brown sugar, packed
- 1/4 cup granulated sugar
- 2 large egg yolks
- 1 1/2 teaspoons vanilla extract
Using just the egg yolks instead of a whole egg gives these chocolate thumbprint cookies a richer, softer texture and helps them hold their thumbprint shape while baking. For this recipe, it’s important to measure the flour as accurately as possible to avoid dry, crumbly cookies. Spoon the flour into your measuring cup and level it off with a knife rather than scooping directly from the bag.
For the Chocolate Ganache Filling
- 1 cup semi-sweet chocolate chips
- 1/3 cup heavy whipping cream
- Colourful sprinkles for decorating
Step 1: Prepare for Baking
Separate the two eggs, placing the yolks in a small bowl. Save the egg whites for another recipe.
Line two baking sheets with parchment paper.
Step 2: Mix the Dry Ingredients
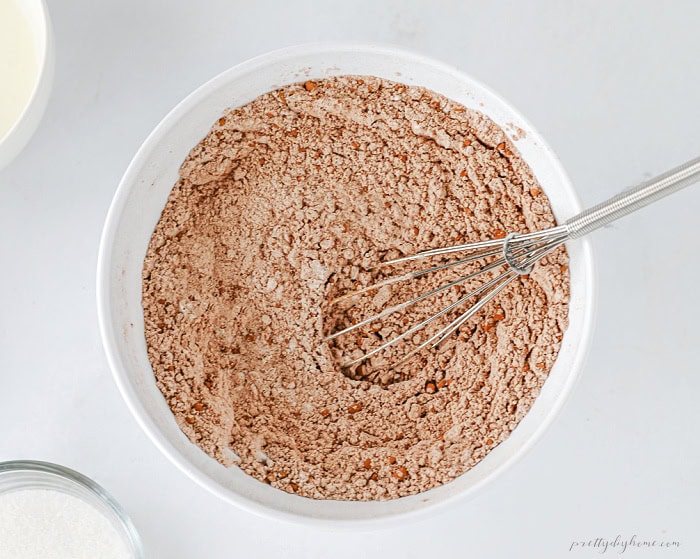
In a medium mixing bowl, whisk together the flour, cocoa powder, salt, and baking powder until well combined. Set aside.
Step 3: Cream the Butter and Sugars
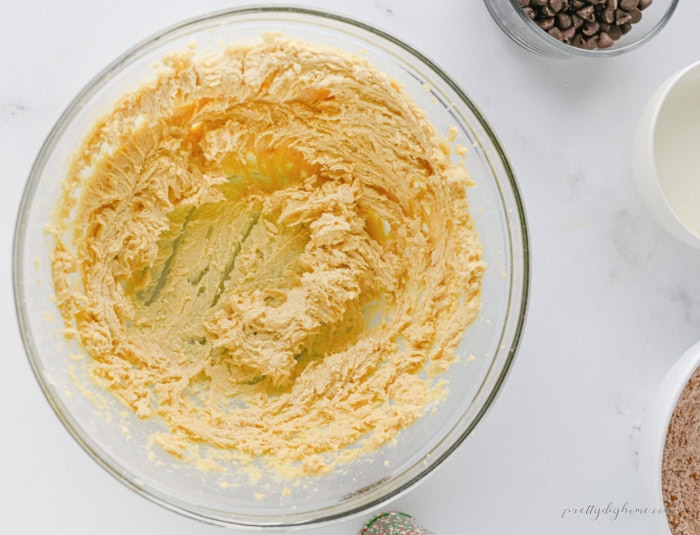
In a large mixing bowl, beat the softened butter, brown sugar, and granulated sugar together for 1–2 minutes until light and fluffy.
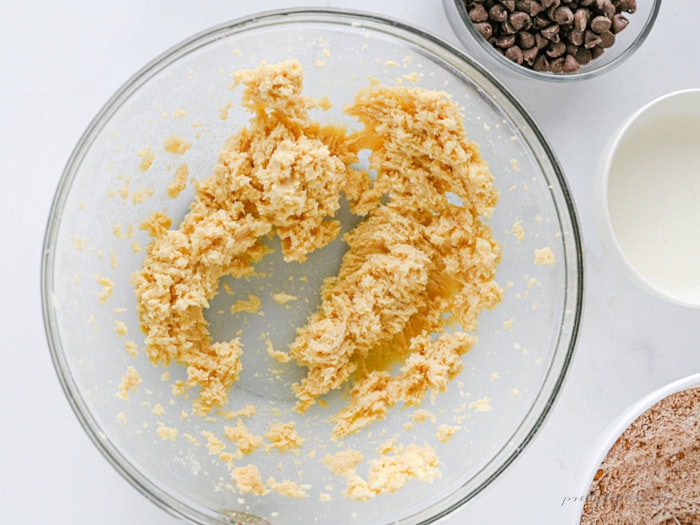
Add the egg yolks and vanilla extract, mixing until well combined. Scrape down the sides and bottom of the bowl with a spatula, then give everything one final mix.
Step 4: Make the Chocolate Cookie Dough
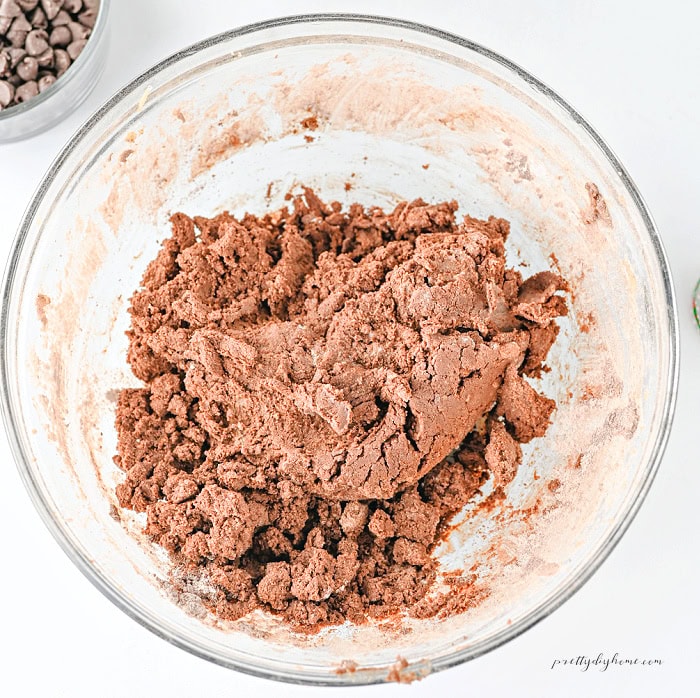
Add half of the dry ingredients to the butter mixture and gently fold together using a spatula.
Add the remaining dry ingredients and continue folding until the chocolate cookie dough comes together. Avoid overmixing to keep the cookies soft and tender.
Step 5: Shape the Thumbprint Cookies
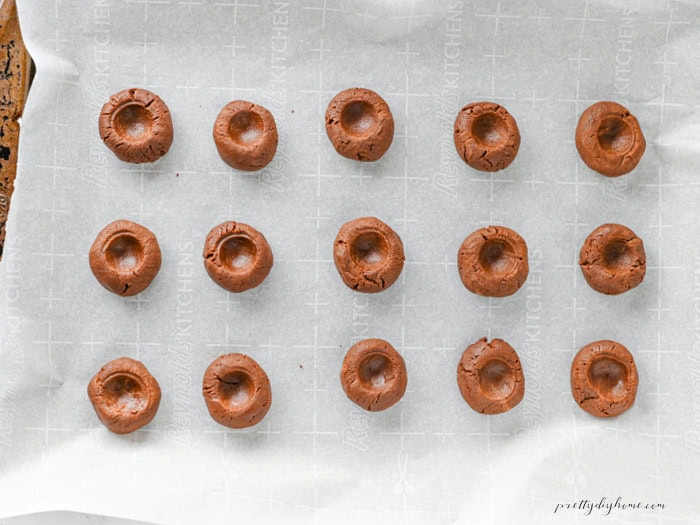
Use a small cookie scoop (about 1 tablespoon) to portion the dough. Roll each portion into a ball with your hands.
Place the cookie dough balls on the prepared baking sheets, leaving about 2 inches between each cookie.
Using the back of a 1/2-teaspoon measuring spoon or your thumb, gently press an indentation into the centre of each cookie. If the dough cracks around the edges, gently smooth the cracks with your fingers.
Step 6: Chill and Bake the Cookies
Place the baking sheets in the refrigerator for 30 minutes to chill the dough.
While the cookies are chilling, preheat your oven to 350°F.
Bake the chilled cookies for 9–11 minutes. Avoid overbaking to keep the cookies soft and chewy. It’s better to slightly underbake them than overbake them. The edges should look set while the centres are still a little soft.
Don’t worry if the thumbprint centres puff up during baking. Once the cookies are out of the oven and still warm, just gently press the centres down again.
Let the cookies cool on the baking sheets for a few minutes before transferring them to a wire rack to cool completely.
Step 7: Make the Chocolate Ganache Filling
Place the semi-sweet chocolate chips and heavy whipping cream in a microwave-safe bowl.
Microwave for 30 seconds, then stir well. Continue heating in 15-second intervals, stirring between each, until the chocolate is completely melted and the ganache is smooth and creamy.
Let the ganache cool for about 10–15 minutes, stirring occasionally, until it thickens enough to spoon into the thumbprint centres without overflowing.
Step 8: Fill and Decorate the Cookies
Using a small spoon, fill the thumbprint centre of each cooled cookie with chocolate ganache.
Add red, green, and white sprinkles for Christmas (or choose colours to match your occasion). Add the sprinkles while the ganache is still soft, so they stick to the chocolate.
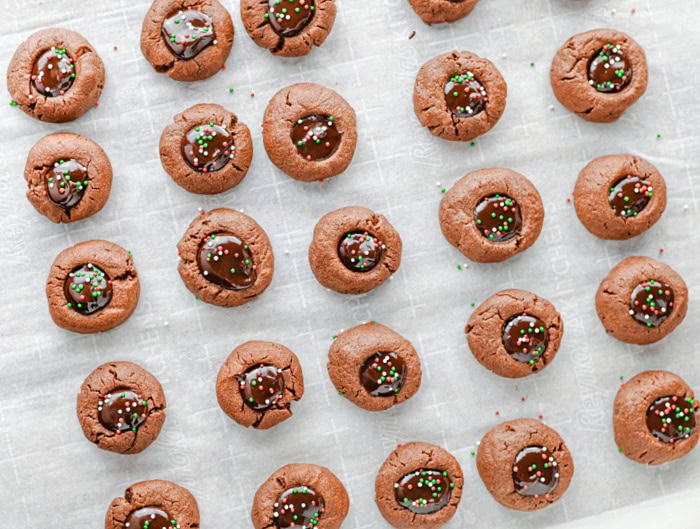
Allow the ganache to set before serving.
How to Store and Freeze Chocolate Thumbprint Cookies
Store the finished chocolate thumbprint cookies in an airtight container in the refrigerator for up to 4 days. Let them sit at room temperature for a few minutes before serving so the chocolate ganache softens slightly.
Freezing: These cookies are easy to make ahead. Freeze the baked, completely cooled cookies without the ganache filling in an airtight, freezer-safe container for up to 3 months. Thaw at room temperature, then add the chocolate ganache and sprinkles before serving.
I like making these chocolate thumbprint cookies for Christmas because I think they’ll appeal to both kids and adults. The rich chocolate ganache filling makes them a little more elegant than traditional thumbprint cookies topped with a Hershey’s Kiss, while the colourful Christmas sprinkles keep them fun for the kids. They’re an easy addition to a Christmas cookie platter, with something for everyone to enjoy.

Chocolate Thumbprint Cookies with Ganache
Ingredients
Chocolate Thumbprint Cookies
- 1 ½ cups all-purpose flour
- ½ cup unsweetened cocoa powder
- ½ teaspoon salt
- ½ teaspoon baking powder
- ¾ cup unsalted butter softened
- ¾ cup light brown sugar packed
- ¼ cup granulated sugar
- 2 large egg yolks
- 1 ½ teaspoons vanilla extract
Chocolate Ganache Filling
- 1 cup semi-sweet chocolate chips
- ⅓ cup heavy whipping cream
- Colourful sprinkles for decorating
Instructions
- Separate the two eggs, placing the yolks in a small bowl. Save the egg whites for another recipe. Line two baking sheets with parchment paper.
- In a medium mixing bowl, whisk together the flour, cocoa powder, salt, and baking powder until well combined. Set aside.
- In a large mixing bowl, beat the softened butter, brown sugar, and granulated sugar together for 1–2 minutes until light and fluffy. Add the egg yolks and vanilla extract, mixing until well combined. Scrape down the sides and bottom of the bowl with a spatula, then give everything one final mix.
- Add half of the dry ingredients to the butter mixture and gently fold together using a spatula. Add the remaining dry ingredients and continue folding until the chocolate cookie dough comes together. Avoid overmixing.
- Use a small cookie scoop (about 1 tablespoon) to portion the dough. Roll each portion into a ball with your hands. Place the balls on the prepared baking sheets, leaving about 2 inches between each cookie. Using the back of a 1/2-teaspoon measuring spoon or your thumb, gently press an indentation into the centre of each cookie. Smooth any cracks around the edges with your fingers.
- Place the baking sheets in the refrigerator for 30 minutes to chill the dough. While the cookies are chilling, preheat your oven to 350°F.
- Bake the chilled cookies for 9–11 minutes. Avoid overbaking to keep the cookies soft and chewy. The edges should look set while the centres are still a little soft. If the thumbprint centres puff up during baking, gently press them down again while the cookies are still warm. Cool on the baking sheets for a few minutes before transferring to a wire rack to cool completely.
- Place the semi-sweet chocolate chips and heavy whipping cream in a microwave-safe bowl. Microwave for 30 seconds, then stir well. Continue heating in 15-second intervals, stirring between each, until the chocolate is completely melted and the ganache is smooth and creamy.
- Let the ganache cool for about 10–15 minutes, stirring occasionally, until it thickens enough to spoon into the thumbprint centres without overflowing.
- Using a small spoon, fill the thumbprint centre of each cooled cookie with chocolate ganache. Add red, green, and white sprinkles for Christmas (or choose colours to match your occasion). Add the sprinkles while the ganache is still soft so they stick to the chocolate. Allow the ganache to set before serving.
Notes
Pin It for Later!
Love these chocolate thumbprint cookies? Save this recipe to your favourite Pinterest cookie board so you can find it again when you’re ready for some Christmas baking or need a chocolate treat for a special occasion.