Easter Crafts for Adults Burlap Bunny Artwork
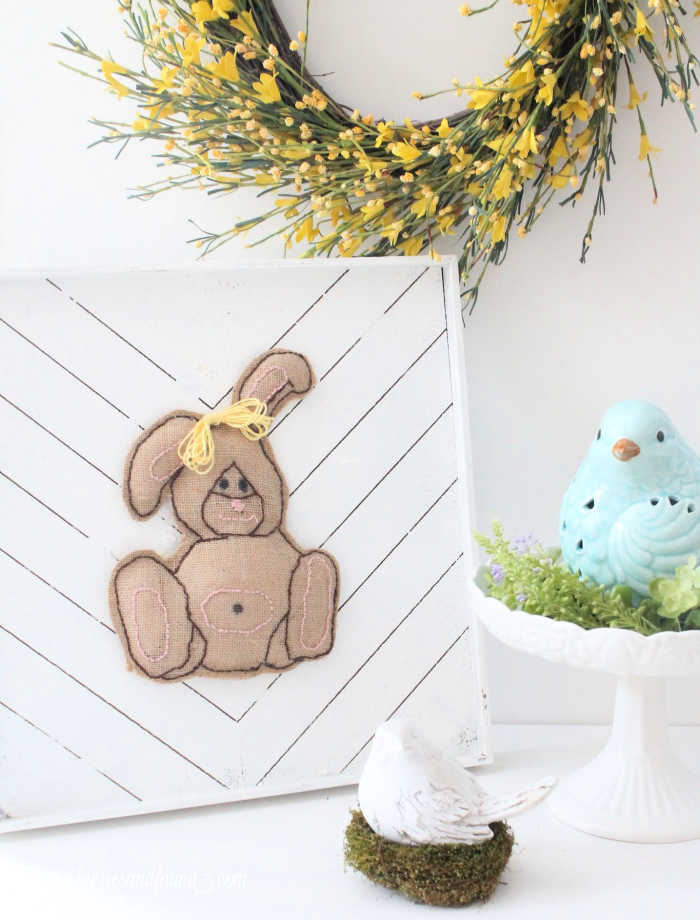
This handmade burlap bunny was inspired by the soft, relaxed look of Gund stuffed animals that naturally slouch as if they are enjoying a bright spring afternoon. Instead of using traditional fabric, I chose burlap to give this Easter bunny a simple farmhouse style that fits well with spring decorating.
My first thought was to use drop cloth fabric, but burlap turned out to be the better choice because it makes simple embroidery easy to see and work with. All of the stitching for this bunny took just one evening while I watched a movie, even with subtitles, which makes this a relaxing project you can finish in a cozy night at home. Later in the post, I’ll show you exactly what I mean.
How to Make a DIY Burlap Easter Bunny Decor
Step 1: Download the Easter Bunny Template
If you have ever downloaded one of my patterns before, you may notice they look a bit sketchy. I don’t design my templates online. Instead, I draw them using graph paper, then scan, scale, and tweak them as needed. Drawing on graph paper makes it much easier to keep the proportions correct and simplifies creating a clean outline.

Once the pattern is created, I make a few adjustments before sharing it here. The templates may not be perfect, but they do work, as I use the same one to create the Easter bunny shown in this tutorial. It’s also a great way to start making your own patterns and templates.
Step 2: Gather the Supplies
You will need:
- Backdrop or frame
- Burlap (about 18 x 12 inches)
- Carbon paper or white chalk
- Chocolate brown embroidery cotton (2 skeins)
- Soft pink embroidery cotton (1 skein)
- Stuffing (polyfill)
- Embroidery needle
- Scissors
- Glue
- Small paintbrush
- Ribbon, embroidery cotton, or flowers for embellishing
- Bunny pattern
Step 3: Cut the Burlap Fabric
Print out two copies of the bunny template pattern.
Lay your burlap with the good side facing up. Place the templates on top and cut two rectangles the same size as the 8.5 x 11 inch printables. We will cut out the actual bunny shapes later.
Step 4: Transfer the Bunny Pattern
Set one piece of the cut burlap aside and place the second piece with the good side facing up. Cover the burlap with a sheet of carbon paper, carbon side down, then place the bunny pattern on top.

Trace over the bunny firmly, working one section at a time to make sure the design transfers clearly. Because burlap is darker, the carbon marks may not show as easily as they do on lighter fabric. After tracing one section, such as an ear, lift a corner to check that the pattern transferred before moving on to the next area.
Step 5: Stitch the Bunny Details
For my Easter bunny I didn’t divide my embroidery cotton, I used all six threads to make the stitching stand out more.
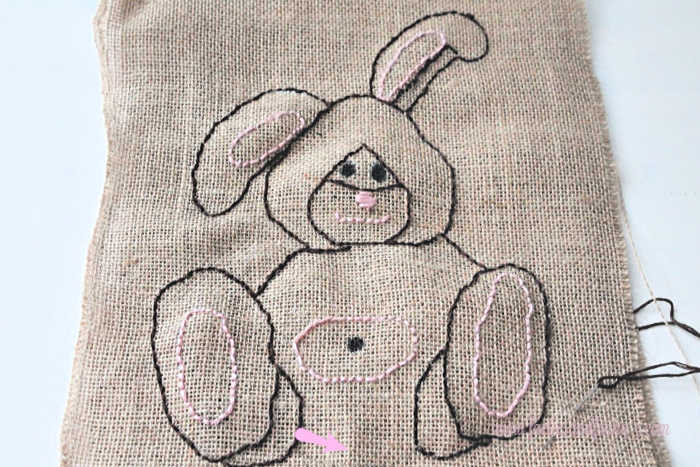
Start with the one piece of burlap with the pattern on it. Outline all the “Inside” lines using embroidery cotton. don’t stitch the outer edges of the pattern.
By outlining all the inside buttons through one layer of fabric it hides any knots you may have on the back, and it allows you to add the stuffing later on.
Keep the second bunny template with you while you sew. It will help you decide what colour the lines should be. If while working your stitches you find it hard to see. Place the pattern under your burlap bunny and fill in the missing bits using chalk.
The Embroidery Back Stitch
For my Easter bunny, I didn’t divide the embroidery cotton. Instead, I used all six strands to help the stitching stand out more against the burlap.
Start with the piece of burlap that has the bunny pattern transferred onto it. Using embroidery cotton, stitch along all of the inside lines of the design, but do not stitch around the outer edges of the bunny yet.

Once you have finished stitching all of the inner details, including the nose, mouth, ears, and feet, place the second piece of burlap behind the embroidered front bunny. Pin the two layers together around the edges to hold them in place before stitching around the outside.
Using dark brown thread, begin stitching around the outside edge of the bunny, starting at the bottom. Continue sewing around the shape, but stop before closing it completely, leaving an opening between the feet for stuffing.
Step 6: Stuff the Burlap Bunny
Stuff the bunny with polyfill, placing more stuffing in the bottom half than in the face and ears. This helps give the bunny a more three-dimensional shape with a slightly fuller tummy.

Once you have the bunny stuffed to your liking, stitch the opening at the bottom closed to finish shaping the rabbit.
Step 7: Seal the Burlap Edges
Burlap sheds quite a bit, so cutting the edges without sealing them first can cause fraying and make a mess. To prevent this, pour a small amount of regular glue into a container and use a small brush to apply glue all around the outside seam of the bunny. Pinch the edges together slightly and allow the glue to dry completely.

Once the glue has dried clear, trim the burlap about 1/4 inch away from the stitching.
Step 8: Attach the Bunny to the Background
Cover the back of the bunny with glue and place it onto your background.
Place something heavy on top, such as a stack of books, and allow it to dry for at least one hour.

More Easter Bunny DIY Ideas
Dollar Store Easter Bunny Craft
If you’re looking for another easy project, try this Dollar Store Easter Bunny Craft, made using an inexpensive dollar store bunny shape for a quick Easter decorating idea.

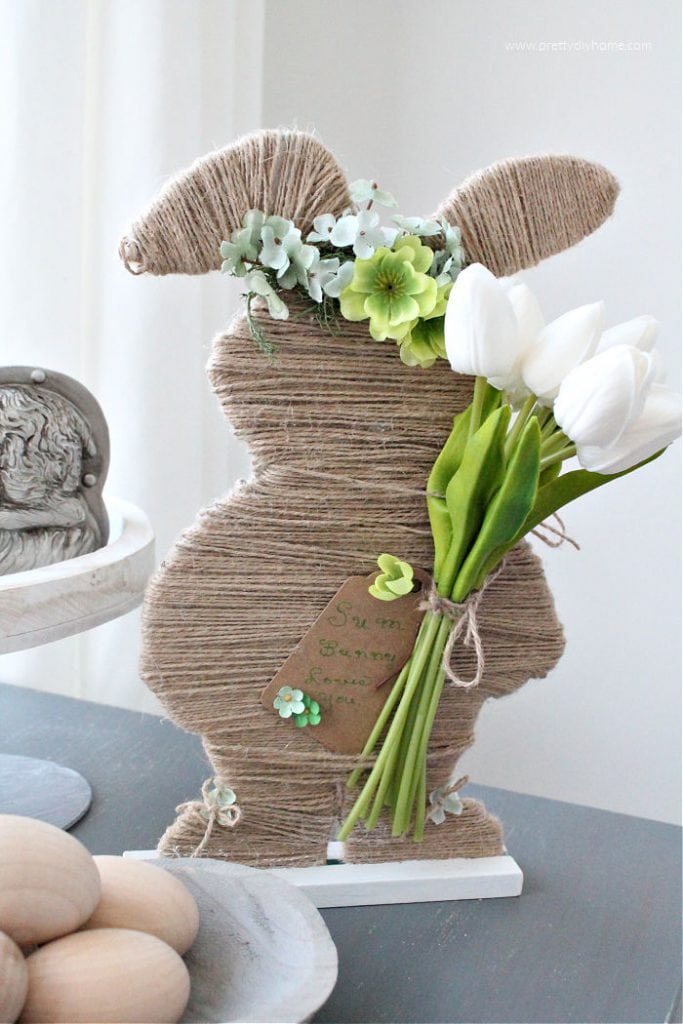
Vintage Rabbit Art – Draw with Cricut
If you enjoy decorating with handmade bunny decor, you may also like this Spring Bunny Mantel Decoration, featuring a vintage style bunny artwork that makes a simple focal point for spring or Easter decorating.
Such a sweet bunny! Love it. Thanks for the inspiration.
What a sweet bunny, it even has a little bow for extra cuteness! Love you used burlap for it
Aw, your stuffed burlap bunny is ADORABLE, Leanna! Love this idea 🙂 Pinned
So sweet Leanna! It’s fun to do adult “crafts” isn’t it. I love this.
Yes, Deborah it most certainly is. And as a bonus, we get to have something one of a kind.
Awww the bunny to too sweet with it rounded little tummy. And thanks a mil for the great tip on gluing the edges before cutting. That’s going to make such a difference, I love using burlap but always felt it had limitations because it tends to fray so much
Thank you Michelle. Finishing seams is always such a paint isn’t it! Glad you like my work around.
How cute is this lil guy!! I love that you have hand drawn this and then turned it into a stitchery masterpiece! Such a fun Easter Project and would make lovely gifts too!
Thank you Sam. It was fun to do, and I love that embroidery never has paint drips lol.
I agree with Mary, such a sweet bunny artwork Leanna. Love the burlap look too!
Thank you Katrin. Maybe you can use the bunny template for your classroom. Thank you for letting me know.
Leanne this is such a sweet take on a bunny pillow. I think the embroidery makes it so special and gives it a homemade quality that is just fantastic. Let’s all look forward to spring.
Thank you Mary. The embroidery went so fast on the burlap. I haven’t used lots of burlap for crafting, but its perfect for needlework.