DIY Crepe Paper Flowers and Wreath Tutorials
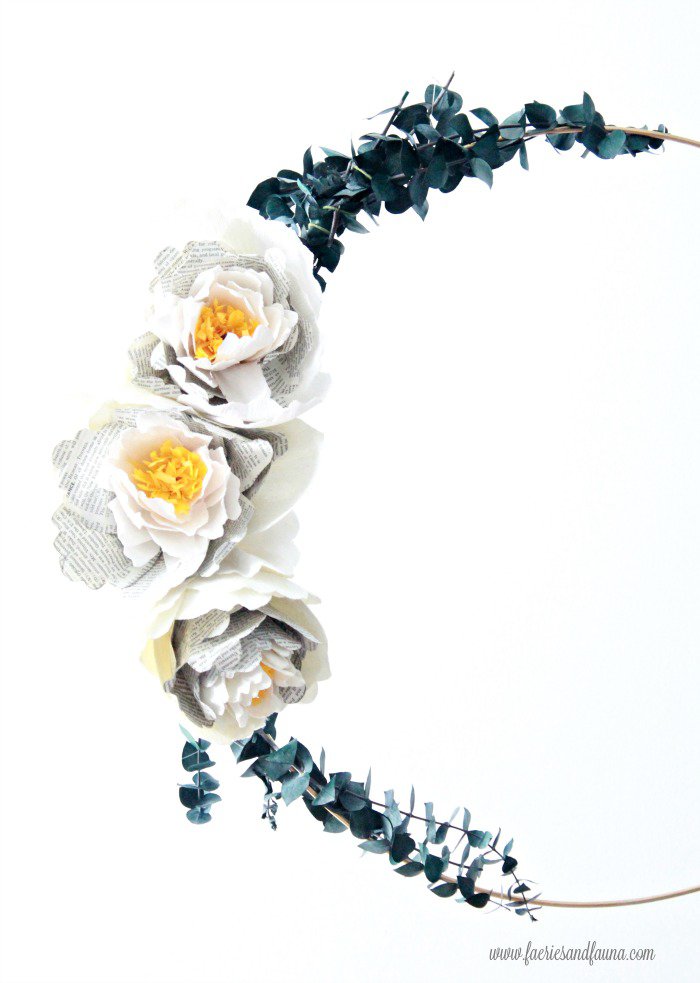
Minimal wreaths are so very elegant and appealing. This blog post has two sections, in the first part, I share a tutorial for how to make the crepe paper flowers. After the flowers are made, I have a quick tutorial on how to create the minimalist wreath.
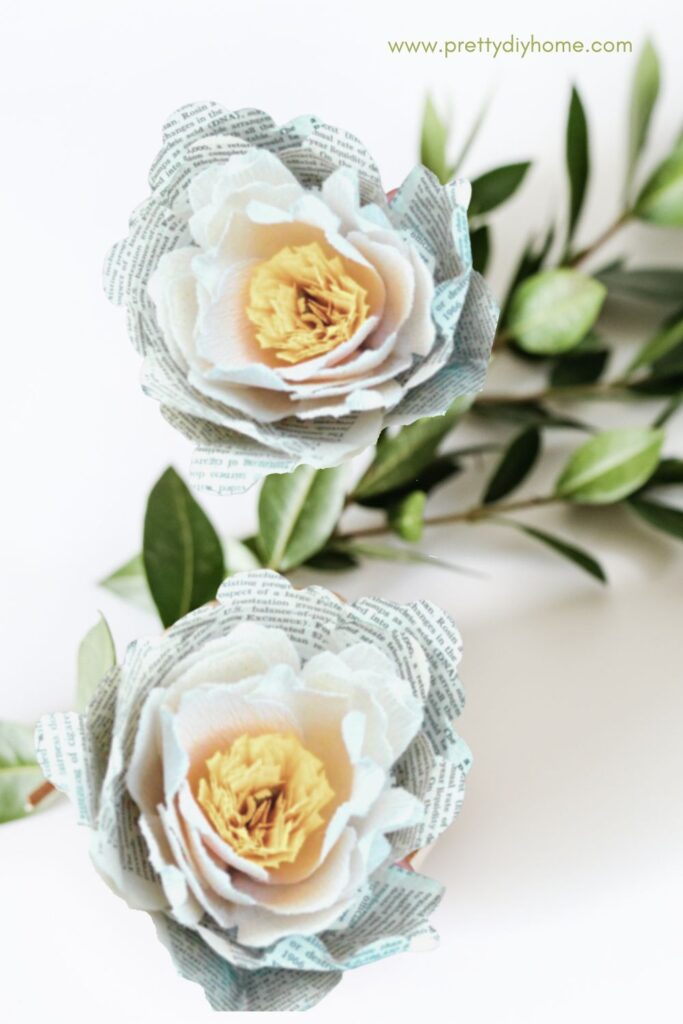
This minimalist wreath is designed to be suspended from the ceiling, but you can hang it on a wall or window as well. It was hard to decide which crepe paper flower to make for it, finally deciding on making a crepe paper peony hoop with and to make it more casual I replaced some of the crepe paper petals with old book pages.

Peony Blossom Hoop Wreath Tutorial
This tutorial is long because I showed a detailed step-by-step tutorial. The wreath is easy to make with a few supplies. This crepe paper flowesr can be made with book paper petals replacing some of the crepe paper. I think the crepe paper flower hoop wreath would lose its elegance if you made it with all book pages.
The flowers take by far the most time to create, putting the actual wreath together took 15 minutes.
Supplies
24″ Gold metal hoop (I had to spray paint mine)
1 Package Eucalyptus
Dark Green Florist Wire
2 packages white crepe paper
Yellow crepe paper, and green crepe paper.
Old book pages (Optional)
2 meters (yards) of iron on interfacing.
Hot glue gun, and lots of glue
While looking at other tutorials about crepe paper flowers, I found they needed heavy crepe paper. As I was not able to find heavy high-quality crepe paper, I improvised by using high-quality fine crepe paper and strengthened with interfacing.
Making the Petals
I made this crepe paper flower hoop wreath over two evenings, the first night I ironed and cut out all the flower petals, and then created the blossoms and the wreath the next evening.
Iron your crepe paper to remove any large wrinkles from the packaging. Sandwich interfacing between two layers of crepe paper, iron with a dry iron to make the interfacing adhere.
If using, do the same with old book pages. ( Each petal took 1 book page)
For each peony, you will need 8 large crepe paper petals, 8 small book page petals and 10 heart shaped paper petals. For the center, you will need 3 yellow fringed pieces.
Cutting the Petals
Using the peony template, cut out 24 large crepe paper petals, 24 medium book page petals, 30 heart shaped paper petals, and 9 yellow fringed centers.

Cut out all the templates.
Start by cutting strips from the prepared crepe paper. Make sure the ridges in the crepe paper run vertically (for stretching), use the template to judge the width of crepe needed and then cut off a strip. Having a smaller strip makes it easier to manipulate. With sharp scissors, cut out the petal. You can cut out a double layer of the crepe paper, but I don’t suggest doing more than that.
To cut the book pages, I used an old encyclopedia, I used pages without pictures, of course, and then placed the template on the page to avoid bold headings etc. Place the template where you like, trace with a pencil and cut out.

Shaping the Petals

Once all the petals are cut out, start shaping the petal.
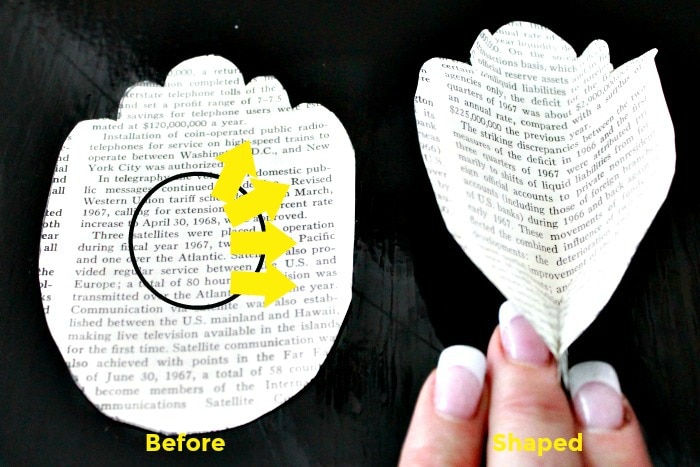
The crepe paper with the interfacing is easy to form, AND it holds its shape. In the illustrative pictures, I glued the bottom portion together to show you the final shape. It’s not necessary to do this ahead.
Shaping the Smallest Petals
Place your thumbs in the middle of the flower where the cutout portion is. Move your thumbs up and out while folding the outside of the petal over. Your thumbs will stay in the middle of the petal (about where the circle is.), working in the direction of the arrows on both sides. It takes seconds to do each one, don’t fret about it being perfect, it just needs to be cupped. Ruffle up the top edge a little bit as well, just so the paper petals don’t look too uniform.

The Middle Size Petals
As you know, I opted to do these petals in old book pages. The pages don’t stretch like the crepe paper does, but they do bend, and the interfacing holds it in place.
To do the medium petals I stretched the petals exactly like the other small petals, but I moved my thumbs out wider as I worked my way down the petal. Ruffle the top edges of the paper.

The Large Petals
The large petals are done very similarly to the other ones, except the cupping is much less pronounced. Work both thumbs outwards in a wider circle and don’t crease over the other side as strongly.

Last word on shaping. My directions are guidelines and hints of the way I found it easiest to shape the petals. Just stretch out the crepe paper moving your middle thumb outwards, and folding the outside edge towards you with your fingers. Perfection is NOT needed, they all get stacked against one another while assembling the flower.
Assembling the Petals into a Peony
With a hot glue being extremely careful not to burn yourself, start assembling the petals into a flower.

Assemble the Center
Start with about an 8-inch length of florist’s wire. Fold over the top a little bit. Lay it on top of the first length of yellow fringe crepe paper, run a thin strip of glue along the sides and bottom of the crepe paper and wrap it around the wire.

Do this with all three pieces of the crepe paper, placing each one a tiny bit higher than the previous piece of crepe paper.

Attach the Small Petals
All of the different sized petals are placed and attached in exactly the same manner.
Start with the first petal, placing it just lower than the previous layer, in this instance the yellow stamen.

Take the next petal and overlap it about halfway around the first one. Attaching it with glue at the bottom.

Continue doing this around the flower, until you have attached all the petals. Here is what the top of the flower looks like. We can now see the flower’s shape forming.

Second Layer Using Medium Sized Petals
Each petal template is just a bit larger than the one before, giving you enough length to start the layer a bit lower than the one before so that the previous layer with all that glue is somewhat covered.

Layer the petals so that they are semi-overlapping.

Continue layering the book page petals until you have used all 8 petals. You should have more than one layer when finished.

Outside Layer using Largest Crepe Paper Petals
Layer the petals exactly like the other two layers. Once done, go ahead and fluff your petals from the top making the flower as tight or as loose as you like.
If you want to make the flower more secure, go ahead and dab on some extra bits of hot glue between the backside of the flowers where they overlap.
Finish the bottom of your flower by cutting a one-inch strip of green crepe paper. Cut an arch in the top and the bottom so that it bends easily. Glue it securely to the bottom of the flower, wrapping the paper as you go. At the very end, glue and press down the edge making sure it goes all the way around the flower base. Scrunch everything into place.

Repeat the steps for the other two crepe paper peonies.


Designing the Hoop Wreath

For the wreath design, I wanted the crepe paper florals to be the focal point. There is no ribbon or different flowers, I kept it very plain. Do you think it looks as elegant as I do?
Start with a large 24″ metal hoop. I was not able to find a gold one, so I had to spray paint mine first.
Take some long eucalyptus branches and gently wrap them around just less than half the circumference of the hoop.

Wrap the middle of your eucalyptus arrangement with florists’ wire. I had some light wire on hand, but dark green wire would look better on the back side of this crepe paper flower hoop wreath.

Feed the wire from the crepe paper peony through the wires of the eucalyptus arrangement. Squeeze everything as tight as you can. Repeat with the other two flowers.
Please comment and let me know what you think of the book paper petals, replacing just some of the peony. I felt it made it a little more casual, but still elegant. I would love your feedback.


This is the best crepe paper tutorial I have found, I even bought a book. You show how to stretch the paper. How it’s supposed to look at the bottom and at the top. I definitely made my best looking peony thanks to you!
This is beautiful! You know I love paper crafts
What a lovely wreath. It’s so intricate and delicate. Your tutorial for making it is great, too. Pinning.
Another beautiful diy decor piece AND tutorial! Love… saw this on the Imparting Grace link party! LOL! 😉
Leanna, it’s gorgeous!! I absolutely love peonies and the eucalyptus and book page combo is just perfect!
Thank you for sharing your thoughts Katrin. I appreciate the feedback on using the book pages.
What a beautiful wreath Leanna! I love how you added the book pages!! So clever!!
Thanks my friend. I wasn’t sure how well the interfacing would work, but it worked perfectly. I think it’s important to do crafts that recycle AND save on the pocket book. Thanks for writing.
I’m loving this wreath!!! It is beautiful!
Thank you, I was pleased with how the book pages bent and held shape using the interfacing. Now that I know it works I will try more book page crafts.
I think it looks stunning Leanna. The book pages add so much interest to the flowers and match the blueish greenery of the eucalyptus leaves perfectly. Everything works together so well. It’s a statement piece that lets you appreciate each bit without detracting form any of the other bits
Thank you Michelle. I have it hanging from the ceiling by our french doors and I am enjoying watching it spin around. I have never been a fan of wreaths because I find them so heavy looking, these new lighter versions are very appealing. I need to make more.
I love the elegant simplicity of your wreath, Leanna! Combining crepe paper and book pages adds such a unique touch and look so pretty together. Peonies are one of my favorite flowers, which makes me love your wreath even more 🙂 Pinned
P.S. Love your new blog header!
Thank you Marie. I wanted the minimalistic wreath to be elegant, but more casual with the book pages. Thank you for the positive feedback, its one thing to love it yourself, but when I share it I always wonder what others think.
Thank you for noticing the new logo and enjoy the weekend!
This is so beautiful. I think it is perfect. Where did you decide to put it?
I am suspending it in our upstairs living room bay window. It was impossible to get a photo of it there because you see all the neighbours homes. Glad you like it Debra.