Easy DIY Christmas Pillow Covers – Ideas with Tutorials
Christmas Cushions Everywhere
Are you getting excited about the holidays and ready to dive into some DIY projects? One of my favorite ways to start decorating early is by making DIY Christmas pillow covers. They’re cozy, festive, and an easy way to coordinate your holiday decor.
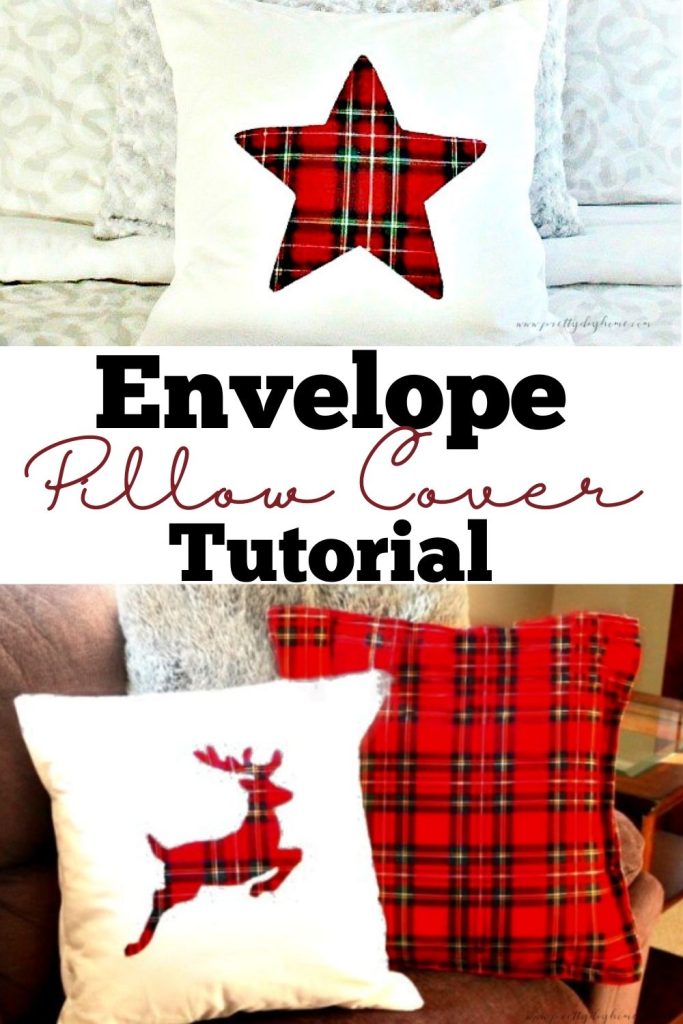
In this post, I’ll share several Christmas pillow cover ideas using classic red plaid fabric, along with a step-by-step DIY Christmas pillow cover tutorial. All the pillow covers are simple envelope style, the easiest kind to sew, since you don’t need a zipper or a pattern.
If you would rather not sew, you can start with a ready made solid color pillow cover. I especially like using white pillow covers as a base and then adding an appliqué on top.
Why you’ll love these DIY Christmas Pillow Covers
I find Christmas throw pillows extra valuable as holiday decor. They add comfort, bring in a cozy holiday vibe, and can give a pop of color to your holiday decor theme, without adding additional clutter.
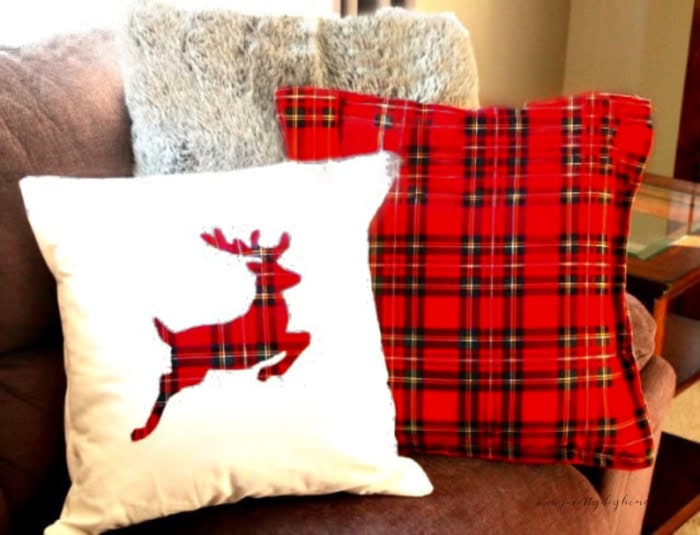
Here are two coordinating pillow covers I made for our living room, shown below. In this post, I will also share several more cushion covers I created for the bedrooms.
How to Sew an Envelope Pillow Cover
Sewing an envelope DIY pillow cover is a very popular craft because it is quick, easy, and affordable; you don’t need a pattern, and all the sewing seams are straight.
DIY Christmas Pillow Supplies
- Fabric – About one yard per pillow xover (depending on fabric width). Choose one plain fabric and one patterned fabric.
- Fabric scissors, or a rotary cutter with a cutting mat
- Heat and Bond Lite or Ultra (for applique pillows)
- Iron
- Sewing pins or clips
- Measuring tape and seam ripper
- Coordinating thread (I like the Gutermann brand)
- Sewing Machine
- Yarn and Pom Pom Maker ( for the pom pom pillows)
- Clear dental floss (for attaching the pom poms)
If you need a tutorial on sewing envelope pillow covers, this full tutorial shows you everything you need to know to make a simple envelope pillow cover and includes a video tutorial. Here are the steps I took to make these Christmas cushion covers.
Sewing the Envelope Cushion – Sewing Option
Step 1 – Wash and dry your fabric to prevent shrinkage, then press it smooth. If you are using red tartan, wash it separately the first time to check for color transfer and press the fabric so the grain is straight before you cut..
Step 2 – Decide on the finished size you want for your pillow cover. Cut three pieces of fabric, each one inch larger than the pillow insert, to allow for seam allowances.
Cut ONE large square piece for the pillow front. For example:
20-inch pillow – cut fabric 21″ by 21″
18-inch pillow – cut fabric 19″ by 19″
Cut TWO rectangular fabric for the pillow back. Each rectangle should be the same width as the front piece and about three quarters of the height. For example:
20-inch size pillow- cut two pieces 21″ wide and 16″ high
18-inch size pillow- cut two pieces 19″ wide and 14″ high
Step 3 – Hem the two rectangular fabric pieces.
Hem the back opening edges before assembling your pillow cover. When finished, the two hems will overlap in the middle.
With the right side of the fabric facing down, fold the long edge of each rectangle over 1/2 inch and press with an iron. Fold the same edge over again, by 1 inch, and pin in place
Repeat for the second back piece, then sew along the folded edge using a straigjt stitch. Remove the pins.
Step 4 – Seal the raw edges.
Finish the raw edges of each fabric piece to keep them from fraying. Sew a zig-zag stitch along each raw edge or use a serger if you have one.
How to Applique a Pillow Cover Both Sew and No Sew Options
Appliqué is an easy way to refresh any plain pillow cover. It is also a fun way to create a custom DIY applique Christmas pillow that fits perfectly with your holiday decor.
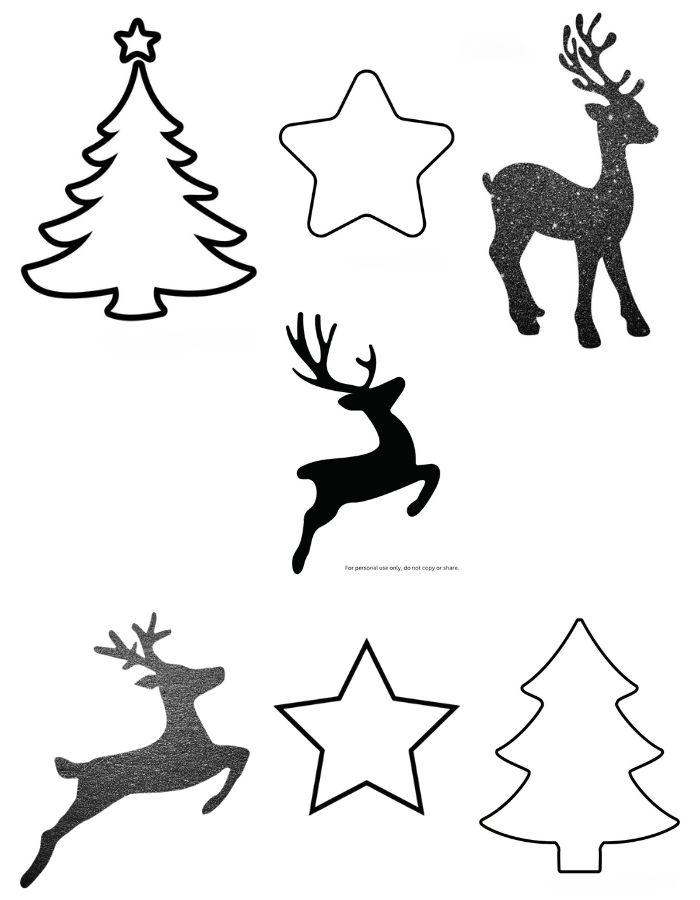
Step 5 – Create an appliqué pattern
Choose a design you love for your applique pillow pattern. These examples are made without a Cricut, so I have included printable letter-size patterns you can download and print in black and white. You will find all the separate files in a folder. Just click download and print the paper patterns in black and white.
If you have a Cricut, simply sign into Cricut Design Space and create a cut file.
If the free patterns are not what you want, grab a coffee and check out some great free resources. Pixabay, Canva, and Picmonkey. These aren’t affiliate links; I have paid accounts and regularly use both Canva and Picmonkey. Picmonkey and Canva offer free online resources you can use to choose something personalized you love. It’s so much fun to play with different looks before choosing your final applique.
Step 6 – Choose Interfacing
The next step is to choose the right interfacing which helps your qpplique hold in place. First, decide whether you want to sew around the edges of your applique or simply iron it on..
If you plan to sew around the edges, use Heat n Bond Lite. If you prefer a no-sew option, choose Heat’n Bond Ultra Hold, which has a stronger bond.
If you don’t want to sew around the edges, you need to use the Heat n Bond Ultra hold, as it’s much stronger. If you already have the heavy-duty duty bond in your stash, you can still use it and sew around the edges for extra durability.
Step 7 – Make the Applique
If you have a Cricut, it will cut out the applique for you. To do it by hand, start by cutting a piece of fabric and a piece of interfacing about 1-2 inches larger than your applique pattern.
Cut around both the material and the interfacing, an inch or two larger than your applique pattern.
Protect your iron board with parchment paper. Place the wrong side of the fabric onto the rough side of your interfacing and press and iron well, following the directions on the interfacing package.
Once the interfacing is attached, pin your paper pattern on top and cut out the design. Simple patterns, like the star and tree cut out easily, while letters and the finer detail take a bit more patience and a good pair of small sharp scissors.
Step 8 – Add the Applique
Find the center of your pillow cover front by folding the panel in half one way and then again to make quarters. Mark the center with a fabric marking pencil, chalk, or a pin. For the applique, use a measuring tape to find the center point and mark it lightly.
Remove the paper backing from the interfacing. Before ironing, double-check the placement to make sure the appliqué is straight. Place it interfacing side down on the front of the pillow cover, and iron well to secure.
If you are not sewing, your pillow front is finished. If you want to sew, stitch all the way around the edges of the applique using a zig-zag stitch on your sewing machine with coordinating thread.
Step 9 – Pin and Sew
Lay the pillow front with the applique facing up. Place the two hemmed back panels on top, hemmed edges facing in toward the center.
Line up all the edges so the back pieces overlap, then pin everything in place. Sew around all four sides with a straight stitch, remembering to back stitch at the beginning and end.
Press the seams open for a crisp finish. Turn the pillow cover right side out, using a blunt knitting needle, chopstick, or turning tool to gently push out the corners. Slip in your pillow insert and smooth it into place.

Cushions with Pom Poms
These red pillows are all envelope style cushion covers made in different sizes and fabrics. On the larger ones, I added handmade pom poms to match the tartan afghan I shared in another post. That post includes the step-by-step tutorial for making pom pom cushions if you would like to try adding them to your Christmas decor
DIY Child Safety Pillows
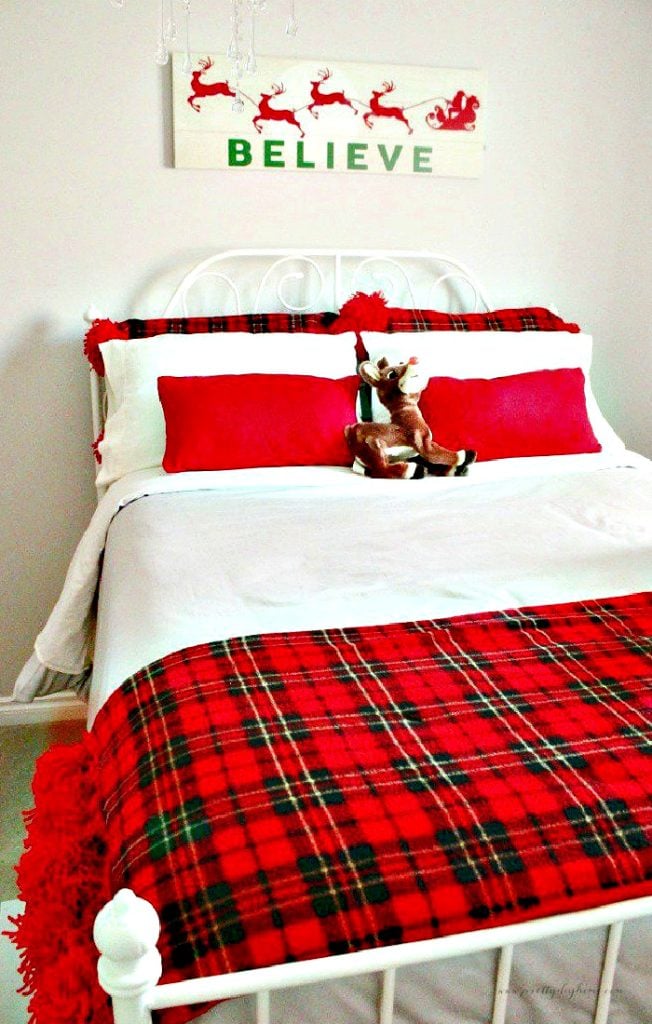
You can make a small safety pillows for your younger overnight guests in just a few minutes. I covered mine in plain red felt to match the rest of the Christmas bedding.
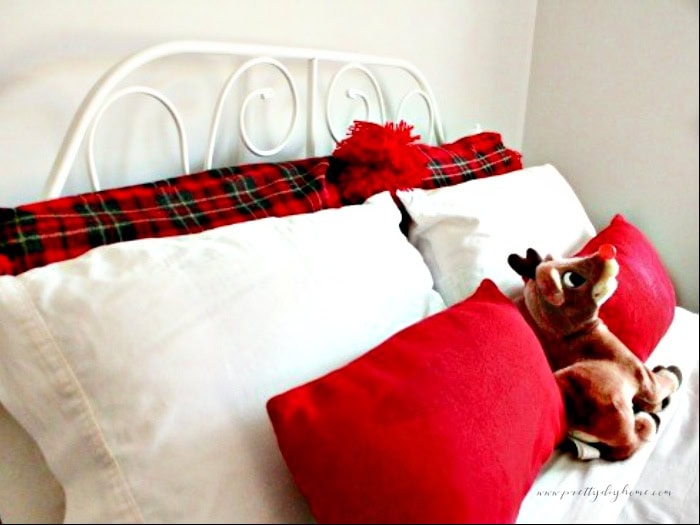
Use small, regular pillow inserts, either purchased or handmade. Sew simple envelope covers, cutting the fabric one inch wider than your pillow insert.
At bedtime, tuck the safety pillows between the fitted sheet and the outer edge of the bed. They create a soft barrier that helps prevent little ones from rolling out. During the day, I place them at the top of the bed as shown in the photo above.

I am really excited about the red tartan Christmas decor. Once you make your first Christmas cushion, the rest are quick to sew and customize anyway you like. I hope these ideas inspire you to create your own cozy Christmas pillows at home.
Final Thoughts
If you are making several new cushion covers, you may want some really nice inserts to go with them. All of the square pillows you see here are filled with the down filled 20-inch inserts from IKEA. They are soft, hold their shape well, and the best part is, they are affordable as well.
Happy Crafting,
Leanna
Love your cushions. I too am a pillow crazy and am encouraged by your post. I also love the throw at the end of the bed. Did you make it? Did you do a blog on it? Merry Christmas to you and yours !!!!
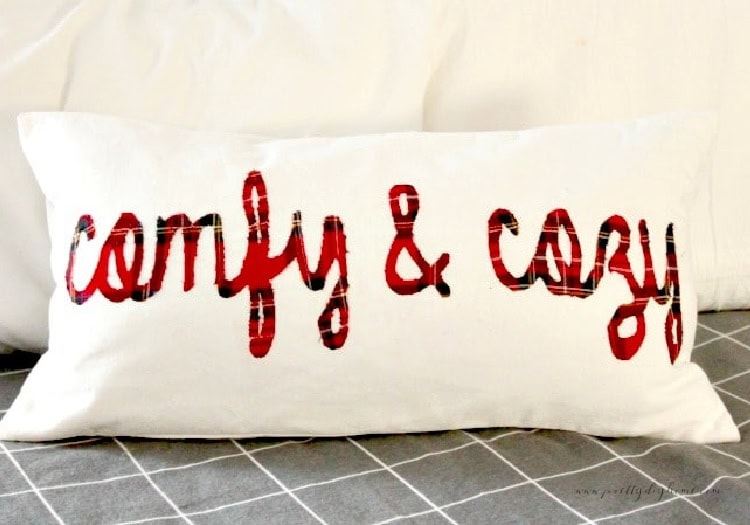
These are lovely, I especially like the comfy & cozy one, can’t beat a bit of tartan!
Loving your collection of cushion covers there Leanna!! I am also a cushion cover hoarder and couldn’t agree more with changing the overs out throughout the seasons! Love your tartan no sew pillows!
I’ve never heard of safety cushions!!! Brilliant. And all your cushions are lovely…love that red tartan. Thanks Leanna
I love throw pillows. Recently, I have gotten really into changing them with each season.
Love how you call them cushions and not pillows like us Brits. I’m loving the plaid/tartan too but I think that’s because I have a Scottish mother.
This is adorable!! I always love to see what you do around the holidays Leanna. Hope you are having a good week!
Okay I’ll admit it – I’m a scatter cushion hoarder. There I said it. Love, love, love your cushions Leanna. I want every single one of them, they’re beautiful.
Hi Michelle: My family had to celebrate Christmas a week early so that I could have them home. I have not read the latest blog posts yet. I look forward to seeing what you have created with your home decor. I will be stopping by the Crafty Mix Blog soon.
Yes, I am dying to make pillows and pillow covers! My sewing machine has been in storage for several years and I just have to get it dug out. The idea of having several different pillow covers for a small number of pillows is great. And they are so much easier to store than the whole pillow..
Wish me luck. I am going to attempt to make four little pillows for my four grandsons for Christmas! We got them all sleeping bags to go with.
Happy Christmas to you and your family!
Hi Naomi: What a great Christmas idea for your grand sons. Being surrounded by a rough a tumble bunch of boys is so much fun. Just imagine them all lying under the Christmas tree in their new sleeping bags. Such a pretty Christmas image.
Let me know how they turn out. Merry Christmas and enjoy your family. Leanna
I love everyone you showed. And I agree that it is an easy way to change the look and they don’t take up valuable storage space. I really do like the Christmas pillows, they are so festive.
Hi Debra: Thank you. The pillows make a big difference, and they are relatively inexpensive to put together when you do them yourself and keep the pillow forms you already have.
Thank you for commenting. Merry Christmas, Leanna
I so hear you about the clutter, Leanna! I like you, love making special holiday covers for my existing cushions. Light and compact to store the rest of the year and a great way to repurpose what is already in the room. I love all the pretty holiday pillows you’ve shared with us throughout your house. Pinning to share your helpful pillow tips today.
Hi Marie: I had a large closet full of cushions in so many different sizes and shapes. I needed the storage room for other items. Sometimes I just feel overwhelmed with Stuff. Updating the cushions instead of purchasing all new ones saved me money and time. Bought the material, sat and sewed. So much easier than trying to find things that match. Merry Christmas Marie,
Although I love reading your blog, I hope you take some time to chillax over the holidays. Leanna