DIY Craft Room Storage and Decor
I am happy to be sharing my current craft room, I think you’ll LIKE the results and find a few ideas you can use to organize your craft supplies.
We downsized to a new home that needed way too much work and wasn’t nearly as big as we had first thought. I had to condense a huge basement craft room from our old home and stuff it into a 12 by 12 bedroom.
The biggest plus of this new craft room is that it’s on the main floor and at least 20 degrees warmer. It also has two beautiful large windows, so it has way more light, which I love. There were definitely a few challenges, and I will share how I fixed them with as little cost as possible.
Here is my list of challenges for my new craft room.
- Too much stuff for the amount of space.
- Not enough storage solutions; my wall of wonderful bookshelves with curtains doesn’t fit here.
- Limited work surface – goodbye to my 4 by 8 craft room table.
- Unfinished projects taking up space.
- Overwhelming Cricut supplies
- Dual-purpose room – It is both a craft room and an office
- This office space has been a work in progress, and because of the budget, it includes a few DIY projects with tutorials I want to share. I have decided to break up one massive post into smaller chunks, including tutorials. Today, I am going to share my challenges and how I tackled them.
Too Much Stuff for the Amount of Space
The first thing about downsizing is tossing and donating. With writing the blog and living so far from any craft store (1 hr each way), I had to figure out how to keep as much of my craft stash as possible. I also love to do all sorts of crafts and DIYs. Crochet, sewing, embroidery, Cricut, decoupage, refinishing, and seasonal crafts.
If you have a craft you don’t enjoy as much, give it up. I used to do macrame when it was popular years ago, and I can make anything I want. But I am over it, so I gave away what macrame supplies I had.
My old craft room was also a playroom for me and my granddaughters. Now the girls are older, and we still craft, but anything that was for little kids I donated away. Coloring books, a mountain of Dollar Tree kids crafting kits, duplicate packages of crayons, chalkboards, kids’ scissors, glue, kids’ paints, etc. I kept only a set of pencil crayons; the rest I donated to a local after-school program.
The previous craft room included almost my entire basement. It had endless storage, including 3 closets I filled with shelves for home decor and crafting.

Our garage freezes during the winter, so paint supplies are kept in a basement storage room. I placed all my craft paints downstairs with the house paints. I am altogether too messy when I paint, so it’s better that I paint in the garage or the basement instead.
I got emotional when I had to dismantle my beautiful craft table. We sadly took it apart and reused the wood. I donated the small vintage cupboard as well.
I managed to hold on to almost everything else and made it a priority to make items with what I had on hand. That’s another common sense way to reduce craft room clutter.
Storage Solutions
Clutter makes my brain shut down, I have something similar to panic attacks, deep breathing, panicking, and trying to get my thoughts straight. Because of that need, all my craft room organization ideas are put-away ideas, whether it’s putting items like washi tape into a jar or a large art canvas behind the bookshelf. You won’t ever see much of it lying around, I can’t think with too much stuff around me.
Craft Closet
Storage solutions that hide the small items in my craft space reduce the clutter for me. I can’t work with items open for easy access. I need things hidden away. Since I have such a small space to work in, with a small work area, the first thing we did was convert the bedroom closet into a craft closet, reusing the plywood from my old craft table. It is the best project we have done for this craft room.
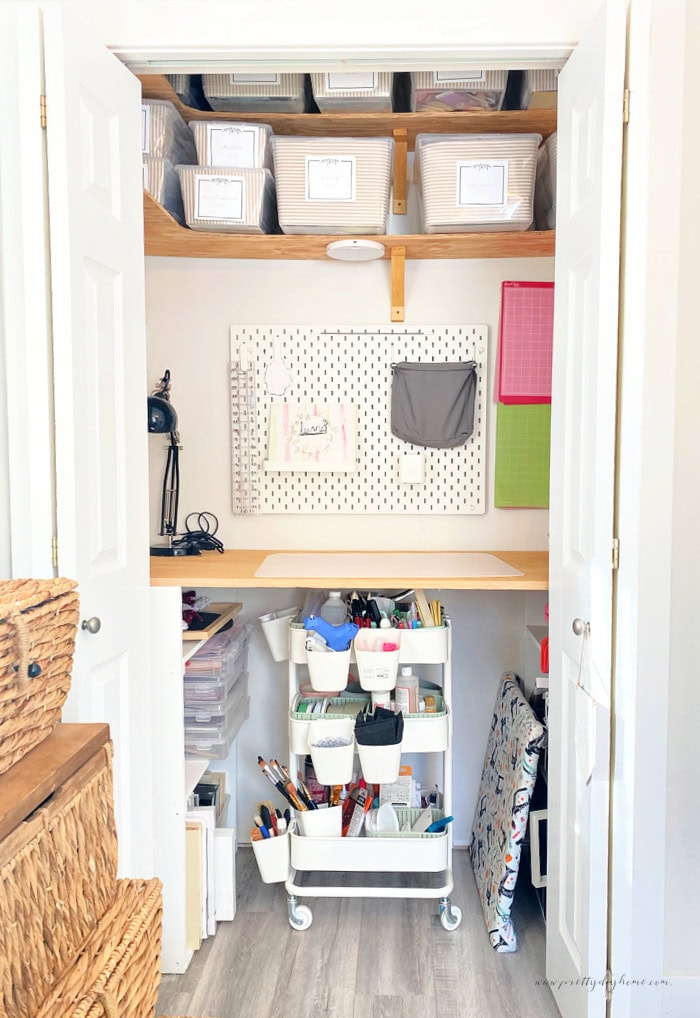
If you’re lucky enough to have the room, creating a craft closet anywhere in your home is a great craft storage idea. My favorite part is that the closet doors close, so if you need to leave a craft project to dry or harden, you can safely hide it in the craft closet where no one will touch it, and close the door. Here is how we created this craft closet for cheap.
The craft closet is also fantastic because you can add shelves right to the ceiling, giving you lots of storage space.
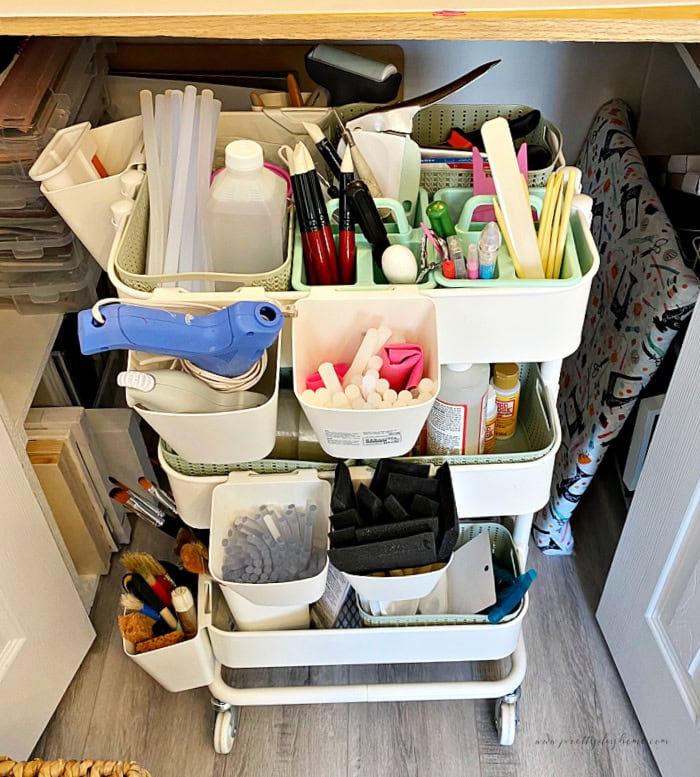
IKEA Raskog Cart
Lots of people have this rolling storage cart in their craft room, and for good reason. This little cart can hold so many different craft supplies. It’s very handy for all sorts of items that you need to grab quickly and use often. I use it for my glue, paint brushes, sandpaper, craft scissors, cricket tools, sharpeners, and cutting edges. I love that you can spin it around to find whatever you need. Mine snuggles nicely into the bottom of my craft closet, where it hides when not in use.
After finishing the craft closet, I took one of my old bookshelves, my rolling cart, and my IKEA desk from before. I added an 8-cube Kallax wall unit, a second Alix drawer unit, and two different-sized Ikea table tops. I treated myself to a new set of IKEA bulletin and skådis pegboard, but I don’t utilize them as much as I thought I would. I do like having the peg board for hanging items to dry on, and I use the metal bulletin board to hide our home office garbage schedule and community phone lists.
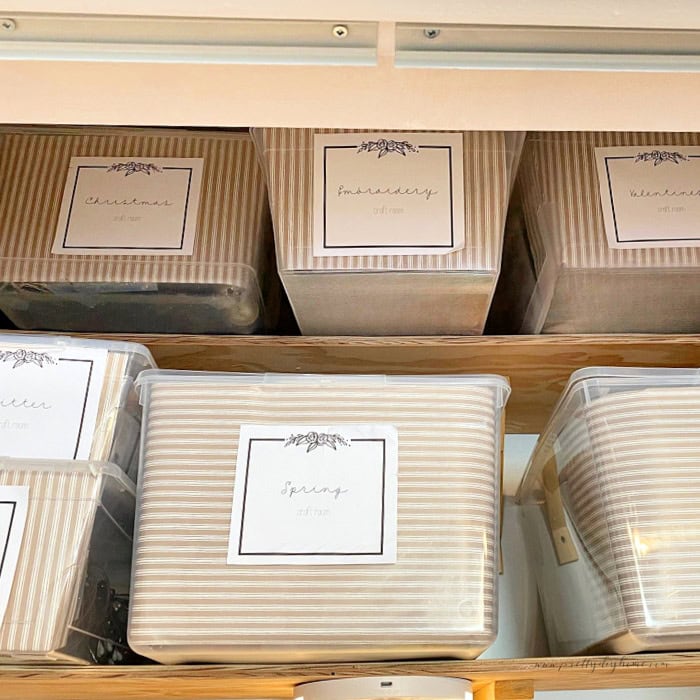
Storage Bins
The next thing is storage bins, I had oodles of Dollar Store clear plastic storage bins. I purchased six new large bins, the rest are from my old stash and Christmas ornament downsizing after the move. Some of the bins are several years old are are surprisingly sturdy.
I prefer to use plastic dollar-store bins for several reasons: the price, they are always available, they come in an assortment of sizes, and they have a lid on them, making them easy to stack. If visual clutter doesn’t bother you like it does me, you can leave the storage bins and just label the front of them. For myself, I bought a roll of gift wrapping paper in a nice striped natural beige color and have used it to cover the front of all my bins. I found a roll at Home Sense and wish I had bought two, so I have a spare. If I am caught without enough paper, I can use plain brown paper as well. It’s a very easy and inexpensive way to hide small items and make everything cohesive for a couple of dollars.
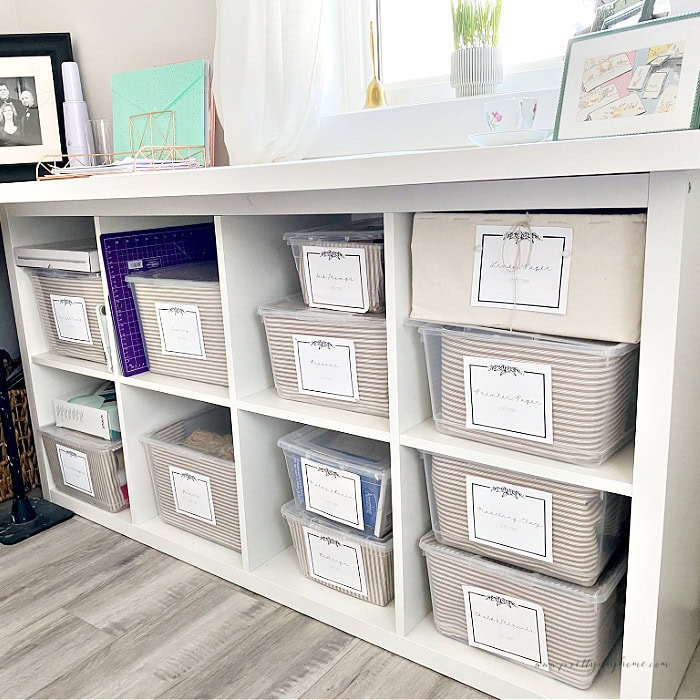
These little bins are my life-savers for anything with open shelving. Adding some labels and stacking them is the easiest way I have found to control my craft stash. I place the majority of my craft supplies in these plastic bins and even place small bins inside the larger storage bins to divide and organize the smaller items.
The cubicle openings in an Ikea Kallax shelving unit are about 13 inches square. Depending on the size of the plastic bin you need for sorting, you can place one or two bins in each cubicle. I have seen people use those cube organizers that slide in and out, but they don’t have lids, so I prefer the cheaper bin idea.
Here is how I created all the Craft Room Bins, Baskets, and Jars. This post includes the instructions for the craft room labels as well.
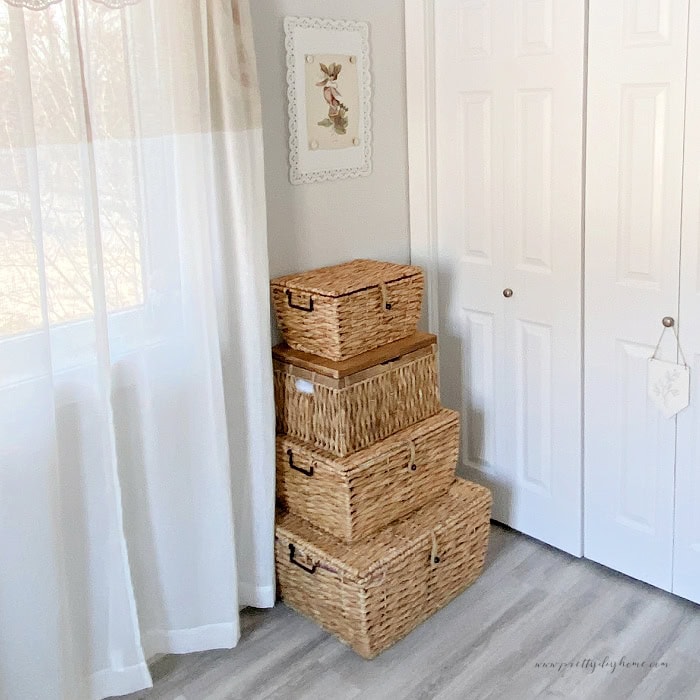
Fabric and Sewing
Whenever I go into Home Sense, I look for these matching lidded rattan storage boxes. The first two are four years old and used to hold blankets. Now, they hold various fabrics and sewing notions. One basket is different and will be replaced when I find a new one that matches.
Limited Workspace
Instead of one large, gorgeous 4 by 8-foot work surface, this new office has 3 smaller workspaces. The left part of my desk holds the Cricut machine, with the supplies behind me. The second one, and my favorite, is on my right side, where I can stand and work right beside the window with direct light.

The third workspace is the flat counter in the craft room. I use it for items that may be a bit messier, like sanding or staining dowels. I use this workspace to dry things a lot.

I don’t work with larger painting projects like I did with the large craft work table. There isn’t enough room in my craft room, so I do those DIYs in the garage.
Unfinished Projects Taking Up Space
I have so many projects that I made but didn’t finish in time for the holiday, ran out of time to start it, or changed my mind about wanting it. Isn’t this the worst part of crafting?? My solution is more plastic bins, which I mark by season and stick up on the top shelf in the closet. Then, when the season comes out again, I can grab that box, place it on the lower shelf, and start using the supplies in it first. It works for the most part, but sometimes I make something different from what I had thought of the year before.
Current Projects Taking Up Space
As I wander around the antique store, the dollar store, or the craft store, I will often find something I want to make soon. These items are held in a linen basket on my shelf. It currently holds a few thrift store teacups and Dollar Tree candles, I thought a pretty teacup candle would be nice to add to this room. Then there is a bag of sand and a container for a door stop. I could/should do something for in-progress crafts, but I just put whatever I have been working on in the closet workspace and close the door.
All of these types of items, some small decor items, and my craft storage jars are set up on the one IKEA shelf I had in my old craft room.

Dual Purpose Room
Although this is a dual-purpose room, for the most part, it’s my special place. Hubs uses it for filing mostly, and like most of the items in our home, he asks me where things are, so I grab what he needs from here. Our plastic filing cabinet is hidden under one part of my desk, and the office supplies and paper storage are in the desk.
Future Projects
I have so many Cricut supplies, scrapbook paper, vinyl, Cricut mats, irons, etc. I currently have them all organized: the Cricut mats hanging from a hook on the wall of the closet, the scrap paper in boxes that are too wide for the Kallas shelves, so they hide in the bottom of the closet, the Cricut machine is on the desk, and the supplies are beside me. I want to find a solution where I can put them all together, likely something with a pull-out table so that I can use it as a workspace when I am using the machine.
I am pondering more curtains over the open shelves, or I want something antique in here to replace my vintage secretary. There isn’t much space left, except for a space under the one window.
Final Decor Touches
Once the craft room was reorganized, it needed personality. I am shifting our home to a more cottage core look, so I got busy and created three simple DIY projects to decorate my craft room office combination.
A new bulletin board with DIY crocheted flower pins.
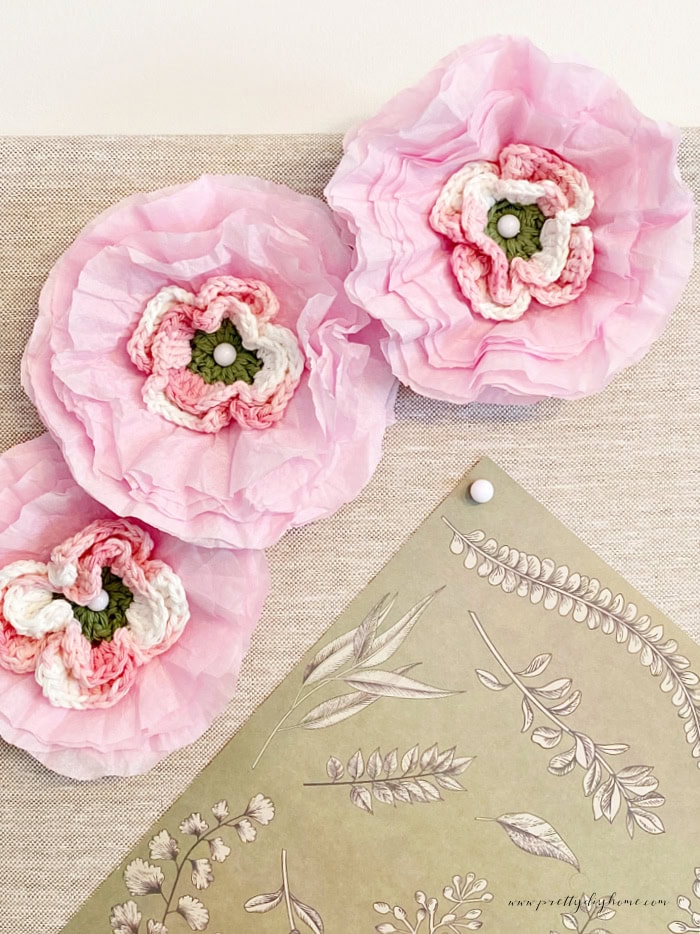
Then I made a very inexpensive craft room cottage core banner for the windows to bring in a little bit more florals and feminine touches, using paper supplies.

I purchased the sweet metal bulletin board at the antique store, I love the vintage bird art.
Then I turned a vintage teacup into a candle, and added some vintage thrift store embroidery patterns to some ornate green frames.

My craft room is very close to finished, at least for this year. My largest priority is using up some of my craft supply stash. I hope you enjoyed my craft room organizing ideas and found some simple, easy-to-do, and inexpensive solutions for your own home.
Happy Crafting,
Leanna