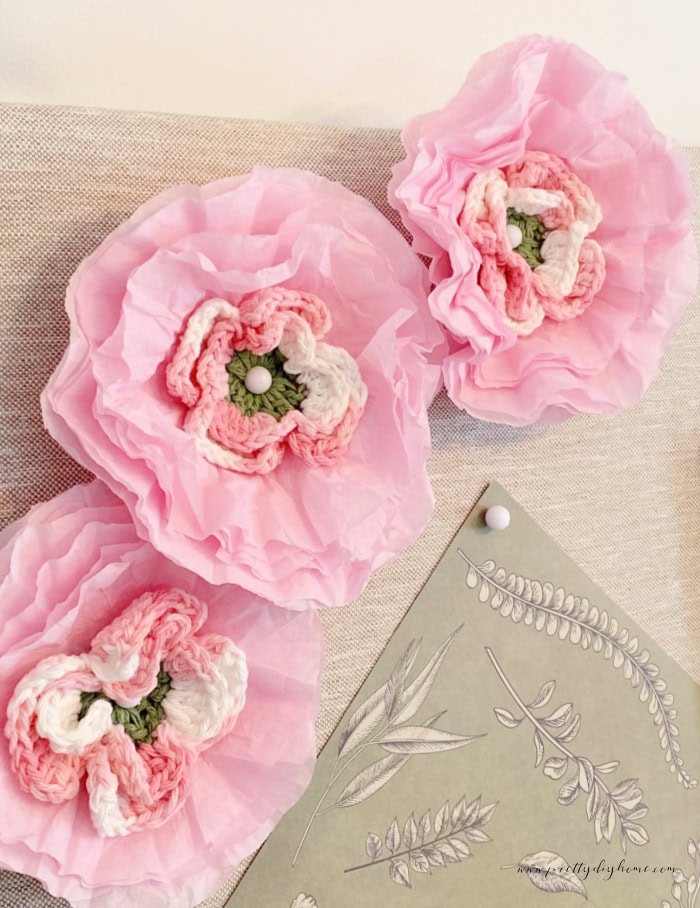
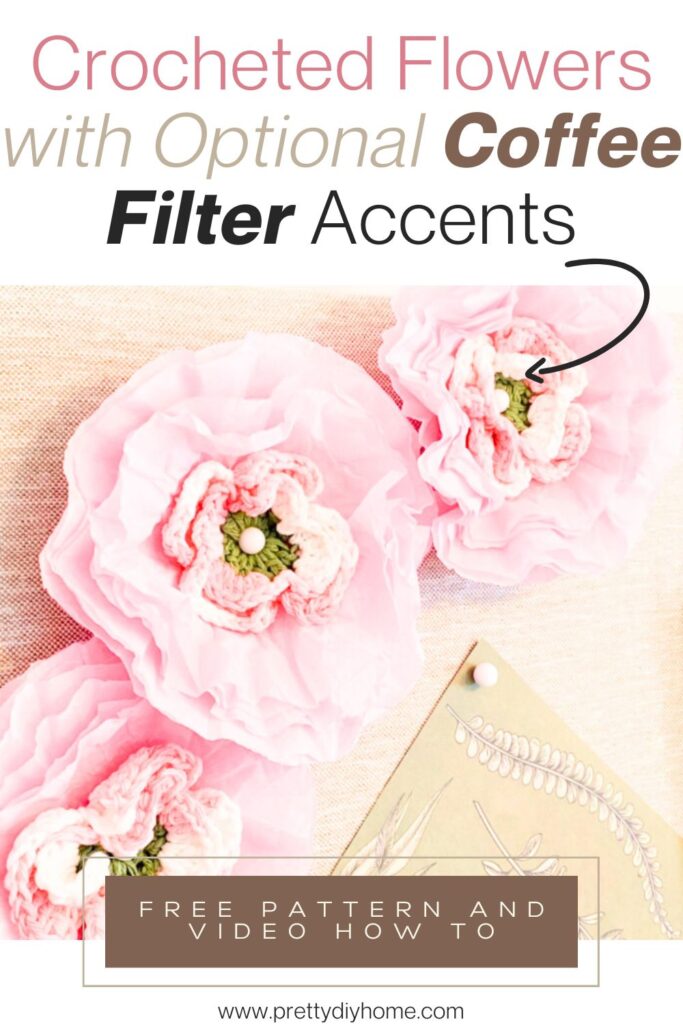
DIY Crocheted Flowers with Coffee Filter Accents
Crochet flowers are such a fun and easy way to add a handmade, feminine touch to all kinds of things, hats, bags, and even home decor! It always amazes me how, with just some yarn and a hook, we can whip up these beautiful little blooms that never wilt. In today’s post, I’ll share a simple pattern so you can make your own crochet flowers in just a few minutes.
Then, if you want to make your flowers even bigger, you can add some coffee filter petals around the outer edges for a soft, delicate touch! It’s a fun way to mix textures and give your crochet blooms a little extra size and personality.
How to Dye Coffee Filters
If your going to add the outer coffee filter petals, you need to do them first. If you just want to do the crocheted flower I am including the pattern further down in the post.
Materials for Coffee Filter Petals
You can make these in any color that coordinates with your crocheted flower. I chose a soft pink color for mine. Here’s what you’ll need.
- 8 white coffee filters per flower
- 1 tsp red or pink food coloring
- warm water
- large flat dish (9 by 12)
- rubber gloves
- parchment paper/ cookie sheet
- paper towels
- scissors
Dying the Coffee Filter Petals
Wear gloves to prevent dying your fingers.
Fill a 12 by 9 inch baking dish with warm water to about an inch high. Add about a teaspoon of red (pink) food coloring. Stir to mix. Adjust the color with more water or dye as you like.
Place the coffee filters in the dye and let soak for 5 to 30 minutes. The longer you let the filters soak the more the pigment will absorb into your coffee filter petals.
Protect your counters with either cookie sheets or parchment paper. Then add a second layer of paper towel to draw the water out of the coffee filters.
Wearing gloves to prevent staining your hands, take out one coffee filter at a time. Straighten it out over the bowl while the water drains off. If you want some of the coffee filters lighter, give them a quick rinse with water.
Lay all the coffee filters out onto the parchment paper towels and let them air dry. I was pleased when it only took two hours for my coffee filters to dry. While they dry, let’s crochet the flowers.
Crocheted Flower Pattern
Make your flowers in any color you like, I first did my centers in yellow with a variegated pink blossoms. But after making two of them I started over making the centers in green to coordinate with the craft room colors.
Supplies
- Two colors of cotton crochet yarn
- Size 3.75mm / USA F5 hook
- Darning Needle
This crochet flower pattern is quick and easy to follow. It has only three rounds and uses four regular stitches.
Stitches and Abbreviations
Chain – Ch
Slip Stitch – sl st
Double Crochet – dc
Treble Crochet – tr
Front Loops Only – FLO
Back Bloops Only – BLO
Start with green cotton yarn.
Tie a loop on the hook and chain 7. Connect to the first chain to make a loop.
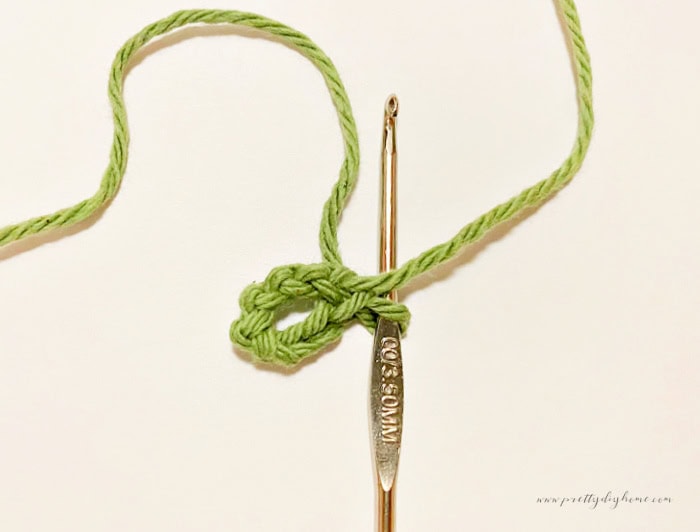
Round 1 – Chain 2, then make 11 double crochets (dc) into the loop, crocheting over the tail as you go.
Make a slip stitch (sl st) into the second chain from the beginning. Trim the green yarn.
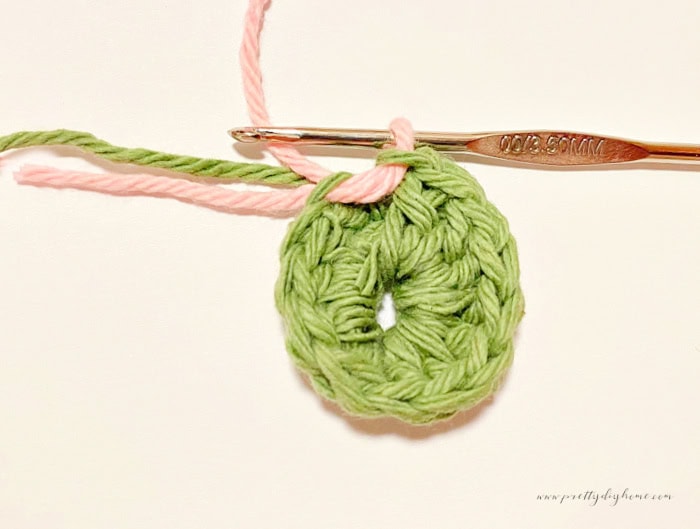
Round 2 – Start the second color of yarn. Yarn over the hook, add the pink thread and then pull through.

For round two, we work into the front loops only (FLO) of the previous row of double crochet stitches.
*Ch 2. Then, make 3 dc in the first dc from the previous row, repeat with another 3 dc in the next stitch. Then, ch 2, make a sl st in the next st, and repeat from * three more times. End the row with a sl st in the top loop of the first ch 2.
This is what the first set of petals will look like.
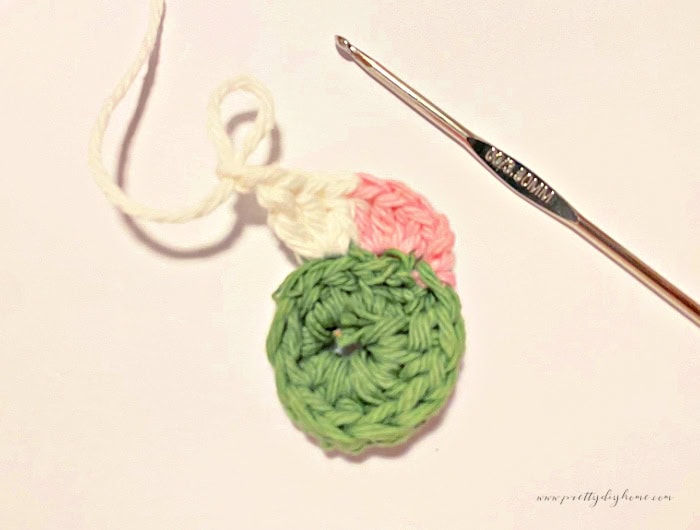
Round 3 – For this round, work into the back loops only (BLO). This row is easy to spot since it’s green. Gently push the petals from Round 2 forward and work behind them.
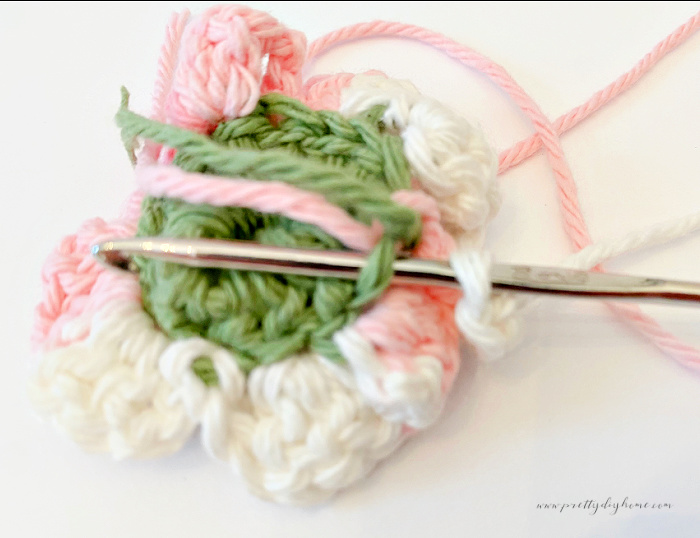
Chain 3. Make 4 treble crochets (tr) in each of the next two stitches. Chain 3, slip stitch (sl st) into the next stitch, then chain 3 again and repeat the pattern. You’ll end up with four pairs of petals neatly lined up behind the ones from Round 2.
Weave the tails into the back of your flower using a large-eyed darning needle.
Combining Crocheted Flower and Coffee Filter Petals
Make two stacks of coffee filters 4 in each stack. Fold each stack in half and then half again to get quarters.
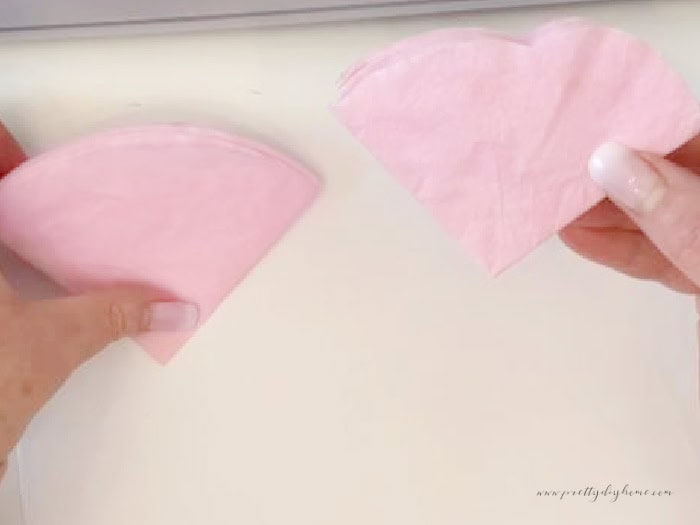
Cutting the Filters into Petals
The outer petals should be larger than the four front coffee filter petals. To create this look, take one stack of coffee filters and trim about an inch from the edge. For the second, back layer of petals, cut closer to the edge. To give the petals a soft, natural look, trim the edges with a gentle wavy curve, cutting slightly in and out. Check out the video tutorial if you want a better example.
Stack all 8 coffee filters together, then use a darning needle to poke a hole through the center of all the layers. Once threaded, gently adjust the petals by rotating them slightly to the left or right so they don’t line up perfectly. This helps create a more natural full look.
Attaching the Crocheted Flower
Once the petals are arranged, place the center of the crochet flower over the darning needle. Then, stitch the flower securely into the green portion. I stitched once on each side to hold it in place, but you can add more stitches or hot glue if you want it more secure.
Final Finishing
Check your flower, you may love it as is. I wanted mine to have a more natural textured look so I scrunched it up in my hand to create some wrinkles and then fluffed the petals out again.
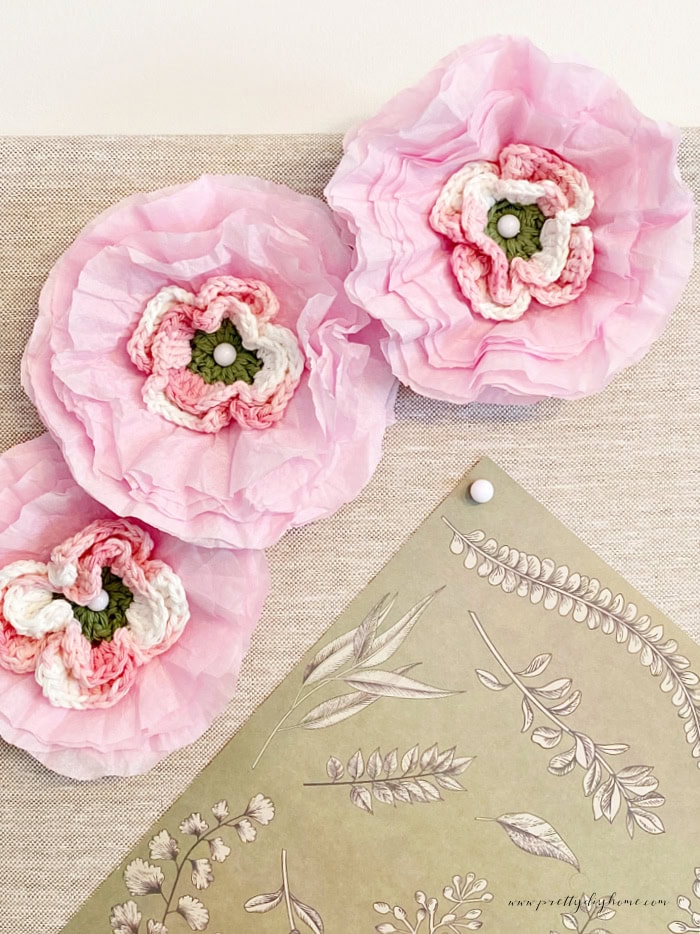
To finish, I attached my flower to my bulletin board using a large white bead pin. You could also use a small pin with a button glued to it or sew a button in the center for a cute, decorative finish!

Video Tutorial
Here is a work-along video for making these flowers including the entire crocheting process. You will notice that their parts with silence in the video, I do this one purpose because I love how quiet and relaxing crochet is to do. Please let me know if the silence bothers you, I can add music if you prefer it.
The latest on Youtube:

Other Crochet Projects to Try

Crochet Flowers for Beginners
Here is a post with four different Crochet Flowers for Beginners with Free Patterns. The post includes all the pretty flower patterns with complete how to, for all these quick and easy flowers and leaves.

Beginners Guide to Crochet
This is one of my most popular posts, and I am glad as it took me forever to complete it. I cover everything I know about crocheting from how to hold a crochet hook and all the essential stitches.