DIY Dollar Tree Wood Pumpkin Craft
If you’re looking for a fun and affordable way to welcome the cozy days of fall, this easy Dollar Tree pumpkin makeover is a great place to start. You can use any of the wood pumpkin shapes they carry. I picked the largest one I could find. It had a jack-o’-lantern face cut out, but that won’t show once the project is finished. With a little paint and a few humble supplies, you can turn it into a sweet autumn accent that brings a gentle, homespun charm to any corner of your home.
How to Make the Wood and Fabric Pumpkin
I used white paint I have on hand, but everything else in this Fall craft for adults came from Dollar Tree. You can buy white latex paint at Dollar Tree as well if you don’t have any on hand.
Supplies You’ll Need
- Large wooden Dollar Tree pumpkin
- Tea Towel or fabric
- Scrap piece of muslin
- Inkjet printer
- Chalk pen
- Iron on interfacing
- Twine
- Needle, scissors, hot glue
- Free Printable Pumpkin Banner
- White paint, art brush
- Fairy lights, command strips (optional)
Step 1 – Sewing the Fabric Pumpkin Cover
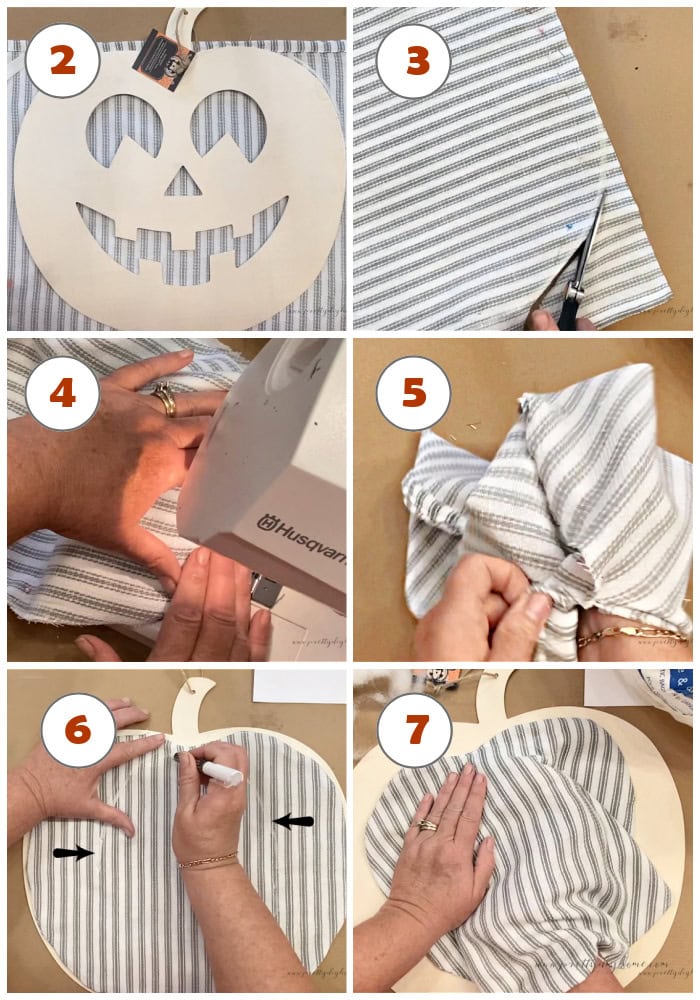
- Start by folding the striped towel in half across the width, with the right sides facing each other. Lay it flat on your work surface.
- Place the wooden pumpkin on top of the folded towel and trace around the outside edge using a chalk pen to create a pumpkin shape.
- Pin the layers together and cut out the shape.
- Sew (or hot glue) around the outside of the pumpkin shape, using a ½-inch seam allowance. Be sure to leave a 4-inch opening along the bottom edge so you can add stuffing later.
- Turn the pumpkin cover right side out and press it flat with an iron to make the edges crisp and the shape look tidy.
- Use your chalk pen to draw a long, oblong shape down the center of the pumpkin. This helps give the pumpkin more dimension and a rounded appearance. Sew around the oblong by machine or hand, leaving the bottom open, including the last inch or so of the sections, so that you can stuff all three sections.
- Use fiberfill or cotton balls to fill the center section to about 1 inch thick, and the two outer sections to about ½ inch thick. Once it’s stuffed to your liking, hand-stitch the opening at the bottom of the oblong closed, then sew the bottom of the pumpkin closed as well. Set aside.
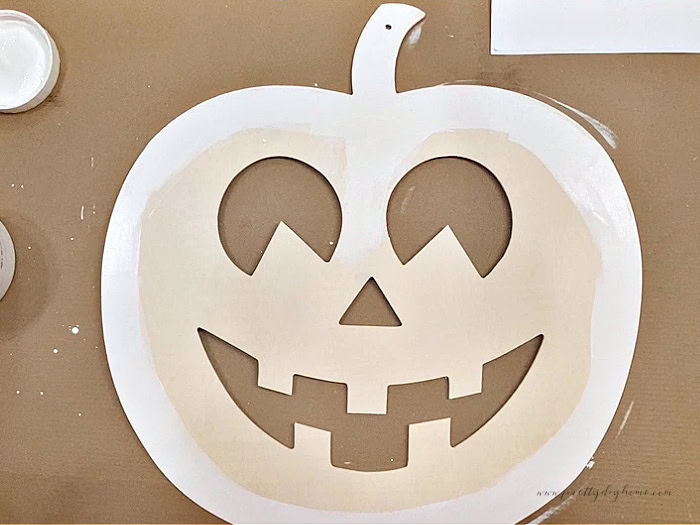
Step 2 – Painting the Wood Pumpkin
Now, let’s paint the wood pumpkin that goes underneath. Choose any color that coordinates well with your fabric. I wanted to keep things neutral and cozy, so I went with a soft white.
I used Fusion Mineral Paint in Picket Fence white, which is my go-to brand and something I usually have on hand. But you can use any brand or type of paint you prefer. Even basic craft latex paint will work just fine.
Paint the outer edge of the pumpkin, plus about an inch inward on the front. This ensures no bare wood peeks out from behind the fabric pumpkin cover. Be sure to paint the outside edge of the pumpkin as well, since it will be visible once everything is assembled. Don’t forget the stem, too.
Allow about 30 minutes of drying time between coats, and let the final coat dry for at least an hour before continuing.
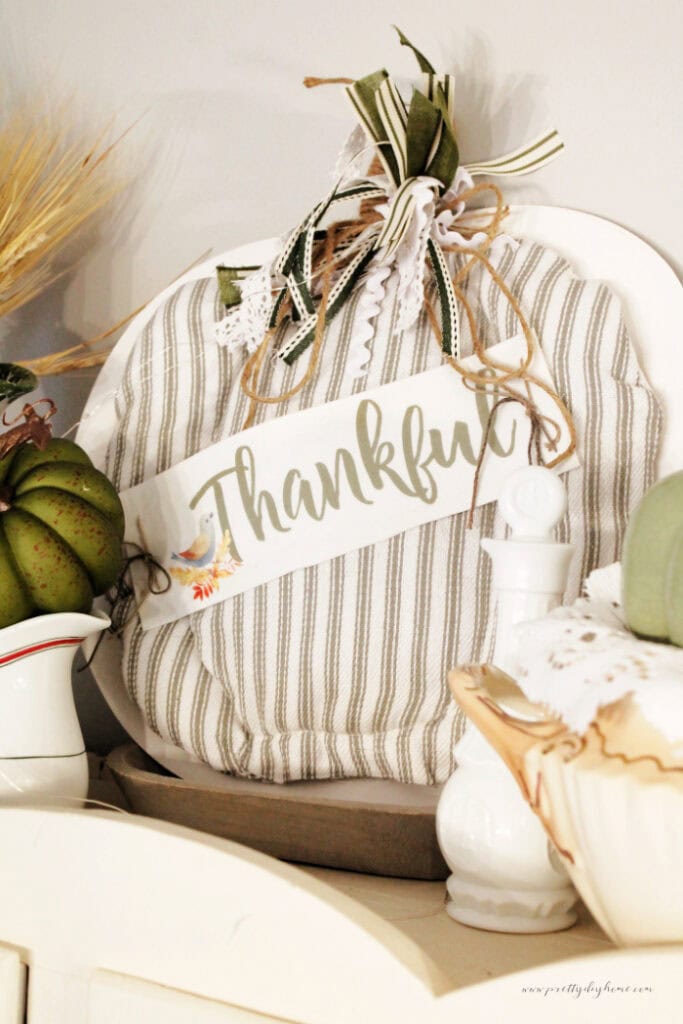
Step 3 – Adding the “Thankful” Banner
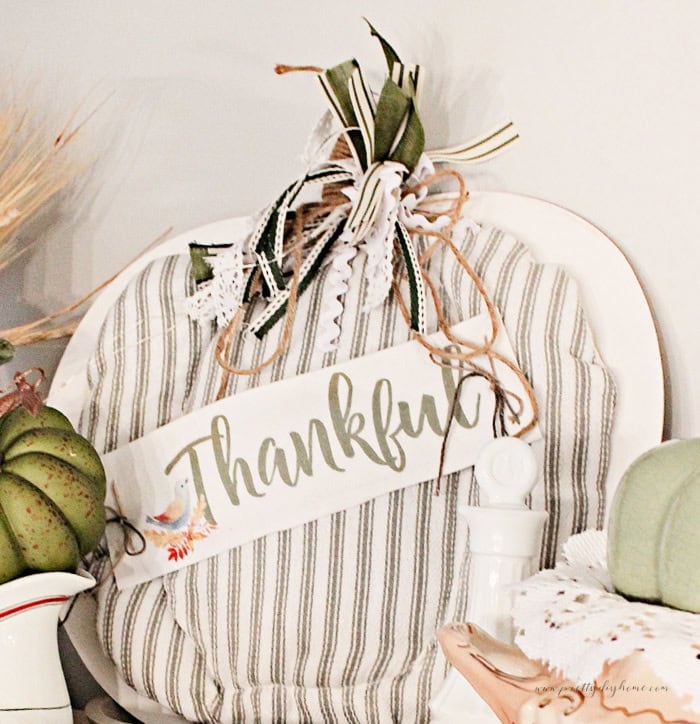
To add a sweet and sentimental detail, I made a little fabric banner to drape across the front of the pumpkin. The free printable features the word “thankful” in a gentle green, paired with a tiny bluebird nestled among autumn leaves. It brings everything together with a soft, handcrafted charm that feels right at home in cozy, cottage-inspired fall decor.
You can download the printable for the Thankful banner here. Just click the link and use the download icon in the top right corner to save it to your device.
Instead of using paper, I printed the design directly onto fabric for a soft, homespun look.
How to Print onto Fabric with a Home Inkjet Printer

We need to start by checking for out printer’s orientation. First, test your printer to see which side it prints on. Take a blank sheet of paper and write “top” on one side and “under” on the other. Run it through your printer. The side with the printed image is the side your fabric needs to face when printing.
1. Cut a piece of Dollar Tree muslin slightly larger than standard printer paper. Use spray adhesive to stick the muslin to a sheet of 8.5 by 11-inch letter paper.
2. Smooth it out carefully, making sure there are no wrinkles or loose edges.
3. Trim the fabric so it’s flush with the edges of the paper. This step is important to help prevent paper jams when running it through your printer.
Note: I do this using my own HP inkjet printer and have never had any issues. That said, please note that printing on fabric isn’t officially recommended by most printer manufacturers, so you do so at your own risk. If you’re unsure, consider using an older printer or one you’re comfortable experimenting with.
5. Load the fabric-backed sheet into your printer, making sure the fabric side is facing the correct way. Print the “thankful” banner directly onto the fabric. Once printed, gently peel away the fabric from the paper backing.
Now that the banner is printed, fold the edges of the fabric over a piece of cut to size iron on interfacing. Do both sides, and then use the hot glue fun to tidy up any edges. Press with an iron to keep everything neat and crisp.
6. Attach the banner to the fabric pumpkin. Thread a bit of cord, twine, or embroidery floss through a large-eyed needle. Stitch each corner of the banner onto the front of the pumpkin, then tie the ends into a simple bow to hold it in place.
Attaching the Fabric Pumpkin to the Wood Base
Now that both the fabric pumpkin and wood base are finished, it’s time to join them together.
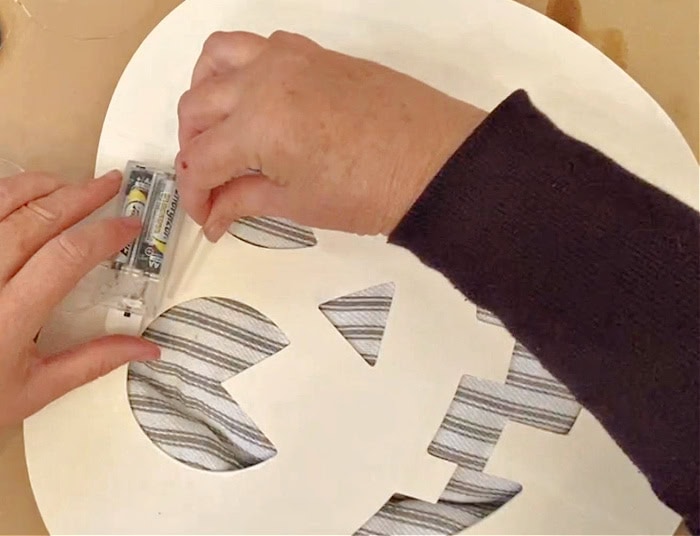
Start by applying E6000 glue along the outer edge of the wood pumpkin. This ensures the fabric layer sticks down securely around the sides. Because the pumpkin I used had hollow face cutouts, I only added additional glue to the solid wood areas around the face shapes. Be careful not to apply glue where there’s open space, or the fabric might sag.
Once the glue is in place, carefully position the fabric pumpkin over the wood base. Press it down firmly with your hands, smoothing as you go to ensure good contact. Set it aside and allow it to dry completely according to the glue’s instructions – E6000 usually takes a few hours to fully cure.
You can totally use hot glue instead if you’re making this as a quick craft or just want it to last for the season. It won’t hold quite as long as E6000, but for a fun fall project that you plan to use just this year, hot glue should work just fine.
Adding a Touch of Twinkle (Optional)
I love adding a bit of sparkle to my fall decor. The days are already getting shorter, and those long evenings can feel a little gloomy. My favorite workaround? Fairy lights.
Dollar Tree carries little strands of battery-operated fairy lights with warm white bulbs, and they’re just right for a project like this. Simply attach the battery pack to the back of the wood pumpkin using a removable Command strip. Then wrap the lights softly around the front, tucking them into the fabric edges or letting them drape gently across the surface. They add the loveliest warm glow, especially as the evenings grow darker and cozier.
Adding a Messy Ribbon for the Stem
To finish it off, I tied a simple messy ribbon around the pumpkin stem. It’s such an easy way to bring in a bit of texture and a hint of color, and the soft green tones feel right at home with the rest of the cozy fall touches.
Cut several strips of ribbon and fabric in soft greens and creamy neutrals. Each strip should be about 6 inches long. Mix and match different textures like muslin, lace, burlap ribbon, or thin satin to give the bow a relaxed, layered look.
Once you have a good handful of strips (about 8 to 10 works well), gather them together in the center and tie them with a small piece of twine or thread. Fluff and twist the layers until they look loose and casual, then tie or glue the bundle right at the base of the pumpkin stem
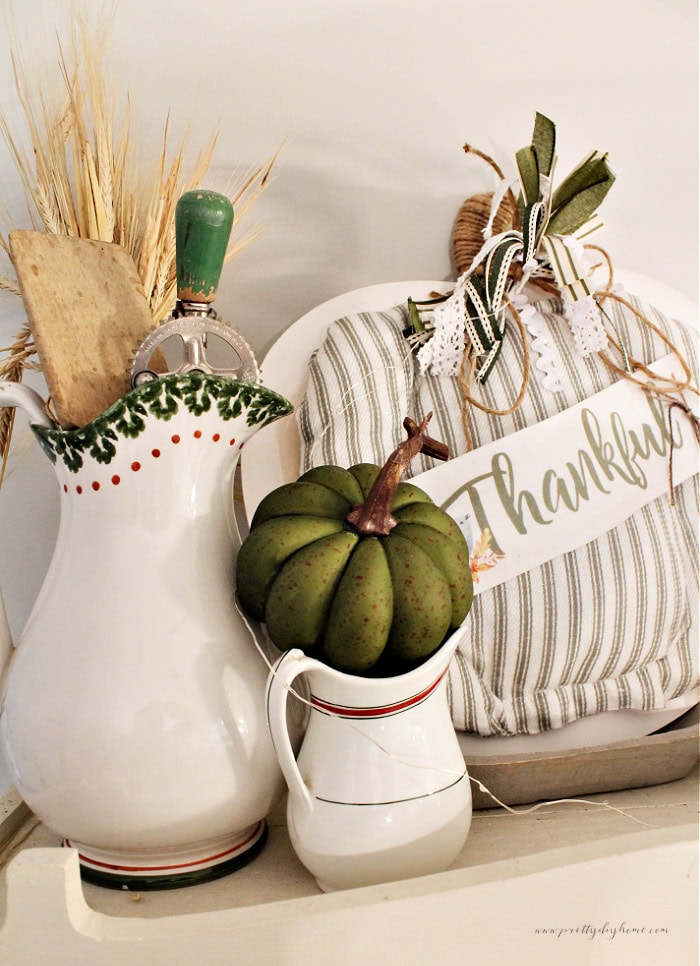
I really love how this little pumpkin turned out. It’s sweet, one-of-a-kind, and didn’t cost much to make. Most of the supplies came from the Dollar Tree, and I was able to make it in a couple of hours. I love how it adds a handmade touch to my vintage Fall decor without being overbearing.
Other Pumpkin Fall Decor Ideas

Dollar Tree Pumpkin with Free Printable
This simple to make Dollar Tree pumpkin makeover receives a quick makeover with a free plaid printable that’s mod podged to the bottom half.