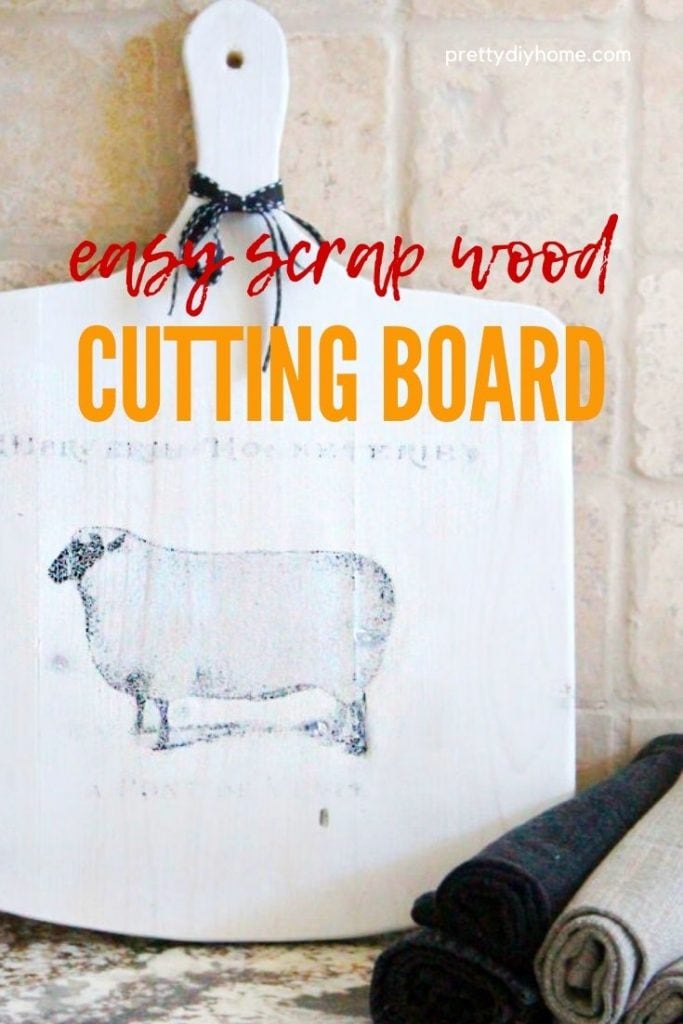
Farmhouse DIY Cutting Board with Graphic
The cutting boards in our house are in constant useWe have a few but I use them to protect the granite countertops from cutting and from anything hot like the slowcooker, toaster and so on. On top of that I like to use cutting boards in our kitchen home decor. Chalkboards add a nice farmhouse feel to the kitchen and I wanted one for decoration only. . Today’s DIY cutting board project solves the problem for me. Unfortunately now I want/need a few more, I love how this one turned out.
Unfortunately with so much use I find they get beat up pretty quickly, all those cut marks, stains, and scorch marks make them pretty icky for home decor. I asked Hubs to help me make one to use just for home decor and its awesome. Let me show you how.
How to Make a Farmhouse DIY Cutting Board
Supplies you will need:
1 – 1″ by 6″ lumber
wood glue
clamps
jig saw
Make a Cutting Board Pattern
Begin by tracing out a cutting board pattern on parchment paper (newspaper) , you can trace around an existing cutting board, or draw a different shape you like.
I traced mine out to be the same shape, and then some little changes to shorten it so that it will fit between my upper and lower kitchen cabinets.


Building the Cutting Board
Using the pattern as your guide cut and glue the 1 by 6 to make a rectangle larger than your pattern. Ours is made with three scrap pieces of 1 by 6.
Apply wood glue to the sides of each piece of wood. Lay it down on a flat surface and clamp to hold the wood together. Let dry overnight. in the morning remove the clamps.
Cut out the cutting board shape from the paper pattern. Place onto the wood and trace out the outside of the shape with a pencil.
Using a jig saw cut out the shape of the cutting board.
Using the 120 grit sandpaper sand off the outside edges by hand. Then sand the top and the underside smooth. Repeat with the 150 grit sandpaper.
Hubs created a hole in our cutting board, but its optional. He used a 3/8″ bit and drilled a hole in the middle of the handle. Then he used a countersink bit to finish it. He happened to have this bit on hand and had never used it. You don’t need to go out and buy one to make the cutting board, I would just leave my handle without a drilled hole.

Finishing the DIY Cutting Board
Apply white stain to the top and sides. Let dry, flip and stain the other side. Let dry. Sand off any drips or splotches. I distressed the edged of my cutting board with 150 grit sandpaper.
Applying the Farmhouse Graphic
I created this printable sheep pattern using graphics from the Graphic’s Fairy. If you want a different pattern she has all sorts of choices for free on her blog. If your making your own printable remember to flip it so the letters print out backwards.
Cut out a piece of freezer paper 8 1/2 by 11. Tape it to the edge of a piece of printer paper. I suggest making two or three in case you need to reprint.
Test to see which side of the paper your printer prints on to. Make an x on the topside and see if the test print comes out on the top or the underside of the paper.
Place your parchment paper facing the printing side, in the case of my printer it is on the bottom. So my paper went face down.
Print out the pattern. Take a look at the printout, check to see if there are any large blotches. I didn’t think my blotches would matter, I was wrong.

If there are blotches on your graphic reduce the quality of your print setting and try again. I used photo quality the first time and got a couple of blotches. so I redid it in print quality, I do have some light areas on my transfer, but no blotches at all.

Lay your parchment paper face down on your DIY cutting board. And here is the real hard part. Walk away, forget its there, don’t even look at it for 24 hours.

After 24 hours lift the parchment straight up from the cutting board and check out your pattern transfer.
This one is white, but you can make numerous ones in any stain colour and shape you like. As long as you have scrap wood available the cutting boards are pretty much free to make. I am hoping Hubs finds the time to make me several more. When he does I will share them.


Other Scrap Wood Projects You May Enjoy
These simple wood block houses spent all summer up on my mantel, make your own set and paint it to the current season, using whatever colours you have on hand.

Easy Scrap Wood House Ornaments
Scrap wood is one of my most favorite projects, its always inexpensive and the variety of projects is basically endless. These pumpkins were made from 4 by 4 left over from our privacy wall if I remember correctly.

Happy Crafting
Leanna

Cutting boards are very trendy right now, and this tutorial looks super quick and easy! I’d love for you to share over at our Creative Crafts Linky Party https://creativelybeth.com/creative-crafts-linky-party-3-join-in-the-fun/
Have a great week!
Creatively, Beth