Large Pegboard DIY – Perfect for Craft Rooms
If you’ve been around here a while, you might remember my craft room inspiration post, I shared a bunch of ideas I was loving, including a cute little craft room pegboard setup. I’d seen tons of DIY pegboard organizers floating around online, and while some looked super cute and practical, I wasn’t sold at first. A peg board can be a game-changer for storage, but if you’re not careful, it can also make your space feel chaotic. I knew if I was going to try a DIY pegboard, it had to be both pretty and functional.
After a lot of back and forth (and way too much Pinterest scrolling), I finally decided to add a large DIY pegboard to my craft room. I mainly wanted a spot to hang some of the bigger, awkward items that never seemed to fit anywhere else and items to dry. I didn’t want it to stick out too much, so this DIY pegboard is super subtle and blends right in with the wall. It keeps things tidy without taking over the whole craft room. It all came together perfectly; it’s exactly what I needed.

Hubs helped me pull this project together in a day, it was such a fun one to tackle together! We started with a quick trip to Lowe’s, where we picked up a full sheet of pegboard, a piece of crown moulding with a flat bottom, some simple trim for the other three sides, and two little square millwork accents for a cute touch.
Step one is measuring your wall space to figure out how big you want your craft room pegboard to be. We had room for one that’s 6½ feet tall (78 inches) and 30 inches wide, plenty big for all the things I wanted to hang!
For the pegboard frame, I purposely chose molding with a flat bottom edge so we could skip the tricky angled miter cuts = much easier! It also gave the whole DIY pegboard a soft, classic feel that fits right in with the rest of the room. Mostly, though, I just wanted it to feel clean, pretty, and put together.

The side and bottom are done with plain, flat 2″ molding.

For the two bottom corners of the frame, you’ll want to grab a pair of 2″ square millwork accent mouldings—just like the ones in the photo. They add a cute little detail, and, just like the top piece of the frame, there’s no need for mitered corners (yay for simple!).
Cut & Paint Your DIY Pegboard
The trickiest part of this whole DIY pegboard project was cutting the pegboard sheet itself. The material is pretty floppy, so it really helps to have two people, one to guide and one to hold it steady while you cut it down to size with a table saw.
Once your pegboard is cut to fit your wall, the next step is a coat (or two) of paint. recommend painting it before attaching the trim, in any color you like. I used Benjamin Moore’s Revere Pewter since it’s the base color throughout our home (and I always have a can or two on hand). We only painted the front side since the back won’t be visible once it’s hung.

Add the Molding
Now for the fun part: adding the frame! Start by measuring and cutting your top crown molding. We added a little extra on each side for a finished look, so ours was cut to 31″ to allow for a ½-inch overhang at both ends. Once it’s cut, glue it in place and secure it with small nails. Hubs used an air nailer and attached it from the back of the pegboard, which helped keep the front nice and clean.
Next, pop those cute little millwork squares onto the bottom corners of the frame. These go on flush with no overhang. Again, glue first, then nail to keep everything nice and secure.
Once those bottom corner squares are attached, measure the distance between the squares and the top molding. Cut your plain trim pieces to fit, then glue and nail those into place.
I had hoped the original white finish on the MDF molding would work as-is, but once everything was up, it didn’t look right. So I gave the whole frame a quick second coat of white paint, and it made all the difference!
Attach Your DIY Pegboard to the Wall
Since this DIY pegboard is meant to hold a good amount of stuff, you’ll want to make sure it’s mounted really securely. Start by finding the wall studs and marking their locations.
We were able to line up the existing holes of the pegboard with the studs. If possible, try and place your pegboard so that the pegboard holes line up with the studs. Predrill a hole into the studs. If you weren’t able to line up the pegboard hole and the stud, pre-drill both the pegboard and the stud.

Hand spin two nuts onto the bolt end.
Place the wood screw end into the predrilled wall stud. Using the top nut and a wrench turn the nut, this results in the screw end drilling into the wood. Tighten to the desired length from the wall. Make sure there is a gap between the wall and the pegboard so you have room for the pegboard accessory pins. Fasten the end of the bolt with an acorn nut.
Repeat this for a total of four spots, two on the top and two on the bottom.


I’m so happy with how this DIY pegboard turned out – it’s functional, pretty, and makes such a difference in keeping my craft room organized. Having a dedicated spot for the large objects has made crafting so much more enjoyable (and less cluttered!). If you’ve been thinking about adding a craft room pegboard to your space, I recommend giving it a try. It’s such a fun project and truly one of those little upgrades that make a big impact!
Other Craft Room Ideas
These shelves were mismatched Hemnes bookshelves from Ikea that I painted to match, and then I made some quick curtains to hide some of the stuff on the flower shelves. The bins are all dollar store.
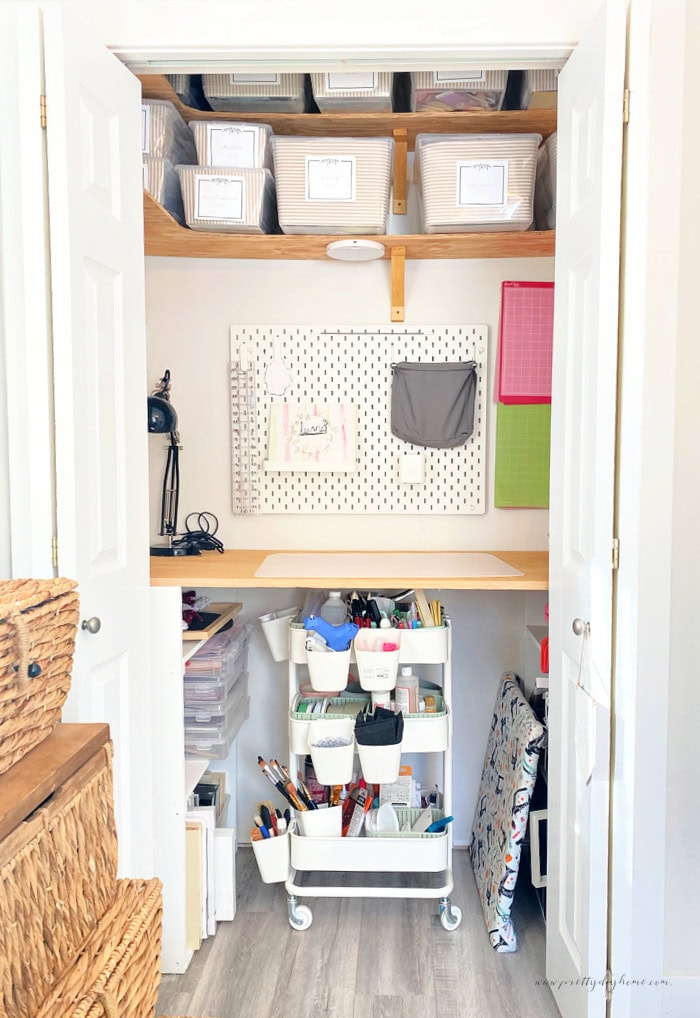
DIY Craft Room Closet
If you’re lucky enough to have a closet in your craft room or a spare closet to turn into your crafting space, this DIY craft room closet tutorial shows you every step, from measuring to choices you can consider for work workspace and lighting.
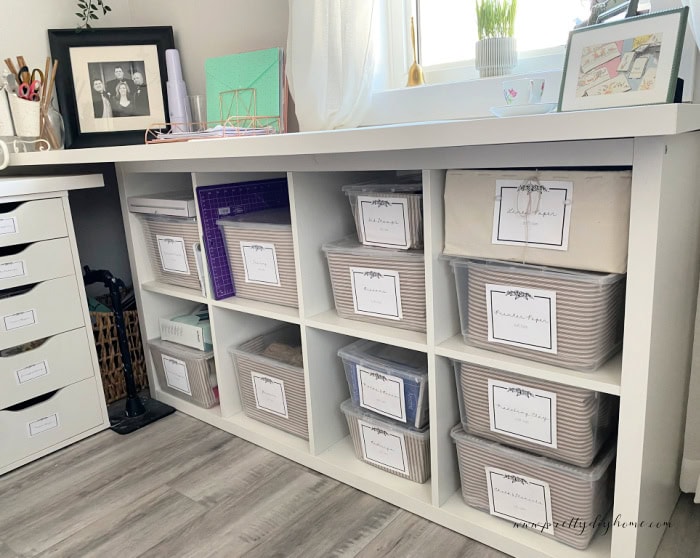
Craft Room Organization with Bins, Jars, and Baskets
Neat matching containers don’t have to be expensive, and they really help tone down the clutter. In this craft room organization post, I show you my hacks for various simple clutter clutter-free ways to organize craft supplies.
Hey Leanna! This is a fantastic idea which came out amazing, I can’t wait to emulate this in my wifes crafting area.
I hear you loud and clear. I grab craft supplies when I see them on sale or when I get to travel to the USA. In addition I tend to keep all kinds of little leftovers. Storage of all the decor and crafting supplies can become an issue in no time at all.
Any ideas to keep craft supplies in order is welcome, I seem to have the most stuff and am constantly looking for ways to tame it all! This looks great.
This is perfect! I want to make one for my craft room.
I think they will be really handy for hanging large items on. This one is large enough to hold all kinds of things.
Leanna that is such a great organizing idea. You can fill it up with all your crafting items and be able to grab them in a heartbeat.
Hi Mary: I like it for all those large items that won’t fit in a container and to hang things up that I am working on. I thought a long time before finally deciding I could make one that blended in.
Oh I could do with one of these, brilliant idea and great tutorial thank you
The main thing is to remember to leave a space between the pegboard and the wall, the various clips need the room.
love the details on this peg board. Will work perfect in my craft area (aka the dining room) Thanks for the great how to !
For a dining room I think you could do one where the top is a box valence for curtains. If you have company close the curtains and whose to know. Hope this makes sense.
I love this! It’s pretty and could be so useful in a craft room. Or in my shed as well. Thanks for sharing at #BloggingGrandmothersLinkParty. I have shared on social media.
What a good idea for storage of craft bits and pieces. Thanks for sharing at #BloggingGrandmothersLinkParty.
Your more than welcome.
Leanna, this is gorgeous. I love how it covers the entire wall and the frame is so pretty. Nice job!
Thank you Janice. I am quite proud of its design. It is a pegboard so you can only do so much, but it looks pretty darn good on the craft room wall.
I would love to have a pegboard in our craft room, it such a great idea and perfect for storage Leanna. It always fascinated me when people mentioned they had to find wall studs. I just couldn’t figure it out. Thank goodness for google. All the houses here in South Africa have solid brick walls inside and out so it’s probably much easier for us just to hang something up without taking the studs into consideration.
Canadian walls need insulation, I imagine brick walls would be freezing cold. Drilling everything into a brick wall has to be hard work though.
Here the wood frame is covered with gyproc and then painted. If you don’t find the screw their isn’t enough material to hold up anything heavy.
Love that you mentioned the difference. Interesting to know.
Love this idea and it came out so cute! The molding around it just adds the perfect touch!
Hi Janine. Thank you, the moulding really helps make it for the home. I also considered doing some stenciling on it, but choose to leave it as is. At least for now.
Love this idea to keep all things organised in your craft room! I also love the mouldings you used to frame it! So clever!!
Other than ripping the pegboard on the tablesaw I could easily do this one on my own. Its super easy to put together and the mouldings fancy it up just enough to make it okay to bring the idea in from the garage version.
That is the prettiest pegboard I have ever seen. I love all of the details.
Much appreciated Debra. It took me awhile to decide if I wanted one and when I did I wanted it to blend in.
This is such a cute and easy way to add a bit of decorations to the house! Love this idea so much
Thank you, I wanted it to be useful without being cluttered. Its a great solution for large items.