How to Refinish a Table in White Stain
How to Refinish a Table in White Wash Stain
Do you have some furniture you just love, or its too new to toss but still needs refinishing? This table and chairs is about ten years old now, everyone in our home is big and heavy, and it stays sturdy and strong. The table has a mechanical center leaf, and I just love it. But it needs to be refinished again, this time I decided to refinish the wood table top in greige/white modern farmhouse finish. I’m happy to show you today, a total labor of love, How to Refinish a Table!
The Before

The Fun Labour of Love Table Top
As the table and chairs are ten years old I think the finish is veneer. I am not certain but when in doubt treat it like veneer. I’d rather be careful then risk losing my table. It was too cold to work outside, so gritting my teeth I did it in the dining room, and dealt with the massive dust problem afterwards. Oh well, I hope you can do your outside or in a garage.
Supplies
[one-half-first]
Chemical Stripper and paint scraper
Plastic wrap
120 and 220 grit sandpaper
Polyurethane in Matte Finish
[/one-half-first]
[one-half]
Binz Primer Sealer
Chippy Paint Brushes, regular paint brush
Fusion Picket Fence White Paint or other White Latex Paint
[/one-half]
Stripping the Table Top
The first step was to strip the old finishes off the tabletop. I did not need to do this on the legs. I used Citristrip but you can use any brand you like. A trick is use is to paint on a thick coat of stripper and then cover everything with plastic wrap. Let the table sit for about an hour to let the stripper to do its magic. If your dealing with veneer sit close by and make sure its not bubbling the veneer off. If it start to bubble remove the stripper asap.

Using a paint scraper remove as much of the finish as possible.
Next comes the sanding.
The stripper took off all of the previous refinishing stain and some of the original finish. Since the table had deep scratches it required lots of careful sanding. I began by sanding it with 120 grit sandpaper in the palm of my hand, not using a sander at all.
Run your hand along the top of the table looking for any rough spots or scratches. You are much more likely to feel the roughness in the finish than you are to see it. Once the scratches were sanded smooth I was sad to realize two sections of the table seemed to be made of different wood than the third.

My first plan was to sand some of the old stain off, and then add grey stain in particular areas to get a darker greige finish. You can see in the picture above that their was grain coming through. As I sanded the third section of the table it seemed to be made of a different wood somehow. It was a darker word. With the different wood showing up, I had to switch plans and make the table top whiter than I had first intended. I had to camoflage the one darker end to match.

How to Create a White Table with Pickling Stain
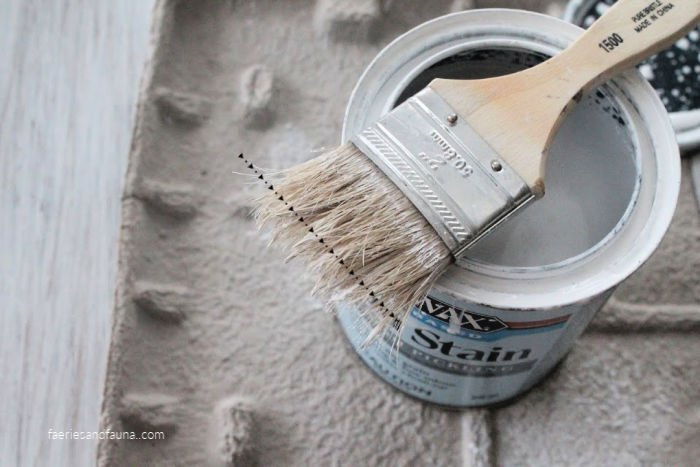
Once the table is sanded down and wiped free of dust you can begin staining. To create this type of finish you will need cheap chippy brushes. Dip just the very ends of the brush into the white pickling stain, removing any excess from the bristles.

Apply the stain to the table top in hundreds of short very light feathery strokes Don’t wipe the stain off,. Spread out the stain as you work, so that you get a evenly covered surface. Let the first coat dry at least four hours. Sand very lightly with 220 grit sandpaper to remove any slight bumps in the finish. Your not sanding any of the stain off, if their are darker areas, build them up with more pickling stain.
Repeat with a second layer of pickling stain in feathery light strokes of stain only in the areas that are darker. Let it dry overnight. Then sand again with 220 grit.
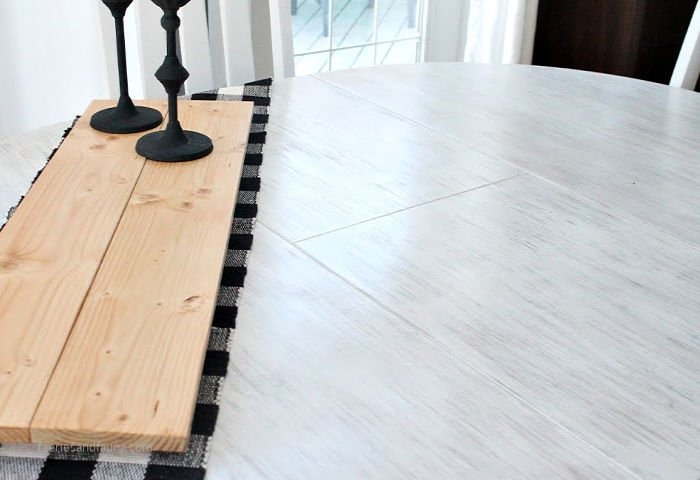
Finally do a third layer of stain in areas that you want to be the lightest. On my table the majority of the third layer went on the section with the different wood. Doing this made all three sections of my table the same tone.
Let the table dry for at least four hours. Sand very lightly again with 220 grit sandpaper.

Protecting the Tabletop with Polyurethane
A very white table sitting beside two very large windows can be bright which is wonderful, but it certainly didn’t require the extra glare of a high polished shine. For our home I chose absolutely clear mat finish polyurethane, but you can choose something shinier if your room is darker.
Apply two coats of polyurethane sanding between each coat a piece of paper bag. This is the finest sandpaperish material I know of and it works so well. When I started Hubs hubs handed heard of it, so he gave it a try and was startled at the difference. He ended up refinishing our kitchen cabinets sanding with a paper bag as well.

Step back and admire how pretty the table is. I love ours better than new already. Now comes the easy part, painting the legs.
Refinishing the Table Legs in White Paint
This portion is less work.
Sand the legs down lightly to make sure there is no shine left on the finish.
Paint the table legs with a coat of Zinsser BIN White Primer-Sealer do not sand afterwards. The legs are painted with white fusion mineral paint.
Apply a layer of Fusion mineral paint in picket fence. Let dry, and lightly sand using brown paper.
Repeat by adding a second coat of paint, and then a final sanding of brown paper.

I will share how to refinish chairs in my next post.


love the table makeover. I’ve had success using CitriGel, too. Veneer can be tricky. You did a great job with this!
I love the table makeover. I’ve had success using CitriGel, too. Veneer can be tricky. You did a great job with this!