Old-fashioned Apple Butter Recipe for Canning
What is Apple Butter?
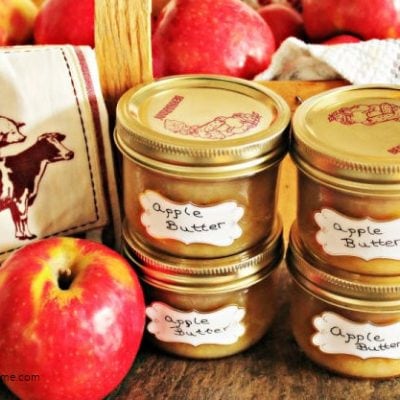
Have you ever tried making apple butter? If this is your first time trying apple butter it’s a delicious spreadable apple puree cooked down until thick and caramelized. Homemade apple butter is the other Fall flavor, apples, paired with cinnamon. This old fashioned apple butter canning recipe is amazing on waffles, pancakes, oatmeal, scones, English muffins, or pork chops. Apple butter is a thick spread, thicker than apple sauce, and has a smooth consistency without any chunks of apples in it.
Hubs makes the best apple butter, he is famous for it. He receives calls every year asking if it’s ready yet. He gives it away on its own, or sometimes I pair it with a loaf of fresh bread or a pack of premade waffles.
What Kind of Apples Should I Use for Apple Butter?
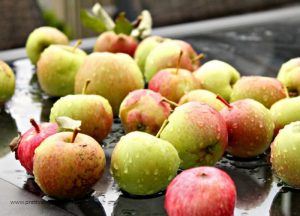
Hubs has made this recipe with many types of apples, his favorite are crab apples or gala apples, but any type of juicy fresh apple works. Gather a variety of fresh apples or crab apples from your yard, or the farmers market. I bet a neighbor will gladly share some with you during apple season to preserve.

Sterilizing Jars for Canning Apple Butter
To sterilize jars in boiling water. Place the clean jars, lids, and rings in a large stockpot pot. Cover with water making sure everything is submerged. Bring the water to a rolling boil and boil for at least ten minutes. It’s very important to sterilize your jars when you hot pack a recipe. Keep the jars hot until the apple butter is ready.
We prefer to can our apple butter in half pint jars, if you have a larger family you can use pint jars.

Old Fashioned Apple Butter Recipe for Canning
Apple Butter Ingredients
- 5 pounds of apples ( you can use a variety of apples, crab apples or small apples work well)
- 2 cups of sugar (how much white sugar you use depends on the sweetness in the apples and personal preference use more or less as you want. If using crab apples add an extra 1/2 cup sugar.)
- Optional – 2 teaspoon cinnamon, 1/2 teaspoon cloves, 1/2 teaspoon allspice
Homemade Apple Butter Recipe Instructions
Prepare the Apples for Apple Butter
Begin by washing the apples, really well and removing any stems. If the apples are small you can cook them whole. If canning larger apples cut them in quarters first. You don’t need to core or peel the apples, the pectin in the peels helps thicken the apple butter.
Place the clean apples into a large pot and barely cover them with water. Simmer on medium-low heat stirring often so they don’t stick. Cook until apples are soft and mushy about half an hour.

Screen the Apples for Apple Butter
Screening the apples through a colander replaces the newer ways of using an immersion blender, food mill, or food processor. To make this easy apple butter recipe, take a large colander, line it with cheesecloth, and place it over a large bowl.

Carefully transfer the hot apples to the large colander, and squeeze the pulp and juice out through the cheesecloth. This screens out the apple skins, cores, and seeds from the apple pulp. Once screened gather up the cheesecloth and toss out the skins.
Cook the Apple Butter
Place the screened apple pulp back into the large saucepan. Add the sugar, and stir until dissolved. Add the spices.
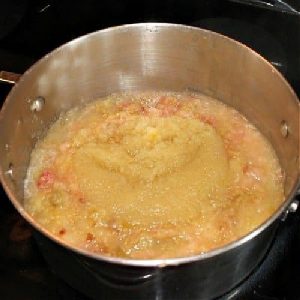
Cook over medium-low heat for a long time until thick, stirring often to prevent sticking. Cooking the apple butter takes approximately an hour.

Stir the apple butter recipe regularly to help dissolve the sugar. Cook the apples until thick and caramelized about an hour.

Place Apple Butter in Canning Jars – Hot Pack Method
This apple butter recipe for canning is cooked on the stovetop, and you can make it without a canner. It’s a classic hot-pack canning recipe.
Using a wooden spoon scoop the hot apple butter into each jar individually. Leave a half-inch gap between the apple butter and the tops of the jars. After filling the insides of the jars, use a wet clean cloth or moist paper towel, wipe the rim of the jar to make sure it’s free from any of the apple butter. Once wiped clean immediately place your sterile metal lid on top
Holding the hot jar in a towel to protect your hands from the heat, screw the ring onto the jar. finger tighten the ring and then wipe the jar clean. Set aside leaving to cool undisturbed.

Allow the jars of apple butter to cool to room temperature before moving them. As the apple butter cools you will hear the lid pop went the jar seals. To check if your jar is sealed push on the already cool lid, if it’s flexible it hasn’t sealed. If a jar fails to seal, place it in the fridge and use it within a month.
Water Bath Canning Apple Butter
I prefer to hot pack can my apple butter and skip the canning process altogether. If you want to water bath can your apple butter it’s just one extra step,
As soon as your jar of apple butter is packed with the lid on place it in a boiling water bath canner. Repeat for the remaining jars. Bring the water to a boil and process for 15 minutes. Remove the hot jars from the canner using a jar lifter. Set aside to cool undisturbed until the jars reach room temperature.
Storing Canned Apple Butter
Canned apple butter will store well in a cool dark place for up to a year.


Apple Butter Recipe for Canning
Ingredients
- 5 lbs crab apples or small apples
- 2 cups white sugar adjust to taste
- 2 tsp cinnamon optional
- ½ tsp cloves optional
- ½ tsp allspice optional
Instructions
Sterilizing Jars
- To sterilize jars in boiling water. Place the clean jars, lids, and ring in a very large pot. Cover with water making sure everything is submerged. Bring the water to boil and boil for at least ten minutes. Its very important to sterilize your jars when you hot pack a recipe. Keep hot until the apple butter is ready.
Apple Butter Instructions
- Begin by washing the apples, really well and removing any stems. If the apples are small you can cook them whole. If your canning larger apples cut them in quarters first. You don't need to core or peel the apples, the pectin in the peels helps thicken the apple butter.
- Place the clean apples into a large pot and barely cover with water. Simmer on medium low heat stirring often so they don't stick. Cook until apples are soft and mushy about half an hour.
- Line a large colander with cheesecloth and place over a very large bowl.
- Carefully transfer the hot apples to the large colander, squeeze the pulp and juice out through the cheesecloth. This screens out the apple skins, cores and seeds from the apple pulp. Once screened gather up the cheesecloth toss out the skins.
- Place the screened apple pulp back into the large saucepan. Add sugar, and stir until dissolved. Add the spices.
- Stir the apple butter to dissolve the sugar.
- Cook over medium low heat until thick, stirring often to prevent sticking. Takes approximately an hour.
- When still hot, spoon the hot apple butter into the sterilized jar until its about half inch from the top. Immediately place your sterile metal lid on top.
- Holding the jar in a towel to protect your hands from the heat screw the ring onto the jar.
- The jars will pop as the apple butter cools sealing the jars. If they fail to seal, place them in the fridge and use within a week.
Other Canning Recipes to Try

Homemade Sweet Pickle Relish
A delicious canned sweet pickle relish recipe. This recipe has no food coloring and gets its color from partially peeled fresh cucumbers.
It’s delicious and sweet, a fantastic way to preserve cucumbers. It not only tastes much better than boughten relish, you know it has fresh water and good quality ingredients.

Dilled Carrots and Bean Pickles Recipe
If you like dill pickles you should enjoy these dilled carrot and bean pickles. The flavor of the pickled beans and carrots go very well together, and as an extra bonus, they look really pretty in their jars.


I love making our own apple sauce, never made apple butter though. It sounds really delicious and I bet it tastes great in baked pastries too! I love making cinnamon buns with different fruit, like honey marmalade so this would go well with it!
Oh my yumminess Leanna, your hubby’s apple butter sounds divine. I’ve always been a bit frightened of making anything that involves bottling/canning afterwards, just in case I mess the sterilizing up. Maybe I’ll give this one a go. I don’t thnk it will even last 1 week so I should be good 😉