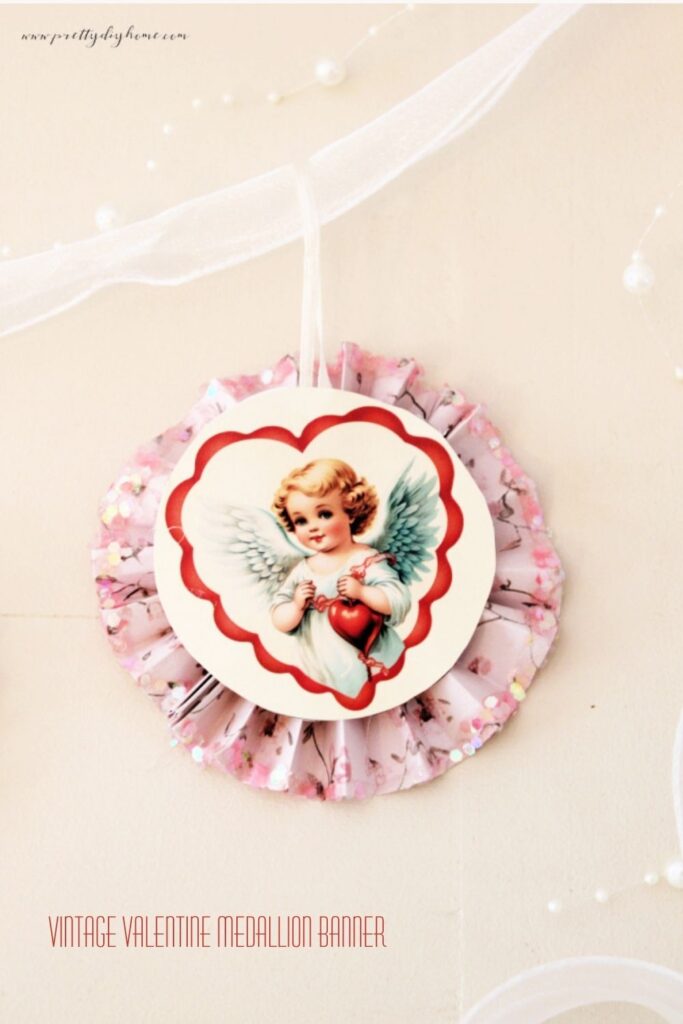
Vintage Valentine Paper Craft: DIY Medallion Banner
This vintage Valentine paper craft is centered on vintage paper medallions and free printable cupid centers, a combination that feels timeless rather than trendy. Cupids have always been a Valentine staple, and I love that they work for any age group and any stage of life, sweet without being overly romantic. After a bit of testing, I found that this project comes together much more easily when you use lightweight cardstock, which keeps the medallions soft, flexible, and easy to shape.
This is a pretty easy project to do, especially after you make the first medallion. Once you get a feel for the folding and shaping, the rest comes together quickly. I tried a few different approaches while making these and ended up with a method that keeps everything flat and easy to handle.
Valentine Medallion Supplies
Before you look at the supplies, I want to mention that this is a cheap, fun, and not fattening January project. Budgets are often tight this time of year, and I didn’t want this craft to feel expensive or overcomplicated. You can buy scrapbook paper by the sheet, the printable centers are free, and you can use whatever ribbon, twine, or embellishments you already have. If you don’t have any extras at all, you can skip them. The medallions are still very pretty on their own.
- 12 × 12 scrapbook paper or lightweight cardstock
- 3-inch free printable Valentine center circles (or images cut from Valentine cards)
- Cardstock for 3-inch backing circles
- Paper cutter (optional but helpful)
- Scoring board and bone folder (optional but helpful)
- Scissors
- Hot glue gun and glue sticks
- Narrow ribbon (5/8 inch works well)
- Mod Podge
- Glitter (iridescent or soft vintage tone)
- Small wooden hearts, lace bows, or other simple embellishments (optional)
How to Make a Vintage Valentine Medallion Banner
Step 1: Download the Free Valentine Printables
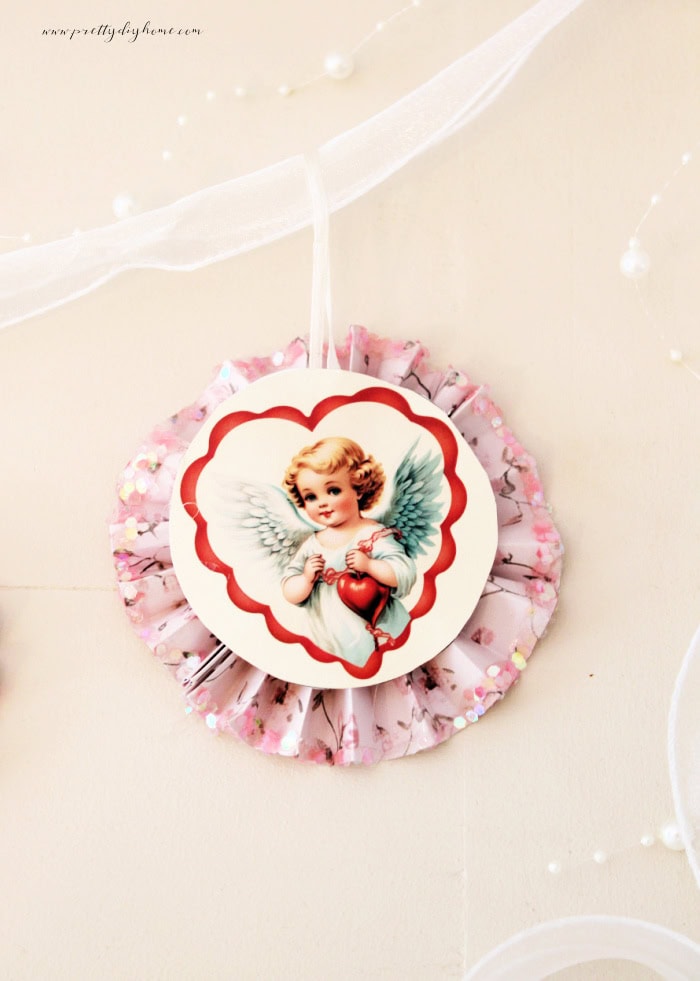
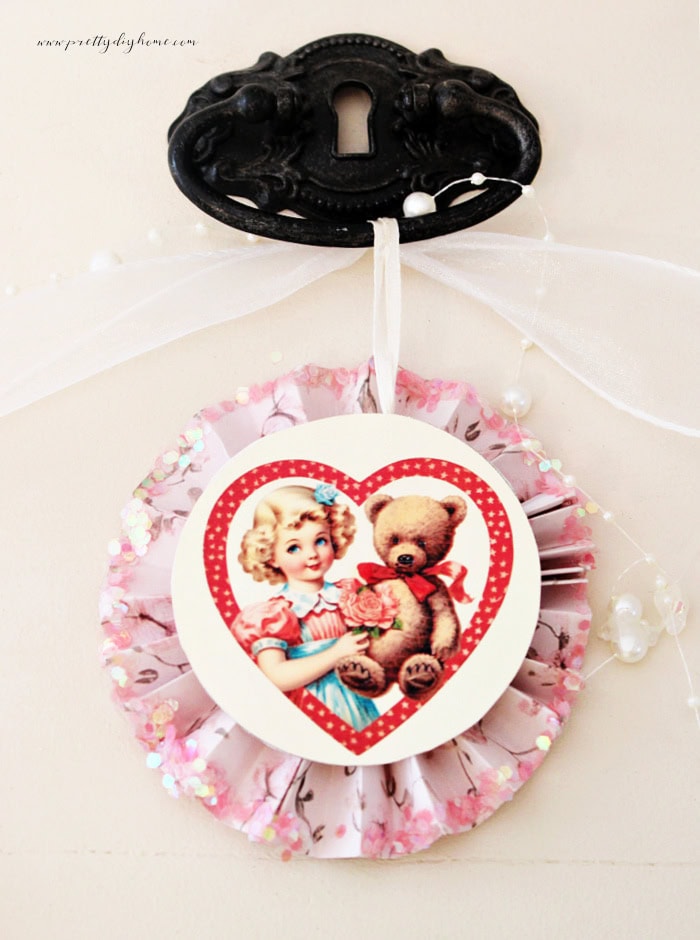
I created a free printable set of 3-inch Valentine center circles to make this project easy to customize. The printable includes three color options: cream, red, and white.
The designs include four cupids and two birds. For my banner, I printed two copies so I could use only the cupid designs for a consistent look, but you can mix and match the images if you prefer.
Download the free printable and, using your best print settings, print the circles on lightweight cardstock. The printables are already sized to 3 inches and are ready to cut and use.
If you prefer, you can also use any Valentine’s card you like. Simply trace a 3-inch circle and cut it out instead.
Step 2: Cut the Paper Strips
Cut the scrapbook paper or lightweight cardstock into strips that are 2 inches wide and 12 inches long. Each medallion uses two strips. You can use a paper cutter, or a ruler and scissors, whichever you have on hand.
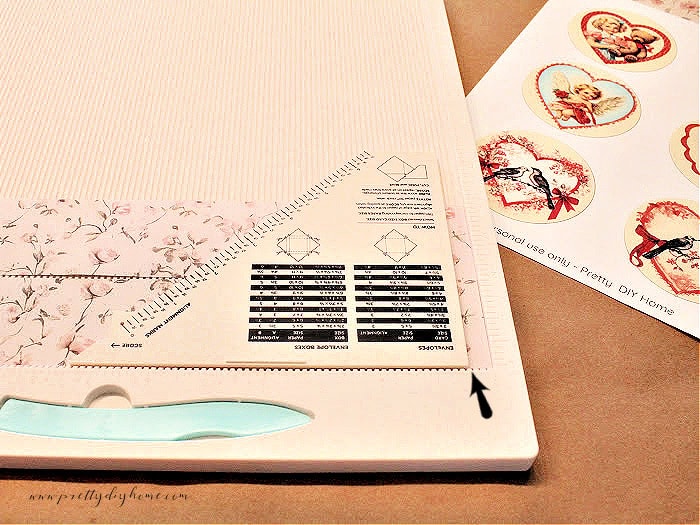
Step 3: Score the Paper (Optional)
If you are using a scoring board, use light pressure as you work. Pressing too hard can tear the paper, even with thicker cardstock. The goal here is to soften the paper and guide the folds, not to cut into it. You should see light indentations as you move along the strip.
Score each strip every 1/2 inch along the length.
If you are able to line up two strips evenly, you can score two strips at the same time, which makes the process go much faster. I also found it helpful to place the tip of the scoring tool directly into the groove of the scoring board before making each score.
Step 4: Join the Paper Strips
Each medallion uses two strips. Instead of gluing them during assembly, I found it much easier to connect the strips first. Glue the short ends of two scored strips together with hot glue to create one long strip.
Joining the strips first keeps all of the folds moving in the same direction, which makes the accordion folding easier and avoids having to adjust the folds later.
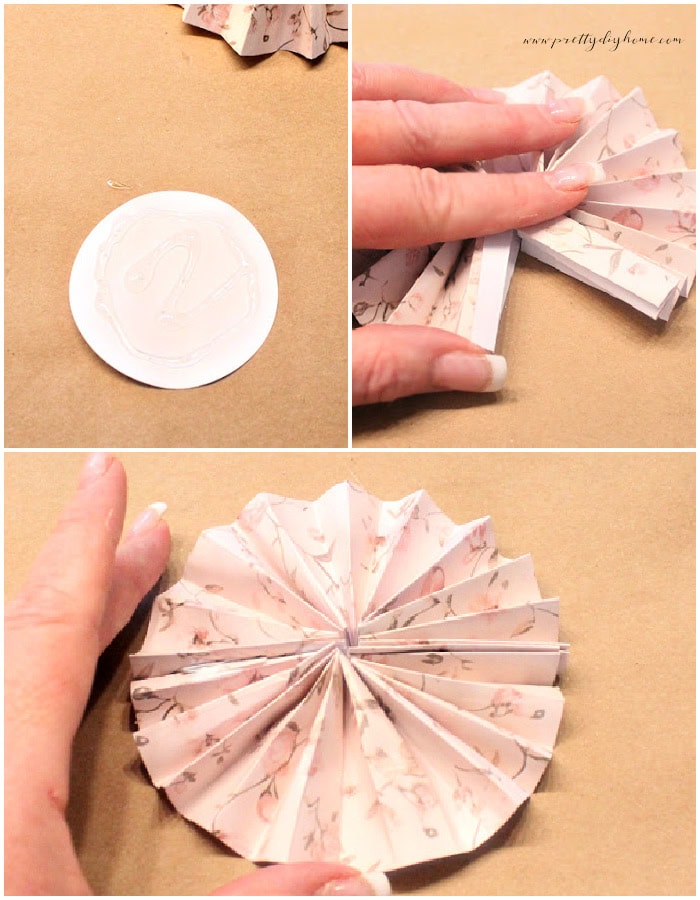
Step 5: Accordion Fold the Paper Strips
Below are two ways to accordion fold the strips, one without a scoring board and one with a scoring board.
If You Did Not Use a Scoring Board
After the two strips are joined, fold the long strip backward first to soften the paper. Then accordion fold the strip back and forth, using the first fold as a guide. As you work, run your finger along each fold to keep it crisp, and once the strip is fully folded, pinch the folds between your fingers to firm them up.
If You Used a Scoring Board
After the two strips are joined, fold all of the score lines backward first to soften the paper. Once the paper feels relaxed, accordion fold the strip back and forth along the score lines. As you work, run your finger along each fold to keep it crisp, and once the strip is fully folded, pinch the folds between your fingers to firm them up.
Step 6: Form the Medallion
Make sure your glue gun is ready, then place the folded strip flat on your work surface and hold it gently in place with the palm of your hand. Pull one end around until it lines up with the other short end and glue it in place. This step is much easier than it sounds, and I promise it comes together quickly once you try it.
Step 7: Attach the Backing Circle
Adding a piece of cardstock to the back of the folded medallion makes this step much easier and helps everything stay flat so you can relax your hand. If the paper pops up a little, gently press it back into place.
Add hot glue to the backing circle, then lay the folded medallion on top and press it down until it feels secure.
Step 8: Add Glitter to the Edges
Brush a thin line of Mod Podge along the outer edge of the medallion only, then sprinkle with glitter. Tap off the excess and allow it to dry completely.
Keeping the glitter just on the edges adds a soft sparkle without overwhelming the paper pattern.
Step 9: Attach the Center Circles
Glue the 3-inch center circles flat onto the medallions and hold them in place with the palm of your hand until secure.
While the glue is cooling during this step, it’s a great time to cut any remaining circles or prepare the ribbon loops.
Step 10: Add Ribbon Loops and Embellishments
Cut 8-inch lengths of ribbon and tie a knot at one end of each piece. Glue the ribbon loops to the back of each medallion for hanging.
Add small wooden hearts and tied ribbon bows as embellishments. I placed mine near the bottom of the medallions for a soft, finished look.
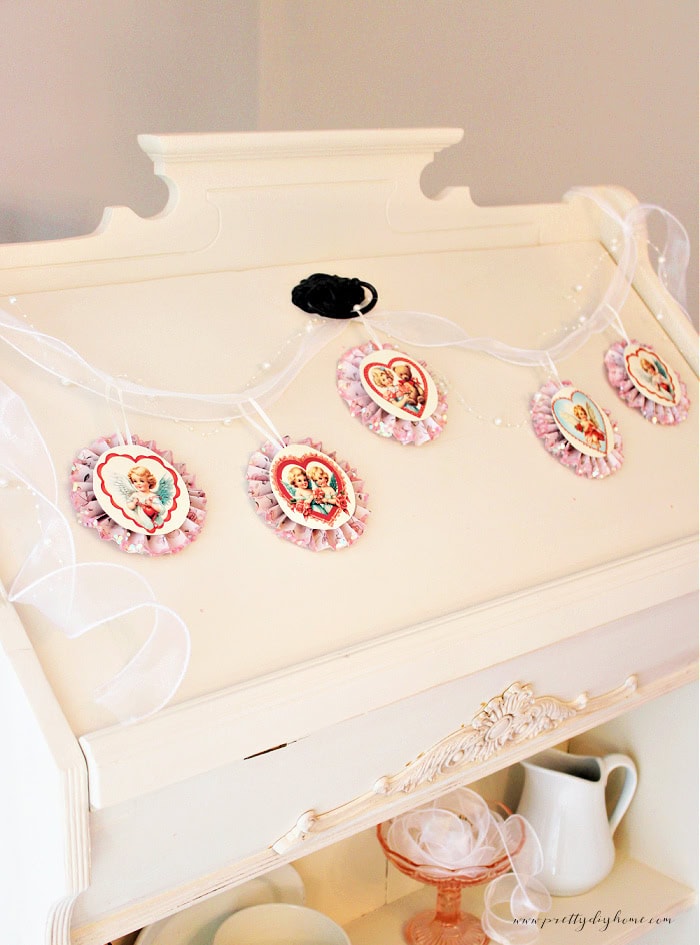
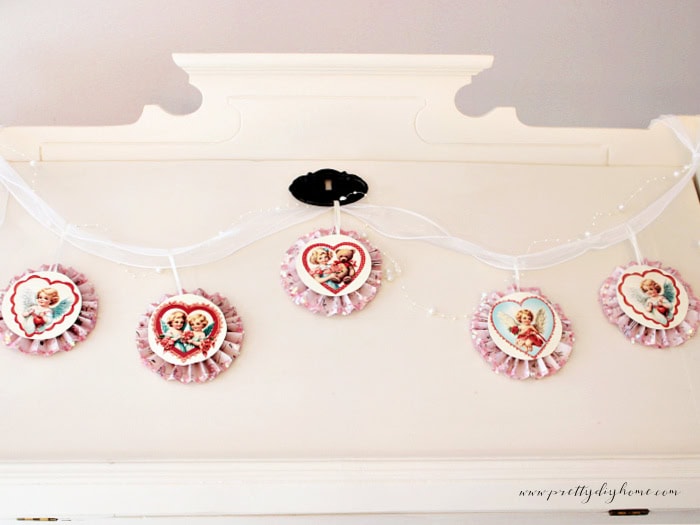
Step 11: Hang the Banner
Once all five medallions are finished, you can hang them individually or attach them to a longer ribbon or string to create a banner. This flexible method makes styling easy on mantels, shelves, or walls.
Styling Tips
This banner looks especially pretty with gentle curves rather than pulled tight. Neutral and floral papers keep it versatile enough to blend with both Valentine décor and everyday vintage styling.
If you love soft, vintage inspired Valentine crafts, be sure to pin this tutorial so you can come back to it later. This paper medallion banner is a simple, budget friendly craft idea made with free printable cupid centers and lightweight cardstock, perfect for Valentines..
More Paper Valentine Crafts
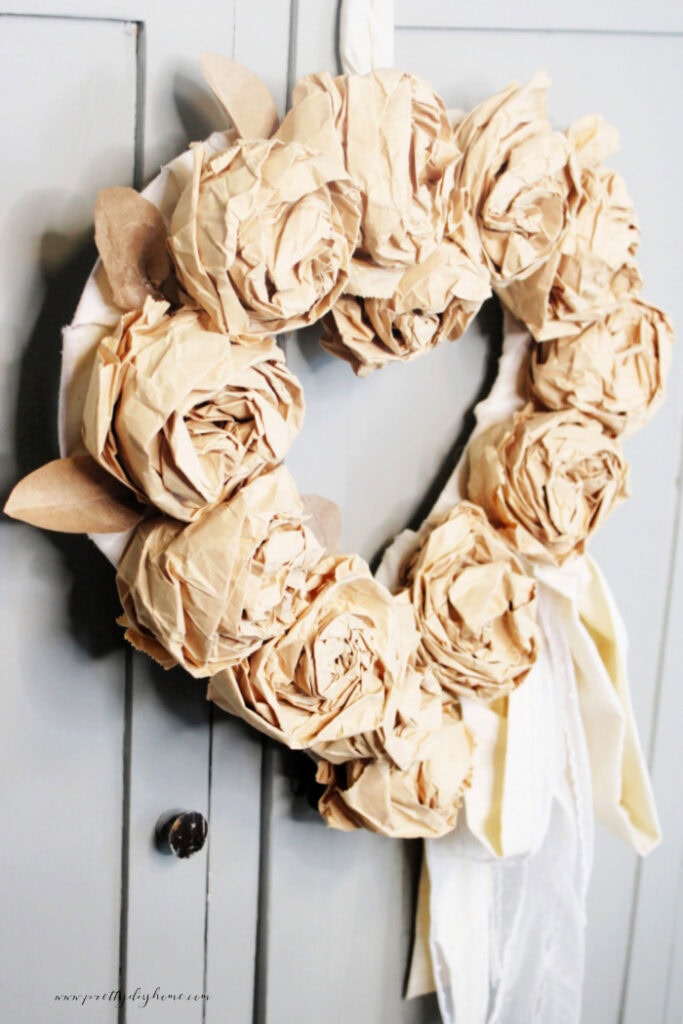
Paperbag Rose Wreath
If you enjoy paper Valentine crafts, you might also like my neutral DIY paperbag rose wreath, a soft and vintage inspired wreath that is simple to make and can be used year around.

DIY Heart Banner
Here is another paper Valentine craft that uses a free printable, which you cut out to create a sweet and nostalgic heart banner.