DIY Spring Wreath Alternative – Linen Bunny Wall Pocket for Front Door
f you’re looking for a DIY spring wreath idea that’s a little different, this adorable linen bunny wall pocket makes a charming alternative for your front door or inside the house as a soft spring decoration.
I love how this finished wall pocket turned out. The linen fabric gives it a soft cottage feel, the appliqués made from an upcycled crocheted table runner add vintage character, and the printable Easter bunny adds a little rustic charm.
This is a very easy sewing project with just straight seams and simple embellishments. The bag is quick to sew and can be finished in an afternoon.

Supplies for the DIY Bunny Wall Pocket
- Linen fabric (2 pieces cut 14 x 18 inches)
- Iron-on interfacing (1 piece cut to fit front panel)
- Printed bunny image on fabric or printable transfer
- Vintage doily
- Thread
- Sewing machine
- Iron
- Twine or hanging cord
Optional Fillers for the Pocket
- Faux flowers
- Pussy willow branches
- Stuffed fabric carrots
- Small greenery stems
How to Make a Linen Bunny Wall Pocket
Step 1: Cut and Prepare the Linen Panels
Begin by cutting the linen pieces for the wall pocket.
Cut two pieces of linen measuring 14 x 18 inches.
One piece will become the front panel, and the other will be the back panel.
Next, cut a smaller piece of linen measuring 71/2 x 10 inches. This piece will be used for the bunny printable transfer.
Press all of the linen pieces with a hot iron until they are smooth and flat. Linen wrinkles easily, and pressing first helps ensure accurate sewing and printing later.
To prevent the linen from fraying while you work, sew a zig zag stitch around the edges of each linen piece. This simple step helps stabilize the fabric and makes the pieces easier to handle during construction.
Step 2: Add Interfacing to the Front Panel
Choose one piece of linen to become the front of your wall pocket.
Cut a piece of iron-on interfacing the same size as the linen panel.
Place a piece of parchment paper on your ironing board to protect the cover from any adhesive.
Lay the linen wrong side up on the ironing board. Place the interfacing shiny side down onto the wrong side of the fabric.
Cover the fabric with another piece of parchment paper to protect your iron from the adhesive.

Following the manufacturer’s instructions, press the interfacing with a hot iron. Hold the iron in place for several seconds at a time, lifting and pressing across the fabric until the interfacing is fully bonded to the linen.
Allow the fabric to cool completely before moving it so the glue can set properly.
Step 3: Print the Bunny Design
Before printing on your linen, always run a test print on regular paper first to see which side of the paper your printer prints on.
Every printer feeds differently. On my printer, the design prints on the underside of the sheet, so I inserted the paper with the linen side facing down.
Set your printer to print full page or 100% size, then print the bunny design onto the prepared linen sheet.
Both times I tried this method, the fabric fed through the printer perfectly and printed clearly.

Step 4: Sew the Top Hem
Before attaching the bunny panel or the crochet doily, finish the top edge of both the front and back panels.
Fold the top edge of the linen 1/2 inch toward the wrong side and press it flat with an iron.
Next, fold the edge down 1 1/2 inches and press again.
Sew along the folded edge to secure the hem in place, creating a fabric tube at the top for the hanging cording.

Finishing the hem first also helps with placement of the bunny panel and crochet, so you can clearly see where the top edge is and avoid accidentally sewing into the tube while attaching the front decorations.
Step 5: Attach the Bunny Panel to the Crochet Doily
Stitching along the folded top hem of the linen panel to create the hanging tube for the wall pocket.
For this project I used a crochet runner, but a crochet doily works just as well if that is what you have available.
Place the printed bunny panel on top of the crochet piece and adjust the position until you are happy with the placement.
Pin the bunny panel securely to the crochet.
Using a zig-zag stitch, sew around all four sides of the bunny panel, attaching it to the crochet runner or doily.

The bunny appliqué can add extra weight to the front of the pocket, which is why it is important to stitch it securely to the crochet so the layers stay flat and stable during the rest of the construction.

Once sewn, press the piece again with an iron to make sure everything lies smooth and flat. Crochet can stretch easily, so pressing helps keep the panel neat and properly shaped.
Step 6: Attach the Crochet Panel to the Front Panel
Place the crochet runner with the attached bunny panel onto the right side of the front linen panel.
Center the crochet on the fabric and adjust the placement until you are happy with the position. Make sure the crochet does not overlap the tube at the top that was sewn for the hanging cording.
Pin the crochet panel in place.

Using a zig-zag stitch, sew the crochet to the front panel only. Sew slowly and allow the feed dogs of the sewing machine to move the fabric naturally.
Crochet can stretch easily, so avoid pulling the fabric while sewing. Letting the machine feed the layers through helps keep the panel flat and evenly attached.

Step 7: Create the Hanging Cord
Cut a piece of cotton cord measuring approximately 48 inches long.
Instead of tying the ends together with a knot, overlap the two ends of the cord slightly.
Using a straight stitch on your sewing machine, sew across the overlapped section several times to secure the cord and form a continuous loop.
This method creates a strong and clean-looking hanging loop without the bulk of a knot, allowing the wall pocket to hang neatly from a hook.
Step 8: Insert the Hanging Cord
Take the cotton cord loop you created and feed it through the fabric tube at the top of the back panel.
Pull the cord through until it is evenly distributed so the loop forms the hanger for the wall pocket.

This cord will allow the finished bag to hang easily from a hook or wall peg.
Step 9: Sew the Wall Pocket Together
Place the back panel right side up on your work surface.
Next, place the front panel right side down on top of it so the right sides of the fabric are facing each other, and the edges are aligned.
Pin the layers together to keep them from shifting.
Sew the two side seams first, then sew across the bottom seam, leaving the top open.

Because my bag was made using a crochet runner, I trimmed the extra end of the runner off after sewing the bag together and before turning it right side out.
Step 10: Hang the Wall Pocket
ou can hang the finished wall pocket in a couple of different ways.
If you prefer a rod style hanger, slide a dowel or spindle through the top hem openings and hang the rod from a hook or nail.
For my wall pocket, I chose a softer look. I threaded another piece of cord through both top openings, tied it into a bow, and hung the pocket from that cord instead.
This creates a decorative hanger that works well with the linen and crochet details of the bag.

Finished Linen Bunny Wall Pocket
Once the sewing is finished, your bunny wall pocket is ready to hang and decorate.
I ended up making two of these pockets. One is for my vintage booth, and the second is hanging on my front door for Easter. I couldn’t resist keeping one because the linen, crochet, and bunny design together give it such a soft cottage look.
Fill the pocket with spring flowers, pussy willows, greenery, or even a few stuffed carrots for a simple Easter decoration that feels both vintage and handmade.

More Bunny Crafts for Spring
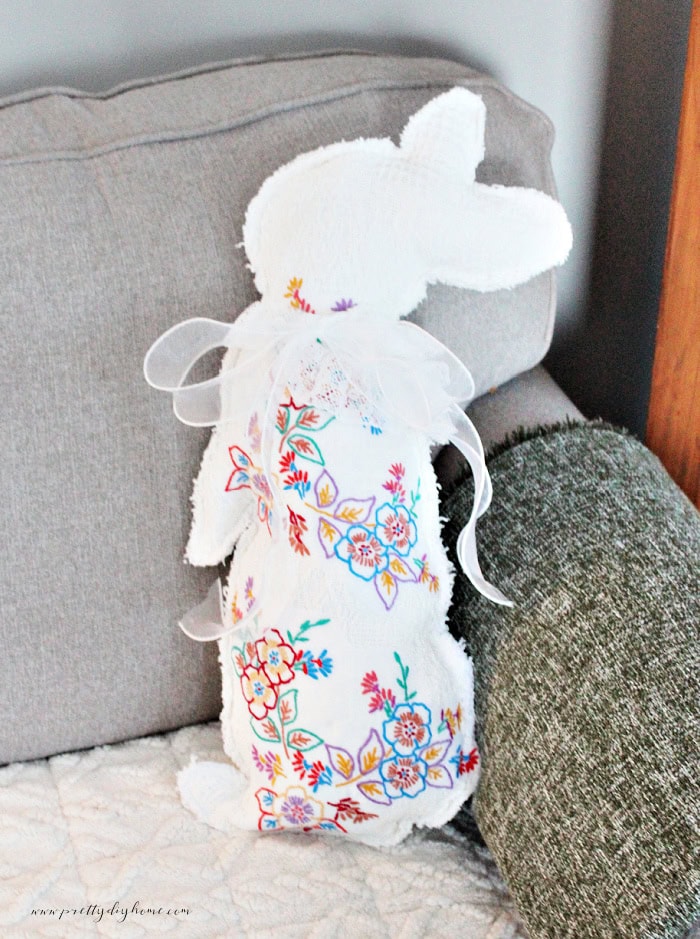
DIY Easter Bunny from Repurposed Vintage Linens
Another favorite project on the blog is this DIY Easter bunny made from repurposed vintage linens, a sweet way to reuse embroidered fabrics while creating soft cottage style spring decor.
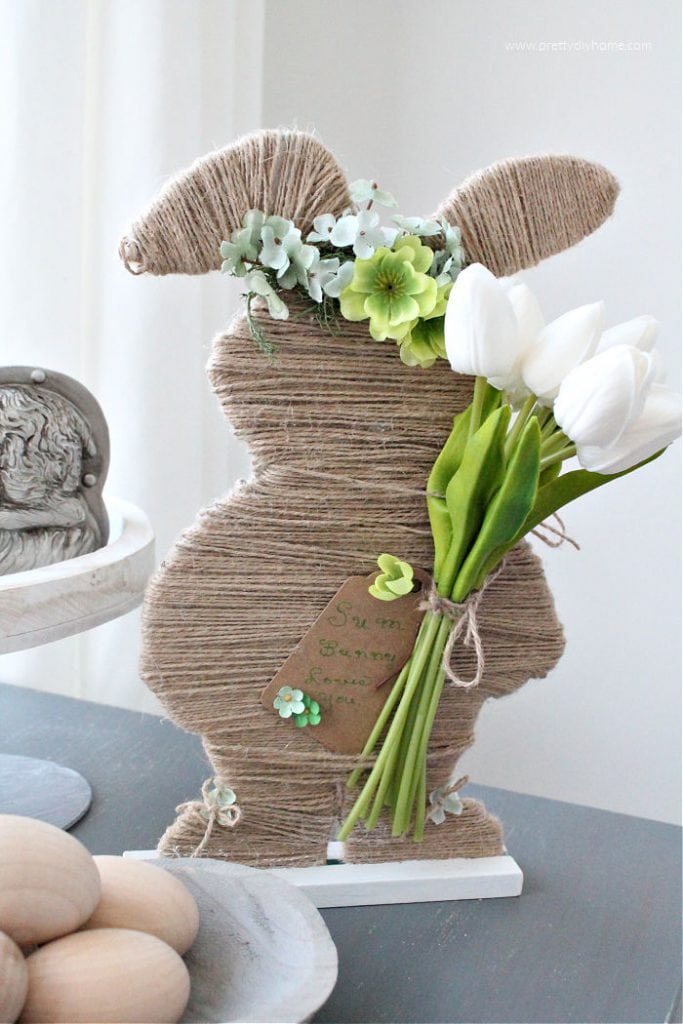
Dollar Store Easter Bunny Craft
If you enjoy making bunny decorations for spring, you might also like this Dollar Store Easter Bunny craft, where a simple wooden bunny gets a neutral farmhouse makeover using twine and flowers.
I hope this little bunny wall pocket inspires you to try something different this spring. It’s a simple sewing project that adds a soft vintage touch to your home, and it looks lovely hanging on a front door or inside as part of your Easter decorating. If you make one, try filling it with pussy willows, spring flowers, or even a few stuffed carrots for an easy way to repurpose unloved crochet.