Dollar Store DIY Easy Wood Easter Bunny Craft
Easy to Make Twine Wrapped Wooden Easter Bunny for Cheap!
This Dollar Store Easter Bunny DIY is the first Easter craft I had time to make this year and I am so excited to share it with you. Bunny crafts are a favorite for this time of year as they explode onto the world for a month or two and then disappear. Making a cute bunny craft for Easter time is the perfect way to push the start of Spring, at least indoors until we wait for the Spring weather and yard cleanup starts.
The best part of this fun Easter craft is that all the supplies can be purchased at the Dollar Store.
The Easter Bunny Before
Dollar Store decor is adorable for little ones, all those bright colors and glitter, but for an all-adult home not so much. If like me you are hesitant to try dollar store decor I suggest giving it a try. Instead of skipping the dollar store for the gift shop, spend a half hour seeing what you could makeover. The Dollar Store and Dollar Tree and both improving their selection of seasonal decorations every year. Their bunny templates are a great starting point for different craft ideas. At least check it out, your wallet may thank you.
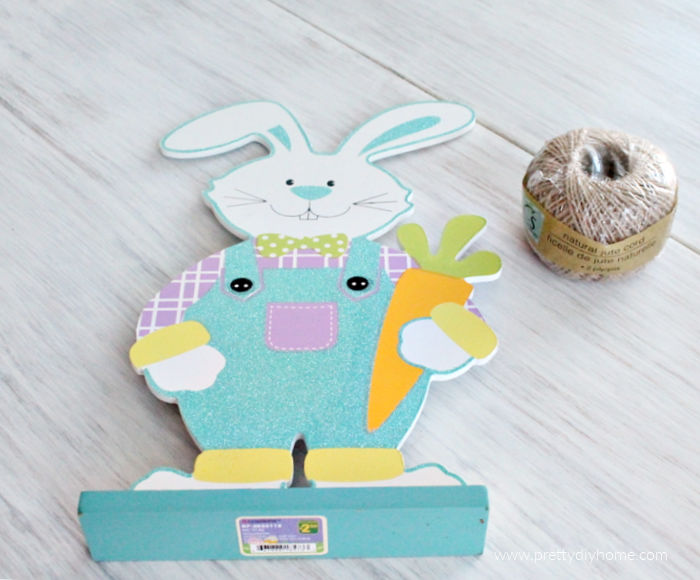
I thought he was seriously cute, but too bright for my taste. Besides a wood bunny, you will need a few basic supplies you can likely find at the dollar store.
Easy to Make Twine Wrapped Wooden Easter Bunny for Cheap!
Supplies Needed
- Dollar store twine (297-foot ball)
- Soft green moss
- 2 Different green-blossomed stems
- 6 Small fabric tulips
- Plain Paper gift tags (I pkg)
- I also used some white leftover paint for the base.
As always if you have any little bits of faux leaves, or tiny blossoms, don’t buy and use what you have. If you have a faux carrot it can replace the flowers if you want. Of course, the colors of the flowers don’t need to be the bright green I am obsessing over this year
Step One – Choosing the Dollar Store Wooden Easter Bunny
The first thing you need to do is purchase the right wooden Easter bunny. When purchasing the Easter bunny look for a nice large one. This one is 13 inches tall, I also checked out the shape and picked one that had the basic outline shape of a rabbit, with nice individual bunny ears. Notice the bunny doesn’t have a large Easter egg middle or cut-out wording we need to work around. Finally, choose one with a built-in stand if possible. Alternatively, you could grab a Dollar Store frame glue the stand to the back of your bunny, and then wrap the twine around both.
For this cute bunny, I began by cutting off the carrot stems.
Once you have the bunny template trimmed and cut to the right shape, this is an easy enough fun Easter craft for older kids to do. As long as they are old enough to use a low temp heat gun, I think this is a great Easter craft for them to enjoy.

The leaves could have been wrapped, or covered with a faux carrot instead, but I wanted to use flowers. I cut the carrots off using a hand saw in a couple of minutes.
Next using whatever white paint you have, paint the stand white. You can use cheap craft paint for this, but I saved the extra cost of paint by using leftover white paint. I made a mistake and forgot to do this step before adding the twine. It is easier to apply a coat of paint now. Let dry.
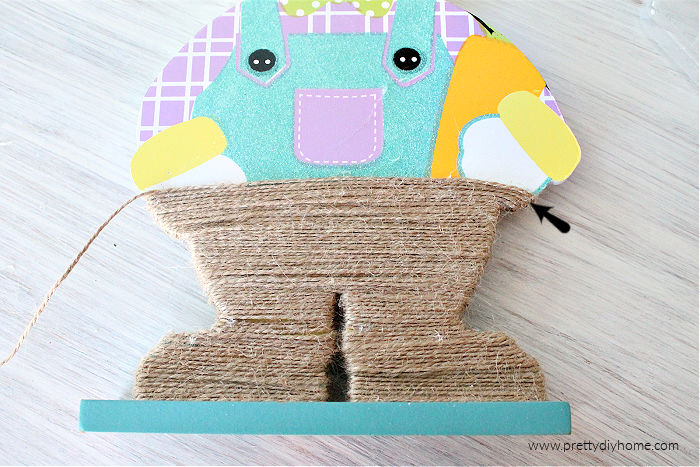
Step Two – Wrapping the Wooden Easter Bunny in Twine
Begin by wrapping the odd-shaped parts of your Easter rabbit. I began with one foot, attaching the twine with hot glue, then wrapped it up to the top. As the whole twine ball won’t fit between the two feet, I cut off 12 feet of twine to work with for each foot.
While wrapping your rabbit keep an eye on the edge surface, you want it covered with twine as well. For the upper portion of the shoes, I folded the twine and attached it with a dab of hot glue so that the twine covered the edge without shifting upwards to the narrow areas. It had glue showing but I will cover that with the shoelace and flowers.

For the feet apply hot glue to the back side every couple of wraps. In this area, I applied the glue to every couple of wraps so it stays straight and you can see the shoe form. To finish the foot, trim off any leftover twine and glue the end bit upwards so that it will be covered with the twine on the body. Repeat the process with the second foot.

Once the feet are done, start at the end of each ear, and wrap towards the main portion of the head. Again be aware of the edge and apply glue to the back of the bunny.
Wrapping Twine around the Body of the Easter Bunny
Beginning at the bottom attach the twine starting at the back with glue. Carefully wrap the twine as straight as possible around the rabbit. I applied my glue at the edge of each wrap.
One side of this bunny has a folded arm, so the “hand” portion I wrapped upwards to cover glued it and then wrapped around the body.
Step 3 -Adding Flower Accessories to DIY Easter Bunny Craft
Yeah, the fun easy party, use any of your creative ideas for this part. But this is what I did.
Your rabbit will now be very plain, and dare I say a bit boring. Like the brides on TV, let’s have some fun “jacking” Easter bunnying him up.
You don’t need the flower stems just the little blossoms.
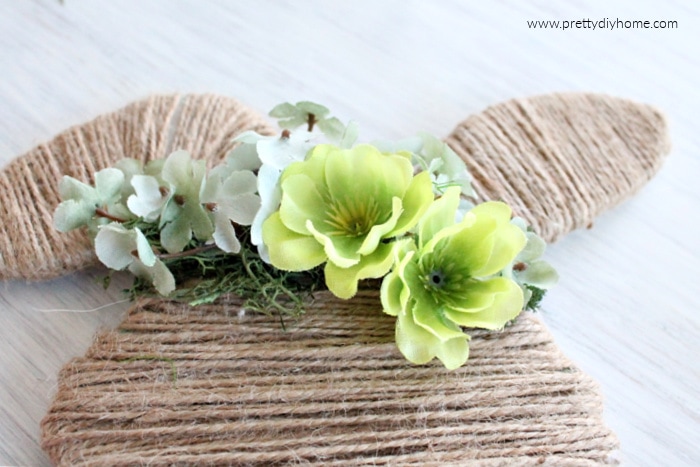
Begin by adding moss, and small background flowers to cover the top like a floral crown.
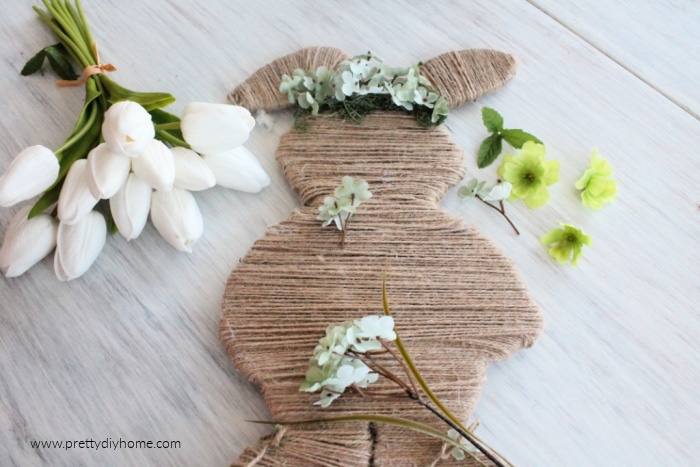
Next, remove the background blossoms from the stems and totally cover the moss with them.
Add the larger blossoms to one side as a focal point and glue them in place.
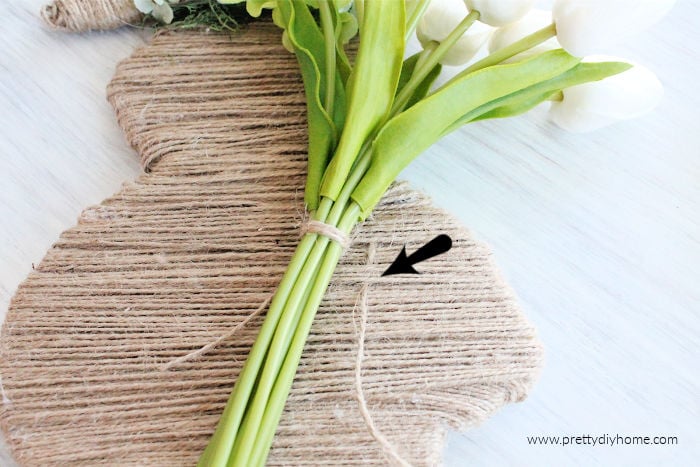
Attaching the Faux Spring Flower Bouquet
I did not glue the tulips to the Easter bunny. Instead, tie the flowers together into a bundle. Then using twine weave it through the front and tie it around the middle. You never know if you will want to keep any dollar store ornament for a year or two, but you can always reuse florals.
Take a second longer bit of twine and tie the top of the bouquet around the neck of the bunny. Knot it in the back where it is hidden.
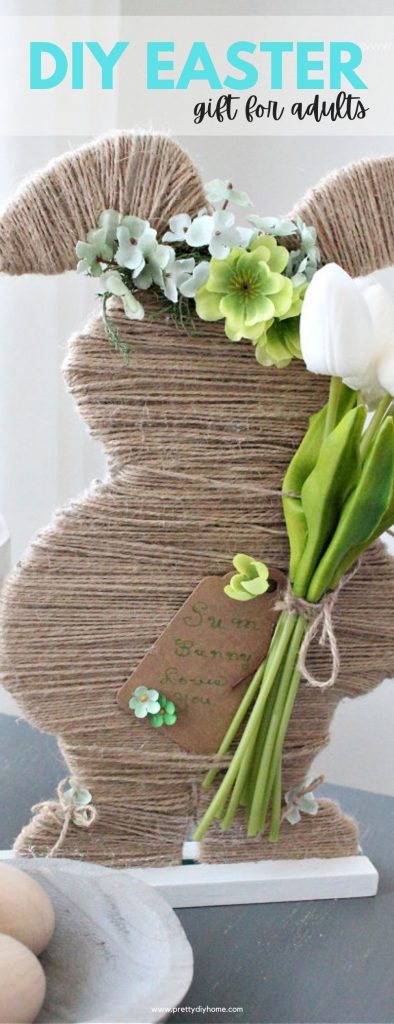
DIY Easter Gift Idea with Optional Name Tag
This DIY Easter Bunny is created as an easy flower delivery for a loved one. Turn it into a DIY Easter Gift by adding a simple tag. I added a plain brown tag with the wording “Some Bunny Love You” Fresh tulips are always nice to have, but if you want to share a floral arrangement that lasts a bit longer, this DIY Easter Bunny gift is a great option. I know this Grama would love it, and hope your loved ones would love it as well.
Here is the DIY Easter Bunny as part of my neutral Easter decor.
This cute Easter bunny is now sitting on our dining room side table, but I think he’d be wonderful in the kitchen.
This sweet bunny goes so well with a little Easter basket filled with eggs and a purchased faux lamb chocolate mold.

Other Easy Easter Bunny DIYs to Try
Here are some other easy Easter Bunny DIYs you may enjoy creating.
Bunny Topiary Decoration for Spring
You likely saw the Dollar Store wall hangings I created these from. This is a simple easy-to-do weekend Easter craft idea for Bunny Topiaries you can create to match any Easter decor theme you already may have.
DIY Wood Bunny
If you’re wanting a larger Wooden Easter Bunny, check out these step-by-step instructions for making this wood bunny. The blog post includes a free Easter bunny pattern you can download to get started.
That’s so clever, he was cute before but not maybe something a grown up would want to add to a pretty spring display. This is such a great idea. Thank you for sharing with us at Handmade Monday 🙂
Clever idea for turning an otherwise tacky bunny into one with such lovely farmhouse charm. Love it! Pinned 🙂