Painted Jars with Transfers for Vintage Storage
I have been seeing lots of painted jars on Pinterest, but none of them included instructions, just a pin image. Most of them only had a small transfer added to the lid, and it never felt like enough to write an entire blog post about.
I have been learning how to bid at auctions, and as it turned out, an auction mix-up left me with a bunch of jars I didn’t really want (and missing the Medalta bowl I actually did want). But at least now I have lots of useful jars to craft with.
I wanted to paint them in a soft buttermilk yellow for spring. Since I didn’t have the right paint on hand, I headed to the store to pick some up.
While I was there, another customer was buying transfers for a window. I was curious and asked her about it, and she assured me it worked really well. That little conversation was all I needed, so I decided to try her method and share it here with you.
Choosing Glass Jars for Your Painted Jar Project
There are all sorts of old, unused jars that you can pick up very inexpensively. Although they aren’t usually valuable antiques, the ones with original matching graphics can be worth quite a bit more. I prefer to leave those as they are and sell them instead of altering them.
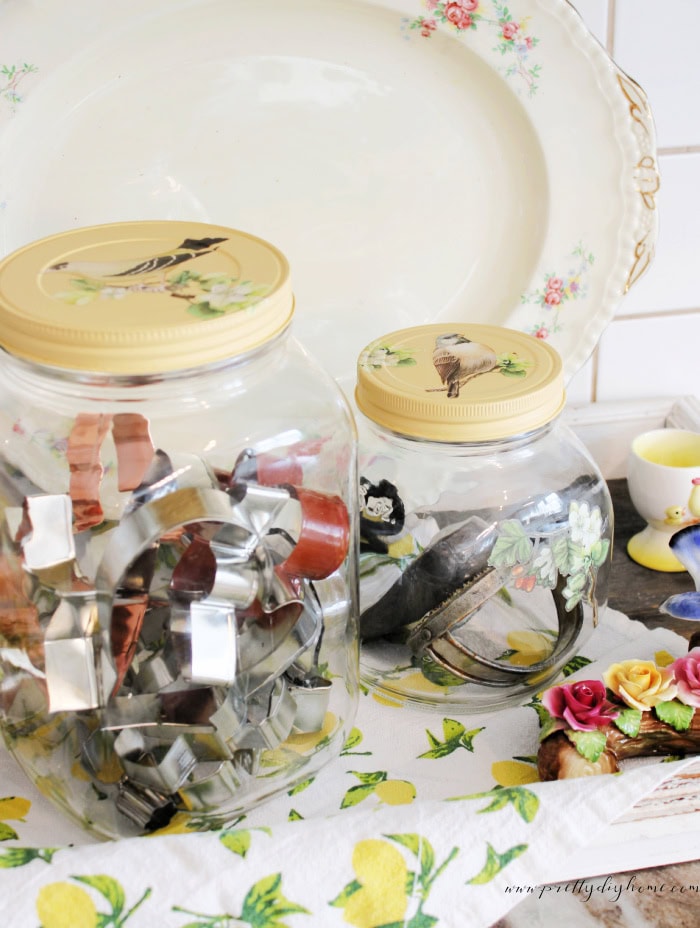
For this project, I wanted a coordinated set, so I chose two jars with a very similar shape, even though one is larger and one is smaller.

When choosing jars for storage, I suggest looking for ones with openings wide enough to fit your hand inside, along with metal lids. I also made sure mine didn’t have any raised details or embossing on the glass. Smooth glass makes the transfers much easier to apply and gives a cleaner, less cluttered look.
Supplies Needed for DIY Painted Jars
- Glass jars with metal lids
- Fusion Mineral Paint (buttermilk color or similar)
- Zinsser 123 (for sealing rust on lids)
- Decorative rub-on transfers
- Sandpaper (medium grit)
- Rubbing alcohol
- Soft cloth or paper towel
- Small plastic scraper or transfer tool (Dollar Tree works great)
- Scissors
- 1-inch paint brush (a small dollar store brush works)

How to Make Painted Jars with Transfers
Step 1: Prepare the Jars for Painting
My jars were dirty and dusty, so I started by giving them a good wash with warm water and dish soap.
Next, I sanded the lids. You could see a bit of rust coming through, so even though Fusion Mineral Paint doesn’t necessarily require a primer, I chose to seal the lids with one coat of Zinsser 123.
Step 2: Paint the Lids
Once the primer was dry, I painted the inside of the lids with two coats of a soft buttermilk-colored Fusion Mineral Paint, letting each coat dry thoroughly. Once dry, I painted the top side with two coats of paint.

You’ll want to make sure the lids still fit after painting. I let mine dry overnight before testing them.
Simply screw the lids back on, and if you notice a bit of paint rubbing off inside the lid, that’s completely fine since it won’t be visible.
If the lids feel tight or won’t screw on properly, just give the inside of the lid a light sanding and try again.
Most of the jars I saw on Pinterest had distressed lids, which is a really pretty look. I chose not to distress mine, though. I prefer the fresh, clean finish, and I think over time they’ll naturally wear in all the right places anyway.
Step 3: Apply Transfers to the Lids
Now that the lids are painted and dry, let’s move on to the transfers.
Choose small transfers that fit nicely on your lids. I used two bird designs along with a few of the extra flowers from the same sheet.
Cut out your transfers. They don’t need to be perfect, but trim away any parts you don’t want, like extra branches or background details so they don’t accidentally get transferred onto your jar.

Before applying them, place the transfers on the lids with the white backing still attached to test your layout.

Once you’re happy with the placement, remove the white backing and begin applying the transfer using a small plastic tool. Gently rub over the entire design, especially around the edges and any small details, while holding the transfer in place with your hand.
Because these transfers are small, they’re very easy to work with and a great option if you’re new to using them.
After the main design is applied, add any smaller floral pieces. You can even wrap some of the edges slightly over the side of the lid.

When you’re confident the transfer has fully adhered, slowly lift the top sheet away, making sure the design stays in place as you go.
Repeat this process for the second jar, then move on to decorating the glass if you choose.
Step 4: Apply Transfers to the Glass
They actually looked very nice with the plain, clear jars, but I wanted to test the glass transfer, so I went ahead and added them.

When applying transfers to glass, take a minute to clean the surface first. Wipe the jar with rubbing alcohol and let it dry completely. I gave mine about 15 minutes just to be safe.

After that, apply the transfer the same way as you did on the lids.

Painted Jar Ideas for Storage and Organization
So now I have two very pretty jars to use, and at first I wasn’t entirely sure what to do with them.
I have an ever-growing collection of small vintage kitchen gadgets that I use for decor, so those are all going into one jar. The other jar is perfect for my collection of vintage cookie cutters.
I also considered a few other ideas. They would work really well for Hubs’ ever-growing collection of pens, or even for storing things like washi tape or double-sided tape.
Of course, these jars would be just as useful in a craft room. You could use them for sewing thread, buttons, bits of lace, or small paper embellishments I’ve collected from my Temu orders.
And of course, they would make really sweet gift jars filled with treats, baking mixes, or small handmade items.

How to Care for Painted Jars
I was told that sealing these with something like Mod Podge isn’t necessary, and after trying it myself, I agree. Fusion Mineral Paint already has a built-in top coat, so the painted finish is quite durable on its own.
The part to be a little more careful with is the rub-on transfers. I would avoid scrubbing these jars and just wipe them clean instead.
If you like simple vintage ideas that are both pretty and practical, don’t forget to pin this for later.

For now, I’m keeping these jars on the counter for spring. I love the little birds on the lids this time of year. Later on, they can be tucked into the pantry and will still add a bit of vintage charm to my otherwise plain shelves.
DIY Kitchen Countertop Organizer
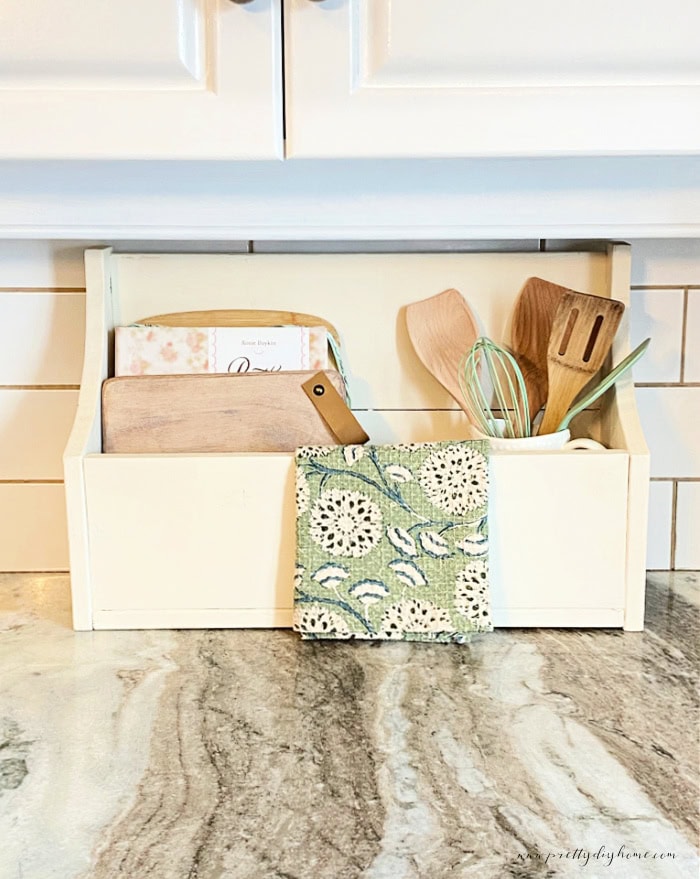
If you like having everyday tools within reach, I also made this simple DIY kitchen countertop organizer that works in a very similar way.

DIY Dutch Tulip Crate
For something more decorative, I also used a glass jug in this DIY Dutch tulip crate to hold branches and seasonal stems.