
DIY Pallet Christmas Trees for Outdoors
Wood Pallet Christmas Trees in Two Sizes and Paint Finishes
I am showing you how to make rustic pallet wood Christmas trees in two different sizes. DIY pallet Christmas trees have been around for a while and look so chic and festive for Christmas. Put one on your front porch as a backdrop, or place a pair of them in your front yard. However you choose to use them, they are handy to have, easy on the wallet, and simple to make. These two pallet Christmas trees will be the perfect addition to our front yard holiday decor, surrounded by white branch light trees.
It was so nice to make these pallet Christmas trees in July, outside in the warm backyard, instead of in November, bundled up and freezing in the garage. The neighbours must have wondered what we were up to, but it was a fun way to putter along together outside.
Where to Find Pallet Boards
Hubs found these pallets by asking his old employer at a concrete factory. You often see them for free on Facebook Marketplace. They disappear fast, but make a note of the location and ask again a couple of weeks later. You can also check Reddit or ask around locally. Drive through your local warehouse or industrial area, and you’re likely to find some just by asking. Liquor stores, hardware stores, and grocery stores are good sources, especially if you’re a regular customer.
Step 1 – Dismantling Wood Pallets
Like any pallet project, the first step is dismantling the pallets. We began with three free pallets, dismantled them, and salvaged all the wood we could. Some of the wood is unusable, so three pallets are a good idea.
Instead of prying each pallet strip off individually, cut the two ends off the pallets first with a jigsaw, circular saw, chop saw, or hand saw. Cut across the pallet just inside the nails and crossbar. Then, using a hammer and/or pry bar, carefully pry off the center of each pallet strip.

Flip the pallet over and do the second side.
By cutting the pallet, each pallet strip will be about 36 inches long, which is more than long enough for the width needed for the tree shape.
Looking at the pallet picture, you can see some of our pallet boards were narrower at about 4 inches wide, while the rest, shown at the bottom, were about 5 inches wide. Once we had the pallets dismantled, we stacked the boards according to size. The 5-inch boards will become a taller tree, and the 4-inch boards will make a smaller tree.
The number of pallets you need depends on the type of pallet and the condition of the wood. Cracks, missing pieces, and other damage can make some boards unusable. You will need 2 to 3 pallets to make both trees. We saved every piece of wood and used the shorter pieces of the pallet slats for the top of the tree and the longer, better pallet slats toward the bottom.
Step 2 – Cleaning Pallet Strips
No one knows where the pallets have been, and ours were incredibly dusty and dirty. We began by laying all our pallet boards out on the lawn and pressure washing them with clean water. We let them dry, flipped them over, and did the other side. For the final drying, we lined them all up on their ends along our fence.
Now that we finally have our wood ready and organized, let’s start the fun part.
Large Seven Foot Pallet Christmas Tree for Outdoors
Pallet Wood Tree Supplies
- 3 wood pallets
- Circular saw or handsaw
- Hammer
- Pry Bar
- Tape Measure
- Mitre saw
- 3 – 2 by 4s. (we used two plus some cut-off pieces we already had)
- 80-grit sandpaper and a sander
- 3-inch screws, a drill, and a screwdriver
- A little brown wood stain for the trunk, tree stand, and optionally the pallet strips
- White paint, paintbrush, rag
- Air nailer, or small nails.
Step 3 – Cutting Pallet Wood to Length
Let me begin by showing you what the wood looks like once it is cut. It makes the project much easier to visualize. I drew this pallet tree pattern for Hubs, with all the cut lengths marked on it.

As I said, we made the tall tree with 5″ wide pallet strips, and one board per section.
Start with the bottom pallet strip. Cut the lower edge to 36 inches and the top edge to 30 inches. On his mitre saw, Hubs said the angle ended up being 31.6 degrees. If you are using a circular saw or jigsaw, measure and draw your cut line first, then make the cut. You don’t need to be perfectly accurate because the boards do not fit together at the corners. The tree is meant to have a rustic look, and I think all Christmas activities are meant to be more about fun. Although we made these easy DIY pallet Christmas trees as a couple, the whole family could easily help with this Christmas project.
Once the first end is cut, you can either flip your board and cut the second side, making sure the angle runs from the long edge to the short edge on both sides, or you can adjust your saw’s angle and slide the pallet strip into position for the second cut.

Once you get the first pallet strip cut, you can use the first cut edge as a guide for your next cut.
For the second pallet slat, cut the lower edge to 34 inches and the top edge to 28 inches. Repeat this pattern, reducing the length as you work up the tree until you reach the top piece. The tree ends with a point, and the bottom piece is cut to 4 inches.
Here are the patterns showing each individual pallet strip cut length,

Step 4 – Finishing the Pallet Wood
Once the wood is cut, you need to refinish the pallet strips before attaching them to the tree trunk. The steps you take will depend on the final look you want.
For the finish on the tall tree, our pallets were very grey, and I wanted to show lots of the wood. To get this finish, begin by giving all the pallet strips a quick sanding with 80-grit sandpaper to remove any slivers.
Then I stained the pallet strips with the natural stain we had on hand. If I was going to purchase stain, I would have chosen a golden brown colour. The sanding and stain helped remove some of the greyish tones from the wood

Even using the simple clear natural stain made the texture of the wood stand out. I wish I had a slightly darker stain on hand, but using leftover supplies is always a good plan for a rustic project.
Let the stain dry, turn the boards over, and stain the other side.
Dry Brush Paint the Pallet Wood
To dry brush the wood, use whatever white paint you have handy.
Dip the very end of your paintbrush into the paint. Lightly wipe most of the paint off onto a rag. Then apply the paint to your wood with a very LIGHT touch. Brush the paint on wherever you like, making sure to leave plenty of the wood showing. Vary the amount of paint from board to board, using a little more on one and less on the next, to give the tree a rustic, weathered look.
Step 5 – Building the Frame and Stand
Decide how tall you want your tree to be. Then cut the 2 by 4 to form the tree trunk. Ours is cut to 7 feet.
Cut two pieces of wood 15 inches long and two pieces 13 inches long.

Stain all the wood brown. We had a little bit of walnut stain left, so we used that.
Using 3-inch screws, predrill the holes and then screw the two 15-inch pieces across the 4-inch side of the 2 by 4, front and back.
Then attach the two 13-inch pieces across the two 2-inch sides of the 2 by 4.

Now your trunk and stand are done. The final part is assembling the tree.
Step 6 – Attaching the Branches to the Christmas Tree Trunk
It’s much easier to do this with two people. One person holds the cross piece and adjusts it, while the second person measures and nails the branches to the trunk.
Start at the top of the tree and place the first piece so the point at the front covers the trunk. Nail it in place.

As you work your way down the tree, the measurements will change. Just make sure the distance on each side is equal. Continue until your tree is done.
Add the second piece and measure from the edge of the 2 by 4 trunk to the point on your branch. When centered, the distance from the trunk to the point will be equal on each side.

Second Tree- Shorter Five Foot Pallet Christmas Tree
I don’t know why exactly, but I find this little smaller tree beyond cute. It is painted more white than the first tree is, and of course, it’s smaller. We used smaller 3 1/2″ wide wood strips from our pallets for this tree, so instead of reducing the width of each cross piece, we reduced the width on every second piece.
Step 1- Cutting Pallet Wood to Length
I felt it would look funny cutting each narrow pallet slat a bit shorter, so instead we’re building the smaller tree in sections and cutting two boards at a time.
Hubs lined up two pallet strips together, measuring the top and bottom according to the pattern. I helped hold the two boards together while he cut them two at a time, reducing the number of cuts by half.
The downloadable pattern shows each section with a top, middle, and bottom measurement. If you feel more confident cutting the boards individually, you can do that instead.
The bottom of the lowest section is cut to 34 inches, the middle is 32 inches, and the top is 26 inches. Each section is 4 inches shorter than the one below it. If you need more specific information, I give the exact measurements on the pattern.

Step 2 -Finishing the Pallet Wood for the Small Tree
The finish for the smaller tree uses much more white paint than the taller tree.
Once cut, sand all your pallet boards with 80-grit sandpaper to remove slivers.
I did not stain the wood at all. Instead, I gave it a thicker coating of white paint, still using the dry brush technique.
Pay attention to where the paint is on each cross piece. I made sure there were heavier patches on both sides of the tree so that, although it looks patchy and rugged, it doesn’t look off-center.
Once the tree is assembled, sand off bits of paint with the 80-grit sandpaper.
Step 3 – Building the Base and Trunk
The base for the small tree is made exactly like the taller tree, except this one is five feet tall. Hubs cut the 2 by 4 trunk to five feet in length. Everything else was done the same way for both trees.
Step 4 -Assembling the Small Pallet Tree
The small tree is assembled in sections, two boards at a time. Start at the top, fit the section edges together so they are flush, and measure from the edge of the 2 by 4 trunk to the outside point of the bottom pallet strip, making sure the distance is equal on both sides.
The small tree has seven sections, or 14 boards. As you work your way down the tree, the measurements will change. Just make sure the sides are the same distance from the central trunk. Continue until your tree is done.
Step 5 – Final Finishing
You may want to finish your tree with matte-finish polyurethane. We skipped this step as I don’t care if our tree ages and gets a little more rustic. This may be a mistake. But I will let you know how it works out.
This year I left the Christmas trees more rustic and natural looking, I think it would be a great idea to add some Christmas lights on the tree as well. If you want to light your Christmas trees, I suggest attaching little hooks or nails to hang the lights from.
Storing the Pallet Christmas Trees
To store your tree, remove the screws, place the stand pieces in a bag, and lay the tree on its side. Because the tree is meant to be rustic, I think you could store it outside. Ours are stored in the rafters of our unheated garage.
I hope you try to make your own Christmas trees; I adore mine, and it was a fun way to spend an evening outside in the yard.
Other Wood Christmas DIYs
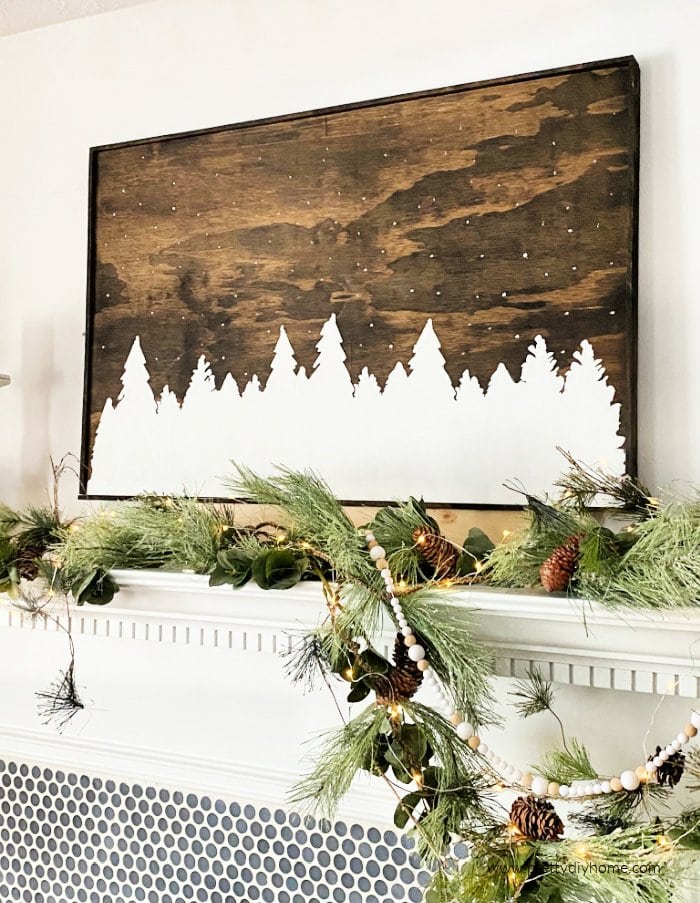
DIY Wood Sign for Christmas Decor
You can make this dramatic rustic DIY wood sign for Christmas and use it throughout the entire winter. It’s so cozy making me think of a sparkling white forest.

Wood DIY Christmas Tree Surround
This rustic Christmas Tree Surround can be made in an afternoon, and then stained. I have used it on a couple of different Christmas trees and it always adds to the rustic charm of the Christmas tree’s theme.
thank you so much for these instructions! very helpful!