Refinishing Hardwood Floors: What to Expect (Real Timeline, Dust, and Tips)
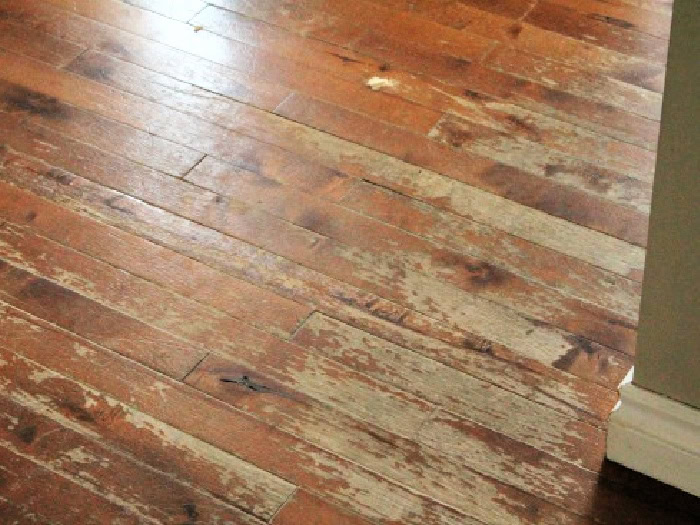
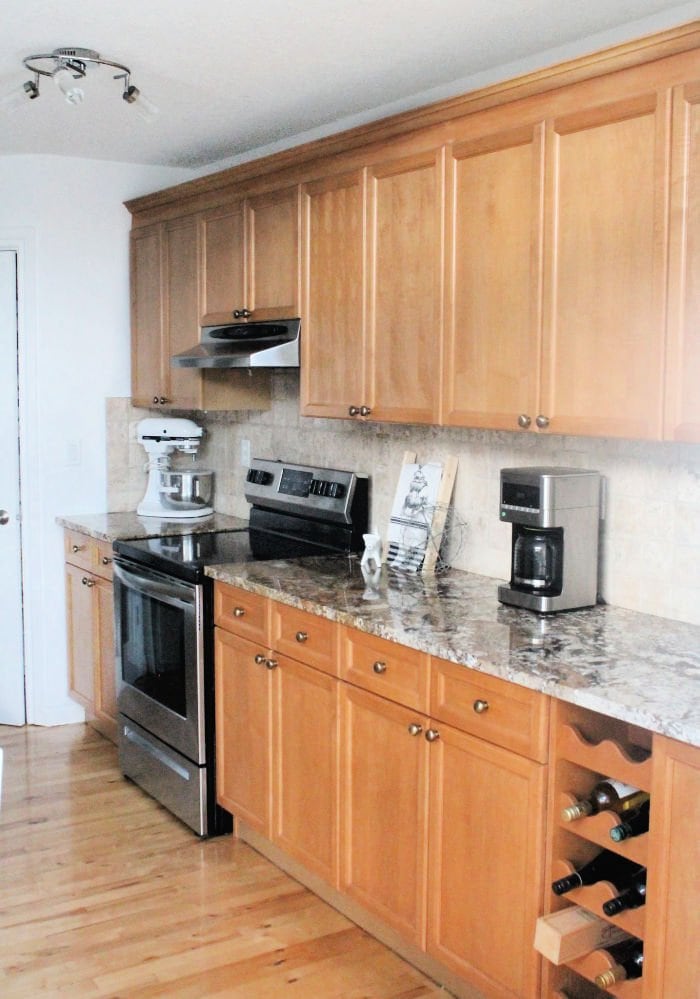
Our entire main floor is hardwood, including the front entry and kitchen. When we bought the house, the floors were in very rough shape. The previous owner had already deducted the cost of replacing them, so we decided to live with it for a while before tackling it.
We knew right from the start that this wasn’t going to be a simple fix. There was no “pour a bottle and wipe it away” solution for the kind of damage we had. It was going to need sanding or replacing. Because we learned so much from our experience, I thought I’d share it with you.
Can All Hardwood Floors Be Refinished?
Not all hardware can be refinished, so before getting started, it’s important to check what type of hardwood flooring you have to work with.
Older homes often have solid hardwood, which is typically about 3/4 inch thick. Floors like this can usually be sanded and refinished several times over the years because only a very thin layer is removed during sanding.
In newer homes, many floors are actually engineered hardwood. These have a thin layer of real wood on top, with a plywood or composite core underneath. Depending on the quality, that top layer can be quite thin.
Lower-cost flooring often has less real wood on the surface, which means it may not handle sanding well at all. In some cases, it can only be lightly refinished once, or not at all.
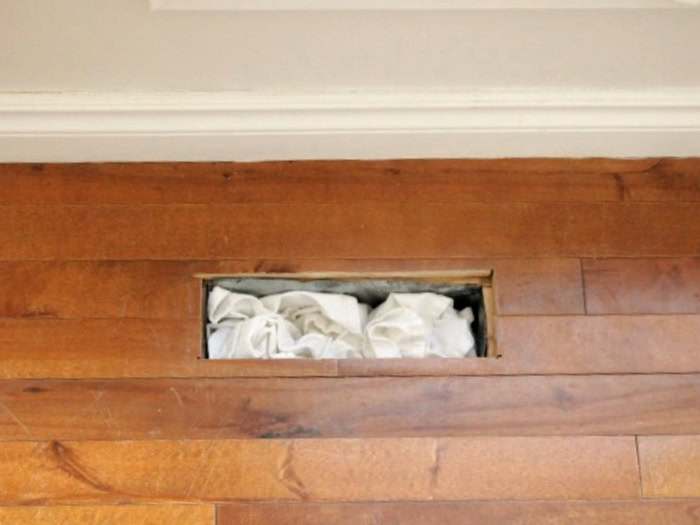
A simple way to check your flooring is by looking at an exposed edge, like a floor vent or register. This gives you a clear view of the layers and helps you see how thick the real wood surface is.
In our case, we were lucky to discover our floors were solid maple, which meant they could be refinished without any issues. It’s also helpful to know this before contacting flooring companies, as we had a couple suggest replacement when it wasn’t actually necessary.
Once we confirmed the floor could be sanded, we looked into the labour involved and the cost of renting sanders and supplies. But the real deciding factor was finding a finish to handle our big dog. The most durable type of finish for homes with dogs is a professional-grade product that isn’t available to homeowners. When I saw them working with it and the fumes from it I knew it wasn’t a DIY.
The Preparation
Before the refinishing started, we had to completely clear the main floor. That included all the furniture, including the fridge and stove. It’s a bigger job than you expect,
You also need to decide whether to remove the baseboards or leave them in place. We chose to leave ours and repaint them afterward.
If I were to do this again, I would remove all the baseboards first. The flooring company said we could leave them in place, so we did, but they ended up getting marked up during the process and we had to repaint all of them and replace a few. It would take an extra day of prep to remove and label everything so it can be put back properly, but in the end, I think it would be worth it.
All closet doors need to be removed as well, so the floors can be sanded right to the edges.
Prepare for Dust
When we put in the basement, Gyproc, you could write your name inside the entertainment center on the top floor. Gyproc dust was EVERYWHERE, and it took a couple of months and a furnace/vent cleaning to get rid of the problem.
This time, we prepared for dust as much as possible ahead of time:
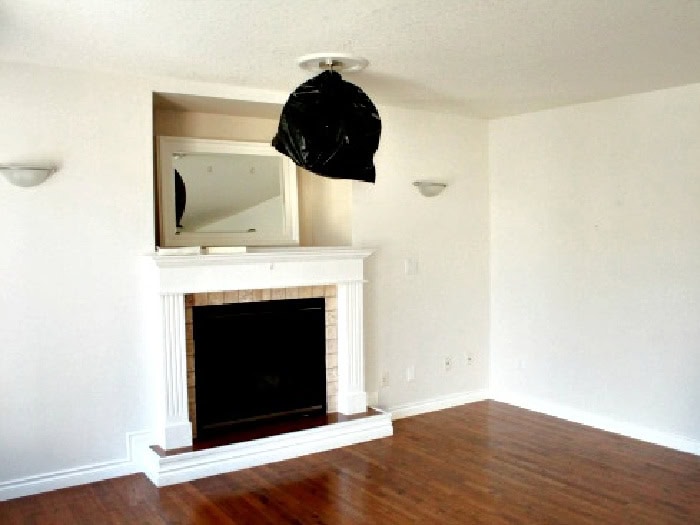
We removed the drapes and artwork, and covered all the main floor light fixtures using garbage bags and zip ties.
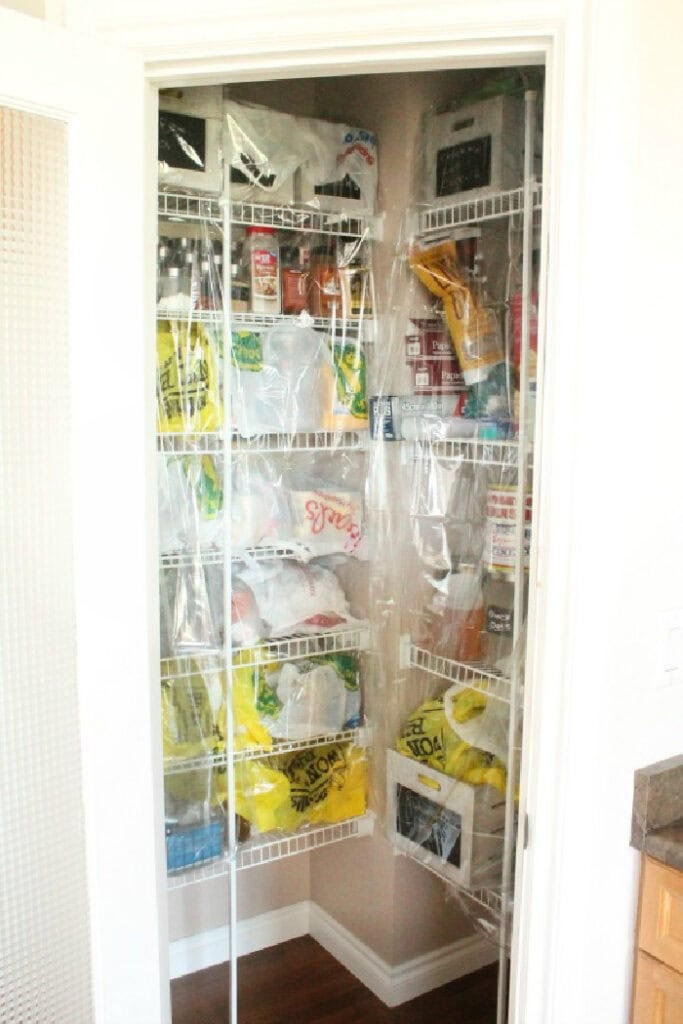
Moving everything in the pantry would have been a nightmare, so we took a shortcut and covered both the shelves and the contents. Dust wouldn’t hurt sealed items, but cleaning everything afterward would be a huge job. We wrapped the pantry items in plastic bags first, then covered the entire closet with large plastic tablecloths for extra protection.
We also stuffed the heat vents with rags, sealed off the rest of the house with tarps and command strips, and closed every door we could.
Once all the preparation was done, we were ready to move on to the actual refinishing process. It was a fair amount of work, but still only a small fraction of the hassle we went through cleaning up the Gyproc dust.
Choosing the Colour
Turns out our floors were a good quality 3/4 inch solid maple. Even though they were extremely worn, the sanding process only removes about 1/16 of an inch from the surface, so they were still in great shape to refinish.
This was great news, and at $2.90 a square foot, it was about a quarter of the cost of installing new floors of the same quality. On Uptown Hardwood’s recommendation, we skipped staining and left the wood colour natural. It allows the grain to show through and keeps the room feeling light and airy.
The Refinishing
Uptown Hardwood sanded all the floors using three different grades of sandpaper. This was our first glimpse of the natural wood underneath all that damage.
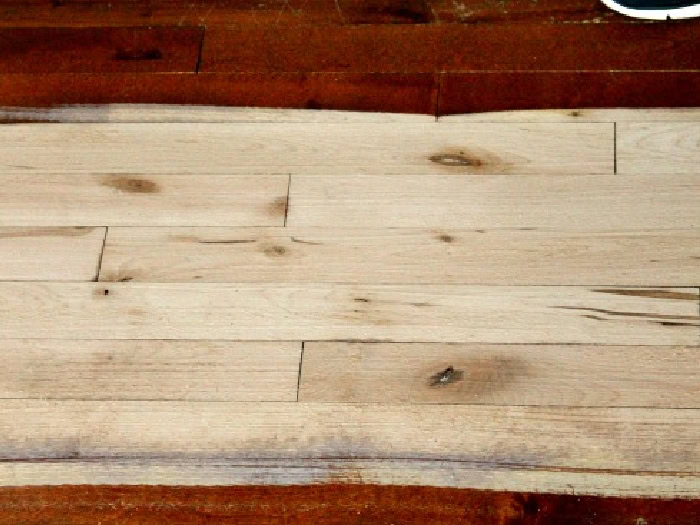
After sanding, they applied a fill coat for the cracks between the hardwood, followed by a sealer coat, and left them overnight to cure.
The next day, the refinishers returned to apply two coats of a more durable, professional-grade moisture-cure polyurethane I mentioned before. Unlike regular polyurethane, it only comes in a glossy finish, but that was the look I wanted. It’s also much more durable and less likely to scratch, which made it a great choice for us, especially with a dog in the house. It cost about $150 more, but it was well worth it.
Once the coatings started going on, we made sure not to stay in the house. The fumes are very strong, even with proper ventilation and the masks the contractors wear.
We were able to come and go while they were sanding the floors, but we didn’t stay long because of the noise. Once the refinisher started applying the coatings, we stayed out completely. The fumes are incredibly strong, so you should plan to be out of the house for at least a couple of days while the coatings are applied and the air clears. We ended up spending two nights in a nearby hotel while the house aired out.
We were able to come and go while they were sanding the floors, but we didn’t hang around. If you want to stay home during this process its noisy but not too bad. Once the refinisher starts applying the coatings, don’t be in the house. The fumes are incredibly strong, even with the masks they wear. We spent two nights in a nearby hotel while the house aired out.
Letting the Floors Cure and Harden
We were told it was safe to walk on the floors after about 24 hours, and to move furniture back in with scratch guards after 48 hours. However, the finish takes about a week to fully cure.
Hubs was the only one walking on the floors in the first 48 hours, and even then, we were careful. It’s important to give the coating time to harden, especially with the dog, so we waited a full week before moving the furniture back. We survived living between the upper floor and the garage.
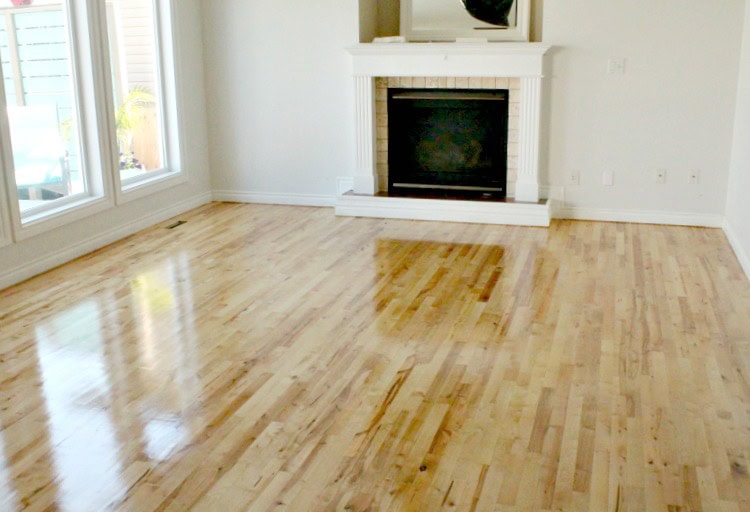
We are so excited about our new floors; we absolutely love them. We did not ask for or receive a discount or payment from Uptown Hardwood Flooring in Edmonton, but I highly recommend them. They were honest, and our floors look wonderful without having to replace the wood.
Now that all the furniture is out, we’re taking the opportunity to paint the ceilings and walls this week.
More Home Projects to Try
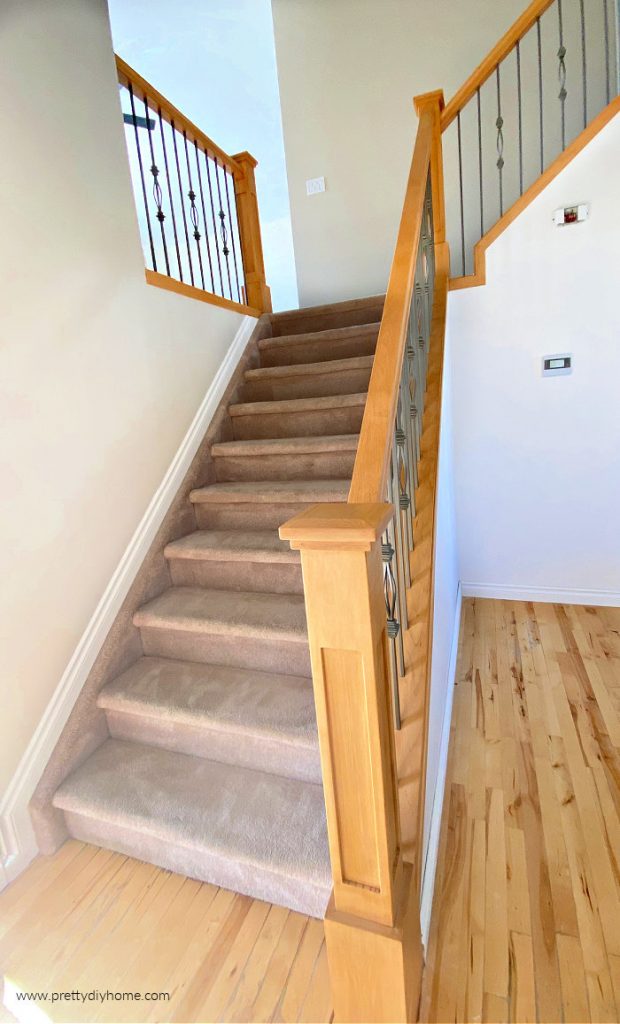
Staircase Makeover DIY or Contractor
If you’re planning a larger project, you might also find it helpful to read about our staircase makeover DIY or contractor project, where we handled the preparation ourselves and hired out the installation.
How to Refinish Honey Oak Cabinets
Light honey oak is a great finish for an open space home. I am so glad that instead of painting, we decided to refinish ours. You can see how we did that in my post on refinishing oak cupboards.
Thank you for providing such detailed information and guidelines.
Congrats Leanna! Your post was featured at the #BloggingGrandmothersLinkParty. See here: http://grammysgrid.com/blogging-grandmothers-link-party-18/
It looks like the preparation was tons of work for you. But, the end result is gorgeous. It’s so nice that your floors were solid maple. They look great, now. Thank you for linking up at #BloggingGrandmothersLinkParty. I’m sharing your link on social media.
Carol (“Mimi”) from Home with Mimi
WOW!! Your floors look amazing!! I love the colour you chose! You must be so happy with them!!
What a beautiful makeover Leanna! I love the light color and can’t wait to see the room all finished!
It looks beautiful! Great tips! Seems like quite an undertaking with all the dust and moving everything, but well worth it I’m sure.
Wow, what a stunning transformation! I love the color you chose too. Perfection!
The floors are gorgeous! Love the color you chose. Thanks for sharing at #BloggingGrandmothersLinkParty.
Wow, that turned out beautifully! Thank you for sharing at #BloggingGrandmothersLinkParty.
That floor is just gorgeous. I certainly do hear you on the length and difficulty of some of these projects. I am in a similar loop with my kitchen.
Hi Elise: So true eh. Kitchens and bathrooms are the worst, they take just so much work. I look forward to seeing your kitchen update.
Your floors turned out gorgeous! You’ll be soo glad that you went with no stain and a lighter color. The laminate in our rental is dark and it shows everything!! I’m constantly sweeping or vacuuming. That said, we have laminate throughout and I love having no carpet. 🙂
Funny you mention that. Our upstairs is all carpet and I love it for the warmth but the stairs are such a pain to keep clean especially with the big puppy, he travels up and down all day.
Thank you for commenting on the colour because I thought it was a bit of a risk not to stain them. I love how light they are now though so I am glad we left them natural.
I LOVE hardwood floors. Yours are gorgeous!
Thanks for sharing #BloggingGrandmothersLinkParty.
PS – I would have whined about moving the china cabinet and all of its contents as well!
I have always loved all things glass, especially stemware. I was scared to break most of it so I took them upstairs 3 at a time. Good for the leg muscles or so someone told me lol
Your floors look fabulous, Leanna! I’ll keep this company in mind should I hear of anyone locally who wants to refinish their wood floors. Don’t work too hard painting this week – it’s so beautiful outside.
Thanks Marie. Its just so gorgeous outdoors finally. I feel so energized when the sun shines.
That’s a brilliant way to cover your pantry Leanna! And the finished product is beautiful, congrats!
Thank you Randi. I still cringe when I think about the gyproc dusting. It took me days to wash everything off, it literally got everywhere.
The clear finish was a bit of a risk but I really like how light they are now. Thanks for commenting.
How beautiful Leanna. I’m so glad you could save the original floors, they look stunning after all that sanding. We’re planning on doing our wooden floor upstairs ourselves sometime soon, so your tips are going to come in real handy.
Great stuff Michelle. Just be really careful with the fumes. Leaving the windows open just isn’t enough to ensure its safe. I am so glad to have them done finally. Was well worth the wait.
Leanna those floors look amazing. I need to do this sometime soon with my son’s apartment. The floors look horrible and I am really dreading it. Haha!
It took me four years to convince Hubs as we thought it could be 10K. Given the work the products and all the different sanders and supplies you need I think its better to hire someone as long as they are honest.
Thanks I am glad to hear you like them Mary.
This came at just the perfect time. One of the rooms in my house is in need of a redo and I was wondering, dreading, exactly what that entailed. Not too bad and your floors are amazing!
Thanks Jax, the only thing is the fumes. No way could you sleep the first night with them in the house. They are so strong.
Thanks for the comment. I love the clear finish but its good to know others agree.
Leanna – the floors look gorgeous! It sounds like there was an extensive amount of work involved, but apparently it will be well worth it. Years of beautiful floors, without a lot of maintenance. I am sure this post will be helpful to others with wood floors.
I was shocked he only needed to take off 1/16 to 1/32 of an inch of the wood to fix them. I think its important to know that because refinishing is so much cheaper than replacing. The refinisher said our floors could be done 6 more times no problem.
The floors look wonderful. It was worth the inconvenience to you and now you get to paint. But it will look lovely when it is all done.
Hi Debra: It is just so great that we didn’t need to replace them, and I can take pictures without worrying about what the floor looks like. So worth it. Thanks or commenting.