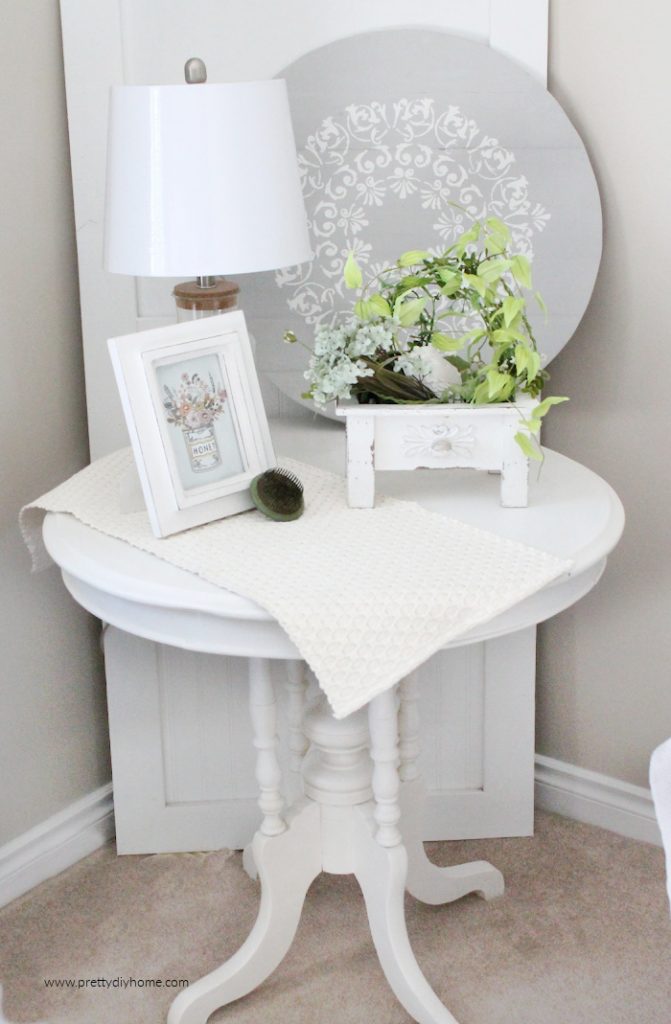
Before and After Nightstand Makeover
Bleaching Wood Nightstand DIY
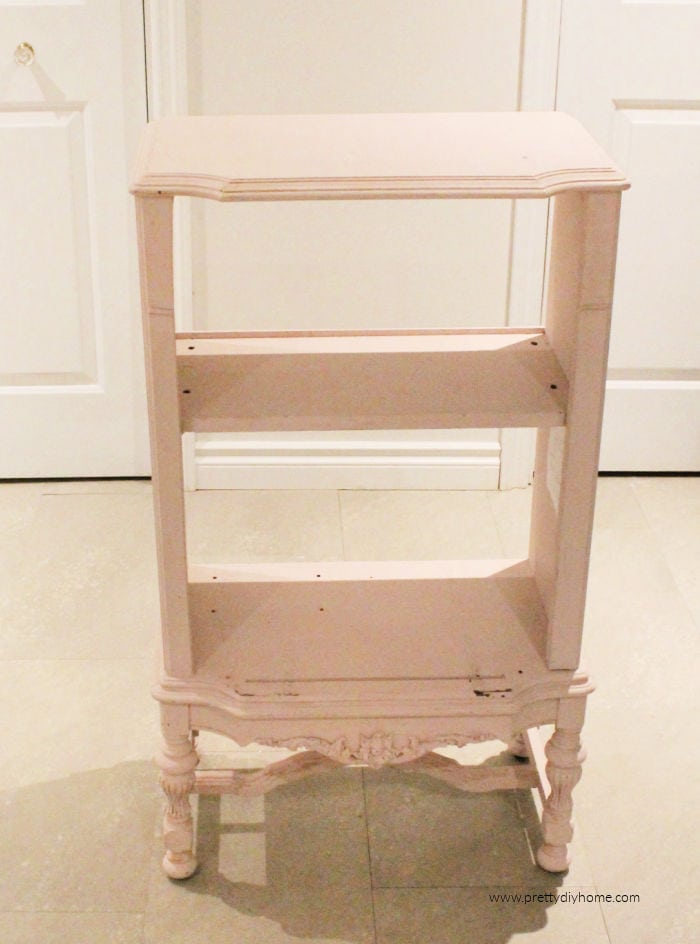
A night stand makeover is so worth the time and effort, whether your fixing a thrift store find, or like us, updating and repurposing a piece you already own. We are redoing our bedroom on a tight $500 budget and we currently have one nightstand. We chose an antique cabinet I had previously chalk painted into a lovely printer stand, I needed a night stand more.
This nightstand is really pretty with lovely detailed legs and embellishments, it deserve to be upstairs instead of hid in our too cold basement craft room. The problem was the chalk paint.
How to Strip Chalk Paint to Natural Wood
Can you strip chalk paint to the natural wood? Yes you can! I did not think it was possible, but asked around and checked out Pinterest and decided to give it a try. Surprisingly the process is very simple. But it is work, especially if your furniture piece has lots of pretty embellishments like this blush pink painted printer cabinet has.
The process is pretty typical of furniture stripping with a little extra effort in crevices etc. Let me show you all the steps Hubs took in stripping this piece down to a natural wood surface. Full credit goes to Hubs on this makeover, he took the challenge while I was working on the computer beside him.
Supplies for Night Stand Makeover Stripping
Paint Stripper
Wire Brush
Large paint brush ( low quality is fine)
Small artist brush (low quality is fine)
120 and 150 grit sandpaper
Rags
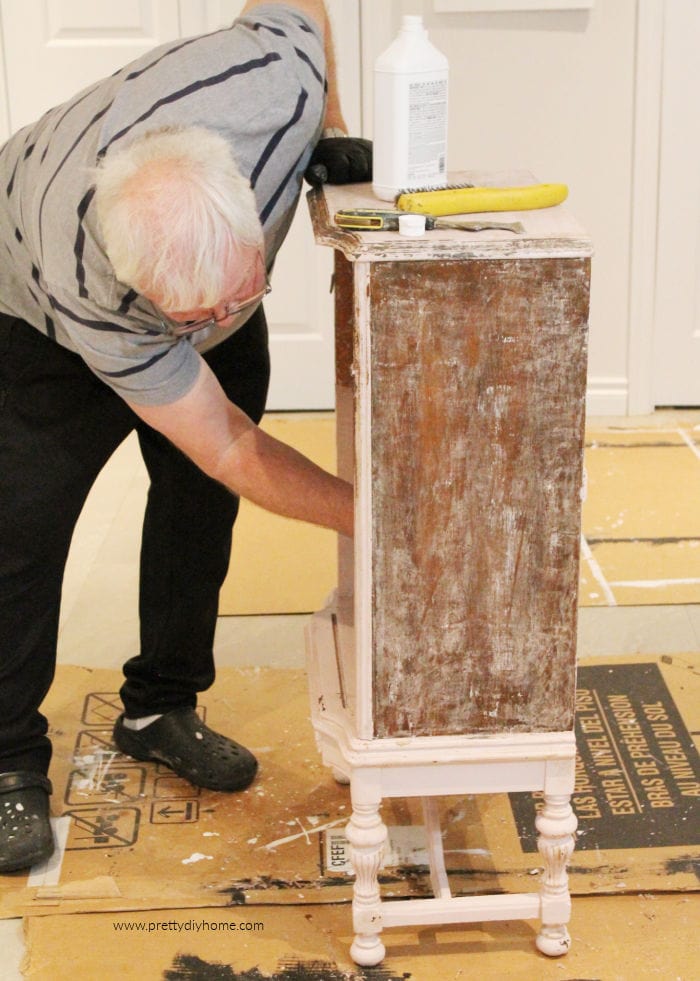
Start with using your favorite regular stripper. I love Citristrip, but I ran out and its unavailable in Canada. Hubs used Heirloom Pure Paint Stripper. It works but has a strong smell. If you have access to Citristrip suggest using it instead.
Whatever stripper you use, brush a thick layer on the cabinet surface. Then cover it with plastic wrap to prevent evaporation. Doing this not only makes the job wayyy easier, it keeps the stripper from evaporating and a little goes much farther. Leave it to sit for an hour, using a paint scraper remove the paint. It lifts right off like regular latex paint, it shocked me that it worked. Yeah.
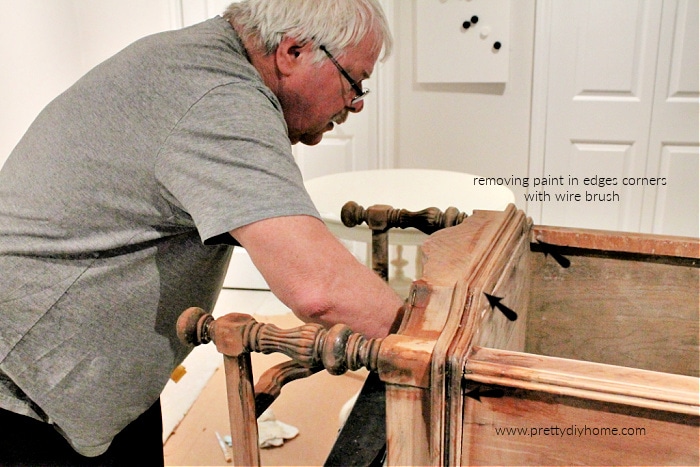
If your furniture piece has curves or embellishments like ours does, use a wire brush to scrape out the small tight areas.
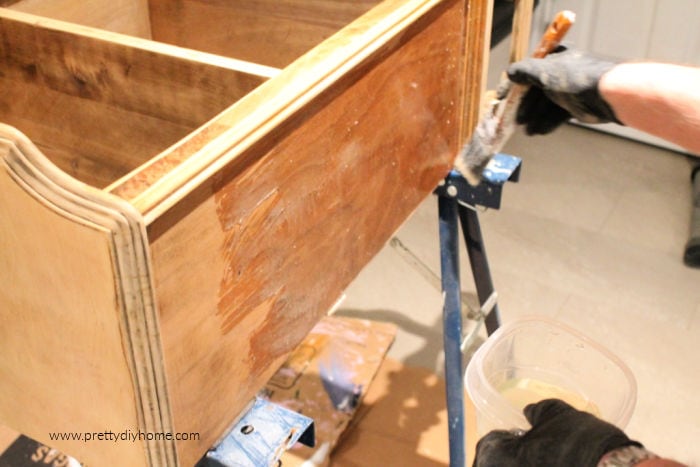
Then dip a paintbrush in more stripper and use the bristles to wipe any extra bits of paint out of the way. I like to use little dollar store paint brushes for this.
Turn your dresser over and repeat this until all the furniture sides have been done.
Once he stripped and scraped the furniture the first time, the majority of the chalk paint was gone, but he repeated the process once more to finish removing any chalk paint and the majority of the original antique finish.
Again, using a wire brush dipped in stripper work off the remaining little bits of paint. When the brush is full of little paint bits wipe it on a rag redip and keep working. This process is repetitive and took him a couple of hours. Like I said its not hard, but it is work.
By this time all the paint has been removed, but their were still darker shades especially in the curved and grooved areas. Hand sand all surfaces with 120 then 220 grit paper. For the grooves we folded the sandpaper into little sugar pack sized bits s and then worked the edges and corner point into the tiniest of spaces.

Once it was all done, wipe it down with a damp cloth. Its sanded and ready for staining, or bleaching.
Night Stand Makeover Bleaching
Night Stand Makeover Supplies for Bleaching
You will need a Brand Name Household Bleach, and an old brush, that’s all.
I did lots of reading on various ways to bleach wood, unfortunately in Canada none of the products were readily available so we ended up just painting on regular strength household bleach. It did lighten the wood significantly, but not the very dark corners. We brought out the sand paper and got to work.
Place your side table on plastic covered with cardboard to protect the flooring. I suggest the garage for this. Make sure your work area is very well ventilated.
Paint the wood with the bleach avoiding runs. Let it soak in overnight. Sand with 150 grit sandpaper, and rebleach until the wood is light enough.
This is how our wood looked once bleached. I like the light parts, but not the dark spots. I would have preferred to remove the dark spots, but it was too stubborn, so I used two tbsp of water and one tbsp of Fusion Paint picket fence white and lightly white washed it.
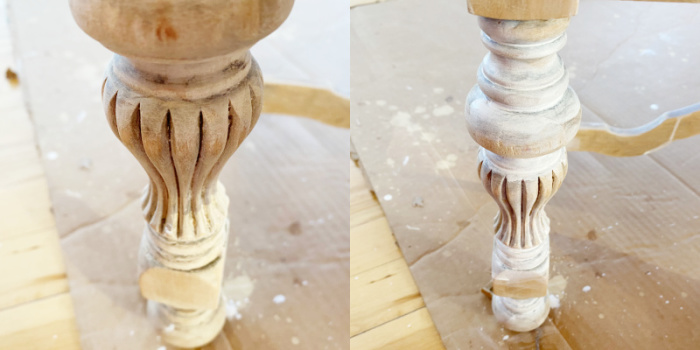
Once the corners were white, I used 150 grit sandpaper to distress off any white paint I didn’t want.


Other Furniture Makeover Tutorials
Furniture makeovers are always the cheapest way to furnish a home. Our budget requires it and I think it makes our home not only pretty but one of a kind.
Round Farmhouse Table Refinish for End Table
This little table was a great find, but like the night stand it needed some love. Here is how we did our Round Farmhouse End Table DIY project.
Hoosier Cabinet Restoration
This hoosier cabinet restoration was a much larger project than the night stand makeover, but so worth it. It is a very primitive piece of furniture and I love the story it told me as I was stripping it down to its bones.