Dollar Tree Easter Bunny Topiary Decorations
Make the cutest Dollar Tree Easter craft using a simple bunny wall hanging. This bunny topiary decoration for spring is a fun weekend DIY idea you can easily customize to match your holiday decor.
Dollar Tree had some adorable Easter wall plaques this year. I loved them right away. They were smaller than I would normally use for decorating, but they were perfect for crafting and turning into something with a little more height and presence.

How to Make Dollar Tree Easter Bunny Decorations
Bunny Topiary Dollar Store Supplies
You can make these Dollar Tree Easter Bunny decorations for under $15. I already had paint on hand, but you can use any latex paint or Dollar Tree craft paint you like.
- Two wooden Easter bunny wall plaques
- Craft paint or Fusion paint
- Two heavy glass jars
- Screwdriver and paint scraper
- 120 grit sandpaper
- Long BBQ skewers or small dowels
- Florist foam
- E6000 glue and hot glue
- Two Dollar Tree wire greenery bundles
- Ribbon and twine
- Green moss

Step 1: Prepare the Bunny Plaques
Gather your supplies and turn the bunny plaques over. Using a small screwdriver, carefully remove the staples from the back. With a paint scraper, gently remove the metal ears and the original burlap bow.
If a little bit of wood lifts when removing the ears, do not worry. The ears will be glued back on later, and ribbon will cover most of that area.
Lightly sand the front of each bunny with 120 grit sandpaper until smooth.

Step 2: Paint the Bunnies
Paint the front and back of each wooden bunny, making sure to cover the sides and any edges. To prevent drips, I like to paint the back first. That way, if there are any runs, they can be lightly sanded off the back instead of the front.

It took three coats to fully cover the front of my bunnies and two coats on the back.
Paint the metal ears in a coordinating color. I chose a soft sea foam green for a gentle spring look.
While the paint dries, cut your wooden skewers or dowels. Trim one to about 18 inches and the second to about 14 inches. Set them aside for assembly.
Step 3: Make the Bunny Topiary Bases
When purchasing the glass jar bases, I made sure mine were heavy so I would not need to add anything for extra weight.
Remove any labels and wash the jars thoroughly. Let them dry completely.
Place a piece of florist foam on top of the jar opening and cut a square slightly larger than the opening. Slowly carve the foam down in thin slices until it fits snugly inside.
Add E6000 glue to the bottom of the foam and press it into the jar. Fill any remaining gaps with extra pieces of foam so it feels secure.
If you are using a lighter jar or can instead, consider adding something heavier inside before placing the foam to give the topiary more stability.


Step 4: Assemble the Bunny Topiaries
Now that all the prep work is finished, this is the fun part where everything starts to come together.
Using E6000 glue, attach the metal bunny ears back into place. Let the glue fully harden before continuing.
Lay the greenery wreath flat on your table. Insert the dowel from the bottom so it comes up just over halfway through the center opening. Glue both sides of the dowel inside the wreath where it won’t be visible.


Place the bunny on the wreath and make sure the dowel is hidden behind the body. Adjust the placement until everything sits naturally and the support does not show.
Once you are happy with the placement, add a generous amount of hot glue to the top of the dowel and press the bunny firmly into place. Hold until secure.
Add additional hot glue behind the ears and near the legs to keep everything stable. Repeat the process for the second bunny.
Decorating with the Bunny Topiaries
I like using these bunny topiaries when creating a spring arrangement because they add height and interest. Unlike a frame or flat backdrop, they stand on their own, which makes them easy to move around and style.
If you prefer, you can decorate the wooden bunnies and the jar bases before final assembly. I tied a thin white ribbon and twine around each bunny’s neck and around the wreath for a soft cottage look.
I added the same ribbon to the green glass jars to keep everything coordinated.
Finally, insert the dowel into the foam base and press down firmly so the topiary stands straight and secure.
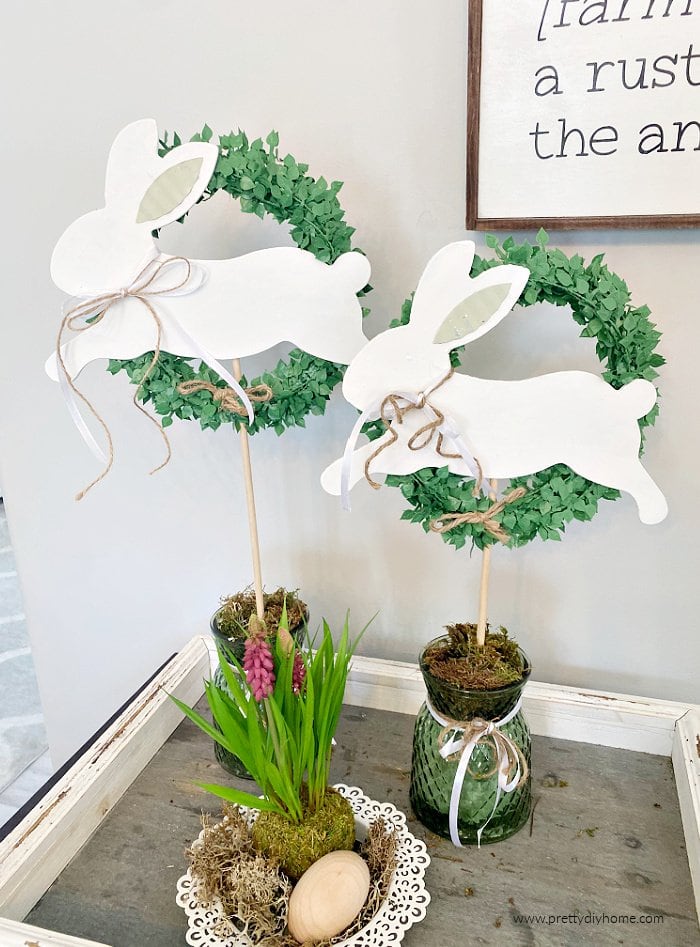
These Dollar Tree Easter Bunny decorations are simple and inexpensive to make, yet add so much charm to your spring decor. It is a unique and unexpected way to use a Dollar Tree bunny that everyone recognizes.
With just a few basic supplies and a bit of creativity, those small wall plaques become soft cottage style topiaries that stand on their own and add height to any arrangement.

Other DIY Easter Decorations to Try

DIY Spring Decor Sign
Using canvas paper and a free downloadable printable, this super easy farmhouse Easter sign can be made in under an hour. It’s a great teen Easter or Spring craft idea as well.

DIY Dutch Tulip Crate
Make this DIY Dutch tulip crate in less than an hour using scrap wood or pallet wood. It’s a beautiful rustic decor piece for Spring and Summer, and is so versatile and strong. I want more of them for our home.

Easy Print and Cut Printable Bunny Banner
A really fun farmhouse Spring or Easter craft is one of my most appreciated posts. The bunny template comes with the designs and colour includes so you just print and cut on cardstock.
They’re adorable, Leanna. The green hoop in the background creates such a beautiful sense of motion. It looks like the bunnies are jumping through hoops of joy.