DIY Pumpkin Bookstack – Easy Fall Craft for Adults
This DIY pumpkin bookstack is an easy fall craft for adults and one of the first projects I am making to decorate for autumn. It is budget-friendly, vintage inspired, and a softer take on traditional pumpkins.
I began by pulling out a stack of thrifted doilies, old books, and fabrics. Together they became the perfect start to a feminine, pumpkin craft for adults on a tight budget.
Vintage doilies always feel so special to me. Someone once spent hours carefully crocheting each delicate stitch, and I can’t help but respect the time and effort it took to create them. The nice thing about this DIY pumpkin bookstack is that the doily is not glued or cut. It simply rests over the top of the books. That way, it can be removed later and reused in another craft or kept as a family keepsake if you prefer.
Easy Pumpkin Craft Tutorial
Supplies
Here is what I used:
- Vintage or thrifted books – choose four in similar sizes so the stack tapers neatly, and make sure the top book is large enough for your doily to sit flat
- Hot glue gun – to hold everything in place
- Cinnamon stick, twig, or small spindle – this will become your pumpkin stem
- Embellishments – flowers, faux leaves, raffia, or ribbons for decorating the top
- One 12 inch crocheted doily – the star of the project that gives it a feminine touch
- Dark coral latex paint and small brush – for dry brushing the edges of the book pages
- Scissors – always handy for trimming and shaping
- Sanding block – to smooth the books once the covers are removed
- Small styrofoam half ball – this anchors the stem and gives your embellishments something to hold onto
- Floral wire – to attach leaves and flowers securely into the styrofoam
You do not have to use the exact same supplies. This is a project where it is easy to work with what you already have on hand. Dollar store finds like paint, cinnamon sticks, scraps of fabric, or even interfacing for rolled flowers can work beautifully. I even picked up my sanding block there. Keeping it thrifty makes the pumpkin even more fun to create.
Step One – Create the DIY Pumpkin Book Stack
Start with four thrifted books in neutral or worn tones. I like them close in size so the stack looks neat, but they do not have to match perfectly.
Tear off the covers and use a sanding block to smooth away any bits of paper left on the spine. If your top book has bold lettering, cut a piece of plain paper to size and glue it over the cover to hide the words.
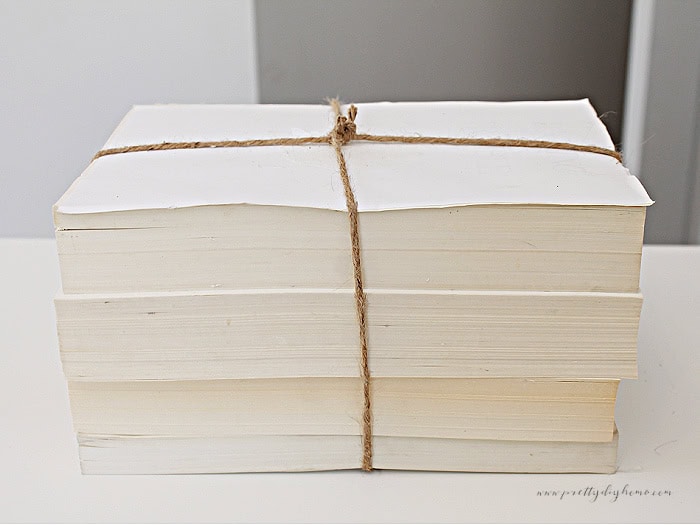
Stack your books with the largest in the middle and the smaller ones toward the top, keeping all the spines facing the same way. To hold the stack together, you can hot glue the books in place, but I prefer tying mine with twine for a rustic, inexpensive option. Use whatever you have handy, such as twine, string, or even raffia.
Step Two – Paint the Book Pages
To give the pumpkin its warm, subtle color, lightly dry-brush paint along the edges of the book pages. I mixed a couple of shades of latex paint I already had on hand to make a soft pinky coral color. I considered using metallic gold, but decided on the coral because it hints that the books are meant to be a pumpkin.
To dry brush, dip the end of your brush into the paint, blot most of it off onto a paper towel, and then drag the brush from the outer edge of the page toward the center. Work your way around all four sides of the diy pumpkin book stack until the edges have just a little bit of the coral color.
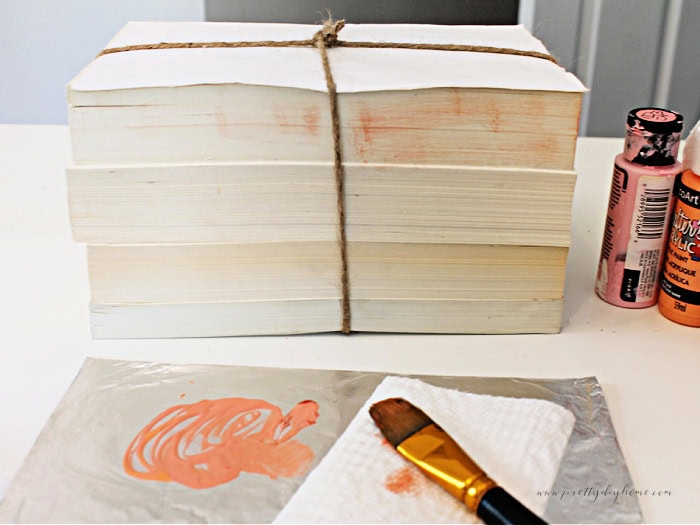
Let the paint dry completely before moving on. This will keep the doily and decorations clean later.
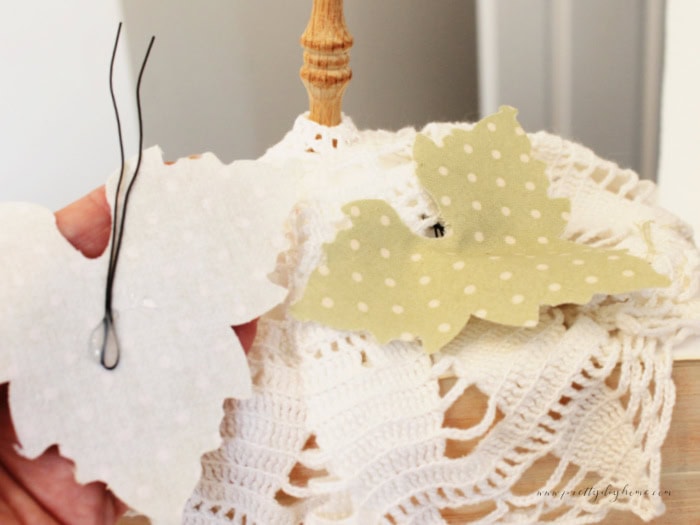
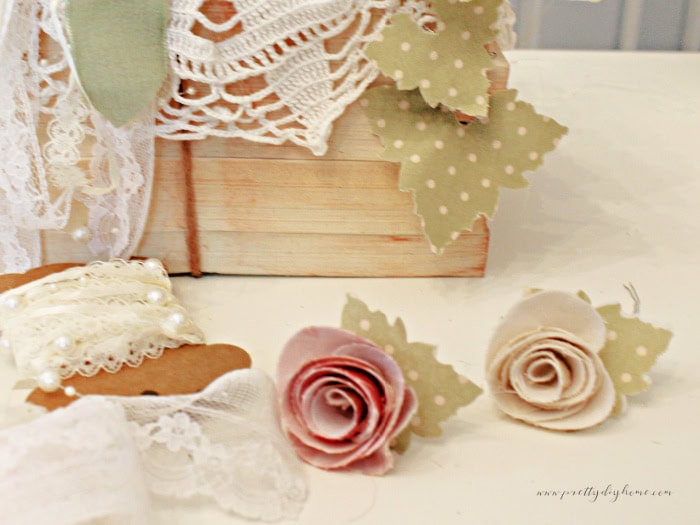
Step Three – Make the Leaves and Rolled Flowers
For a soft and feminine look, I like to add a few leaves and rolled flowers to the top of the pumpkin. You can cut the flowers and the leaves using a Cricut. I wrote a whole blog post about how to make rolled roses. Or you can cut them by hand using my free pumpkin leaf and flower cut files . Alternatively, you can use ready-made flowers and leaves if that works better for you.
Attach a small piece of floral wire to the back of each leaf or flower with hot glue. Once the glue is hardened, each piece becomes a little pick that can be tucked right into the styrofoam. Use the picks to gently tuck and lift the doily, creating pretty folds and curves while also preventing hot glue from getting on the lace.
For the flowers, I used fabric backed with interfacing, then rolled and glued them into simple roses. They do not need to be perfect.
If you don’t have fabric for the flowers, you can use scraps of ribbon, lace, felt, or other bits of greenery for your flower decorations.
Step Four – Add the Stem and Doily
The stem is what turns the book stack into a pumpkin, and we need a base for our flower and leaf picks. To create a base, cut a 2-inch styrofoam ball in half. If you tied your books with twine, make a little dent in the underside so it sits neatly, and the knot can sit inside the dent to keep everything flat.
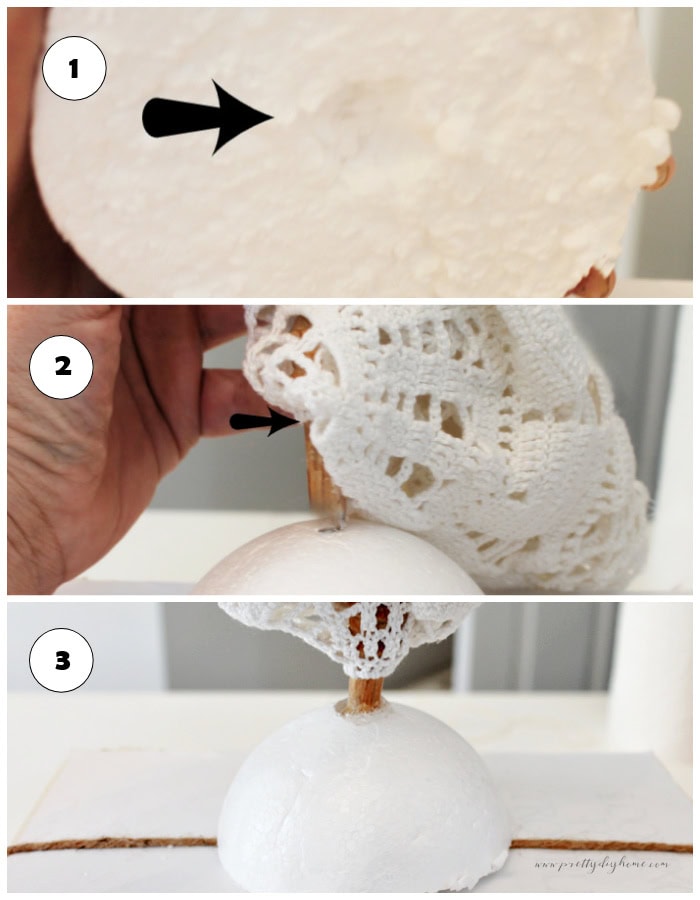
Next, choose what you want to use for the stem. A cinnamon stick, twig, or small spindle all work well. A dried real pumpkin stem will not work here since the base is too large to fit through the doily. If the stem is a little too wide, trim or shave the bottom so it fits through the center of the doily. Push the stem through the center of the doily, then apply glue to the end, and insert it into the styrofoam. Secure the bottom of the styrofoam ball to your book stack, making sure to keep the doily lifted away until the glue has cooled.
Once the glue is set, spread the doily over the top of the book stack.
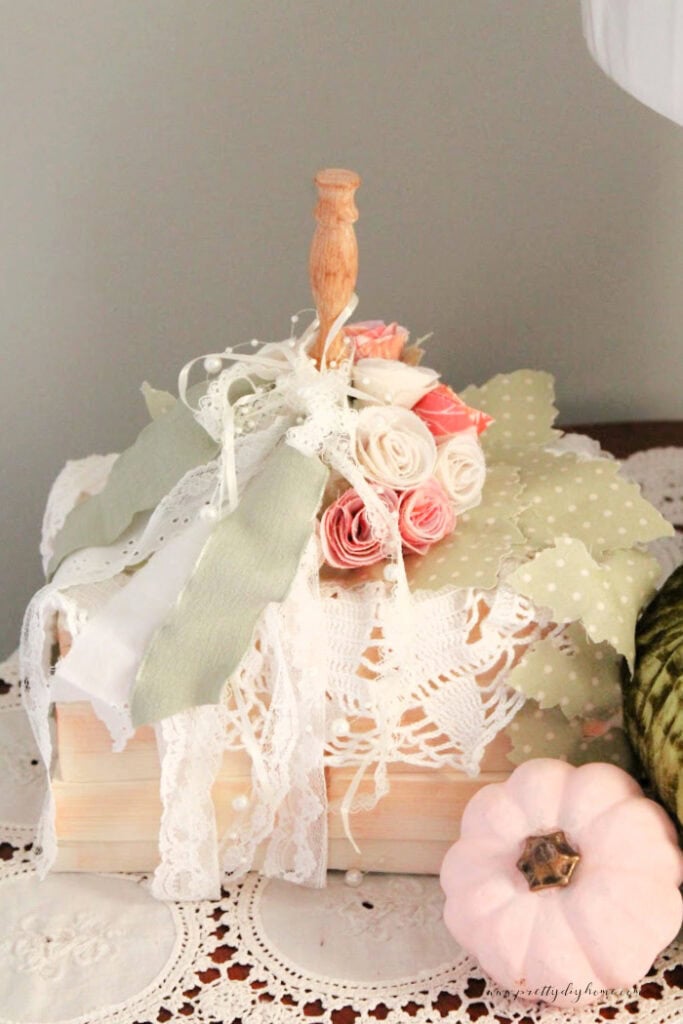
Step Five – Embellish the Pumpkin
This is the part where you can make the pumpkin your own. Start by arranging the wired leaves, tucking some up under the doily to create gentle folds and letting others trail softly over the sides of the stack. A few leaves can even be slipped and glued between the book pages for extra detail.
Next, cluster your rolled flowers around the base of the stem. I made mine asymmetrical with most of the flowers on the right side.
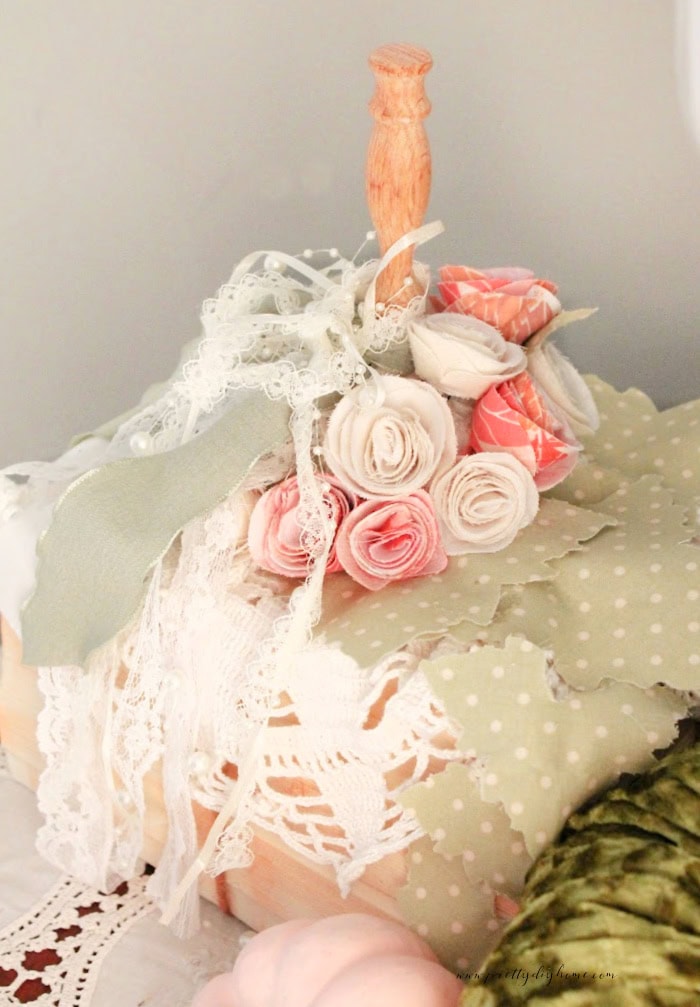
For the finishing touch, tie on some long pieces of lace, ribbon, or raffia and let them cascade down the side of the pumpkin. This simple detail adds to the feminine whimsy and vintage look. My lace is a garage sale find, but you can use ripped fabric, ribbon, or twine as well.

There are no rules here. Use what you have, play around with the placement, and let the pumpkin reflect your own style. (I would have loved to add a vintage brooch to mine.) This pumpkin cost me $2 for the books; everything else was gathered from my supplies. I love the creative challenge of doing it on the cheap. Even if you buy a few new craft supplies, I bet you could make one for less than $5.
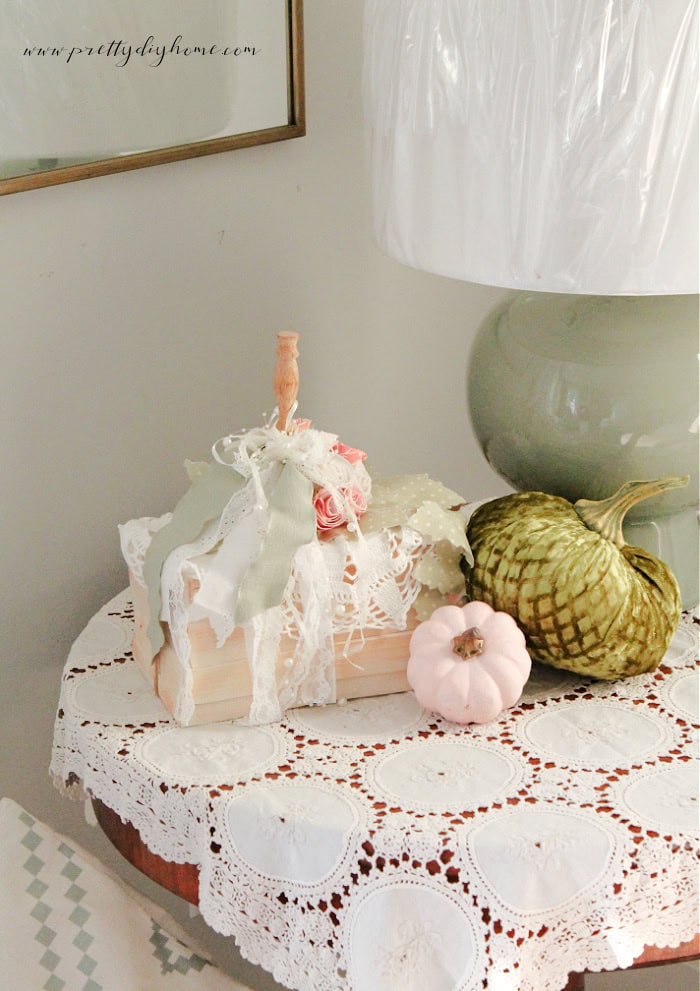
Styling Ideas
This little DIY pumpkin bookstack is just as fun to decorate with as it is to make. Tuck it onto a shelf alongside other books for a subtle autumn touch, or place it on a stand with a lace doily underneath for even more vintage goodness. It looks charming in a tray with candles and pinecones, or as part of a fall centerpiece surrounded by smaller pumpkins and greenery. No matter where you display it, the mix of old books, soft embellishments, and vintage lace will add a homemade touch to your fall decor.
If you love vintage inspired crafts on a budget, this DIY pumpkin bookstack is the perfect project to try. It is simple, cozy, and one of a kind. Do not forget to save it to Pinterest so you can come back to it when you are ready to make your own.

Other Pumpkin Crafts to Try
Pumpkin crafts are such a fun way to be creative. If I can find the time, I make a new design every fall. Here are some other ideas that you may enjoy checking out.

Dollar Tree Pumpkin Craft
This easy-to-do pumpkin diy is made using a Dollar Tree wood pumpkin decoration. I added a free printable bottom in soft plaids to make it stand out.
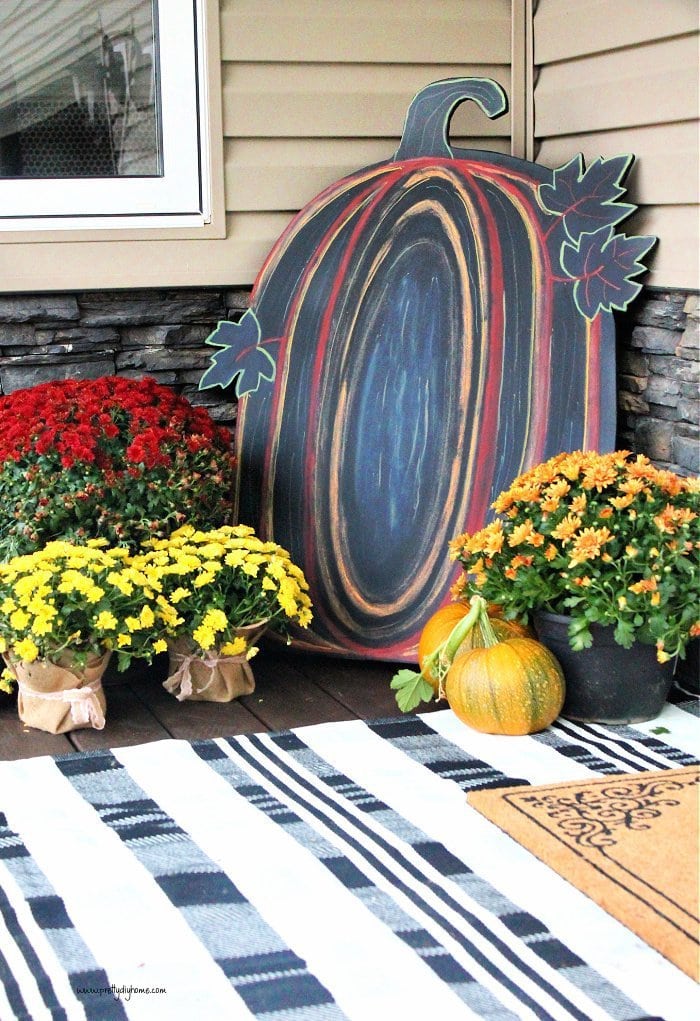
Customizable Pumpkin Chalkboard for the Front Yard
This large wood pumpkin diy is very striking in the dark black, and you can update it for Halloween or any new Fall color themes because it’s made using chalk pens instead of paint.