DIY Vintage Christmas Craft: Wooden Spool Postcard Holders
If you love simple vintage projects, these wooden spool postcard holders are a charming way to display Christmas postcards or old photos. I found a few thrift store thread spools and turned them into warm, Old-World Christmas accents that fit right in with my collection of ironstone dishes and vintage Santa prints. They make pretty little Christmas decorations that you can tuck into any arrangement to add height, color, and a touch of nostalgia.
How to Make Wooden Spool Postcard Holder for Christmas
Supplies You’ll Need
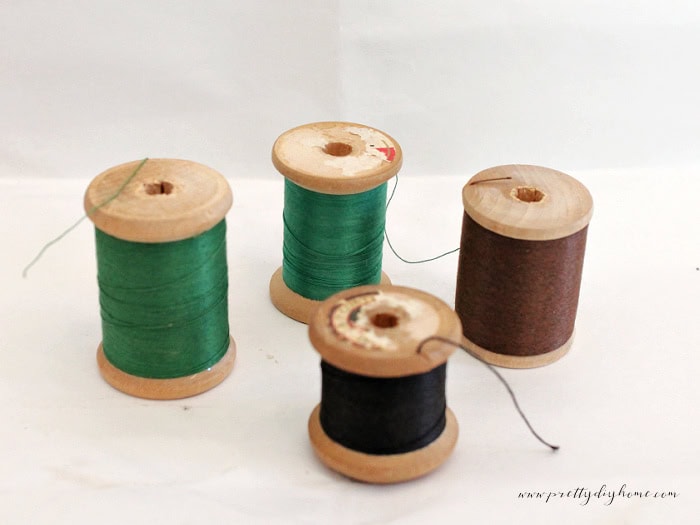
- Wooden thread spools — thrifted or vintage-style
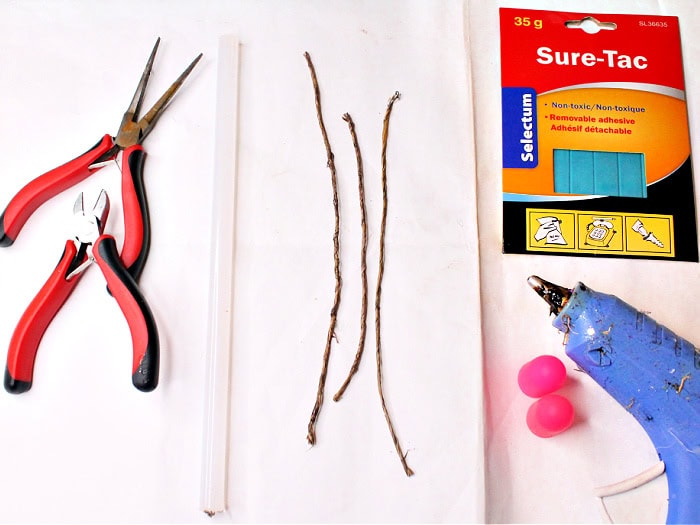
- 18-gauge paper-covered wire
- Dark walnut wood stain and a small craft brush
- Soft cloth or rag for wiping stain
- 120-grit sandpaper or a sanding block
- Poster putty — to hold the wire securely in the spool
- Printable Santa Thread Company labels (free download below)
- Scissors or paper cutter for trimming labels
- Optional: cream cardstock or lightly tea-stained paper for printing labels
- Vintage Christmas postcards — originals, Temu prints, or free downloads from The Graphics Fairy
Step 1 – Prepare the Wooden Spools
Start with a few old wooden thread spools. Give them a good cleaning to remove dust and oil. I left the thread on mine, but you can remove yours if the color doesn’t suit your project. Wipe each spool with a soft cloth and let them dry completely.
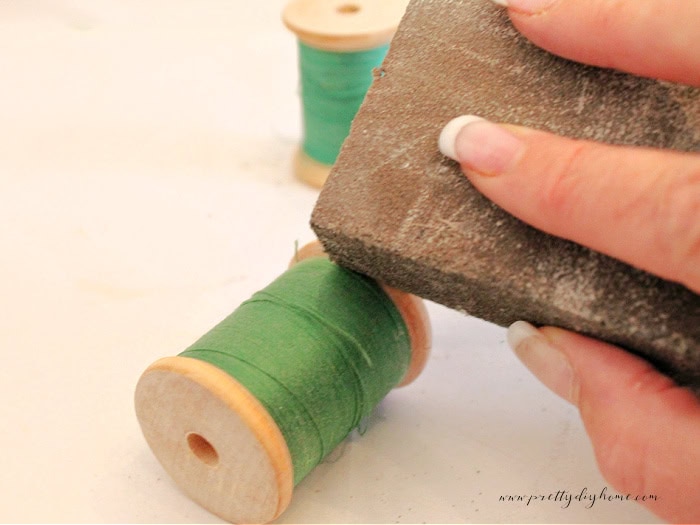
Once dry, sand the spools with 120-grit sandpaper until you reach bare wood. This gives a smooth surface for staining and helps the finish soak in evenly.
Because the thread was still on my spools, I used a small, thin craft brush to apply the stain carefully around the edges, avoiding the thread. I used a dark walnut wood stain to bring back the richness of the grain. Work slowly in sections, brushing along the grain and wiping away excess stain with a soft cloth as you go. I did one end let them dry and then did the opposite end.
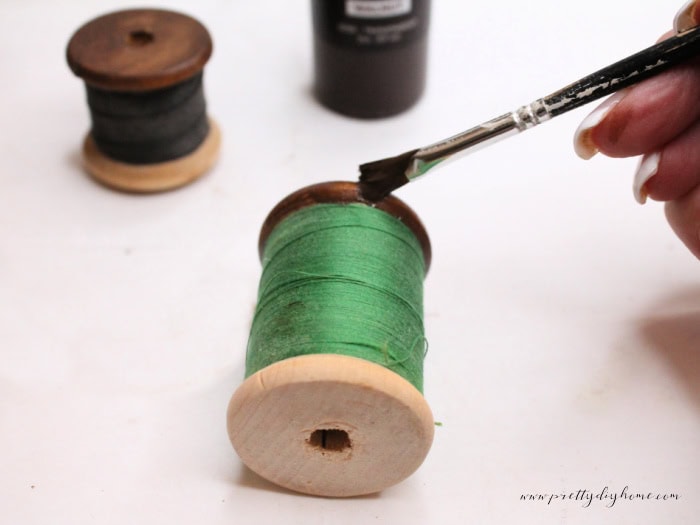
Set the spools aside to dry between coats. I applied two thin coats for a deeper tone and richer contrast against the thread.
Once your spools are stained, you’ll still need to stain the center after the wire has been inserted. Keep the stain handy for that final touch to cover the poster putty.
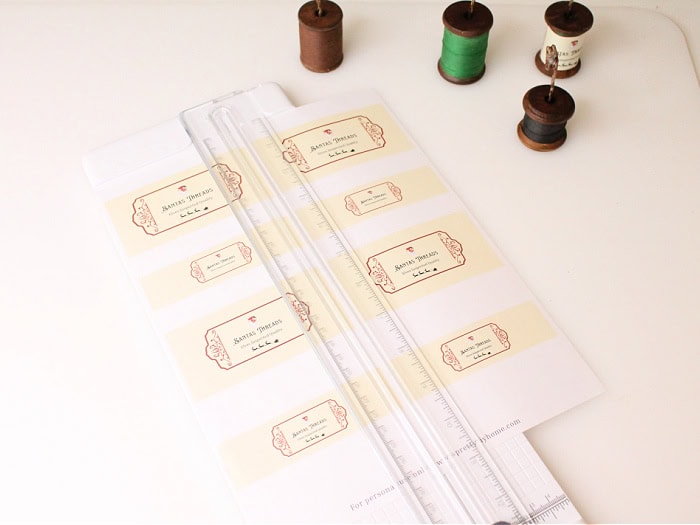
Step 2 – Add the Printable Santa Thread Company Labels
To give each spool a finished vintage look, I designed a Santa Thread Company printable label sheet that includes three different sizes on one PDF page. If you’d like to use them, you can download them for free below.
Print the labels on cream cardstock or lightly tea-stained paper and cut them out. I used both a paper cutter and scissors; either works just fine. Choose the size that fits your spool best, wrap the label around, holding the back edge snugly, and secure it with a small piece of clear tape or glue.
The labels add a Christmas touch to the postcard holders and a little bit of nostalgic whimsy. You can simply remove them to use for another season.

Step 3 – Make the Wire Postcard Holders
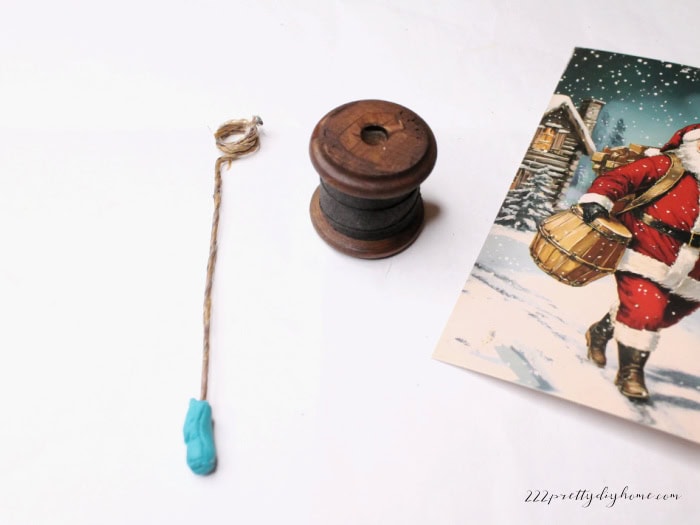
Cut pieces of paper-covered 18-gauge wire in different lengths so the postcard holders will stand at slightly varied heights.
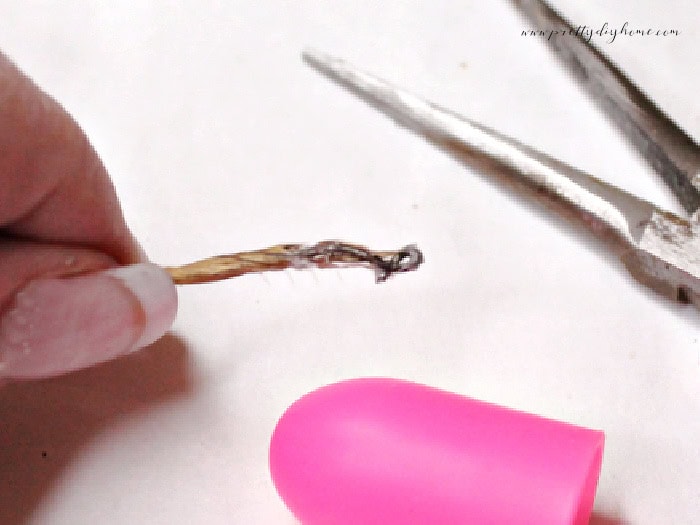
Before forming the coils, curl the very end of each wire back on itself into a tiny loop. I saw this small detail on antique wire holders and thought it added a more authentic, vintage touch.
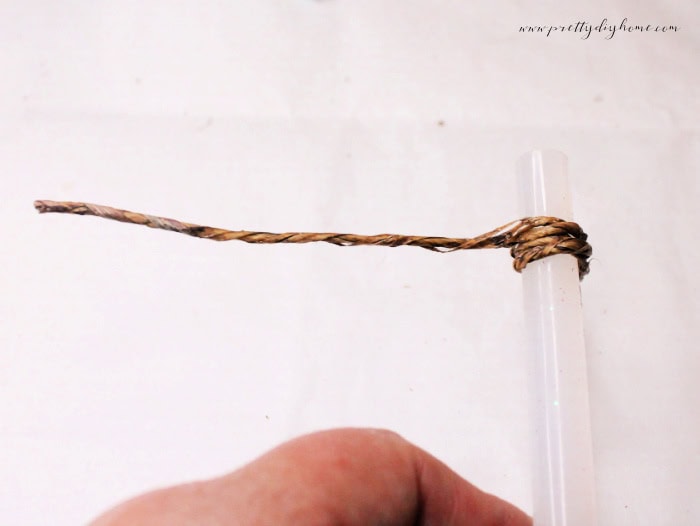
Next, wrap the opposite end of the wire around a glue stick a few times to form smooth, even coils. These little loops are what will hold your postcards.
To secure the wire inside the spool, tear off a small piece of poster putty and wrap it around the straight end of the wire, judging the thickness by eye so it fits snugly into the spool’s center hole.
Gently press the puttied end into the hole until it feels firm and stable.
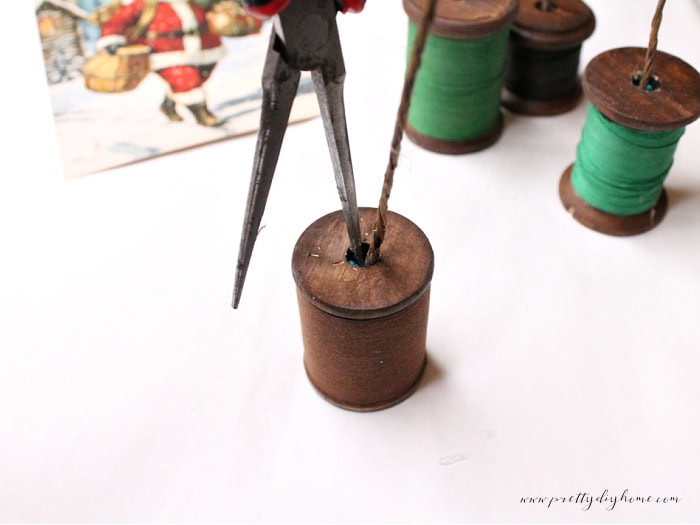
The putty grips the wire securely but can be removed easily later if you want to reuse the spools for another season.
Adjust the angle of each wire so the holders sit naturally together. The mix of heights and curls gives the finished display more character and movement.
Once the wire is secure, use a small brush to stain the inside of the spool around the wire. This covers the poster putty and gives the top a clean, finished look.

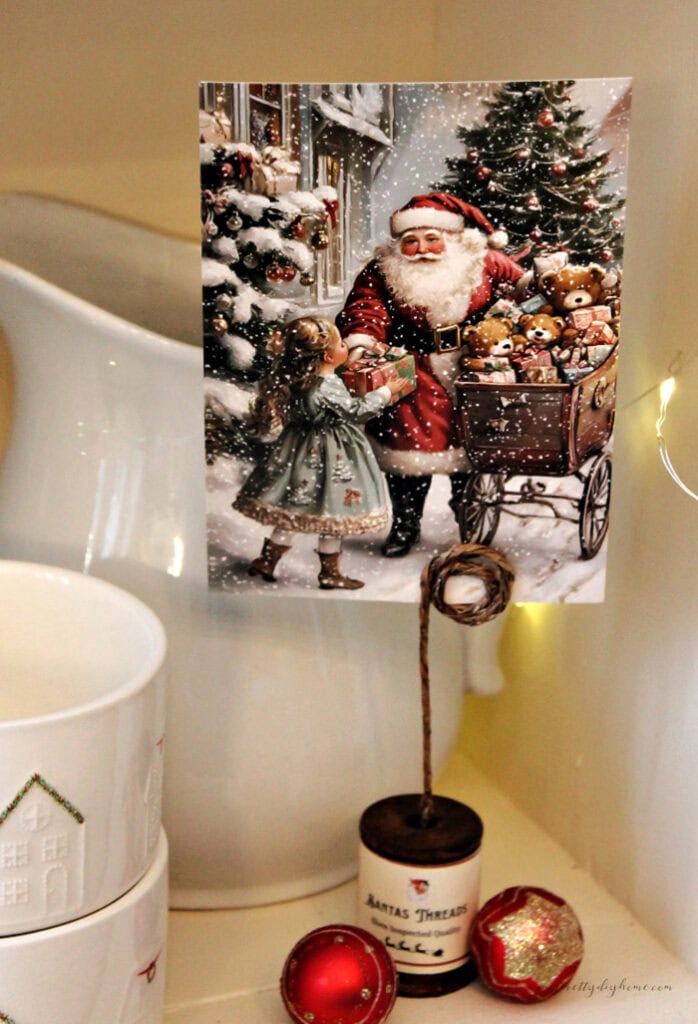
Step 4 – Add the Vintage Postcards
For my display, I used vintage Christmas prints from Temu that I’d originally ordered for another project, but you can find plenty of beautiful free images online too. One of my favorite sources is The Graphics Fairy, which offers a huge selection of printable vintage postcards and Christmas artwork.
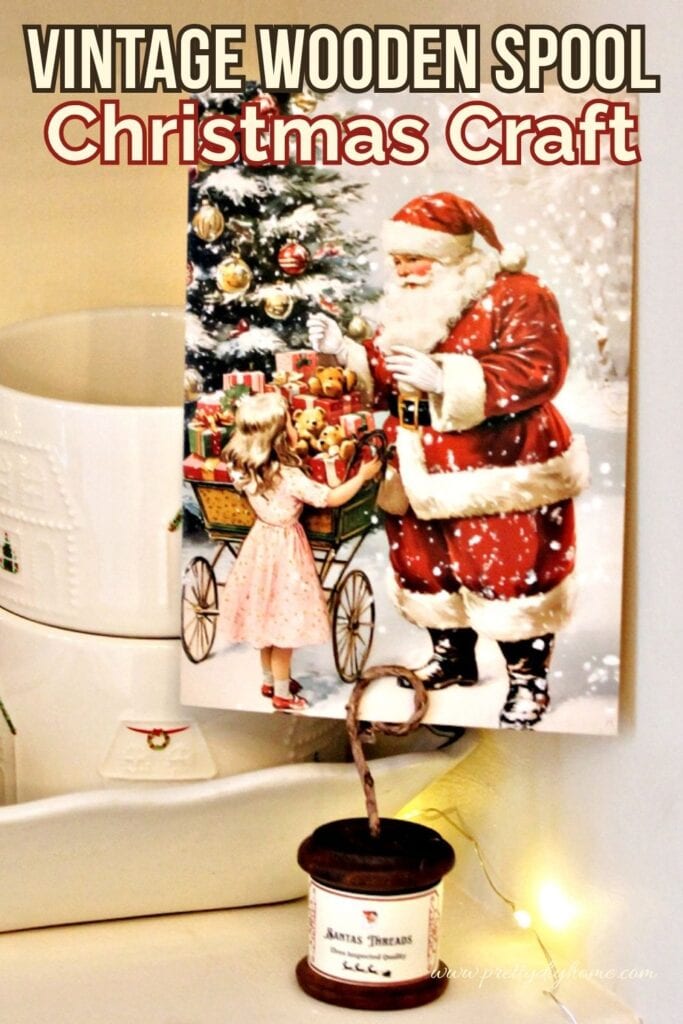
The soft reds and greens of these postcards add just enough gentle color against my cream and white Christmas decor. Gently tuck each postcard between the loops of the wire until it stands upright.
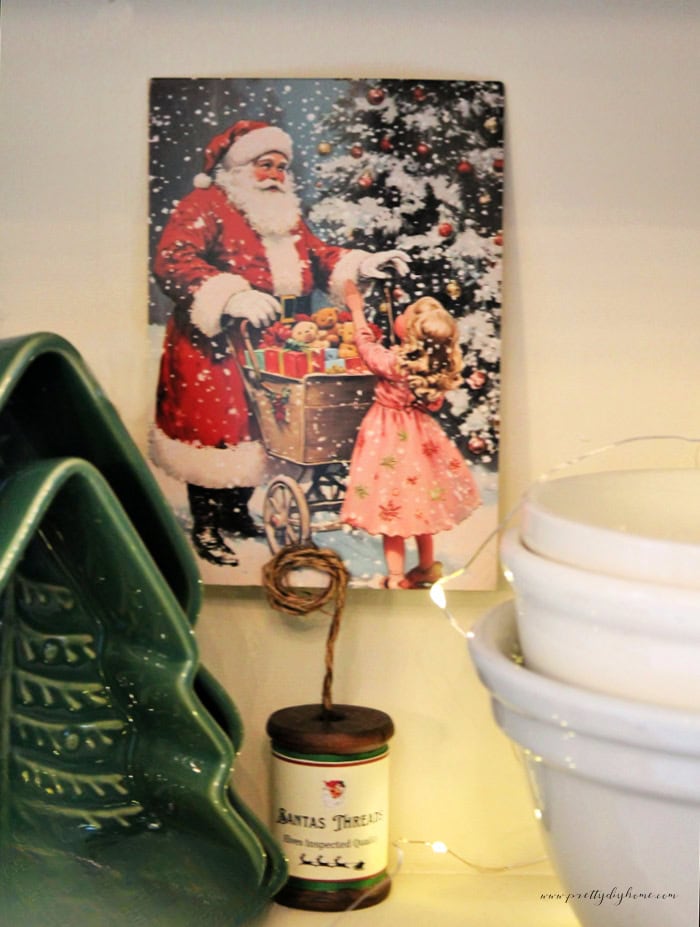
If a postcard keeps leaning or you’re placing the holders in a spot with a little breeze or foot traffic, add a small piece of tape on the back of the postcard, connecting the two wire loops. It doesn’t harm the holders or the postcard, and it helps everything stay perfectly in place.
Styling the Postcard Holders with Ironstone
Over the last year or so, I’ve been working to give our plain box bungalow a little more character and warmth. Because of my Grandma Aida’s influence and my budget, I’ve leaned into vintage finds, garage sales, and thrifted treasures as the most affordable way I know to add charm.

While browsing Pinterest and wandering through local antique markets, I discovered ironstone, and a new little obsession was born. I only have a few pieces so far, but I love their creamy tones and simple lines. For this year’s Christmas decorating, I added these vintage wooden spool postcard holders alongside a few vintage-inspired bottle brush trees to my ironstone display.

The soft pops of color from the postcards add just enough warmth and whimsy against the white dishes, keeping everything subtle but festive. I tucked a short strand of battery-powered mini lights into the secretary I refinished this summer, and the gentle glow ties the whole display together with a cozy, Old-World Christmas feel.
Get the Printable Santa Thread Company Labels
To make this project even easier, I’ve created a set of free printable Santa Thread Company labels in three sizes to fit most wooden spools. Each design has a soft cream background and faded Old World lettering that matches the look of vintage packaging.
You can print them on cream cardstock or lightly tea-stained paper for a more aged look. Trim, wrap, and secure them around your spools to finish the look.
Download the Free Printable Labels →
Vintage Christmas Spool Craft Idea
If you love vintage Christmas projects, this one’s such a fun way to use old wooden thread spools. These DIY postcard holders mix simple materials, a bit of wire, and free printable spool labels to create something you won’t find in stores. They look beautiful tucked into holiday vignettes, with ironstone dishes, bottle brush trees, or vintage Santa prints.
The soft mix of cream, brown, and pine green makes this craft perfect for an Old-World Christmas theme. classic, cozy, and affordable.
Save this idea to your “Vintage Christmas” or “DIY Christmas Decor” board to make later!
This little craft came together from such simple pieces: old thread spools, some paper wire, and a few vintage Christmas postcards. But that’s what I love most about it. Small, easy projects like this add a touch of nostalgia without spending much, and they bring so much personality to Christmas decorating.
I know no one else has these exact spools or postcards, and that’s what makes them special. They aren’t mass-produced or trendy, just quiet little handmade touches that make our home, well, ours.
If you decide to make your own wooden spool postcard holders, I’d love to hear how you display them. Whether it’s with old family photos, Christmas cards, or vintage Santa prints, each one will tell its own story and add a little more warmth to your home for the holidays.
More Vintage Christmas Ideas You May Enjoy

Christmas Candles in the Window
Create a warm Old World glow with simple candlelight and greenery, a timeless budget budget-friendly way to welcome guests to your home.

Thrift Store Christmas Angel
See how I transformed a secondhand angel into a soft, sparkly Christmas angel decoration using painting and delicate detailing.