
DIY Vintage Christmas Ornaments: Chenille Dolls
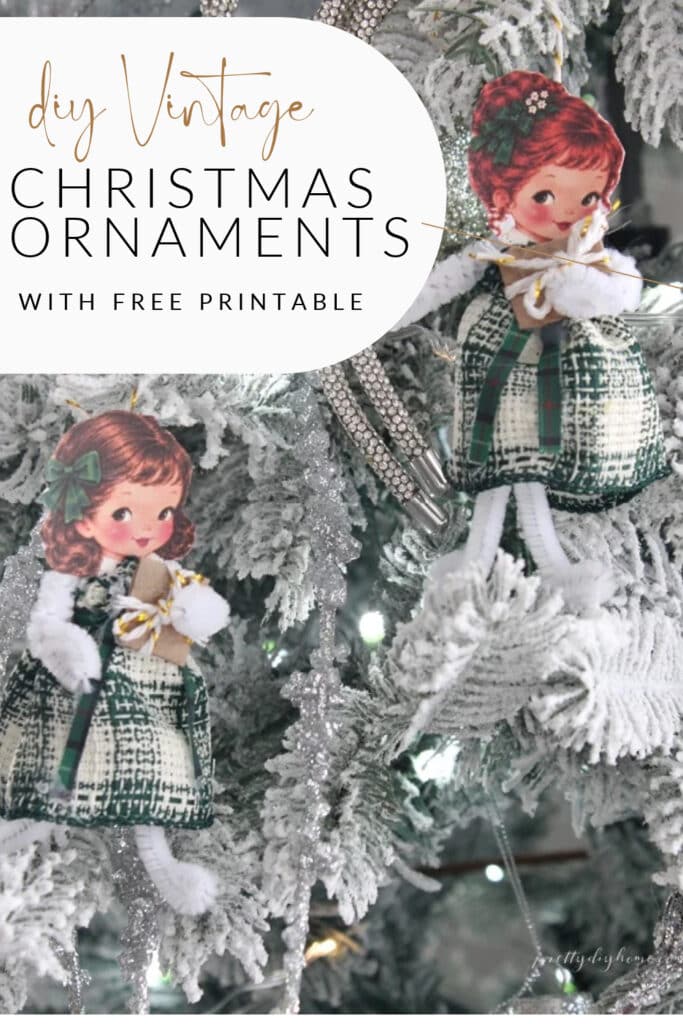
These DIY vintage Christmas ornaments are made with regular pipe cleaners, free printable paper doll faces, and gathered ribbon skirts. You can get most of the basic supplies from Dollar Tree. I chose white pipe cleaners and green and cream plaid ribbon for an old-fashioned Christmas look, but you can choose colours to match your own Christmas decorations.
Hang these little dolls on a vintage or green-themed Christmas tree, nestled among glass ornaments, ribbon, and twinkling lights. They would also be sweet on a little girl’s Christmas tree or strung together as a festive swag above a window or headboard.
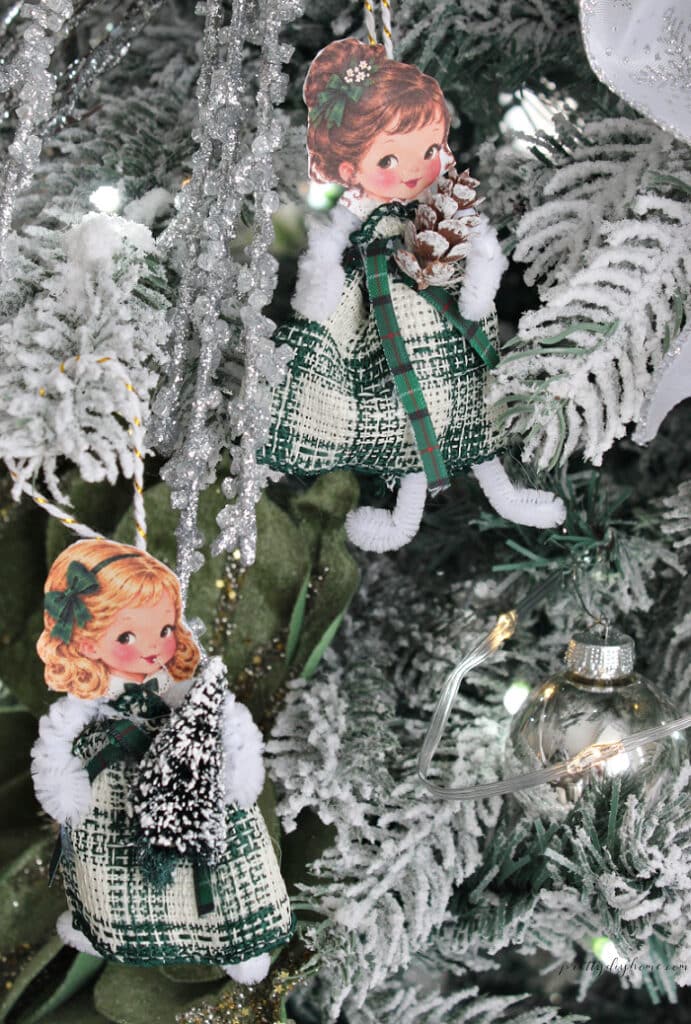
DIY Vintage Christmas Ornaments Using Pipe Cleaners
This tutorial has three main parts: making the pipe cleaner base, sewing the ribbon skirts, and attaching the printable doll faces, which include little lace collars and ribbon bows. Once the dolls are assembled, we’ll add little Christmas embellishments to give each one her own personality.
Supplies for Chenille Doll Ornaments
I made six dolls. For each doll, you will need:
- Three 12-inch pipe cleaners
- Free printable doll face, printed on cardstock
- A 6-inch length of 2 1/2 inch wide wired ribbon
- Coordinating narrow ribbon for the waist bow
- Needle and thread, or a sewing machine
- Paste glue stick
- Hot glue gun and hot glue sticks
- Scissors, wire cutters, and ruler
- An 8-inch length of baker’s twine for hanging
- Small Christmas embellishments
I used a sewing machine for the skirt seams and gathered the tops by hand. You can also glue the back seams and use a needle and thread for the gathering.
Step 1: Shape the Pipe Cleaner Body and Legs
Cut one pipe cleaner to 10 inches long and fold it in half.
Measure about 1/2 inch down from the folded end and twist the two strands together, leaving a small loop to support the paper head. Continue twisting the strands together for another 1 1/4 inches to form the body. Leave the remaining ends separate for the legs.
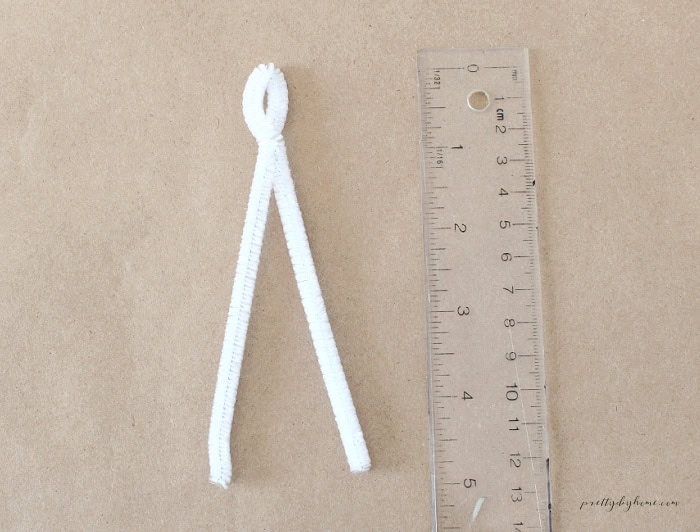
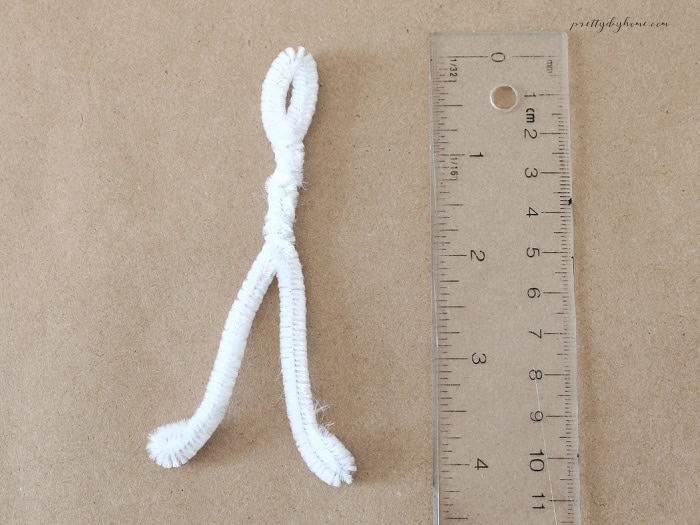
Bend the bottom of each leg forward to form a little foot, folding the wire tips back against the legs.
Make the pipe cleaner body approximately 4 inches tall, from the top of the loop to the bottom of the feet. This keeps the feet small and sweet.
Step 2: Attach the Arms and Form the Hands
Start with one full 12-inch pipe cleaner. Fold it in half to find the centre, then open it back out. Place the centre behind the upper body, just below the neck loop. Wrap the middle around the body and secure it with a small dot of hot glue. Let the glue cool before continuing.
Starting on one side, measure about 1 1/2 inches from the side of the body to mark the arm length. Taking the time to measure helps keep both arms the same length and leaves enough pipe cleaner for wrapping. Fold the pipe cleaner back towards the shoulder at this point, forming a small loop for the hand.
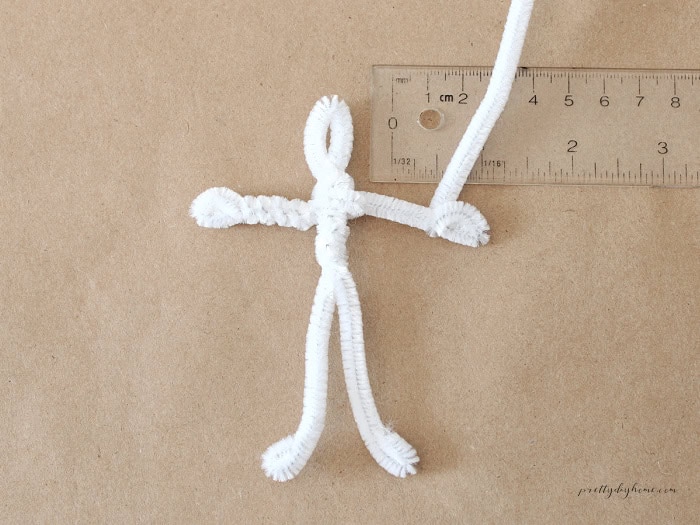
Wrap the remaining length of pipe cleaner neatly around the arm, working from the wrist towards the shoulder. Keep the wraps close together and as even as possible, since the arms will show on the finished doll.
Step 3: Wrap the Chenille Body
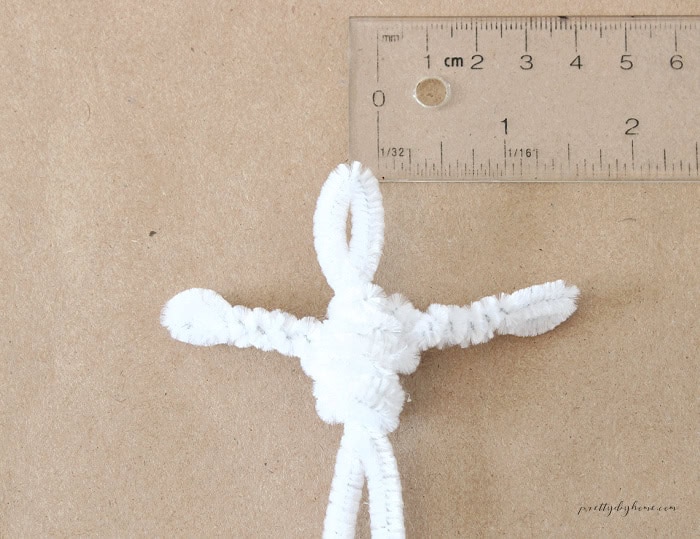
To make her waist large enough for the skirt, cut a 6-inch length of pipe cleaner. Glue one end to the back of the body, just below the arms, and let the glue cool for about 30 seconds.
Using your thumb as a guide, wrap the pipe cleaner around the body four times, keeping the body approximately 1/2 inch wide. Make the wraps as neat and even as possible.
Secure the other end at the back with a small dot of hot glue. Keep the neck loop uncovered so you can attach the paper head later.
Step 4: Make the Ribbon Skirt
Cut a 6-inch length of 2 1/2-inch-wide wired ribbon. Choose which long edge will be the top of the skirt and carefully pull the wire out of that edge. Leave the wire in the bottom edge so you can shape the hem later.
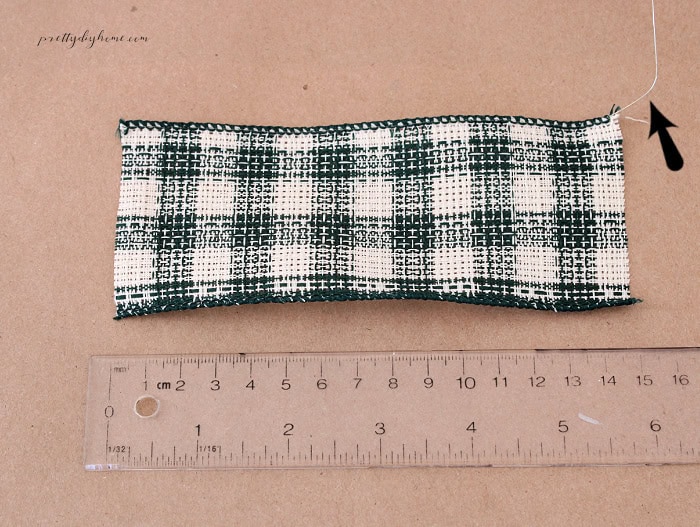
The handy part of using ribbon is that the top and bottom edges are already finished, but we still need to seal the two cut ends to prevent fraying. I used my sewing machine and a zigzag stitch. If you don’t have a sewing machine, fold the cut ends towards the back of the ribbon and secure them with fabric glue or iron-on hemming tape.
Fold the ribbon in half with the good sides facing each other and line up the two short ends. Sew them together by machine or by hand to create the back seam, then turn the skirt right side out.
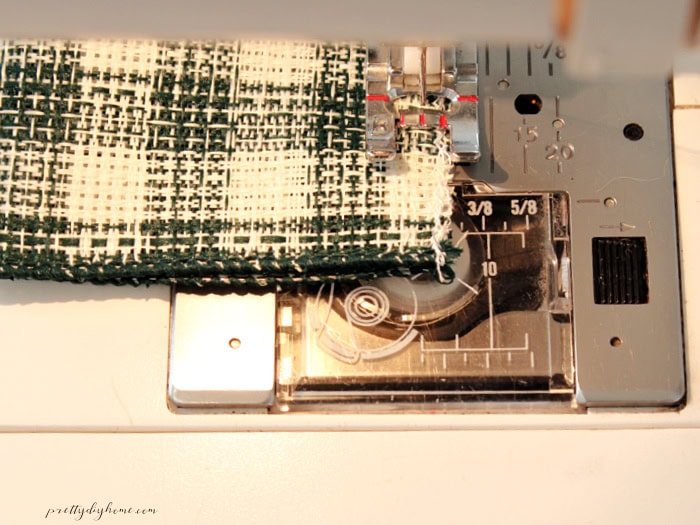
Make sure the wired edge is at the hem. Thread a needle with a double length of thread and knot the ends together so it’s strong enough to pull the gathers tight. Sew gathering stitches about 1/4 inch long all the way around the skirt, about 1/4 inch below the top edge. This leaves a little ruffle above the stitching.
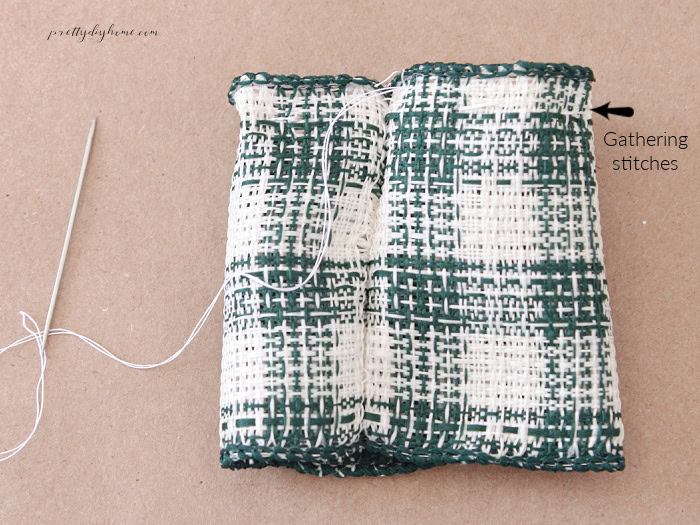
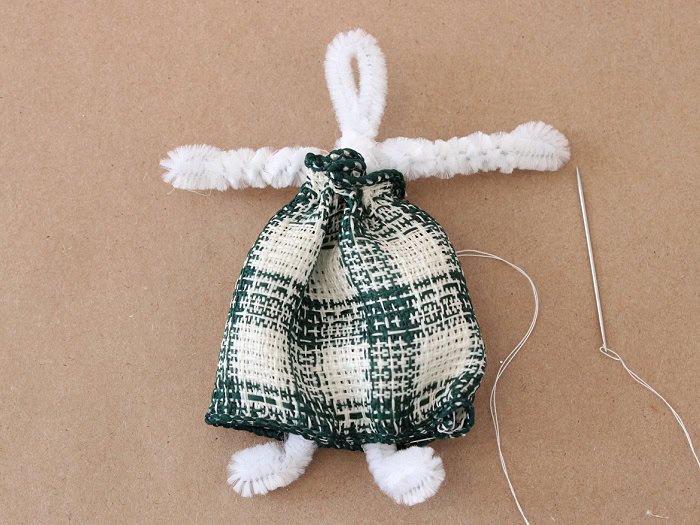
Slip the doll into the skirt with the seam at the back. Hold the skirt in place at the front and back while gently pulling the thread tight with your other hand to gather the waist. Arrange the gathers and little ruffle evenly around the body, just below the arms.
Sew a few stitches through the gathered ribbon and the chenille body to hold the skirt securely in place. Knot the thread and trim away the excess.
Step 5: Add the Ribbon Waistband and Bow
Cut a 5-inch length of coordinating ribbon. My ribbon was 1/4 inch wide, which felt out of proportion to the doll, so I cut it in half lengthwise first.
Place a small dab of hot glue at the back of the waist and press the centre of the ribbon onto it. Let the glue cool, then turn the doll over and bring the ribbon ends around to the front. Tie a simple bow over the gathering stitches, leaving the little ruffle visible above it.
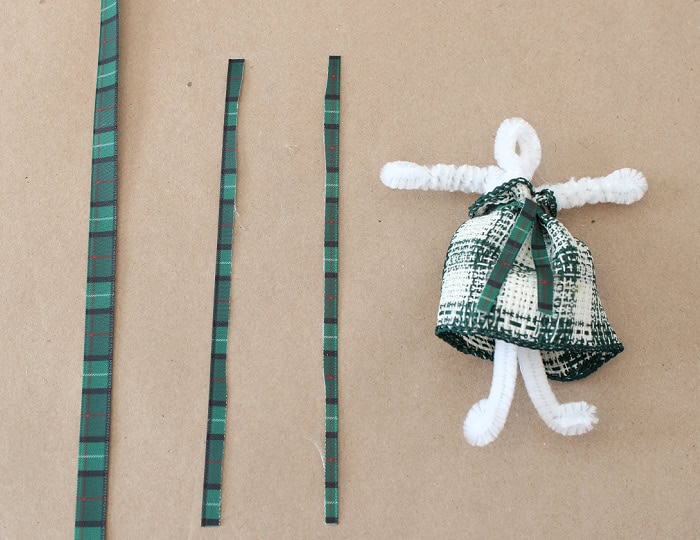
Trim the ribbon tails if needed, then use tiny dabs of hot glue to hold their ends in place.
Step 6: Add the Hanging Loop
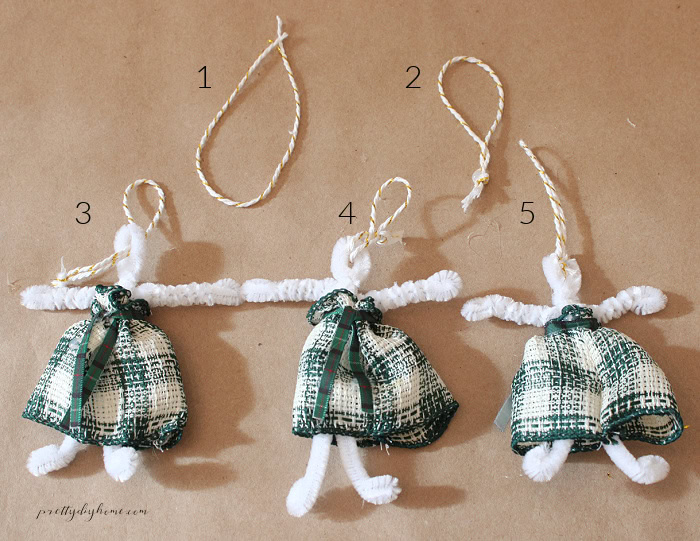
Cut an 8-inch length of baker’s twine and tie the ends together to form a loop. I used white-and-gold baker’s twine to coordinate with the dolls. Secure the knot with a tiny dab of hot glue and let it cool.
Push the knotted end through the opening in the chenille neck loop. Pass the long hanging loop through the small loop of twine on the other side, then pull gently to tighten.
Tuck the knot into the opening in the chenille where the paper head will be attached, keeping it hidden and out of the way.
Step 7: Add the Printable Doll Faces
Download the free printable doll face sheet.
Print the doll face sheet on letter-size paper (8 1/2 x 11 inches), using your printer’s best quality setting. Select 100% or Actual Size, rather than Fit to Page, to keep the faces at the correct 1 1/2-inch size.
Use a paste glue stick to attach the printed sheet to heavy cardstock, smoothing it flat. Let the glue dry, then carefully cut around each face, including the hair, printed lace collar, and ribbon bow.
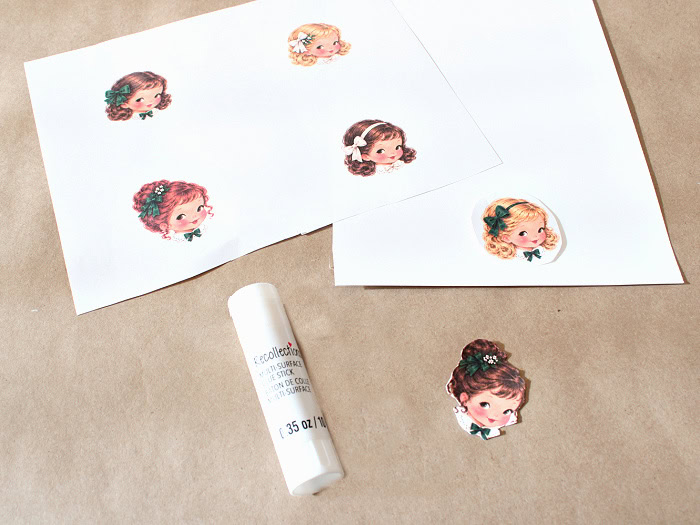
Choose a printable doll face and lay the chenille doll flat, with the front facing up. Place a small dab of hot glue on the front of the chenille neck loop. Position the paper head with its lower edge tucked slightly underneath the skirt ruffle, so the printed lace collar and ruffle meet. Press gently and hold in place until the glue cools.
Step 8: Add the Christmas Embellishments
Give each doll her own personality with a little Christmas decoration. I would have loved a miniature teddy bear or kitten tucked into a doll’s arms, but I couldn’t find any tiny enough. Even the little wreaths I bought were too large, so I made accessories using supplies from my stash.
To make tiny gift packages, I cut 1 1/2-inch squares of brown paper and wrapped each around a tiny bit of stuffing. I secured the folds with hot glue, then tied the packages with the same baker’s twine used for the hangers.
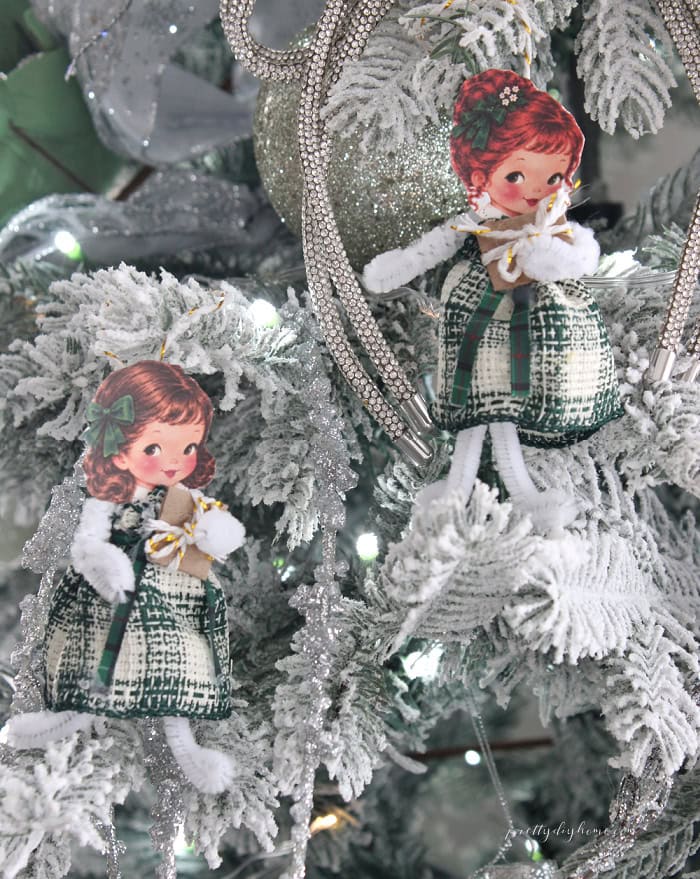
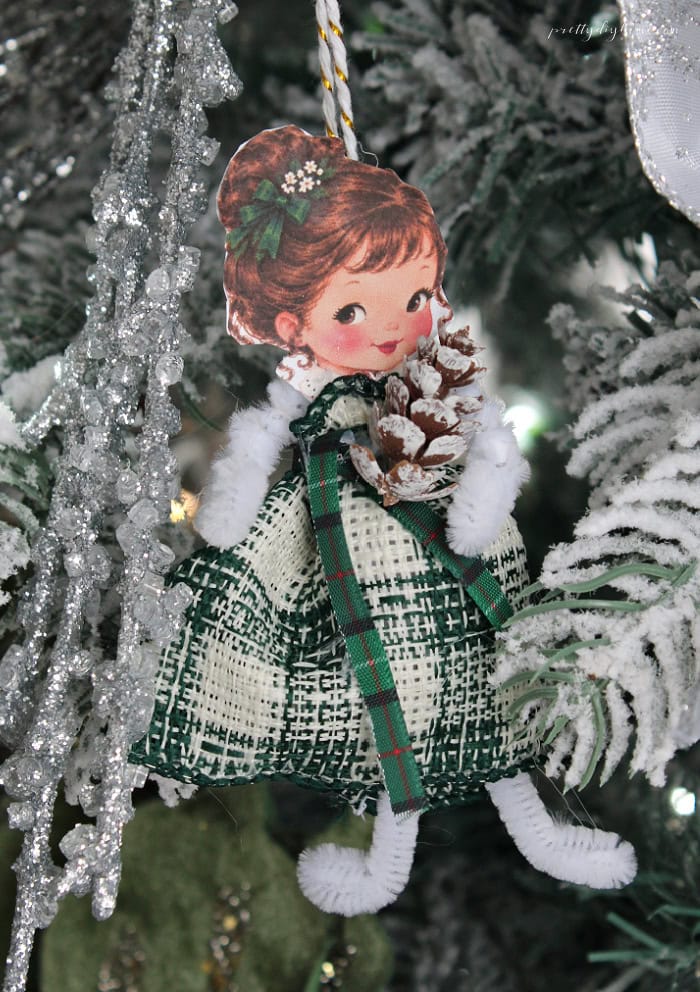
One doll received a white snowflake, and another got a tiny Christmas tree that I trimmed down to fit. For another, I glued three wooden snowflakes together to resemble a little garland she might be hanging. I also gave one doll a tiny snow-covered pinecone to hold.
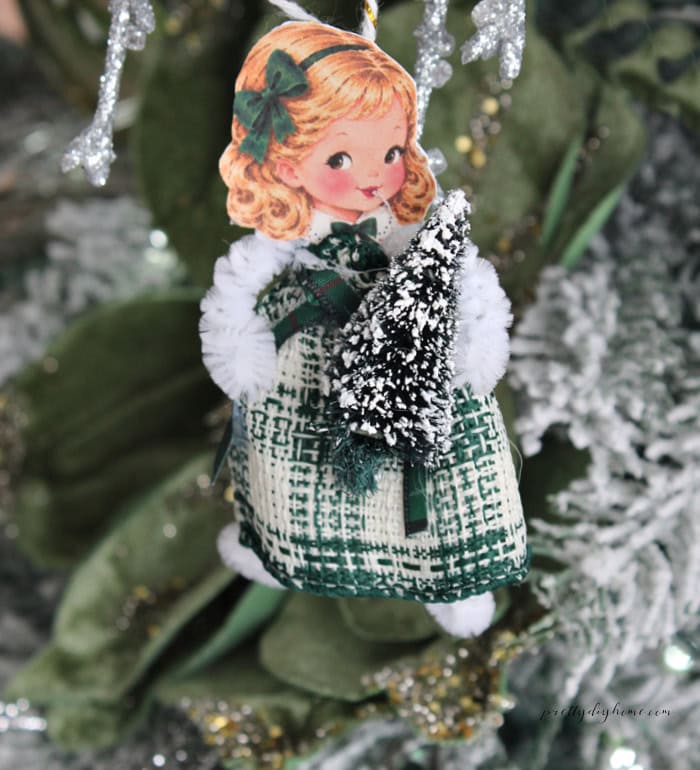
Glue your chosen embellishments to the dolls, then gently bend their arms into position so they appear to be holding or arranging their little Christmas treasures.
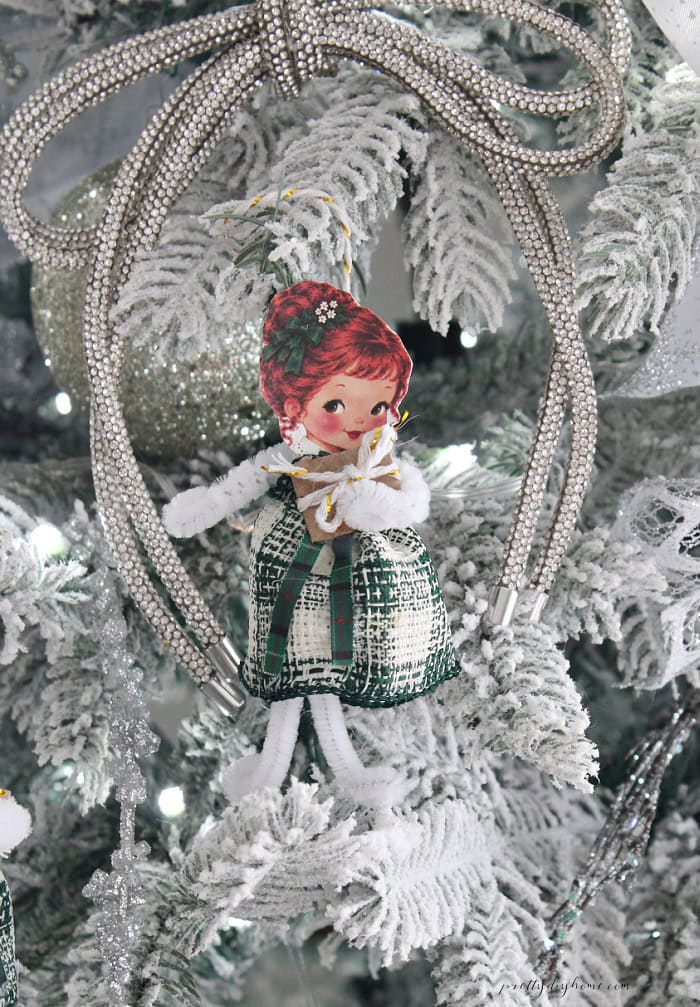
I love the calm, cohesive look of these little dolls, with their simple plaid skirts and vintage hairstyles inspired by the 1940s and 1950s. Of course, you can make yours bright and colourful, choosing ribbon and little accessories to suit your own Christmas style.
Love these sweet vintage Christmas ornaments? Pin this tutorial for later so you can find the free printable doll faces and step-by-step instructions when you’re ready to make your own chenille doll ornaments. They’re a lovely addition to an old-fashioned Christmas tree!
More Handmade Christmas Ornaments
If you love making your own Christmas decorations, here are two more handmade ornament ideas for your Christmas tree.

DIY Fabric Star Christmas Ornaments
These pretty DIY fabric star Christmas ornaments combine homespun fabric, velvet ribbon, and charming little embellishments for a warm, handmade cottage Christmas look.
DIY Wire Star Christmas Ornaments
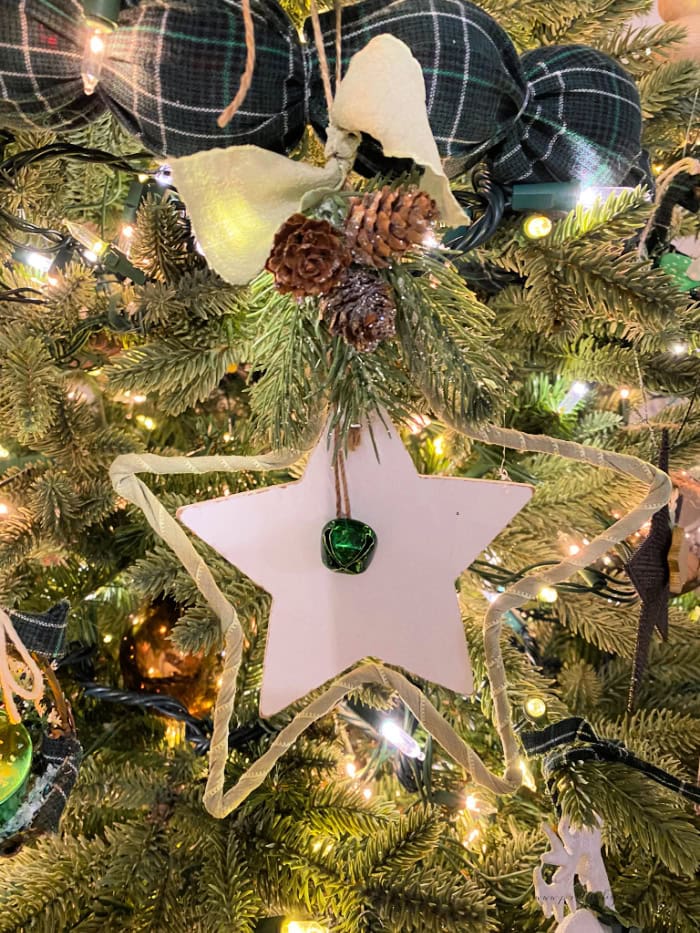
These DIY wire star Christmas ornaments are an inexpensive alternative to pricey gift shop decorations, made with wire, fabric ribbon, greenery, pinecones, and little bells for a charming rustic Christmas look.