
How to Make Wire Star Christmas Tree Ornaments
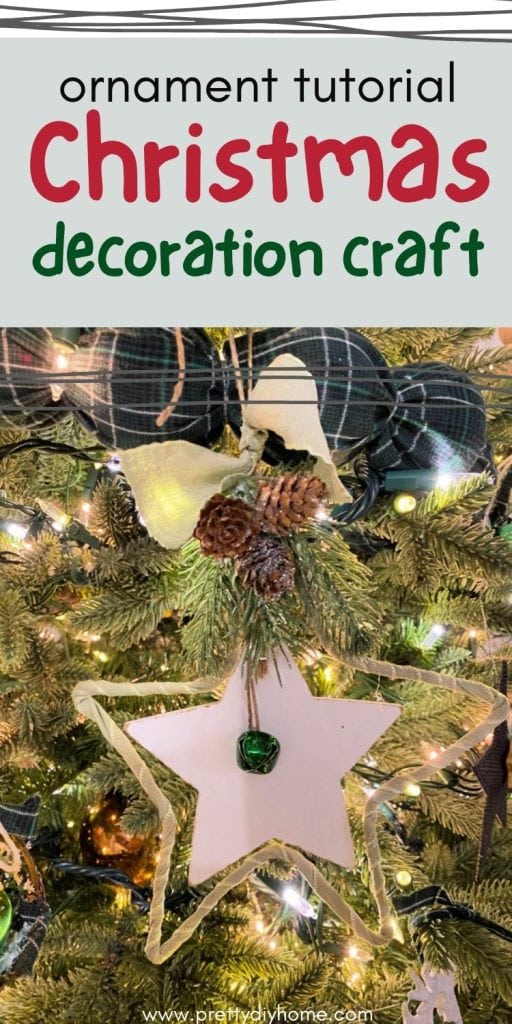
These easy wire star Christmas tree ornaments are a dupe of some expensive ones I found at a local gift shop. They were priced at $15 each, and I knew I could make my own for a fraction of that. These DIY Christmas star ornaments are easy to customize for any Christmas decor style and are a fun Christmas craft you can make without any special supplies.
DIY Wire Star Christmas Ornament Tutorial
Supplies You Will Need
You can use any type of fabric you like for this part. If you want a neat, finished look like mine, I suggest using ribbon because the edges are already finished. For a more shabby look with soft, frayed edges, use 1-inch strips of torn fabric.
If you can find a large wire star form, you can skip ahead to covering it with fabric. If not, here is how to make a 7-inch wire star form using wire, a scrap piece of wood, and small nails. Use nails with small heads so the finished star is easier to remove from the form.
Here are the supplies you will need to make one DIY Christmas star ornament.
- A scrap piece of wood at least 7 inches square
- 10 small nails with small heads, and a hammer
- 30 inches of wire (Dollar Tree wire works)
- Star template
- Roll of 1-inch-wide fabric ribbon ( or scrap fabric cut into 1-inch strips)
- A white 3-inch wood star
- Pine bough greenery
- Thin twine
- Green jingle bell
- Hot glue
Step 1: Make the Star Ornament Template
Begin by printing the star template and cutting it out.
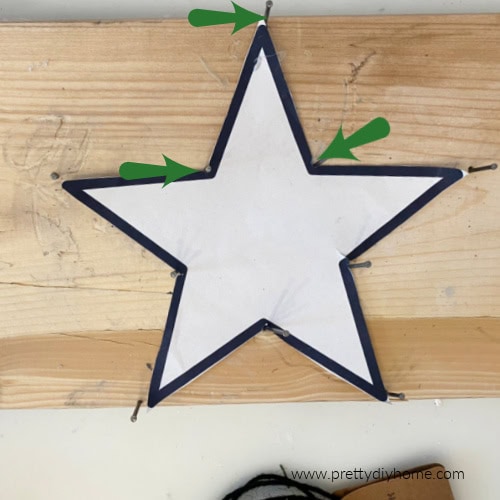
Place the star pattern on a piece of lumber at least 7 inches square. Add a nail at each point and each inside corner of the star. Hammer the nails in as straight as possible. I added arrows to the image to show the nail placement.
Step 2: Wrap the Wire Star with Fabric
It is easier to wrap the fabric around the wire before shaping it into a star. If you are using a premade star form, simply wrap the fabric directly around the form. If you are making your own, begin with a 36-inch piece of wire.

Attach the fabric to the wire at one end with hot glue, then carefully wrap the fabric around the wire. You want to wrap the fabric evenly around the wire with overlaps every half inch or so. Overlapping the ribbon too much takes too much ribbon. When you reach the other end, glue it with hot glue.
Step 3: Shape the Christmas Star Ornament
- Once all the nails are in place, leave the star pattern on the wood.
- Make a small bend at one end of the wire and hook it around the outside of the top nail.
- Wrap the wire around each nail, pulling it tight as you go. At each point of the star, wrap the wire around the outside of the nail. At each inside corner, wrap it around the inside of the nail. Use the star pattern as a guide to keep the sides straight, and pull the wire tight before moving on to the next corner.
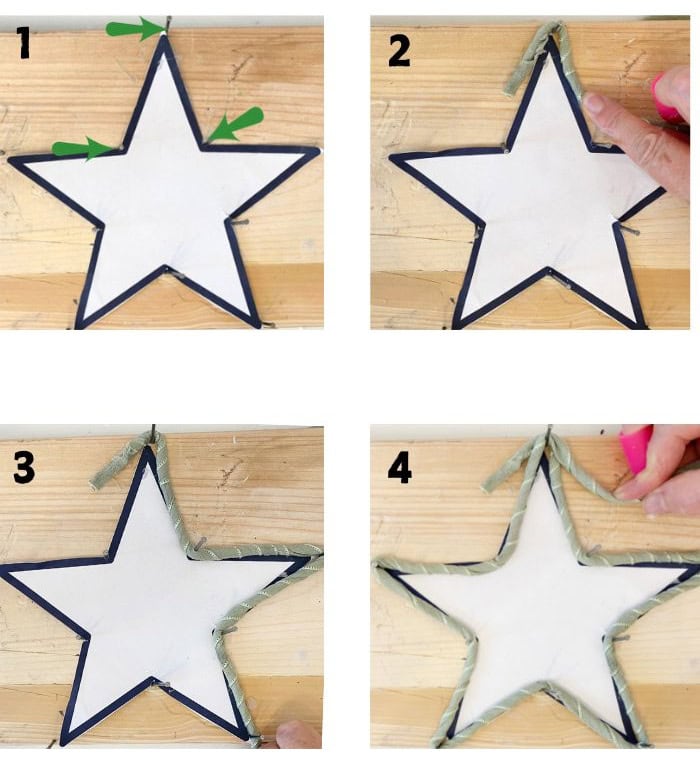
When you reach the starting point, overlap the two ends of the wire by at least an inch and secure them together with hot glue. Gently lift the star a little at a time over each nail, then remove it from the template.
Step 4: Decorate the Christmas Star Ornament
It is fun to decorate these stars with whatever embellishments you have on hand. Besides bells, you could use buttons, small pinecones, greenery, ribbon, or another small star.
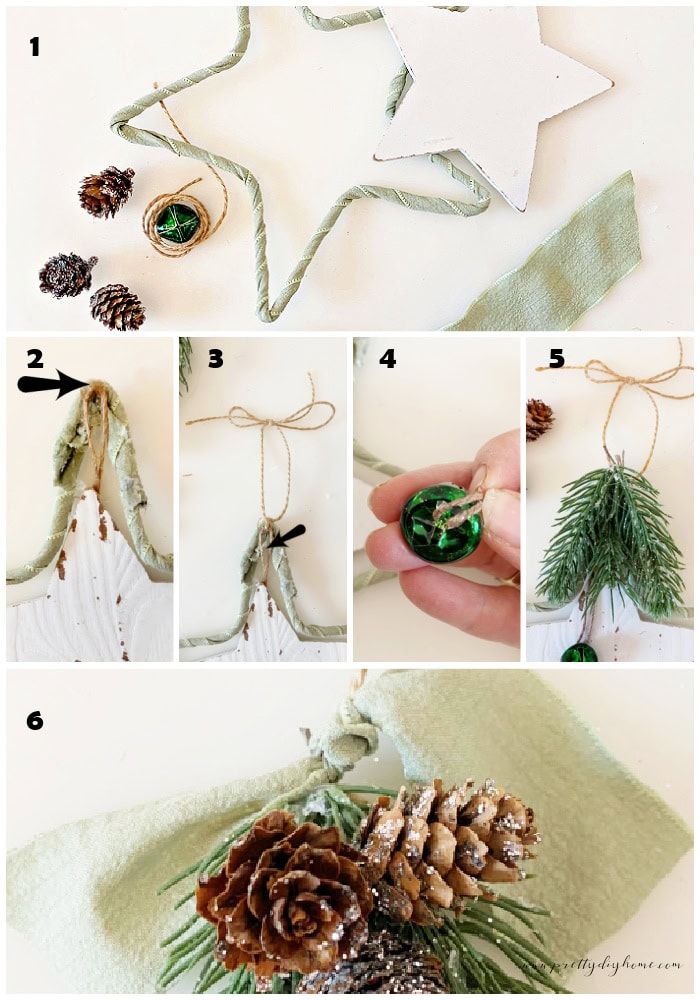
- All the embellishments I used to finish the Christmas star ornament.
- Place a white wood star in the center of the wire star, and attach the hanger to the top of the fabric star.
- Cut a piece of twine 10 inches long, tie it around the top of the star, knot it, make a loop two inches tall, then tie a bow.
- Cut a piece of twine 7 inches long and thread the small jingle bell. Tie a knot in the other end. Secure the two sides of the loop twine to the back of the jingle bell with twine. Once tied, glue the knotted end to the top of the fabric star.
- Attach three small pieces of greenery to the top of the star with hot glue.
- Add three small pinecones. Finally, cut a piece of ribbon 8 inches long (or more) and tie it around the top of the star.
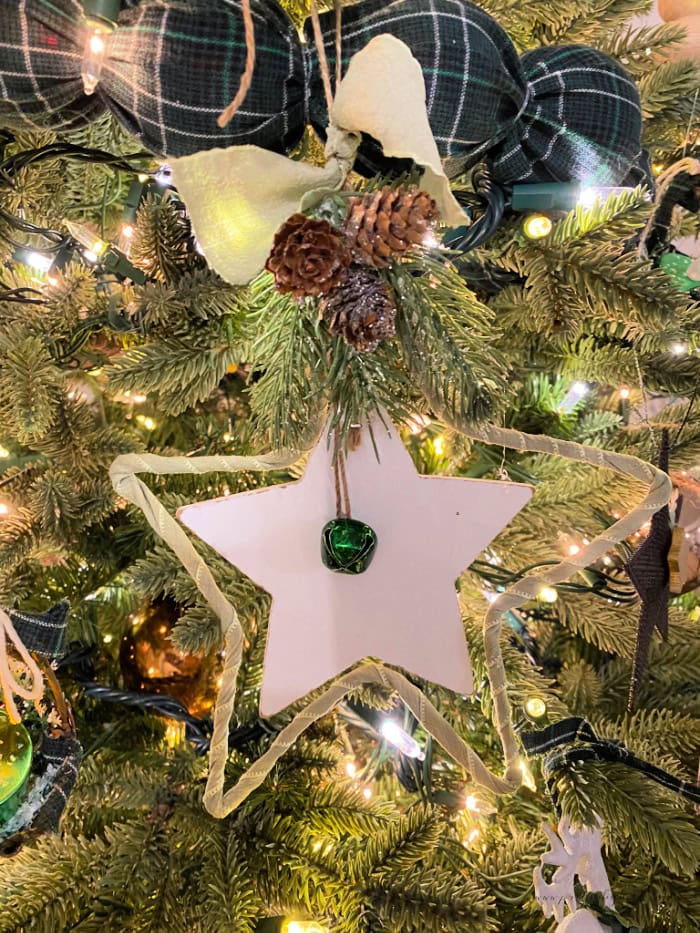
I love how these turned out every bit as nice as the expensive gift shop ornaments that inspired them. Even better, I was able to make six of these DIY Christmas star ornaments for less than the cost of buying just one.
Save these DIY Christmas star ornaments to your Christmas crafts board so you can find them when you are ready to decorate your tree. They are inexpensive to make and look every bit as nice as the costly gift shop versions.
More DIY Christmas Ornament Ideas
Dollar Tree DIY Christmas Ornament
Another easy Dollar Tree star ornament. I love it in the chocolate brown as it adds depth to my neutral Christmas tree theme.
How to Make a DIY Fabric Star
Keeping with the star and neutral Christmas tree colors, I created these simple and elegant stars using fabric. You can sew them, or make them with glue.
Painted Dollar Store Christmas Ornaments
These ornaments look surprisingly beautiful on a Christmas tree. I needed something inexpensive to fill my tree in and loved them enough that I kept them to use again, so pretty!