
DIY Christmas Star Ornaments from Dollar Tree
These Dollar Tree DIY Christmas ornament stars started with a surprisingly difficult search for brown Christmas ornaments. Even in Canada, I never expected brown ornaments to be so hard to find. After spending an entire Friday looking, I finally found one single brown Christmas ball for $32.99.
By then I was feeling like a Grinch, so I gave up and headed to Dollar Tree for supplies and the hardware store for a can of dark brown spray paint. Much happier, this girl with a plan went home.
These easy DIY Christmas ornaments from Dollar Tree are part of a collection of handmade ornaments I created for our neutral Christmas tree.

Supplies for Dollar Tree DIY Christmas Star Ornaments
Whenever I add a new type of ornament to my Christmas tree, I like to use at least six. Repeating the same ornament throughout the tree is a simple way to make your tree look balanced and intentional. I was able to find eight of these Dollar Tree star ornaments, so that is how many I made.
- Dollar Tree star ornaments
- Dark brown spray paint
- Dollar Tree miniature wood stars
- Gold metallic paint (craft paint or spray paint)
- Hot glue or E6000 glue
- Small bits of greenery
Optional Supplies for a DIY Spray Paint Box
- Medium gauge wire (Dollar Tree)
- Old cardboard fruit or vegetable box with hand holes
If you’re making a few of these, or any other type of spray-painted Christmas ornament, I suggest taking the time to make this simple spray paint box. I used an old tomato box and some wire to hang the ornaments while painting them.
Instead of spray painting one side, waiting for it to dry, flipping it over, and then repeating everything for a second coat, this little setup lets you spray both sides and leave the ornaments hanging to dry.
The spray paint box certainly isn’t pretty, but I promise it is worth making.

Spray Painting the Dollar Tree DIY Christmas Ornaments
After getting the painting boxes made, I gave each star two coats of espresso brown paint, including as much of the hanging string as possible. Let each coat dry for about an hour before adding the next coat.

Painting the Gold Star Embellishments
I was able to find these little wood star ornaments at Dollar Tree, 10 for $1.50. I already had some gold spray paint, so I used that for mine, but any kind of metallic gold paint will work. Rub ’n Buff would also be a great option for giving the little stars an aged metallic finish. I gave the stars two coats of gold spray paint, letting each coat dry for about half an hour.

Assembling the DIY Christmas Star Ornaments
Putting these Christmas star ornaments together is very simple, and the photos show each step.

I had some thrift store greenery, so I cut the ends of the branches into one-inch pieces. I used two small sprigs for each star and attached them to the center of the brown star with a little hot glue.

Next, I added the little gold star. I used E6000 and a small amount of hot glue to hold it in place.

I lined up the small gold star so its points faced the same direction as the larger brown star.
These stars are very quaint and beautiful on the Christmas tree. They add little bits of dark contrast to our neutral Christmas tree. I love how they turned out, especially compared with the $32.99 ornament I found. And I still had almost a whole can of espresso brown spray paint left for more Christmas ornaments.
Dollar Tree Christmas Star Ornament Video Tutorial
Here is a video tutorial I created for you. I still cannot get over how difficult brown ornaments are to find. I would love to hear what you think of the brown ornaments on our tree.
If you are planning handmade Christmas ornaments this year, save these Dollar Tree Christmas star ornaments to Pinterest so you can find the tutorial when you are ready to make them.


Other Inexpensive DIY Christmas Ornaments
I love making inexpensive Christmas ornaments, especially when I can customize the colours to suit my tree. Here are a couple more DIY Christmas ornaments you may enjoy making for your own Christmas tree.

DIY Dollar Tree Christmas Ornament Garland
Instead of using ribbon this year, I decorated our tree with a DIY Dollar Tree Christmas garland, branches, sparkling brown picks, and greenery. It turned out very high-end looking, and I am so glad I tried it for a new look this year. I hope you check it out for your tree.
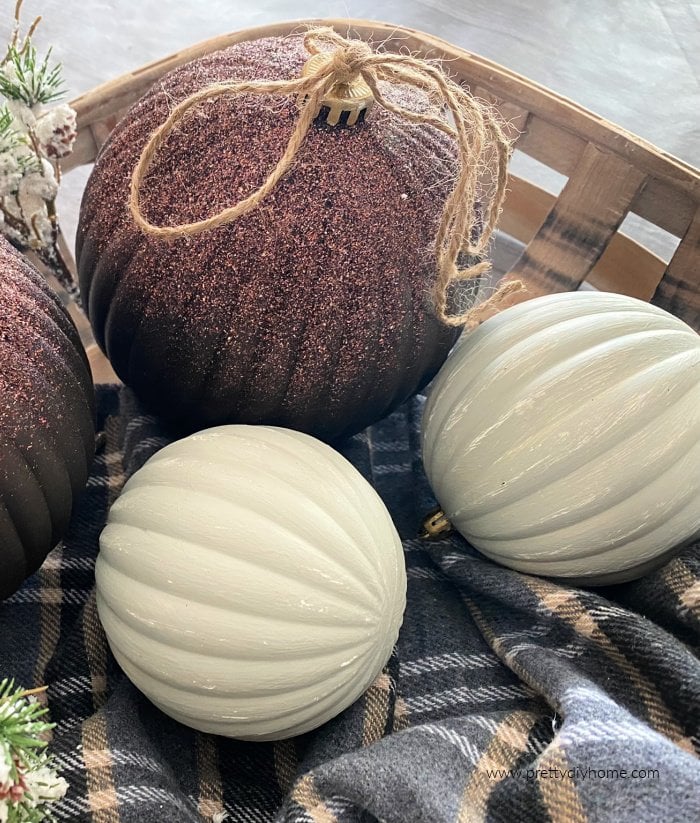
Painted DIY Christmas Balls Craft
These painted Christmas tree balls are from last year. I loved how they turned out, so I used them again this year. The soft green colour is my favorite part; they are warm and calm-looking and add a soft bit of colour to the tree.
Leanna, you did a great job. I found brown balls at Canadian Tire, in a pack of 50. They included a sparkly, matte and shiny brown assortment. I do not use them on my tree, which is full of ornaments from trips and special memories. I added the balls to my garlands on the banister and mantel, with mini lights intermingled. And I really enjoy the elegant look, and the brown blends in nicely with our decor.