Easter Egg Decorating with How Tos
30 Easter Egg Decorating Ideas
Easter egg decorating for the Easter holidays, is one of the funnest crafts of the year. Easter egg decorating crafts are a fun way to be creative and inexpensive. Whether your an adult having some creative fun crafting, or want to create a fun Easter holidays activity I am certain I have found several fun ideas for Easter egg decorating you will enjoy trying.
I love that making Easter egg crafts is one of the crafts most people participate in. Whether you choose to go old school and work with natural eggs, or buy faux eggs, to decorate for Easter, the decorating choices are endless.
Before we decorate out Easter eggs we need to prep them. At the end of the post you will find instructions on how to hollow an egg, cut the cap off an egg how to hard boil an egg, and how to keep Easter eggs. It’s always good to have instructions on the basics.

Different Ways Decorate Easter Eggs with Dye
How to Dye Eggs Naturally
Martha provides full recipes and directions for a wide variety of colours to add to a boiled egg. Granted its more expensive than a dye kit, but you know whats in it.

Dyeing Eggs Naturally | Martha Stewart
How to Dye Eggs with Shaving Cream
When I looked up how to do Easter eggs this way I was startled at how easy and fun this would be to do with children.

Shaving Cream Dyed Easter Eggs | Crafty Morning
Tye Dying Easter Eggs with Paper Towels
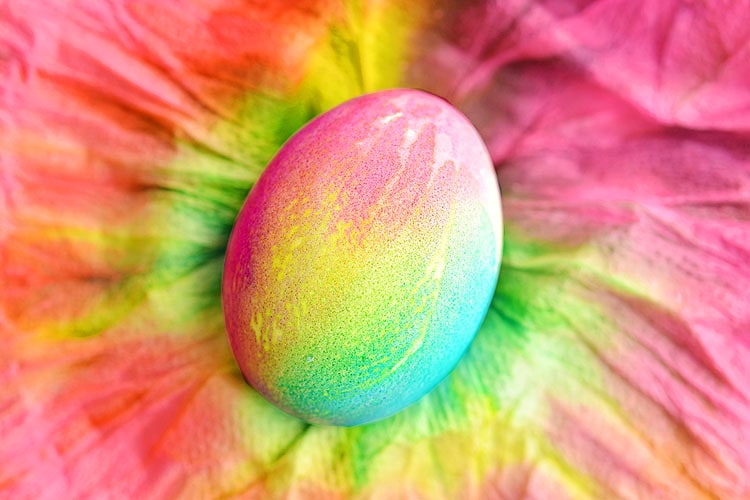
Tie Dyed Easter Eggs | One Little Project
Ombre Dyed Easter Eggs
These eggs are dyed but super easy to do. To get the ombre effect you dye each egg a little bit longer than the previous one. So pretty and so easy.

Ombre Eggs | Sugar and Charm
Cool Whip Dyed Easter Eggs
Cool Whip Easter Eggs are quick, easy, and require minimal clean-up. You will love this less mess way to dye Easter eggs with kids.
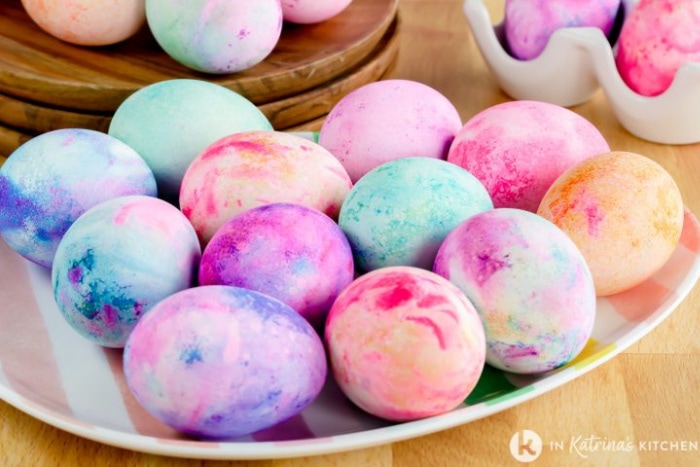
How to Make Cool Whip Easter Eggs | In Katrinas Kitchen
Egg Decorating Without Dyes
With so many people suffering from food dye allergies (including me) I wanted to include some dye free ways to Easter Egg decorating ideas.
Isn’t she just the cutest sweetheart of an egg. Start with a brown egg, add a pretty headband and a sweet face. She is just so adorable.
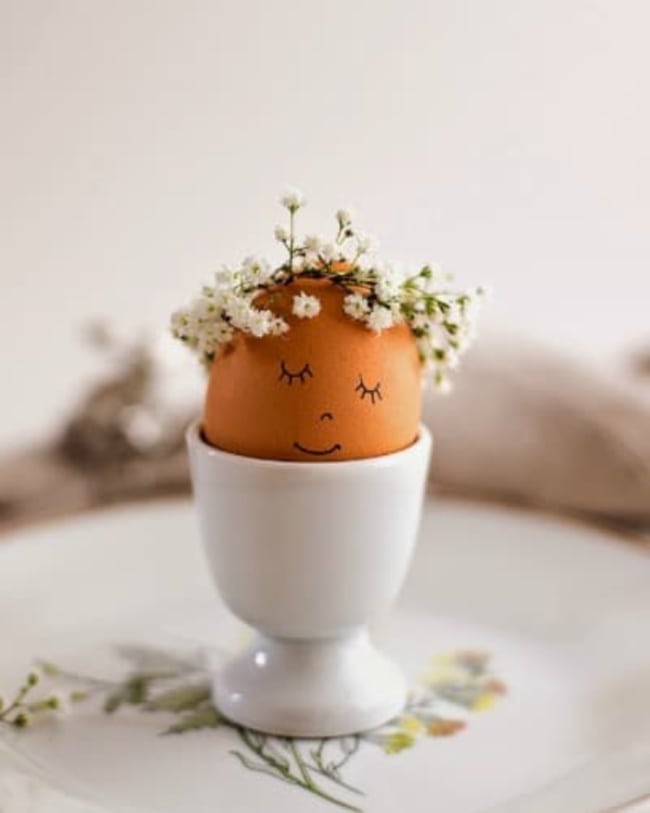
aFloral Wreath Crowned Easter Eggs | Flax and Twine
If you happen to have some pretty ribbon or unused washi tape in your craft room. How about decorating Easter eggs with ribbon.
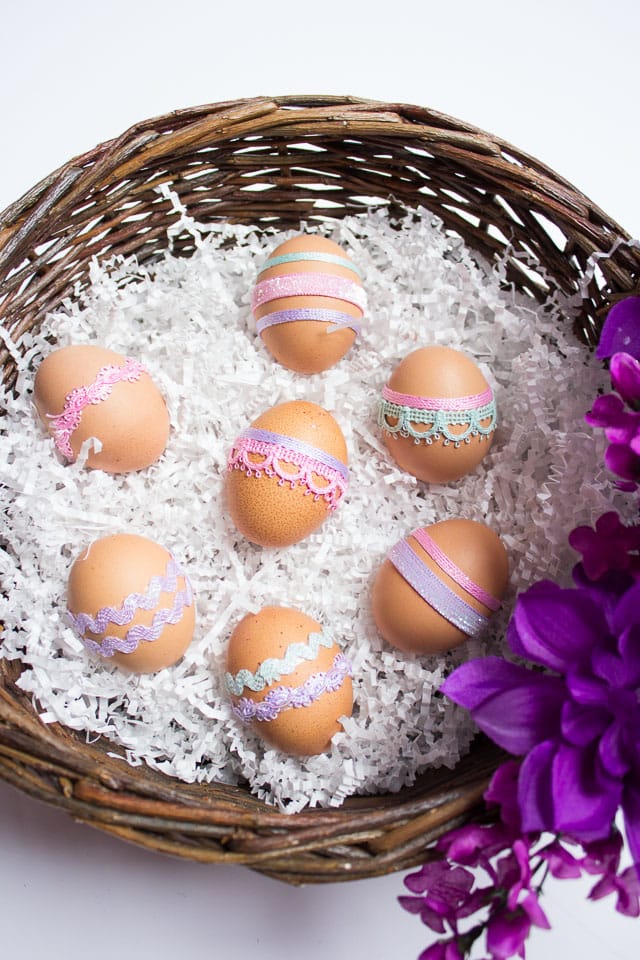
Ribbon Wrapped Easter Eggs | Design Improvised
These simple elegant eggs are done with a cutting machine and gold vinyl. I find their quiet elegance beautiful. If you don’t have a cutting machine you could hand letter or stencil your own wording.
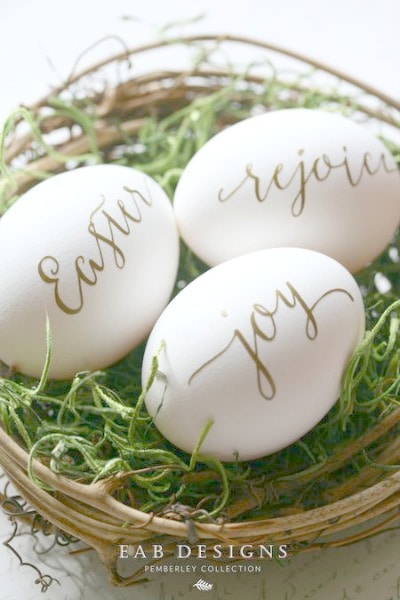
Easter Egg Project | EAB Designs
These glittered Easter eggs or so sparkly and fun. Imagine all the difference colours of glitter you could use, tutorial in the post. Love the brown egg idea.
a
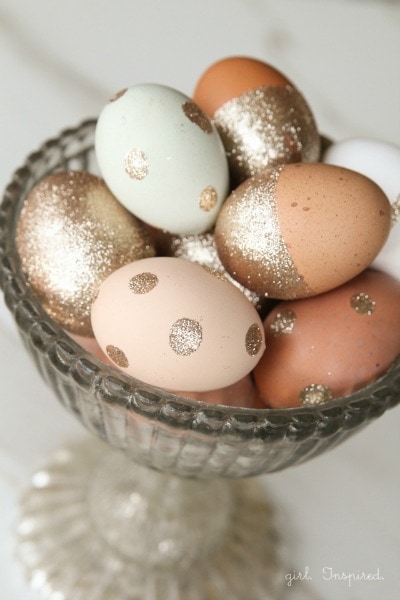
Glitter Easter Eggs | The Girl Inspired
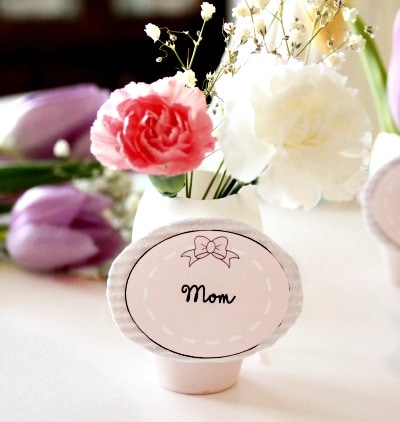
This is one of my own Easter Egg designs. These Easter themed placeholders make a simple tablesetting look elegant. Complete step by step instructions for this simple design are in the post.a
The secret to these easy decorative Easter eggs is printable tatoo paper. All the design and no mess.
Easy Decorative Easter Eggs | Monika Hibbs
Easter Egg Decorating with Paint and Embellishments
The variety of Easter egg decorating ideas for the holidays are countless and amazingly fun to read about. Here are some of my favorite examples.
You see speckled Easter eggs in all the gift shops, heres a tutorial on how to paint and speckle them yourself. I found her picture just so pretty!

Speckled Eggs | Saavy Saving Couple
These Easter Egg bunnies are created with thumb prints! I just love how cute they are sitting in their little spring pots.

Thumbpring Bunny Easter Eggs | It All Started with Paint
These Disney Pixar eggs are inspired by the families favorite movie. What a fun creative way to create together with the kids.
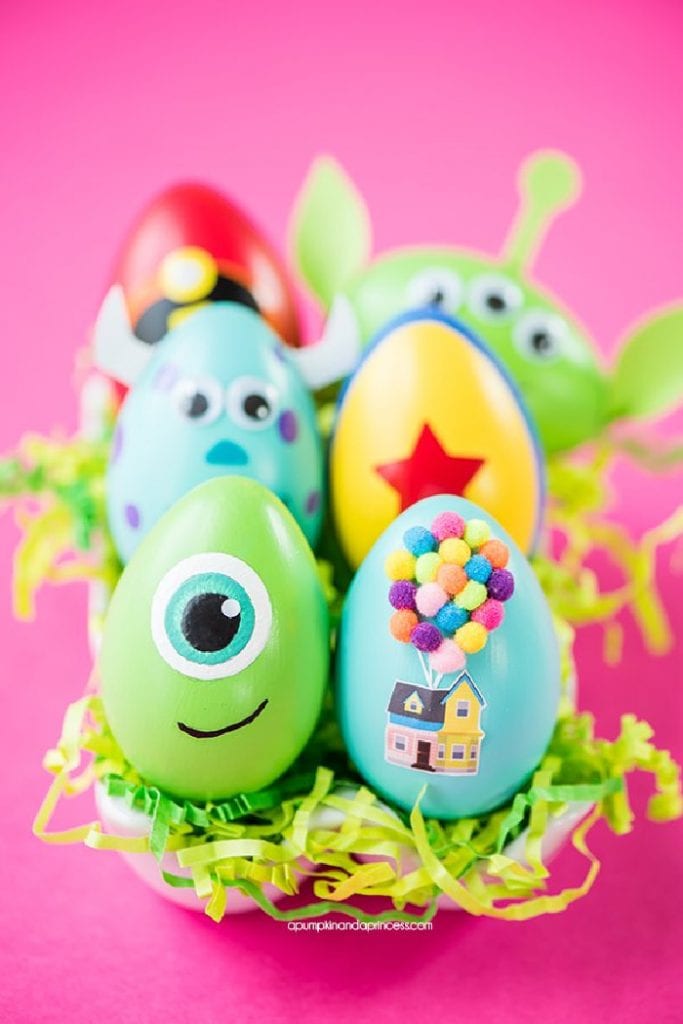
DIY Disney Pixar Easter Eggs | A Pumpkin and a Princess
Lia Griffith shares the full tutorial for these Animal Easter Eggs with Members, but I think they are inspiring.
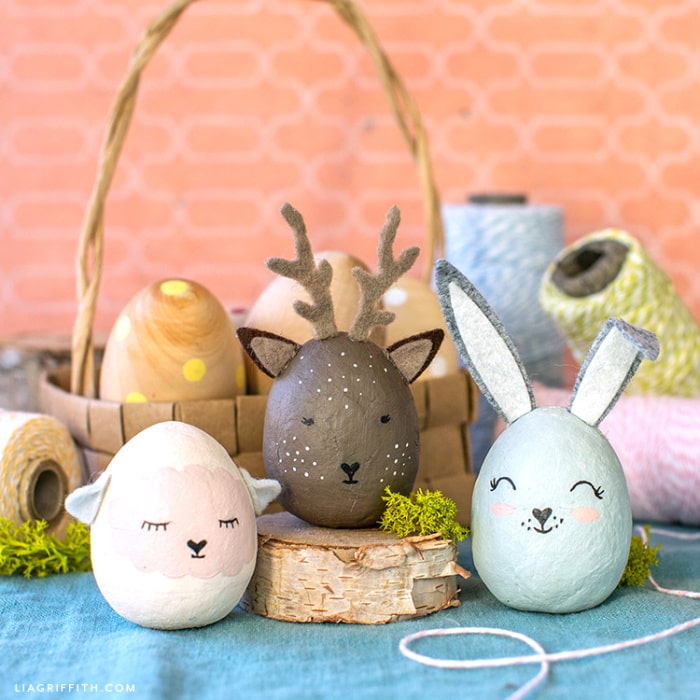
Easter Egg Animals | Lia Griffith
The Bunny face Easter eggs couldn’t be easier to make. A Girl and Her Glue Gun includes a free svg file to make it super simple to create.

Funny Face Easter Eggs with Free SVG File | A Girl and a Glue Gun
These little cactus Easter eggs start with real eggs. A very unique and different Easter egg in natural cactus colours. I enjoy the neutral colours of these eggs.
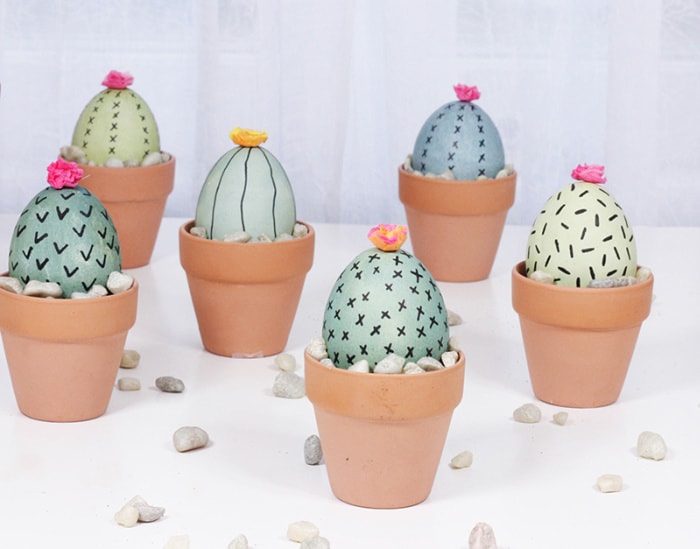
Easter Egg Cactus | Quartz and Leisure
These magical Unicorn Easter Eggs are great for tweens, start by painting a wooden egg, adding a face and pretty accessories.
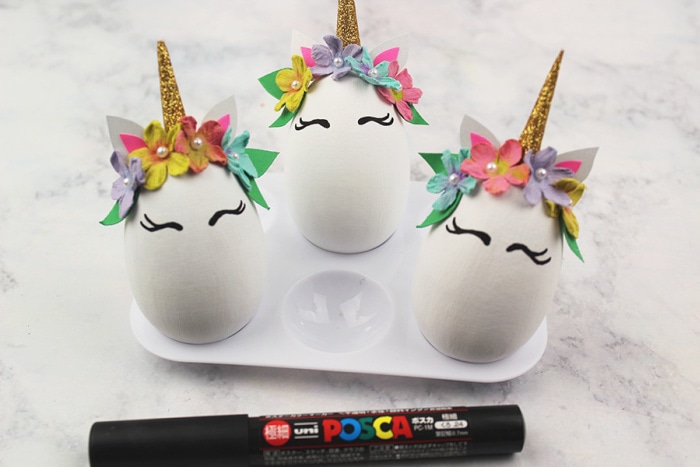
Unicorn Easter Eggs | I Heart Arts n Crafts
Temporary tatoos are the secret to these pretty Easter eggs. Those lovely vintage images are so special, did you spot the one of the car?
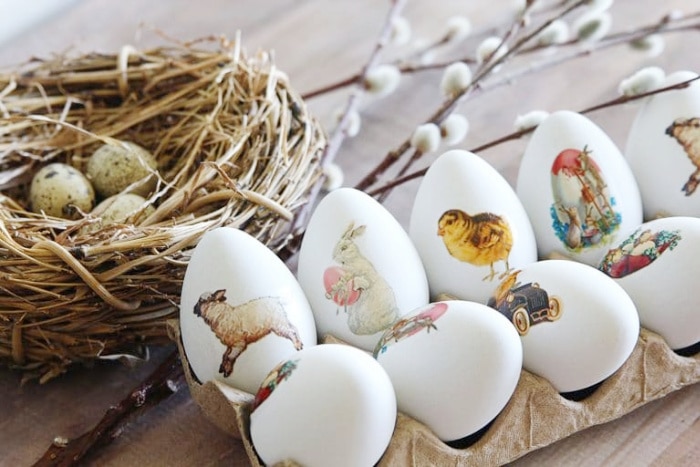
DIY Easter Eggs Decorated with Temporary Tattoos | House of Hawthornes
A simple yet adorable painted Easter egg craft. Such a sweet and unique looking Easter egg idea.
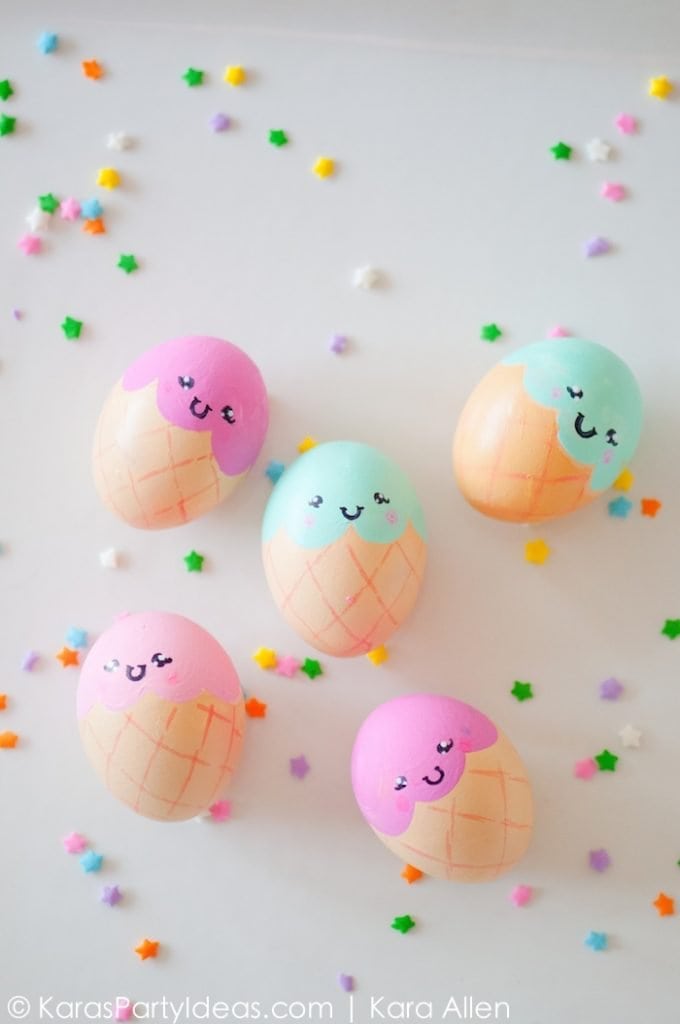
Ice Cream Cone Easter Eggs Karas Party Ideas
This farm themed Easter egg decorating craft is done with wooden eggs. After decorating your wooden eggs they can be used as toys. View from a Step Stool even shares the pattern for everything we need.
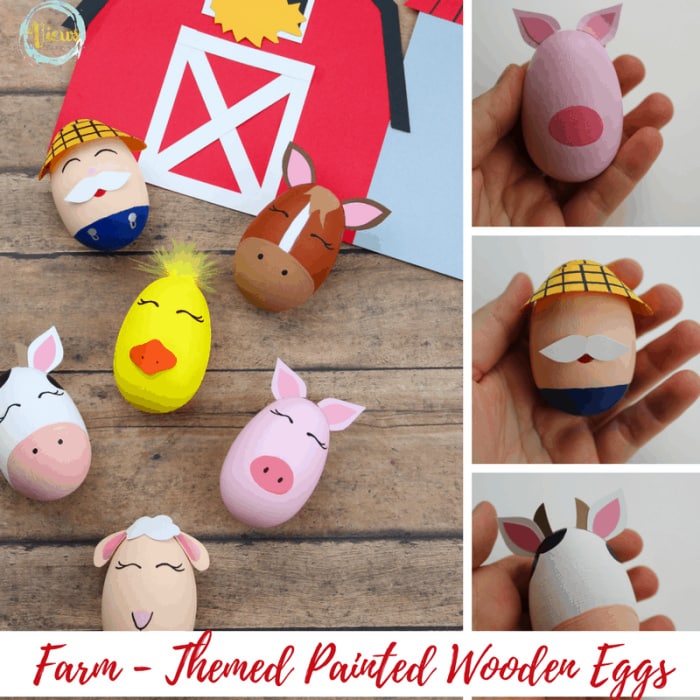
DIY Toys Farm Painted Easter Eggs | Views from a Step Stool
Moss is so trendy right now you see it everywhere in Easter and Spring decor. Cherished Bliss provides us with a tutorial of her gorgeousand unique diy moss covered egg.
a
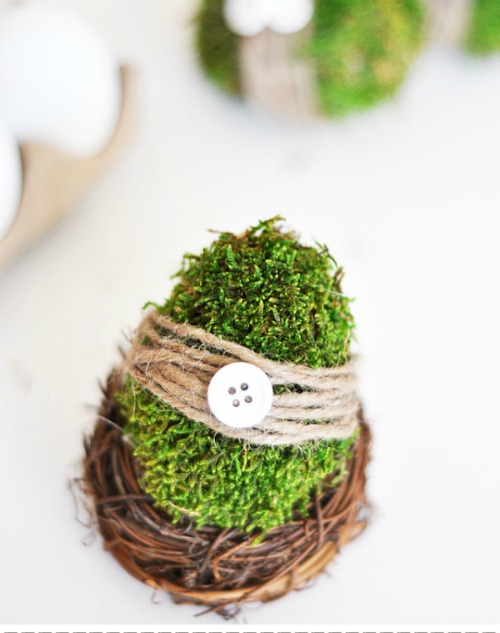
Moss Covered Easter Egg | Cherished Bliss
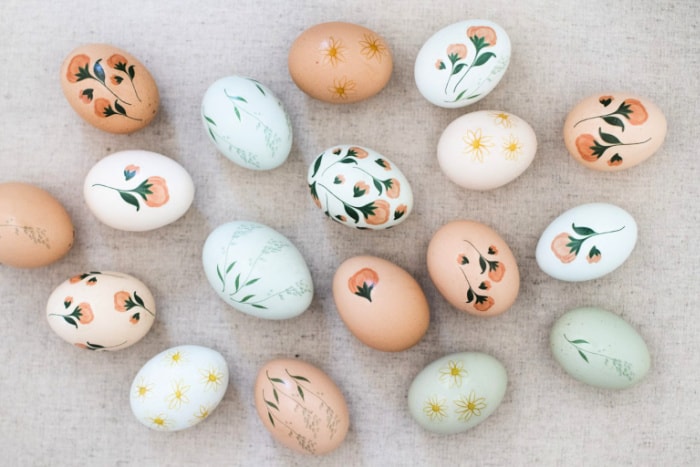
Painted watercolour Easter eggs by following a simple tutorial, trust me, no art ability required.

Watercolour Easter Eggs | Pretty DIY Home
Whether you use real blown out Easter eggs or faux Easter eggs these decoupage napkin eggs are beautiful. Such an inexpensive Easter decor idea.
a
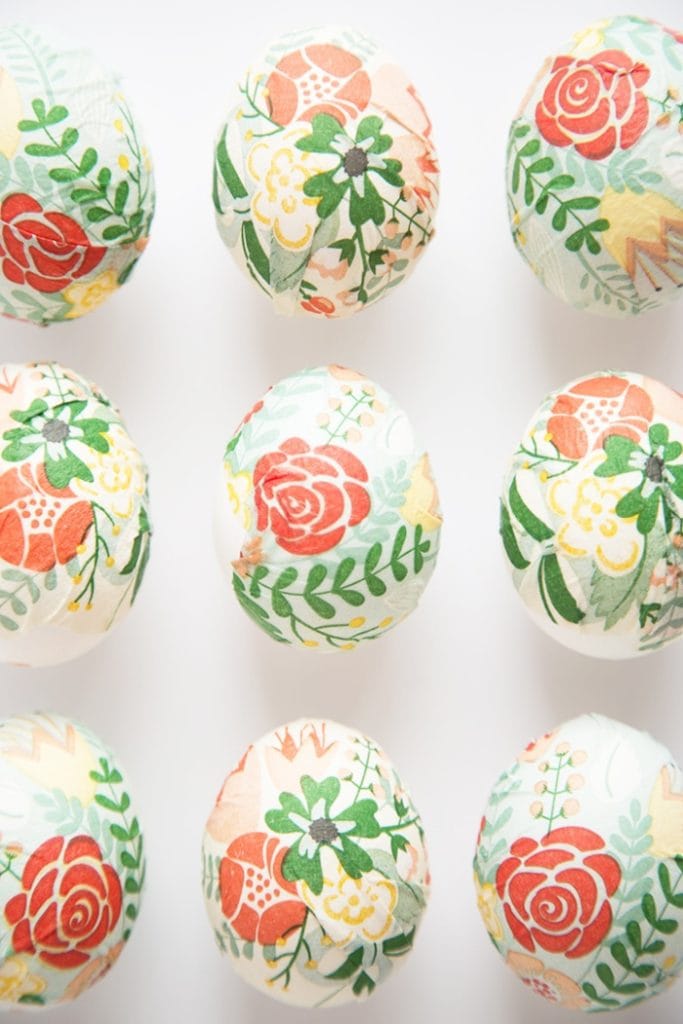
DIY Napkin Decoupage Easter Eggs | Alice and Lois
I laughed when I saw these bunny and chick Easter eggs from Frugal Fun 4 Boys. How can an egg be this cute?

Bunny and Chick Painted Eggs | Frugal Fun 4 Boys
Want to Try on or Several of These Tutorials ? Pin it to Have it Later

a
General Egg How-To Tutorials
In the old days we had to work with natural eggs and blow them out if we wanted to keep them. Even if you purchase faux eggs to decorate instead, this is always good information to have.
How to Keep Decorated Easter Eggs
You can keep and store real Easter eggs as long as you blow them out first. Solid hard boiled Easter eggs are easier for children to decorate as they aren’t fragile, but we shouldn’t eat eggs that have been out of the fridge more than an hour.
To store the blown out Easter eggs just place them in an egg container and store in a dark place. The shells store well as long as they have been blown out.
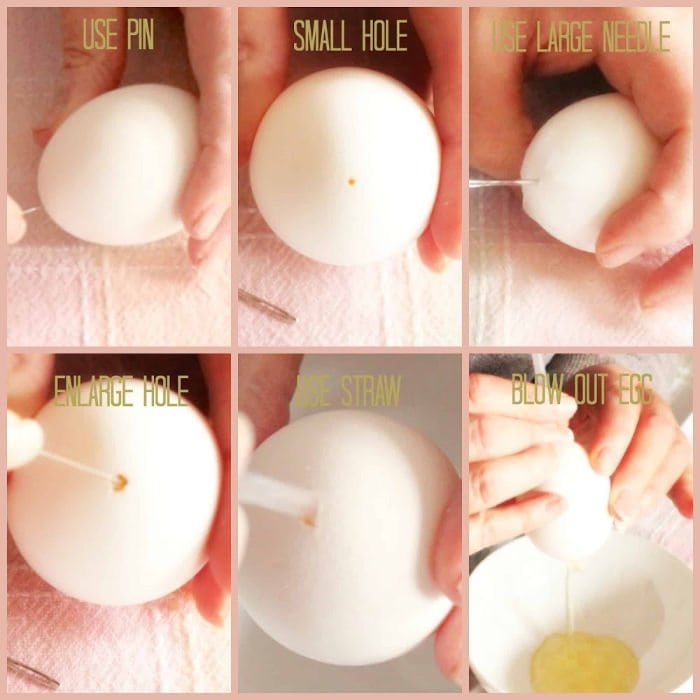
How to Blow out an Egg so it Keeps
I promise this is easy to do, all you need is a little bit of patience. The worst case scenario you may break one egg out of a dozen and your going to have enough eggs for an omelet supper either way.
a
Supplies for Blowing Out an Egg
Eggs, towel, bowl, tape, small headed pin, large sharp darning needle, and a juice box straw.
Start with washing your egg. Place on a clean towel, along with needles, straw, and bowl.
Firmly grasp the egg. Poke the egg with the small needle in the pointed end first, apply steady pressure and twist. You will feel the needle slowly grip and then drill through the eggshell. This may take up to a minute or so, this requires patience. I promise it works.
Once the small pin breaks the surface, apply tape over the hole. This will help prevent cracking.
Insert the large darning needle. Twirl it around gently to enlarge the hole a little bit and plunge in and out of the egg to break the yoke and sort of scramble the insides.
Using the small pin roughen up the edges enlarging the hole.
Repeat this on the other end.
Now that you have two holes. Cut the juice box straw and use just the little straight part.
Place your egg over the bowl, put the straw over the hole and huff and puff and blow the egg out.
Once this is done, run the egg under the tap to rinse out whatever little may be left inside.
You can then drain your eggs for two days, or do like I did and bake them at 300 F for ten minutes. Let cool and decorate.
How to Remove the Cap of an Egg
You will need Caution, an egg, and a sharp box cutter. Be cautious and careful and don’t get cut.
Make sure the box cutter blade is sharp. Apply a steady pressure towards the narrow end of the egg. Spin the egg slowly as you scratch a single line, it may take two rounds. The egg will start to crack along the weak scratch point. Continue cutting along the line until the cap of the egg is lose and comes off.
Empty the egg contents out into a bowl, you can still eat them. Rinse the shell out thoroughly with water and let dry.
How to Hard Boil Eggs for Decorating
Place eggs in a pot, cover with water so that the water is 1 inch above the eggs. Place on high heat, once they boil turn to very low heat and let them quietly cooks for about 12 minutes.
To test if they are hard boiled take an egg out of the water and spin on the counter. If it spins well that means the yolk is hard. If the egg wobbles it means the yoke is still runny causing the wobble.
I hope you have found this collection, unique, fun and informative. Happy crafting. Leanna
What a wonderful collection of tutorials! I want to try some out and why wait for Easter? I think these would be great…like some of the vintage prints or the vinyl cut outs for an ordinary breakfast with family or friends. Thank you for sharing at TADA! Thursdays
Leanna,
Rounding up these creative Easter eggs are amazing. As usual your sweet touches melt my heart. Thanks for sharing with TADA.
Happy Creating,
Karen Marie
Great round-up, so many beautiful egg tutorials. Thank you for sharing at Ravenwould.
Such a complete how-to for eggs! Thank you so much for taking the time to put all of the info together for us!
such a good round-up! Cute eggs
Thank you Ariel. Even I am shocked at how many pretty eggs I found before I was able to decide on a final selection. Enjoy your Easter.
Some lovely ideas and links for fun easter egg ideas here thanks!
Thank you Caroline. There are many pretty eggs but fewer with tutorials. I enjoyed reading the different methods and ideas.
Some beautiful projects to try, thanks for such a great round up – Pinning:) #handmademonday
Thank you very much, this is the first round up I put together. I appreciate the positive feedback.
So many beautiful ideas! I want to try the napkin ones this week over spring break. We have always hardboiled the eggs before use, but my husband can only eat so many (I’m not a fan). If you blow them out and bake them, are they ok for some time or will they start to smell?
If you blow them out and rinse them well they should be fine. Many people store them and reuse them. I had not thought of plastic eggs but you may be able to find some that would work well for the covered eggs.
Cute Easter Eggs! Wish I would have read it before I dyed mine! I blew my eggs and it wasn’t easy! My eggs came out really pretty though, I used red cabbage dye!
Hi Holly. Did you follow the same method for blowing out the eggs as I use? I will have to try the red cabbage next year and the beet was blotchy. Thanks for the feedback.
This is a nice collection of all of the ways to decorate eggs. Each one is so pretty.
Thank you Deb: I had gathered this collaboration a little while ago, but wanted to have some of my own in it (seemed cheating not to) and now its so close to Easter. I hope I left people enough time to make some before the Holiday. Thank you for commenting. Leanna
These are so elegant! I love all of them.
Nice round up of easter eggs, Leanna! Definitely pinning the tutorials I haven’t seen before in this round up.
Thank you Marie. I spent way more time then I planned on putting this together. I wanted all tutorials instead of just pictures. Glad you like them, I sure did.