Farmhouse DIY Bucket Makeover
Today I am sharing a DIY bucket makeover. Do you have lots of stairs in your home and a battle with clutter wagering on full-time? Our home is a four-level somewhat two-story, and instead of putting things where they go, they get left for me. I bet you can relate. That’s where these clutter catcher bucket ideas started.
Over the years I have developed a spot on each floor to place stuff for my next trip up or down the stairs. But those piles can get messy and these buckets will so so handy as a pretty container to stick odds and sods in before I make a trek to the other floor.
DIY Farmhouse Bucket Makeover
Every week I pair up with Sam from Raggedy Bits. This week we decided to do a DIY bucket makeover. It’s a very inexpensive craft DIY project that saved my buckets a trip to the trash. You will see Sam’s’ DIY bucket makeover, right at the end of my DIY bucket tutorial.
The DIY Bucket Before
The metal buckets were cluttering up my storage room. they used to be Fall decor, but they are too traditional for me and haven’t been used in forever.
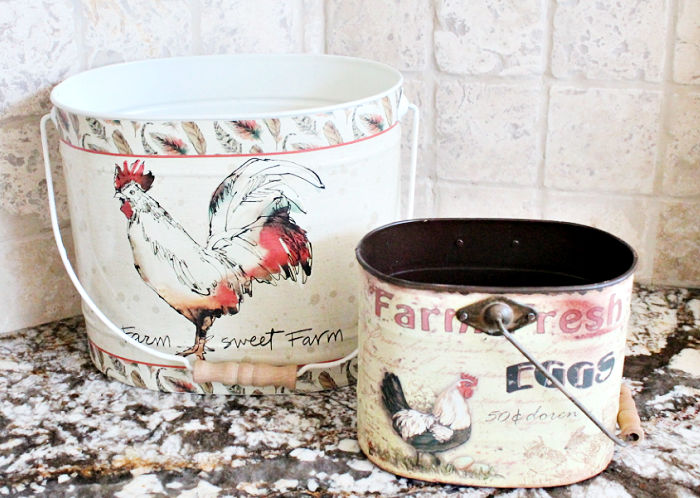
I still like the buckets, especially the little wood handles and there is not one thing wrong with them. But they just don’t suit our home anymore.
Bucket Makeover Supplies
Other than an old bucket there are a couple of inexpensive supplies you need for this makeover.
Old Bucket
Painters tape
Small and medium paint brush
Painting the Bucket
Step 1 – Cleaning and Preparation
Begin with giving your bucket a really good scrub using TSP and letting it dry. This is especially important if the bucket has been lying around for a while like ours was.
Next tape off any areas of the bucket you want to keep original. I wanted the inside of my buckets to remain as they were, so I carefully taped off the rim and handles.

Step 2 – Paint the Bucket
Paint the bucket(s) with primer and then two coats of latex paint in any colour you like. I used Binz 123 primer and Fusion Mineral Paint in picket white.
Let the paint dry well between each coat. It takes about half an hour to dry.
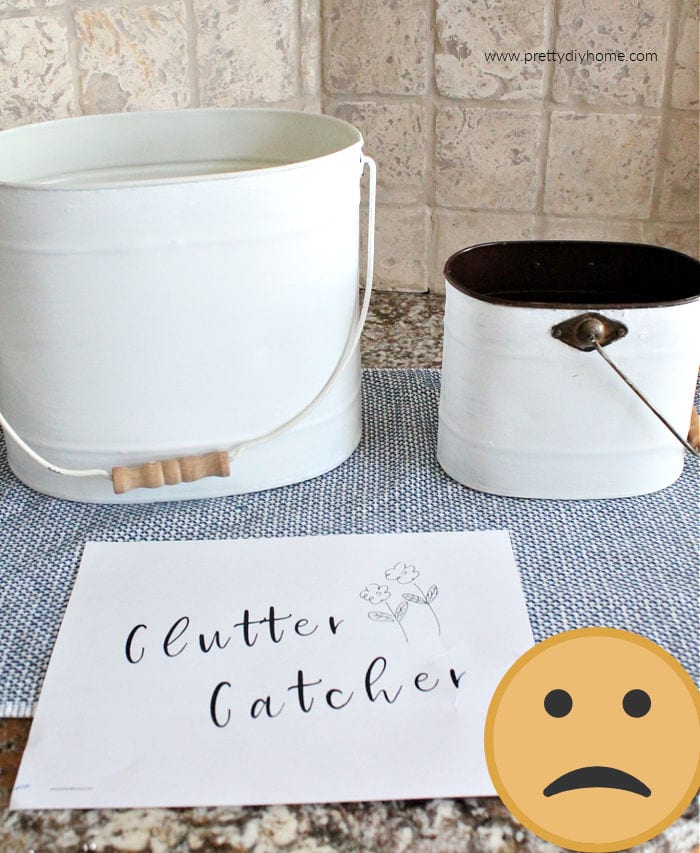
I began by making the flower pattern on the finished buckets and this clutter catcher printable. Unfortunately, I wanted to try scraping the lettering out, and then filling it in with fine-tipped pens. I disliked the colors of the pens, washed, sanded, and painted the buckets and started over. I will try it again without silly colored pens.
Step 3 -Adding the Floral Label
So with the clean white buckets all ready to go again. I swapped out the childlike colors of the pens for a more sophisticated all-black flower label. I printed out the label on a clear label sheet and attached it to the front of the bucket. You will notice the downloadable pattern is in PNG, to keep the background transparent when printing.
To be fair to the artist, I created the design using vectors from Rawpixel.com.
Begin by checking which side your printer prints on. Mine prints on the underside, so I placed the shiny side of the label face down on my printer. Then change the menu to print labels, easy peasy.
Once printed cut the flower label out and stick to your bucket. That’s all it takes.
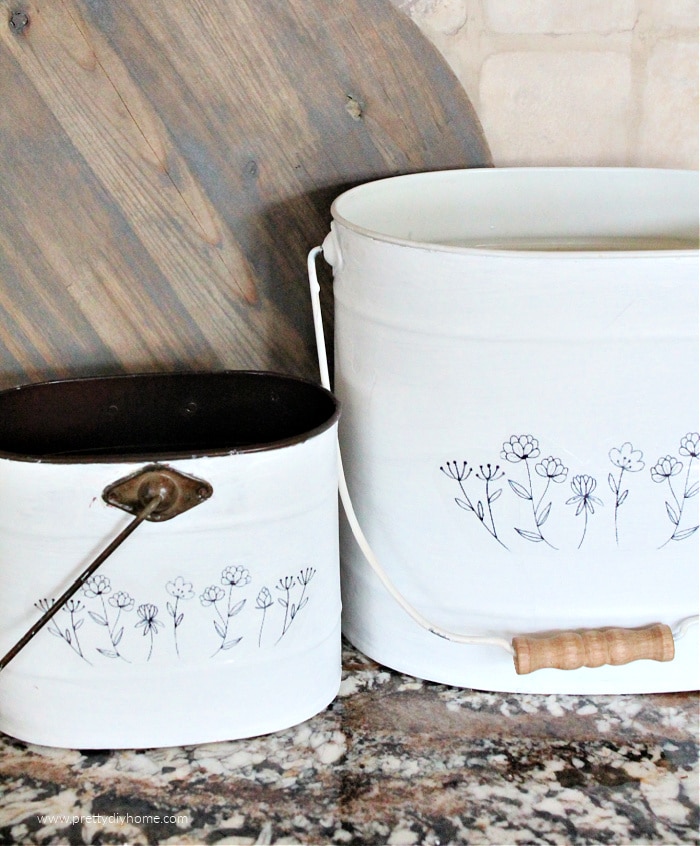
For now, the small bucket will be used on the countertop to hold keys, brushes, pens, tape from the office, and so forth. The large bucket will be perfect to hold books, papers, found socks, and the whatnots that need to go upstairs.
Other DIY Bucket Makeovers
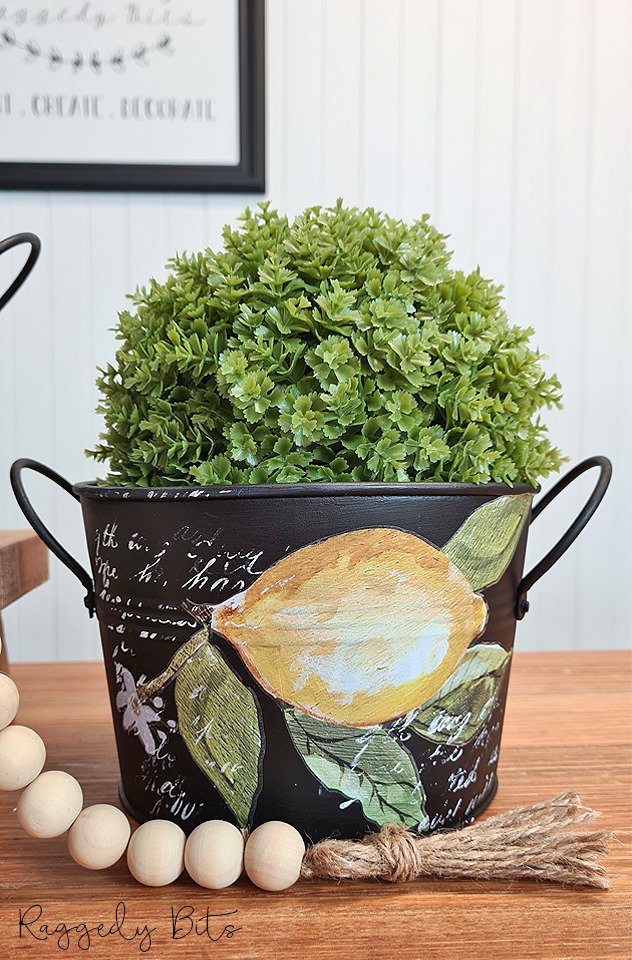
Sam from Raggedy Bits consistently amazes me, how trendy is this black DIY farmhouse bucket makeover complete with lemons?
Vintage Farmhouse Galvanized Bucket Makeover
Check out these other DIY bucket makeovers, lots of pretty and unique ideas for inexpensive and useful crafting.
Galvanized Bucket Makeover with Color Stain
Amy from Atta Girl shows us how to use coloured stain to transform a galvanized bucket into a pretty garden planter.
$2 French Floral Bucket Makeover
Would you believe this began as a $2 thrift store find? Add some spray paint, and a Prima transfer, and just like that Artsy Chicks Rule made this gorgeous French floral bucket.
Got an old bucket you want to craft with?
Pin this Idea to have for Later.
