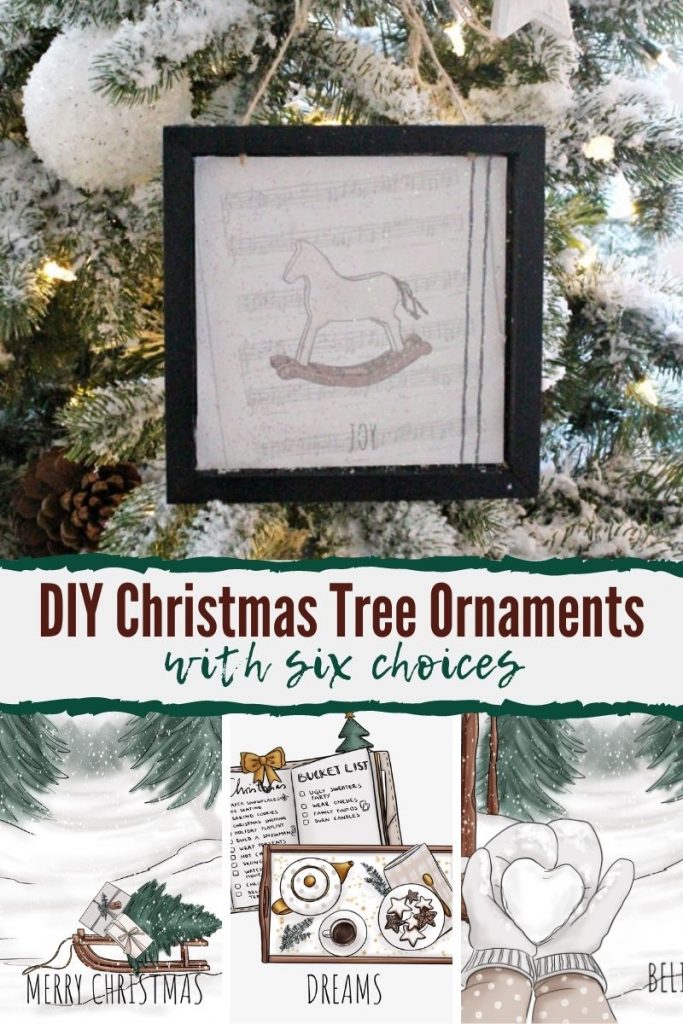
Farmhouse DIY Christmas Tree Ornament
If you love buffalo check and neutral decor ideas I think your going to enjoy these DIY Christmas tree ornaments.
If your tastes are different no worries this post is part of the Festive Christmas Event and you will find links to all kinds of different DIY Christmas posts at the end of my post.
Welcome back to year 6 of our Festive Christmas Event where we team up with oodles of our talented blogging friends we admire to bring you a plethora of creative ways to celebrate your holiday season
You will find new ideas every Monday and Wednesday between Oct. 19th through Nov. 18th. Scroll all the way down to find all the ideas linked at the end. At the end of my post you will find a listing of all the other DIY Christmas ornament ideas from the Fabulous Christmas group.

Its no surprise that DIY Christmas ornaments are very popular. They make fun easy craft projects and you can have fun creating them. Often they don’t take lots of time and like the one I am sharing they are often easy and inexpensive to create. My Farmhouse style ornaments start when I found plain all wood art frames at the dollar store. No building and the frame comes with the art backing. I loved that idea and scooped up several of them.
Supplies
The supplies and directions for this Christmas craft are simple. Kids can make them using craft paint and craft glue instead of the spray on adhesive.

8 by 8 inch wood frames (dollar store)
Black or White Paint
Dollar store twine
Free neutral Farmhouse Printables
White tissue paper and sparkles (optional)
Spray on adhesive
Directions
Start by painting the outside frame and the back of the frame with two coats of paint.
Print out the 6 different printables and carefully cut out the square prints you like.
Optional Tissue Paper and Sparkle Layer
In the gift stores this year I noticed several new style of purchased Christmas wall signs. Instead of having a painted background they have this layered paper look. Its softer and I like the look so I decided to create the look in a DIY version. It makes the printable lighter and softer looking, and I love it that way. When making the ornament check out to see which version you prefer, if you don’t like the soft look skip the tissue paper.

If using the tissue paper layer, iron one piece of paper flat to remove the wrinkles.
Lightly spray adhesive to the front of the paper prints. Carefully layer a piece of tissue paper over top while avoiding wrinkles. Flatten the tissue by apply light pressure from the center to the outside of the print.
Once glued trim off the excess tissue paper leaving the edges as straight as possible.
If you want to add sprinkles, spray a second light application of adhesive, sprinkle with the sparkles, let dry.
Adhering Printable to Frame
Before attaching the printable permanently test to check for fit. Dollar store frames are perfect and oh my either is my cutting. If the picture doesn’t fit properly trim you picture. If its cut too small and part of the plain background shows fix it by painting the backing with a little bit of the frame paint.
Adding the Twine Hangers
You can glue the twine to the top of the frames, or you can drill the frame and thread the twine through.

Using a drill make two small holes on top of the frame an inch from the outer edge. Cut two pieces of twine for each ornament. Tie a knot in one end. Thread the twine first through a large eyed needle and then through the frame. Tie the two ends together in a pretty bow and hang on the tree.

If you like this post? Pin it for Later.

How to Make Animal Crossing Balloon Present Ornaments My Pinterventures
Easy Painted Wood Slice Ornaments In Bright Colors Intelligent Domestications
Christmas Lights Scavenger Hunt As For Me and My Homestead
Wood Burned Ornaments The Aspiring Home
Snow Globe Ornaments From Recycled Ice Cream Lids! Little Vintage Cottage
Minion Ornaments Coffee With Us 3
Crystal DIY Christmas Ornaments From House To Home
DIY Pour Painted Christmas Ornaments Blogghetti
DIY Christmas Tree Ornament: Easy Decoupage Craft An Alli Event
Organza DIY Embroidery Hoop Ornaments Interior Frugalista
Disney Holiday Cookie Ornament Craft Simply Inspired Meals
Glittery DIY Candy Ornaments with Your Cricut Craft Rocker
DIY Starfish Ornaments for a Coastal Tree Across The Blvd.
Clothespin Snowflake Ornaments Polka Dot Poplars
Farmhouse DIY Christmas Tree Ornament Pretty DIY Home
Lightweight Bauble Ornament Eye Love Knots
Woodland Ornament DIY Christmas Tree Lane
Simple DIY Leather Christmas Ornaments Domestically Creative
Light Up Christmas Lantern Ornament Purple Hues and Me
DIY Wood Slice Christmas Ornaments Mom Home Guide
Lettered Wood Slice Ornaments Creative Cynchronicity
Swedish Paper Heart Ornament Tikkido
Personalizing Ornaments with a Cricut Domestic Deadline
How To Make One-of-a-Kind Snowman Ornaments My Humble Home and Garden
DIY Wood Slice Ornaments Farm Girl Reformed
How to Make Super Simple and Sparkly Christmas Ornament Our Sutton Place

Those are so cute and unique!
These are so pretty, Leanna! I really like the soft tissue paper look too. The printables you’re so kindly sharing with us are just darling! Just gorgeous, especially on a flocked tree..