
Free Printable Vintage Pantry Labels for Fall Decor
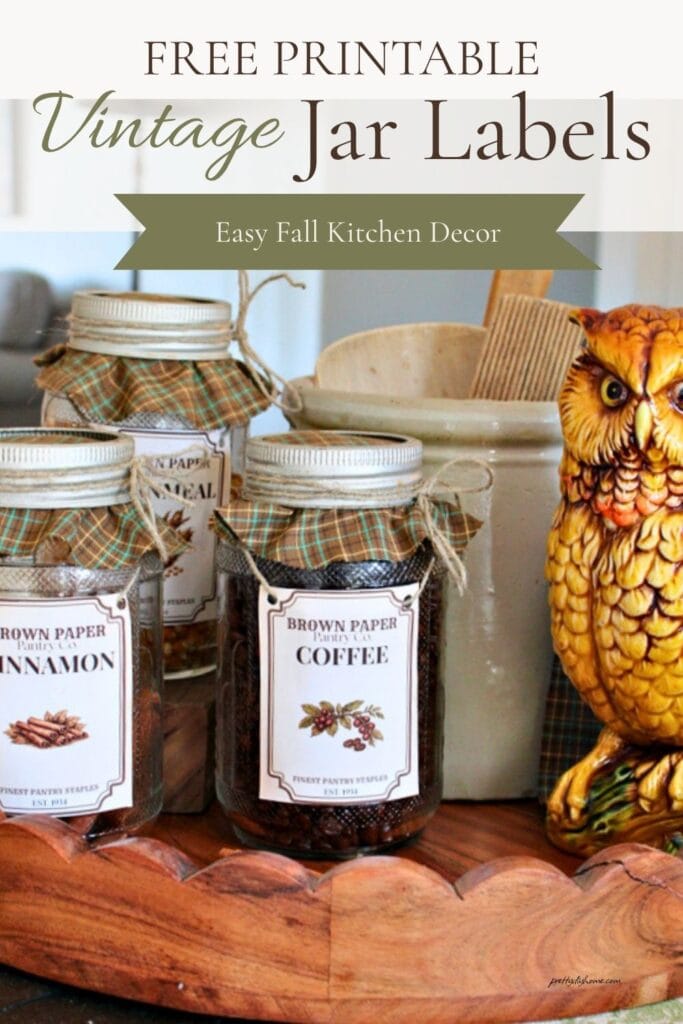
Do you have a collection of old jars sitting around that you should put to use, or do you keep seeing piles of them at the thrift store? These free printable pantry vintage labels were made for them, and they won’t hurt the jar.
I recently bought a lot of beautiful vintage Nabob jars with Art Deco details, and I wanted a way to show them off. To do that, I created this set of free vintage-style pantry labels. You can print them onto sticker paper if you want, but I’m tying mine on instead so there’s nothing permanent added to those gorgeous vintage jars.
The printables include nine different vintage labels, so you can choose the ones that best suit your jars and the look you want to create.
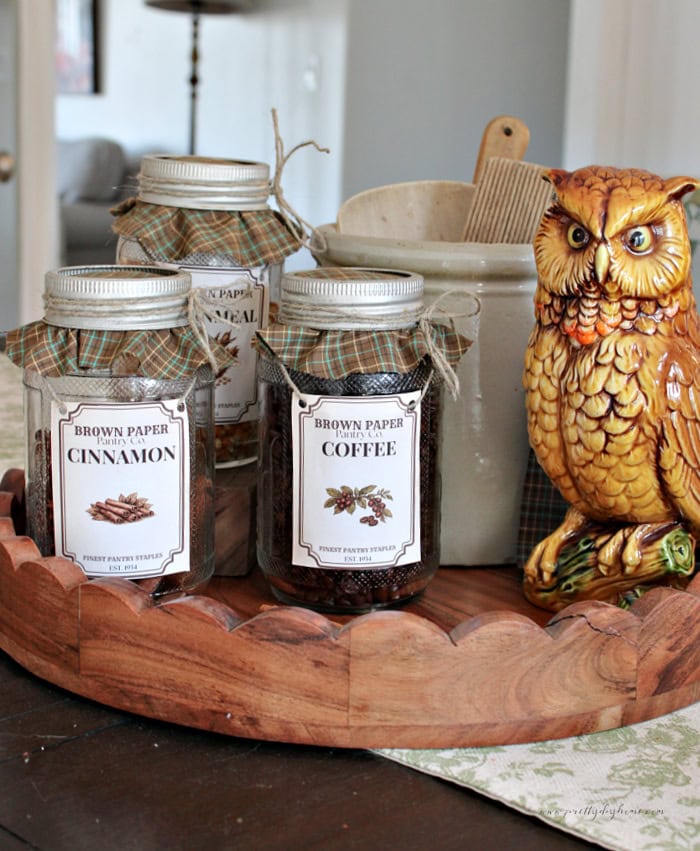
How to Make Vintage Jar Decor with Printable Labels
Choosing Jars for This Project
You can certainly use regular Mason jars for this project, although that look has been done many times. I prefer inexpensive vintage jars because they have so much more character, and they are often very affordable when the original lids are missing.
My jars are vintage Nabob jars from around the 1940s, with beautiful Art Deco details and their original glass lids and metal screw bands. You can often find all sorts of lovely old jars at thrift stores, garage sales, and estate sales. Don’t overlook the ones without lids. For a decorative project like this, many can be fitted with modern replacement lids, or you can simply cut a lid from sturdy cardboard since it will be hidden beneath the fabric.
Materials and Supplies
You don’t need much for this project, and most of the supplies are easy to substitute with things you may already have or can find at a thrift store. I did buy homespun fabric because I love the old-fashioned texture, but it was quite expensive here, so don’t feel like you need to use it. Muslin, linen, cotton plaid, drop cloth, an old tea towel, or even a thrifted cotton shirt would all work.
What You’ll Need
- Free vintage pantry label printables
- Vintage glass jars
- Lightweight white or cream cardstock
- Neutral homespun, muslin, linen, cotton plaid, or other lightweight vintage-style fabric
- Twine, baker’s twine, or butcher’s twine
- Small hole punch
- Scissors
- Glue tape and transparent tape
Optional Decorating Supplies
- Decorative fillers of your choice
- Ribbon, raffia, or narrow fabric strips
- Assorted fall picks such as sunflowers, wheat, leaves, or inexpensive Dollar Tree greenery
- Cotton balls and a few drops of essential oil for scent
- Hot glue gun and glue sticks for securing ribbons or small embellishments
Clean and Prepare the Vintage Jars
Wash the jars by hand in hot, sudsy water and let them dry completely, or simply pop them in the dishwasher. Make sure the jars are clean and check the glass carefully for any cracks or chips before using them.
Check the lids as well, especially if you are working with older jars. I had to throw away one of my original glass jar lids because it had a large chip.
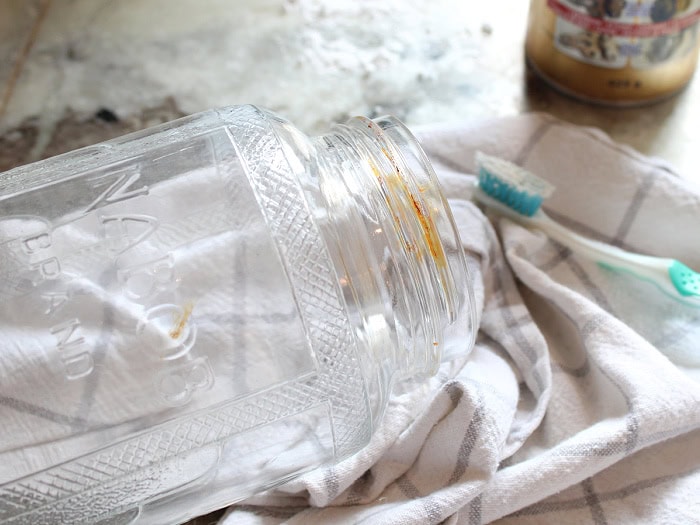
If your old metal rings have left rusty marks on the glass, don’t worry. A little Bar Keepers Friend and an old toothbrush worked every time I tried it. Gently scrub the stained area, rinse the jar well, and the rust marks should come right off.
Printing the Free Vintage Pantry Labels
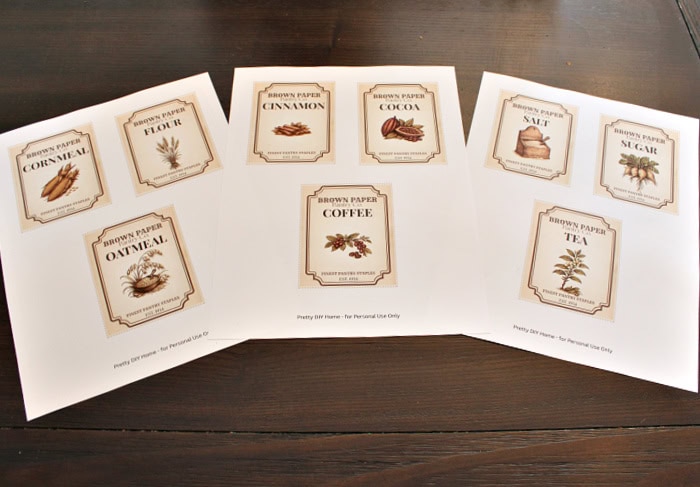
Download the free vintage pantry label printable and choose the labels you want to use. The set includes nine different vintage label designs arranged alphabetically on three separate sheets.
You can print the entire set or just the sheet that contains the labels you want for your jars. For the best result, print them on lightweight white or cream cardstock using your printer’s best-quality setting. Cream cardstock will give the labels a slightly warmer, more aged look, while white cardstock will keep the colours a little brighter.
Print the labels at 100% or actual size so they stay at the intended dimensions.
Cutting and Preparing the Labels
The labels include small dot markings to help guide your cuts. Cut each label out along the markings using scissors or a paper cutter, whichever you find easiest.
If you are tying the labels onto the jars, use a small hole punch to make a hole near each upper corner of the label. The little indents in the border make a natural place for the holes and help keep the label hanging straight.
If you printed the labels on sticker paper instead, skip the hole punching and simply peel and apply the label to a clean, dry jar.
Attaching the Labels to the Jars
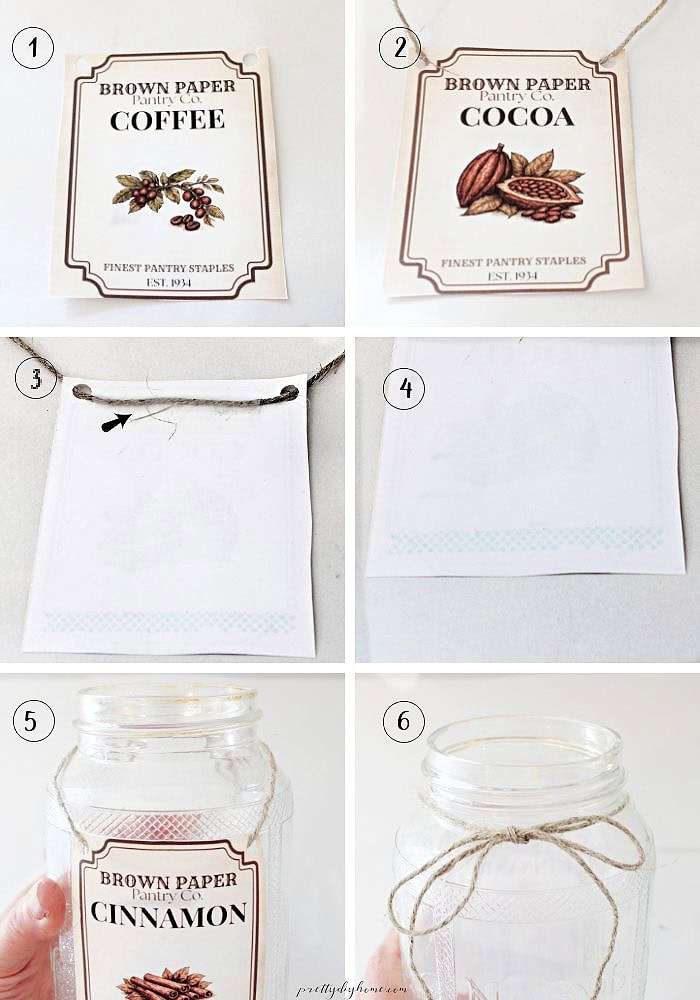
- Punch two holes at the top of the label.
- Cut about 24 inches of twine. Thread it through one hole from front to back, across the back of the label, then through the second hole from back to front.
- Centre the twine and tape it in place.
- Add glue dots or glue tape near the bottom.
- Press the label onto the jar.
- Pull the twine snugly toward the neck and tie a bow.
The twine supports the weight of the label; the small amount of adhesive simply keeps the bottom sitting flat against the jar.
Filling the Vintage Jars
For fall, I like filling the jars about two-thirds full with simple pantry ingredients that have warm colours and interesting textures. Coffee beans, cinnamon sticks, dried beans, rice, pasta, nuts, or even small dried corn kernels all work well. The contents become part of the display through the old glass, so choose fillers that complement the label and the rest of your fall decor. You can even use the same filler in each jar if you want a more monochromatic look.
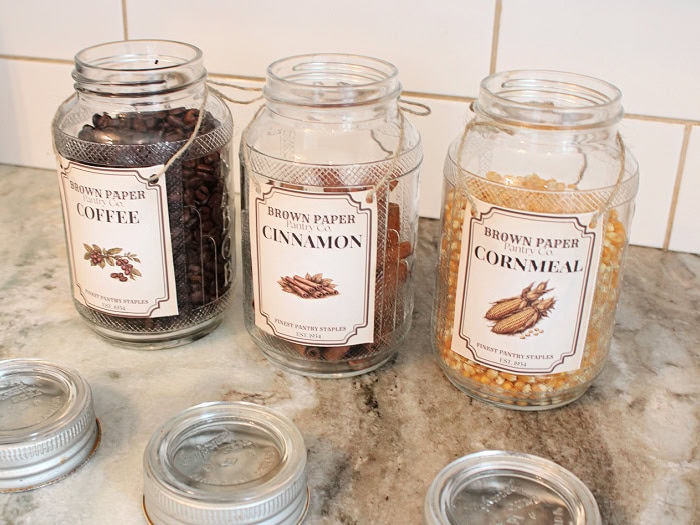
Adding the Lids and Fabric Covers
Adding fabric covers is completely optional. I think the jars look beautiful with just the vintage labels, especially if they still have their original glass lids. If your vintage jars are missing their glass tops, though, fabric is an easy way to camouflage a modern metal lid or even a simple cardboard lid cut to fit.
If you are using thicker fabric, place it over the lid and ring and tie it in place with twine or ribbon. For a different look, thinner fabrics such as homespun or quilting cotton can be placed underneath the metal ring before it is screwed back onto the jar. I especially like this method if you have very old galvanized metal rings like mine, because you can still see the aged metal while the fabric adds a softer layer underneath.
Cut the fabric into a circle about 7 inches across. You can use a Cricut, trace around a pot lid or saucer, or simply cut the circle with scissors.
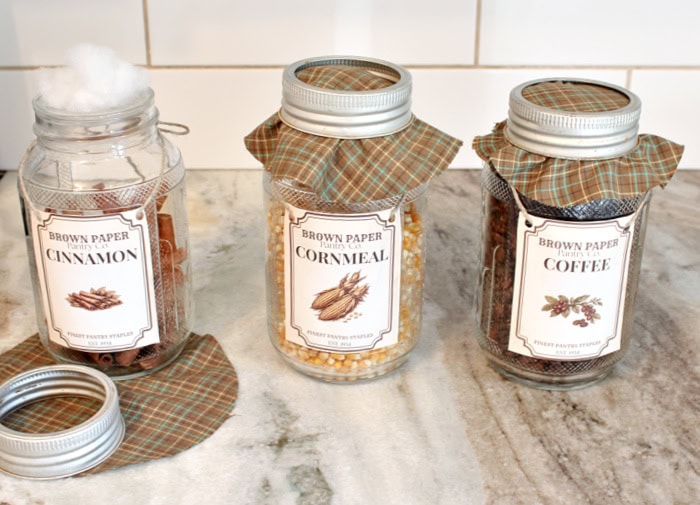
Place a small amount of stuffing on top of the jar lid, then centre the fabric over the stuffing. Finally, place the metal ring over the fabric and tighten it onto the jar. The stuffing gives the top a little fullness and helps create that soft, old-fashioned pantry jar look.
Adding Simple Embellishments
You can embellish the jars as much or as little as you like. I chose to keep mine very simple and tied a piece of fine jute string around each jar. These are beautiful vintage jars with pretty Art Deco detailing all on their own, so I didn’t want to cover them up with too many extras.
The vintage labels, old glass, and homespun fabric already add plenty of detail. Instead, I added the fall decor around the finished jars when I styled the display. This lets the beautiful Art Deco details on the jars remain part of the finished look.
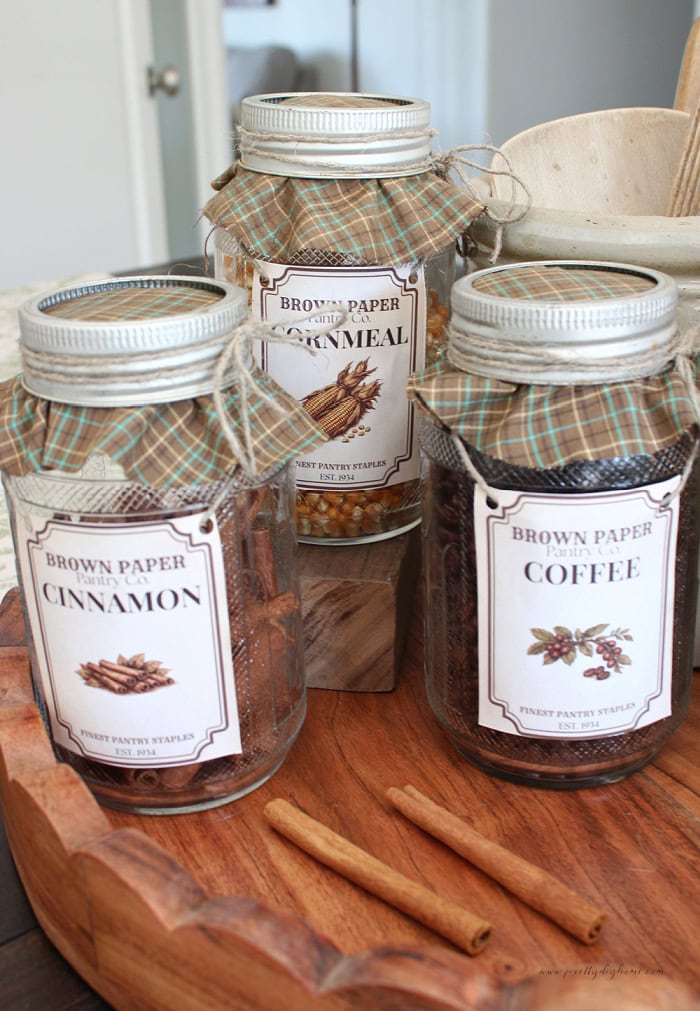
Styling the Vintage Jars for Fall
Once the jars are finished, they are easy to work into your fall decor. I grouped mine together and added simple seasonal pieces around them rather than attaching more decorations directly to the jars.
The vintage labels are designed in soft creams and warm browns, so they work especially well with neutral fall colour schemes, natural wood tones, olive and sage greens, muted oranges, and deeper rust or caramel shades. They also pair beautifully with old glass, galvanized metal, baskets, crocks, and other vintage kitchen pieces.
Small pumpkins, wheat, fall leaves, sunflowers, wooden boards, or other simple seasonal accents all work well. Keeping the extra decor around the jars instead of on them lets the vintage pantry labels and the beautiful old glass remain the main focus.
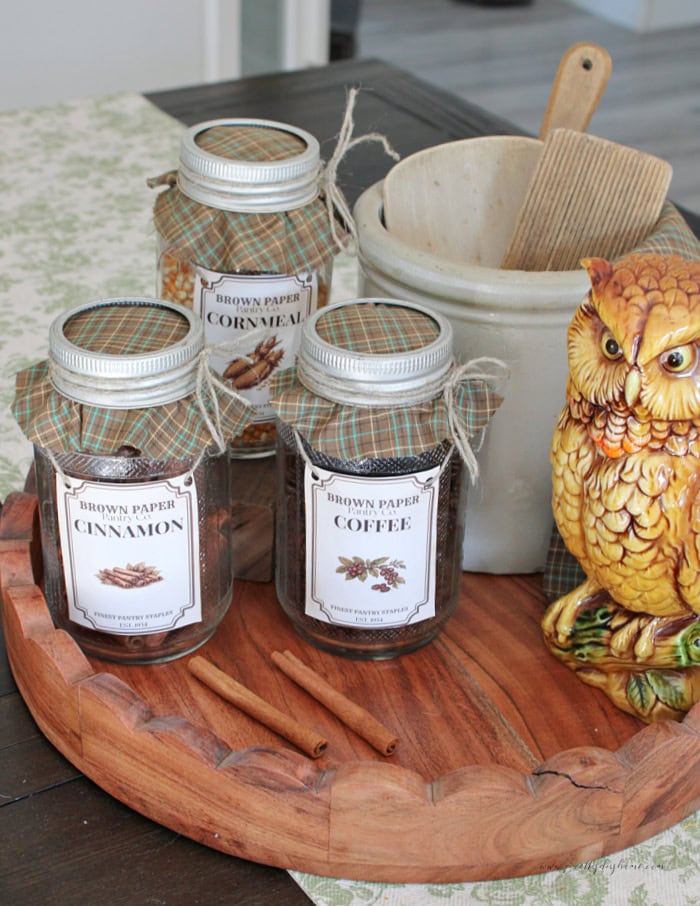
These vintage pantry labels are handy for both pretty food storage and seasonal decorating. I would love to have the storage space to keep bins of seasonal decor on hand that I could simply choose from whenever I wanted, but our home is just too small for that.
Instead, I like projects that can be made inexpensively, used for a season, and then passed along or repurposed. A few old jars can be bought secondhand, decorated for fall, and donated again later if you no longer need them. Mine will eventually be reused for gifts in a jar.
There really isn’t much decor less expensive than paper, and that is one of the reasons I love creating printables. I hope you find these vintage pantry labels useful for your own fall decorating.
Love these free printable vintage pantry labels? Save this project to Pinterest so you can easily find it again when you’re ready to decorate your kitchen or put together some simple vintage fall decor.
More Easy Fall Printables
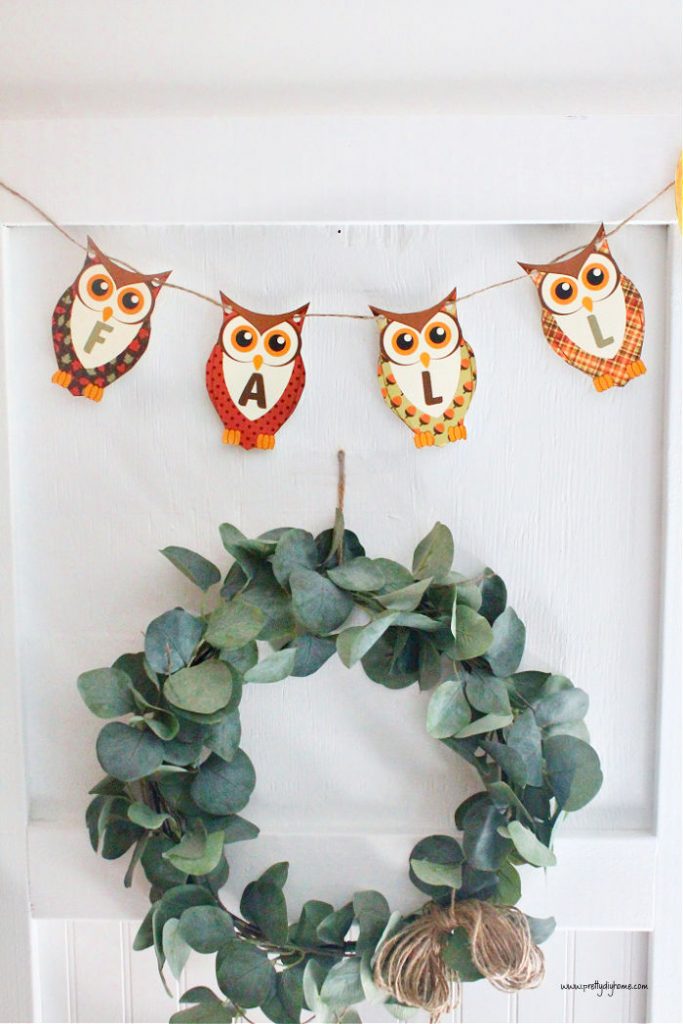
Free Printable Fall Banner with Owls
This cheerful fall owl banner is another easy way to decorate with paper. Simply print the owls onto cardstock, cut them out, and hang them with twine for an inexpensive fall decoration you can use on a shelf, mantel, doorway, or window.
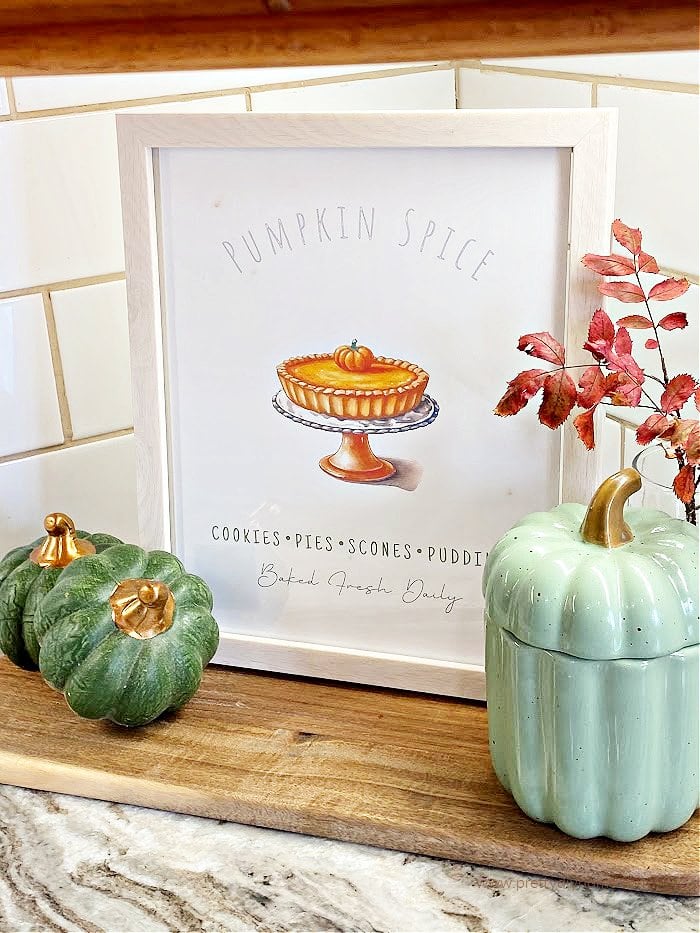
Free Fall Kitchen Printables
Add a little more seasonal colour to your kitchen with this collection of free fall printables, including pumpkin spice artwork, a coffee bar printable, and pretty plaid designs. They are an easy and affordable way to change your kitchen decor for fall without needing much storage space.