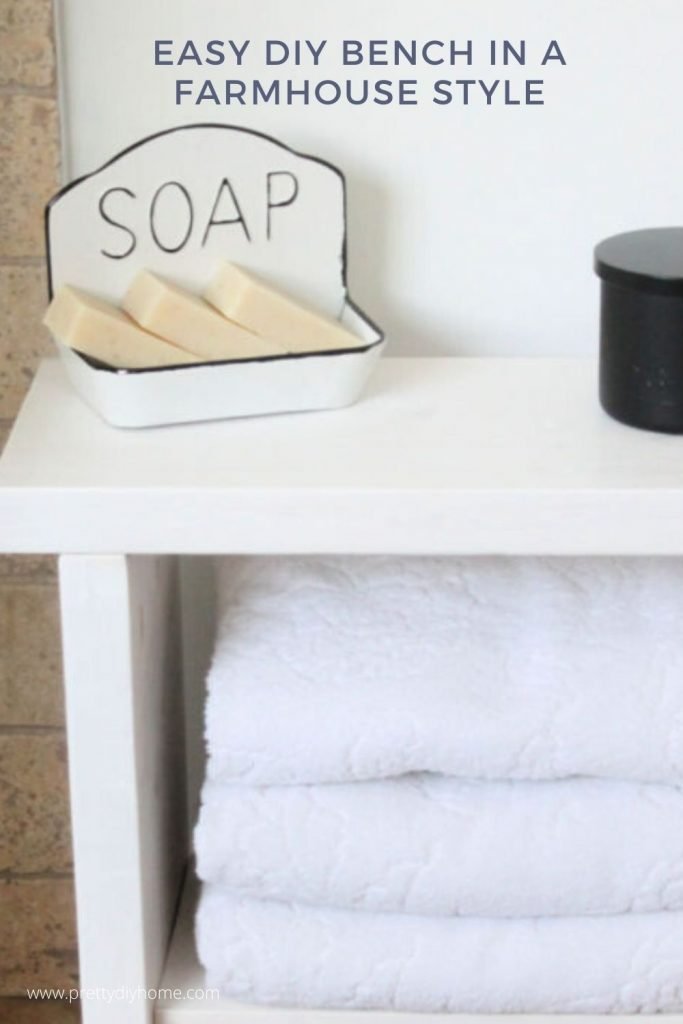
How to Build a Sturdy DIY Bench for the Bathroom
If you’ve ever wished for a little bench in the bathroom to stack fresh towels or just sit for a minute, this is such an easy project to make. This sturdy wooden DIY bench doesn’t take much time, uses only a couple of boards, and you can finish it in a color that works with your home.
We made ours in two different finishes, one in a soft whitewash for a lighter, airy feel, and the other in a rich walnut stain that shows off the wood grain. Both turned out beautiful, and both cost very little to build. If you’ve got a free afternoon and some basic tools, you can have one too.
DIY Bench Supplies
- 1 – 2″ × 10″ board
- 1 – 2″ × 12″ board
- 120-grit and 150-grit sandpaper
- Kreg jig
- 12 – 2″ wood screws
- Stain of choice (Dark Walnut or White Pickling Stain)
Cutting List
From the 2 × 10:
- One piece – 14″ long
From the 2 × 12:
- One piece – 20″ long (bench seat)
- Two pieces – 16″ long (legs)
- One piece – 14″ long (cross-piece shelf)
Using a Kreg Jig to Drill Holes for Connections
If you have never used a Kreg jig before, do not be intimidated. It is one of those tools that looks fussier than it is. The jig guides your drill so you can make angled holes called pocket holes. These pocket holes hide the screws inside your project so you do not have the screw heads showing on top, giving you a clean and polished finish. Here is a picture of my little Kreg jig kit.

You will notice the little plastic bag on the left. We will not be using those today. On the right is the jig itself, along with the special drill bit and the key you will use to fit it into your drill.
In the next picture, you can see the underside of the jig. The grey slider is the only moving part, and it adjusts to match the thickness of the wood you are drilling into.

Always measure the actual thickness of your board rather than relying on the commercial size. For example, my 2-inch by 12-inch board is really only 1 ½ inches thick. I adjusted the grey slider to match that measurement. The markings on the jig are clear in person, although they can be a little hard to see in photos.
Once you have the slider adjusted for the thickness of your wood, flip the jig over. Fit it tightly against the edge of your wood. Measure it an inch from the outside, and clamp in place.
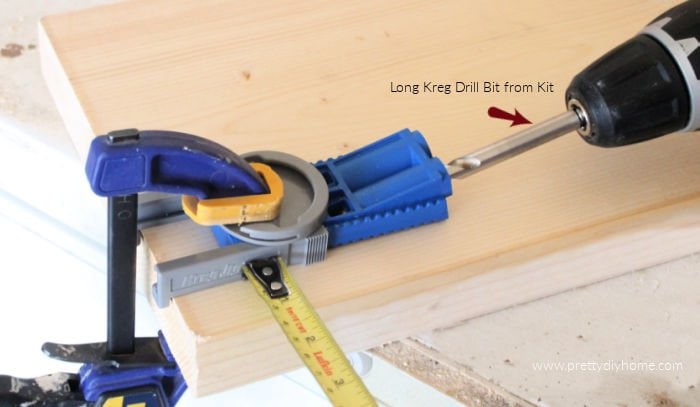
Place the long drill bit from your kit into the drill. Hold the jig steady, line up the bit with the slot, and drill. The hole will not go through the end of the board. It creates an angled opening for the screw to slide into later.
Now that you know how the jig works, let’s drill the real pocket holes for the bench pieces.
Step 3 – Drill Pocket Holes in the Bench Pieces
Now that the jig is set and you have practiced, it is time to make the real pocket holes for the bench parts. On each leg piece, drill three pocket holes along the top edge, two near the corners, and one in the center. On the cross piece, drill four pocket holes, two at each end.

These holes will allow you to attach the legs securely to the seat and the cross piece between the legs while keeping all screws hidden from view.
Step 4 – Sand the Wood
Once all the pocket holes are drilled, give every piece a good sanding. Start with 120-grit sandpaper to smooth away any rough spots and edges, then finish with 150-grit sandpaper for a nice, clean surface that is ready for stain or paint. Sanding now is much easier than trying to smooth the bench after it is assembled.
Assembling the Wood into a DIY Bench
Now that all the jig holes are done, it takes about ten minutes to put this awesome little bench together. Start by attaching the cross piece to one leg. You will be putting the screws into the jig holes on the cross piece. (not the holes on the legs, they are for the top.)
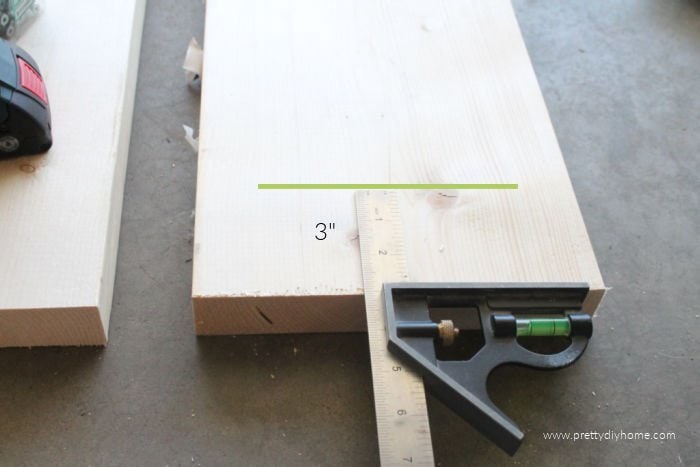
Measure three inches from the bottom of the legs and make a mark. Center the cross piece on the leg, and screw it into place.
The jig set came with the long bit needed for adding the screws.

Once you have the cross piece attached to the two legs, flip the legs over so the jig holes of the legs are against the bench seat.
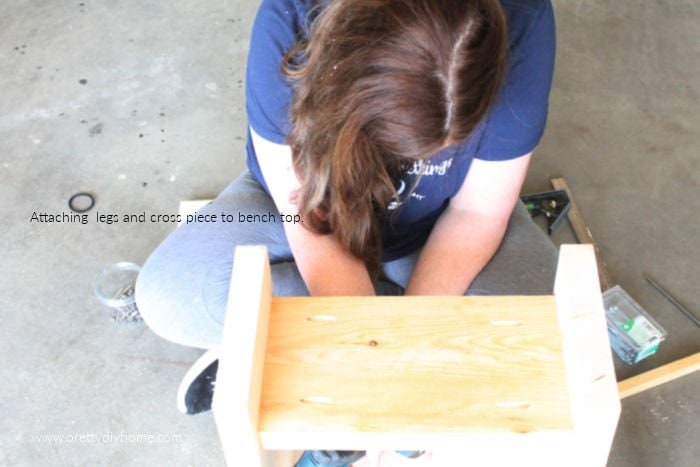
Center the legs over the bench seat. Measure to make sure it is centered and then attach the legs to the bench seat with the six screws. Once done flip over.

I love how classic and simple, and sturdy this bench is, especially with all the wood grain.
Finishing the Rustic Farmhouse DIY Bathroom Bench
The choice of finish is obviously yours, I have three variations to show you, walnut stain, white pickling stain, and what I call modern farmhouse stain. I finished one bench in modern farmhouse stain and the second one in white pickling stain.
Here is the comparison of the finishes.
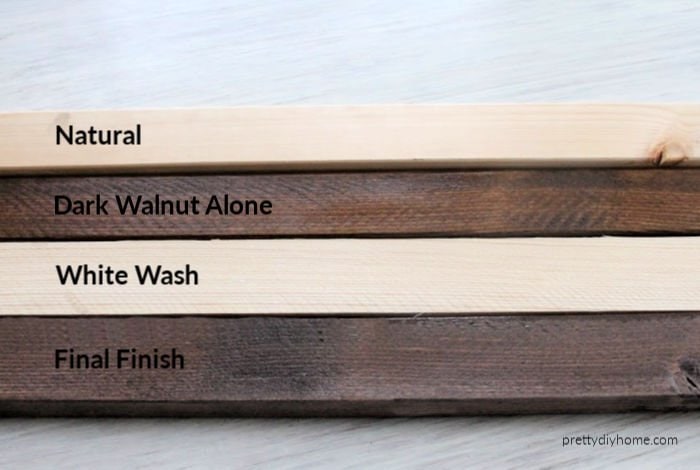
Natural Finish
Clear coated with polyurethane, no staining at all.
Dark Walnut
The dark walnut finish is two coats of dark walnut stain. I applied stain and spread it evenly over the wood using a foam brush. Once dry, I added a second coat.
White Wash
The white wash finish is two coats of white pickling stain. Apply the pickling stain and spread it evenly over the wood using a foam brush. Once dry, I add a second coat.
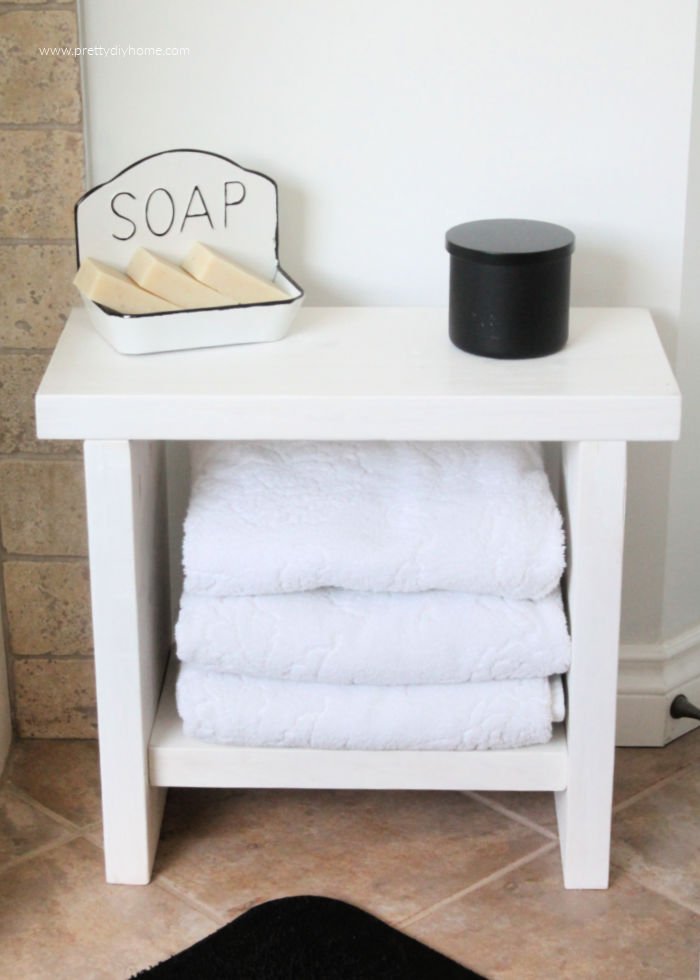
This white farmhouse DIY bench sits outside our master bath shower. I am using it to hold towels, but it’s also wonderful for doing pedicures. It has a matching simple farmhouse towel hanger that I will share this week.
Modern Farmhouse or Final Finish
Frankly, this is a new finish I am playing with. I started by mixing 1 tbsp of white latex paint with 3 tbsp of water.
Using a paintbrush, I painted the wood and left it for 10 seconds, and then wiped most of it off with a soft rag. Let dry for 15 minutes.
I then proceeded by adding two layers of dark walnut. It gives the wood a bit of a milky texture. I love it, but it takes some fiddling to get it the way you like. I suggest trying it on a scrap piece of wood and seeing if you like it.
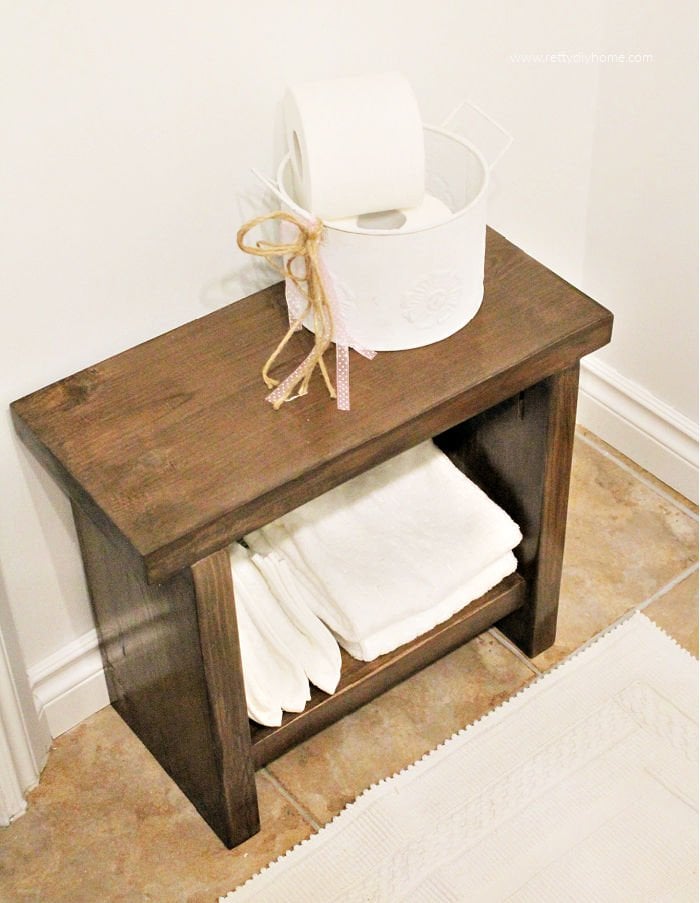
This little DIY stool is in our main floor half bath that most of our guests use. I don’t expect it to be used very often as a stool, but it’s the perfect size to store some fresh linens and toilet paper without using much space in our tiny half bath.

Don’t you just love the Kreg Jig! I think it’s one of my favorite tools in the workshop. Love your adorable farmhouse benches,, Leanna! I could use one in my front entry.