How to Make Repurposed Vintage Linen Hanger Covers
Today, I am sharing how to make hanger covers from repurposed vintage linens. They are especially handy during the summer months when spaghetti straps, silky tops, and lightweight dresses constantly slide off regular hangers.
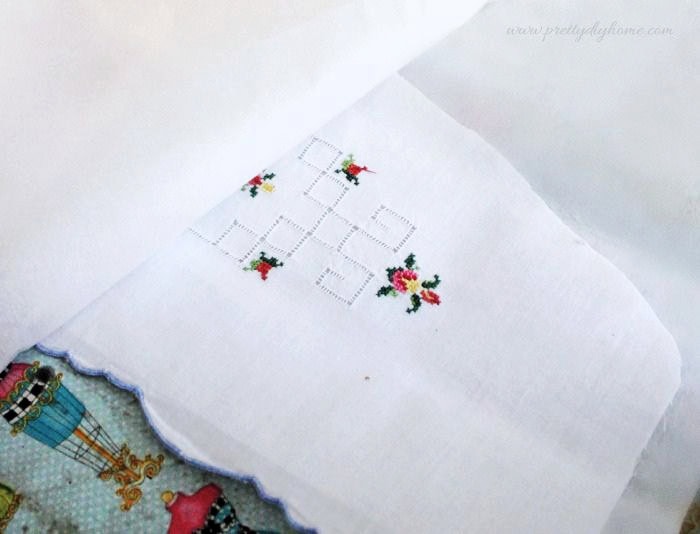
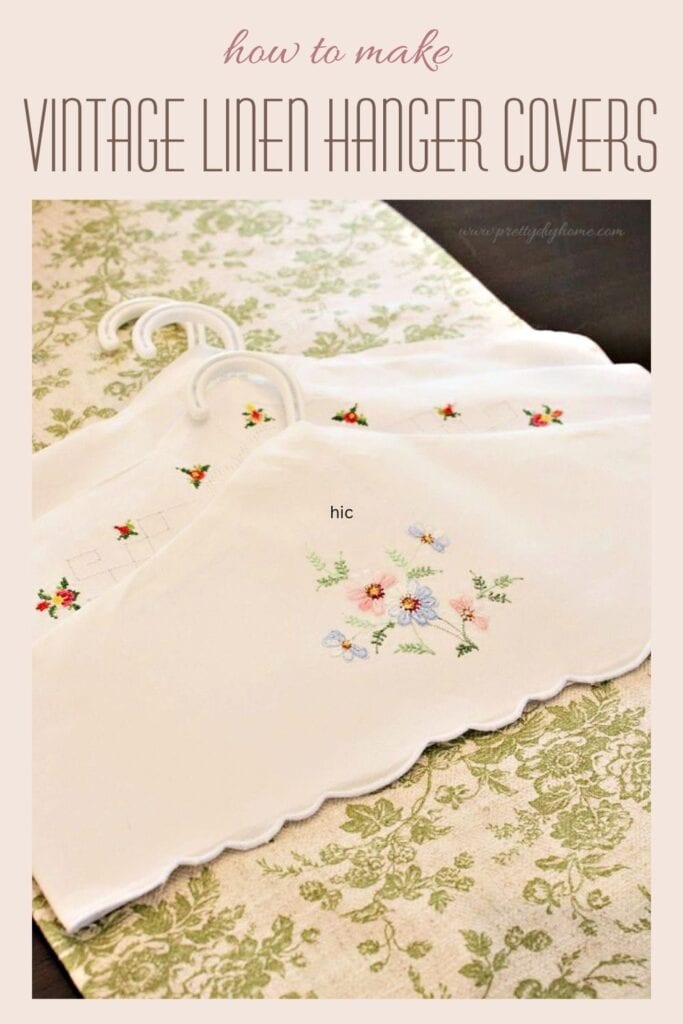
These DIY hanger covers are made using vintage embroidered pillowcases, often found at estate sales and antique shops. They feature delicate embroidery, lace edging, and beautiful quality cotton fabrics that are far too pretty to leave behind without a purpose.
Unfortunately, many vintage linens are left unused because of stains or worn fabric. But with a closer inspection, you can often find sections with beautiful embroidery and decorative edges still completely intact and perfect for repurposing into pretty hanger covers.
How to Make Repurposed Vintage Linen Hanger Covers
This easy sewing project is a wonderful way to repurpose vintage embroidered pillowcases into something both pretty and practical for the closet.
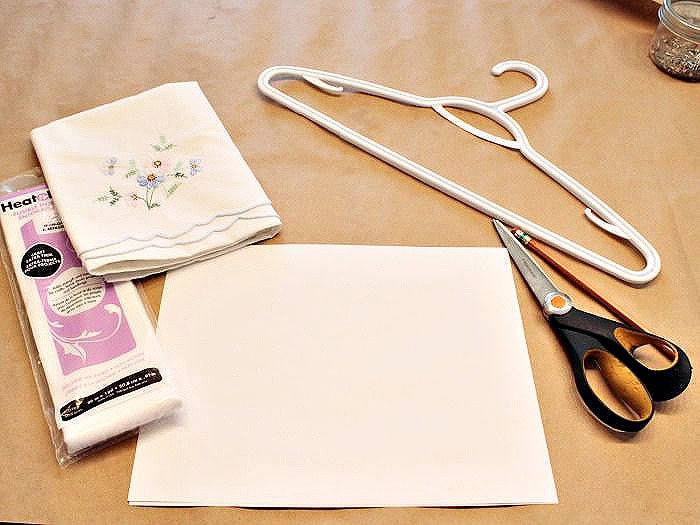
Supplies Needed
- Vintage embroidered pillowcase or vintage linen
- Wooden or plastic clothes hanger
- Lightweight iron-on interfacing
- Basic sewing supplies (pins, scissors, matching thread, sewing machine)
- Paper and pencil for making a pattern
- Iron and parchment paper for attaching interfacing
Step 1: Prepare the Vintage Pillowcases
Before starting, wash and iron your vintage pillowcases or linens. I recommend using OxiClean to gently brighten older fabrics and avoid using bleach, which can harm delicate vintage fibers and embroidery.
When purchasing vintage pillowcases, look for clean embroidered sections and decorative edges that are still in good condition. Stains on the upper portions of the pillowcase are not usually a problem for this sewing project, as we only use the decorative lower section.
If you are not using a vintage linen pillowcase, you can use the same process with vintage tablecloths, embroidered runners, or other decorative linens. Simply line up an already finished edge of the fabric along the bottom of the hanger cover pattern, the same way you would with the pillowcase edge.
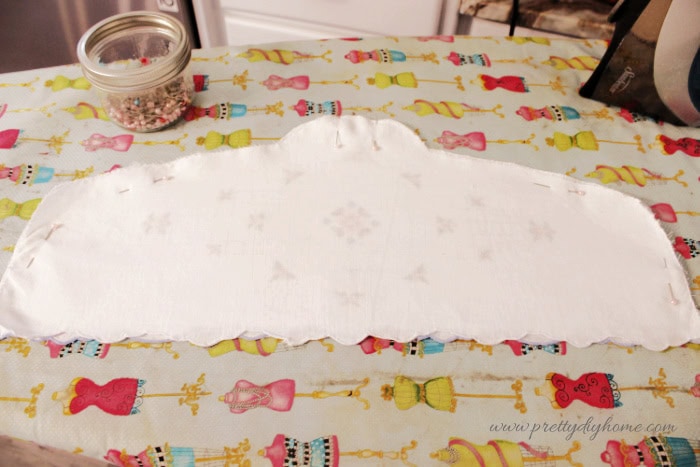
Step 2: Make a DIY Hanger Cover Pattern
As each hanger can vary slightly in shape and size, I recommend making your own simple pattern using the hanger you plan to use.
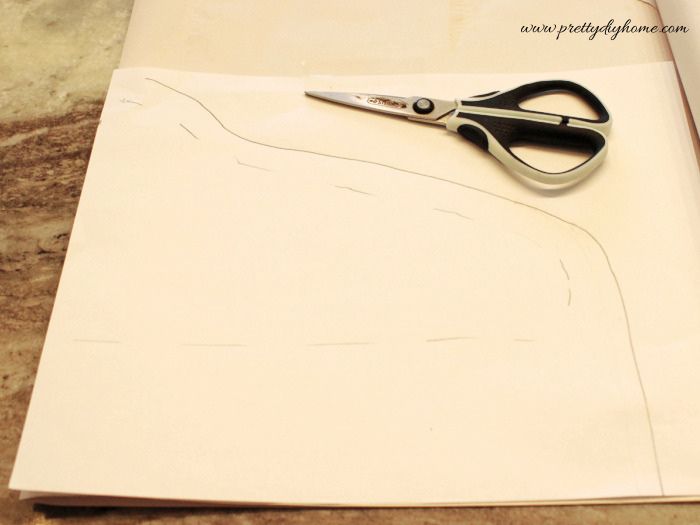
Place a piece of paper underneath the hanger so the hook portion sits along the folded edge of the paper. Trace around one side of the hanger, then remove the hanger and draw a second line approximately half an inch outside the traced line for the seam allowance and to allow room for the hanger inside the cover.
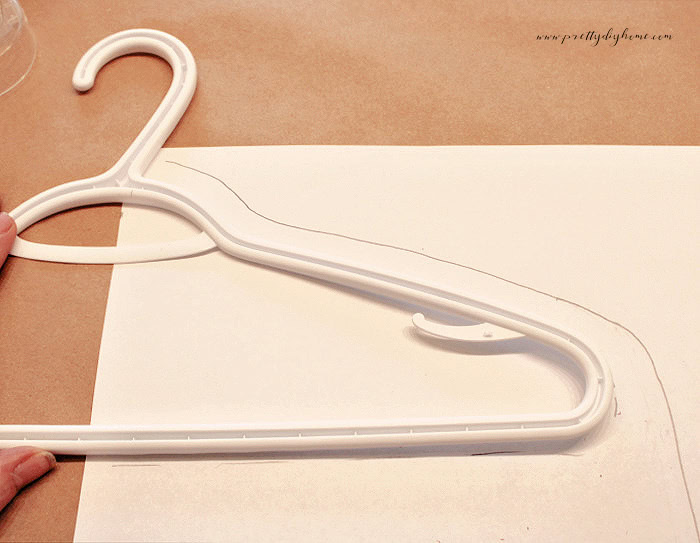
Folding the paper in half before cutting ensures both sides of the DIY hanger cover pattern are even and symmetrical. Cut out the pattern, unfold it, and place the hanger on top to make sure the size and shape fit properly before cutting your fabric.
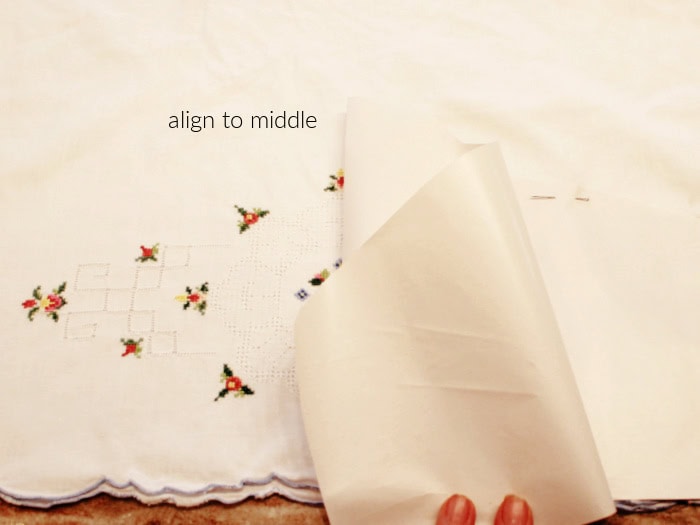
Step 3: Cut the Fabric and Interfacing
Lay your ironed vintage pillowcase flat and place the pattern along the finished decorative lower edge, making sure any embroidery or decorative details are centered on the pattern. Pin the fabric together well so both layers remain aligned while cutting.
Cut around the pattern, then repeat the process using lightweight iron-on interfacing. For this project, I only added interfacing to the front portion of the hanger cover to help the embroidery stay crisp and smooth.
Step 4: Attach the Interfacing
Using parchment paper to protect your iron, place the glue side of the interfacing facing upwards, then place the front fabric piece on top with the wrong side of the fabric against the interfacing.
Carefully iron the interfacing onto the fabric following the package directions. I only added interfacing to the front portion of the DIY hanger cover to help the embroidery stay crisp and smooth while still keeping the back soft and flexible. You can skip the interfacing entirely if you prefer a softer, less structured hanger cover.
Step 5: Pin the DIY Hanger Cover Together
Lay the front and back fabric pieces right sides together, carefully matching the bottom finished edges and curved outer shape. I made sure the finished bottom edges were aligned evenly and added extra pins near the bottom corners to help keep everything straight while sewing.
Pin the entire hanger cover well to prevent the fabric from shifting while sewing. At the top center of the hanger cover, place two pins approximately one and a half inches apart to mark the opening for the hanger hook. Leave this small section unsewn when stitching the hanger cover together.
Taking the time to pin carefully helps prevent the curved edges from shifting or puckering during sewing. Although the seams on this project are small and simple, the curved shape of the hanger cover can easily pull unevenly as you sew without enough pins to help hold everything in place.
Step 6: Sew the Hanger Cover
Using a narrow seam allowance, begin sewing at one side of the hanger opening and slowly follow the curved outer edge of the hanger cover down toward the bottom. Backstitch at the beginning and end of each seam to help secure the stitches.
I found it easier to sew one side at a time instead of trying to sew around the entire hanger cover in one continuous pass. Sewing the curved edges separately helps prevent the fabric from shifting or puckering as you sew.
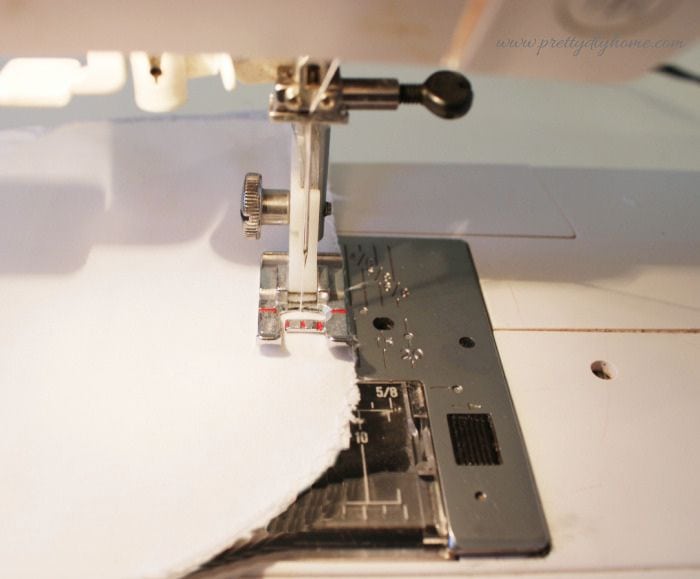
Once one side is sewn, smooth the fabric back into place and repeat the process on the opposite side, leaving the small opening at the top center unsewn for the hanger hook.
Step 7: Turn and Press the Hanger Cover
Turn the sewn hanger cover right side out through the bottom opening and gently smooth out the curved seams with your fingers. Align the seam toward the center using your fingers, then press the hanger cover flat and neat with an iron.
At the top opening for the hanger hook, fold the small unsewn fabric edges inward neatly and press them flat. The finished bottom edge of the vintage pillowcase creates a clean opening for the hanger cover, so no additional sewing is needed along the bottom.
If you like, you can lightly spray the finished DIY hanger cover with fabric starch before ironing to help give it a crisp, fresh finished shape.
Step 8: Insert the Hanger
Slide the hanger carefully into the finished hanger cover through the bottom opening and guide the hook through the small opening at the top.
I did not add a button or bow along the top seam of my hanger covers, but if you have a particular piece of clothing you want to help keep in place, you could sew a tiny white button or a small bow along the top edge of the hanger cover for extra grip and decoration.
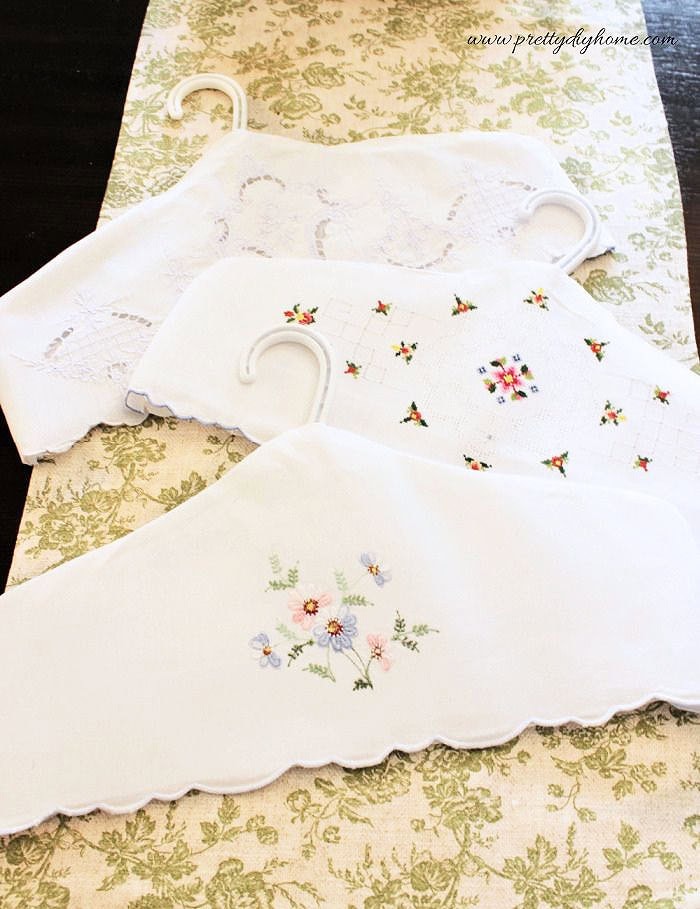
These repurposed vintage linen hanger covers are a great way to reuse old vintage linens while creating something both pretty and practical. They also make a thoughtful bridal shower gift, and can even be made using family heirloom linens for a meaningful, handmade keepsake.

Love vintage linen projects? Save this DIY hanger cover for later and try making it using embroidered pillowcases, heirloom linens, or thrifted vintage fabric finds.
More Vintage Linen Craft Ideas
I have shared a few other craft projects using repurposed vintage linens, and here are two of my favorites.

Doily Craft Table Runner
This easy vintage linen craft uses repurposed doilies and embroidered linens to create a soft cottage style table runner full of vintage texture and handmade charm.

Decorating With Vintage Flour Sacks Without Cutting Them
Several simple cottage style decorating ideas you can do using vintage flour sacks without cutting or damaging the original fabric.