How to Make DIY Pillow Inserts for Cushion Covers
Making DIY Cushion Inserts
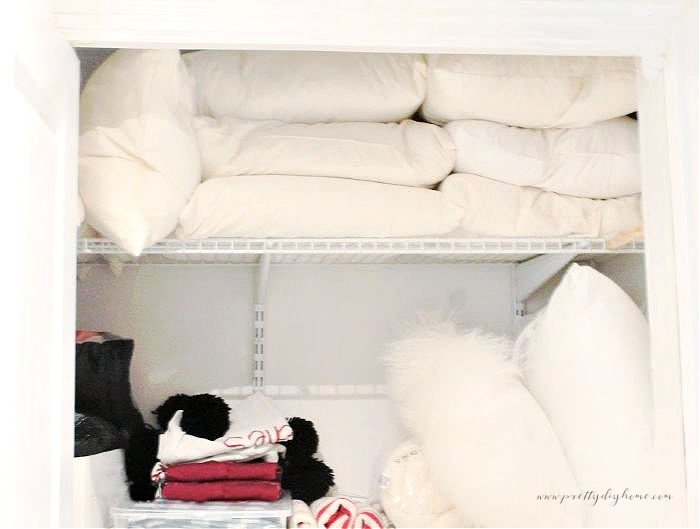
I LOVE pillows! Love them, and a DIY pillow insert in various sizes and shapes to go with them. Unfortunately, If you love buying lots of throw pillows, you can end up with a large collection of unwashable pillows you need to do something with. I ended up with a whole closet full of them, so I had to find a different way. Upcycled pillow inserts are the answer, and it’s so easy to do.
On the other hand, what if you’re a crafter with new DIY throw pillow covers you quilted, or embroidered that don’t fit into the standardized sizes? If you want to create pillow shapes like X O, a heart for Valentine’s Day, or ghosts for Halloween, knowing how to make your own pillow insert will open so many new possibilities for your cushions. It’s also a great way to refresh bedroom pillows.
Pillows are the perfect beginner’s sewing project, they are so much fun to design and a fantastic way to add some stylish home décor fabric touches to a room.
Cushion and Pillow Standard Sizing
Pillows have standard sizes, decorative throw pillows are typically 18″ by 18″ or 20″ by 20″ in square sizes. Commercially purchased pillow inserts and covers are often 18 inches, but most interior designers recommend the larger 20-inch square size.
The European cushion’s standard size is 26″ by 26″.
The bolster cushion’s standard size is 10″ by 27″
The lumbar pillow standard size is 16″ by 24″
Note: Now that you know the standard sizes remember that whatever pillow insert you make needs to be one inch larger than the cover. This extra inch allows for a nice puffy shape, and fills out your pillow cover while avoiding saggy corners or edges!
IKEA Pillow Inserts
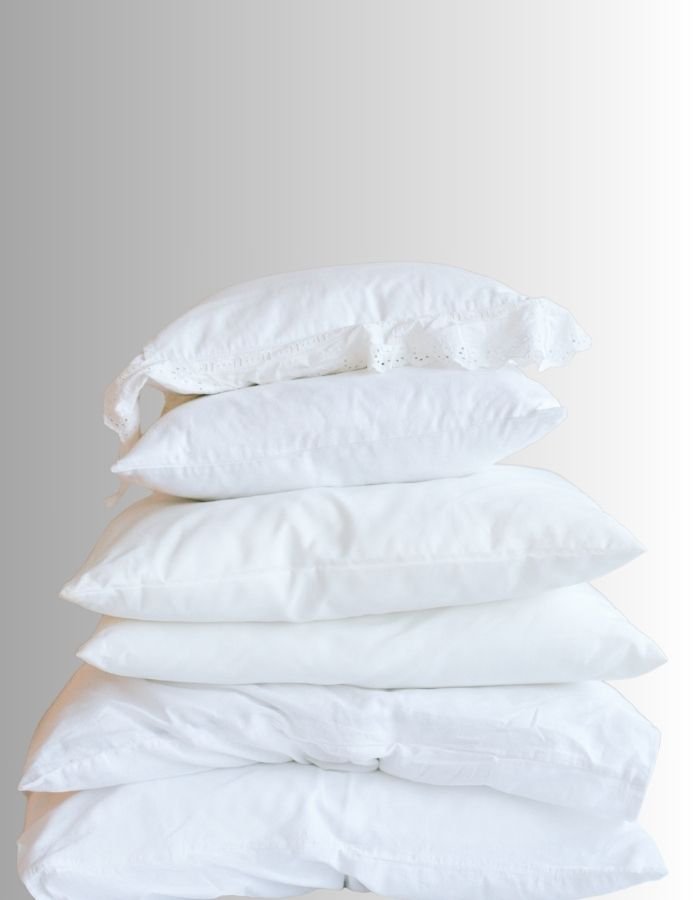
I have used IKEA feather pillow inserts on hand as I used to sew and sell cushion covers and used the Ikea pillow inserts for display. They come in 20 by 20-inch, feather-filled, and are great. However they can stained and need recovering, or you may not have an IKEA nearby. Making your own cushion inserts even in the standard size often makes sense. Purchasing or making all the DIY pillow covers you want and then just swapping out the covers onto pillow inserts is the best solution for pillow lovers.
I am going to make two different styles of pillow inserts as examples for you. My goal is to declutter and create some cushions with inserts I don’t already have. I will make a large European cushion in the example but the process is identical for any sized square or oblong pillow insert. The second example is a bolster cushion with round ends.
How to Sew A European Pillow Insert
Supplies Needed
Filler – I used feathers from four 20 by 20 cushions I had. If making couch pillows I recommend feather-filled, as it gives you a designer look, but it’s your choice. For other pillows, use whatever filling you have on hand from old pillows, bedroom pillows, and polyester fiberfill stuffed animals.
If purchasing filler check out dollar pillows, or inexpensive bedroom pillows, the bed pillows from Walmart are much cheaper than buying the fiberfill stuffing itself is.
Fabric – Choose light cotton fabrics for your pillow inserts, I recommend using muslin. If you have other fabric you can upcycle like cotton sheets, use them as long as it’s a light color. The light color works best as it’s less likely to show through any cushion cover you place over it.
I used the following supplies:
- 4 meters (yards) of 36″ wide cotton muslin
- Sewing pins or clips
- Needle and matching thread
Cutting the Fabric
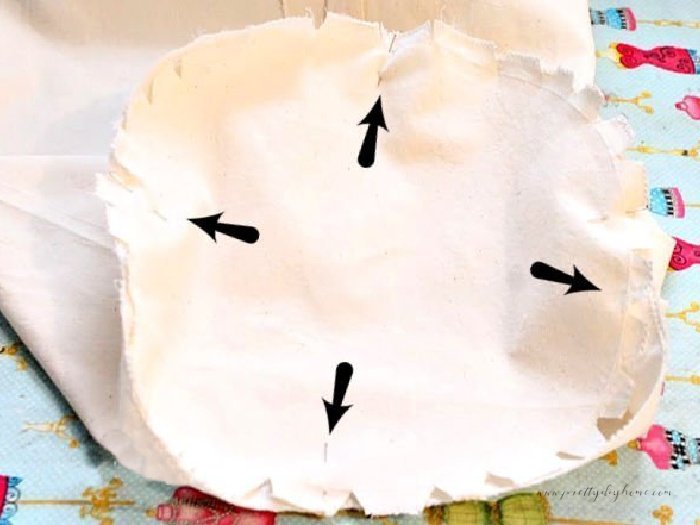
To allow for seam allowances for each cushion cut two pieces of muslin 27 1/2 ” by 27 1/2 ” square using scissors or a rotary cutter. Iron the cut-out fabric pieces.
Sewing Pillow Insert
Seal the edges of your fabric, zig-zag stitch around the edges to seal. (Optional for this project, as you will never be washing these inserts, so they are not likely to fray.
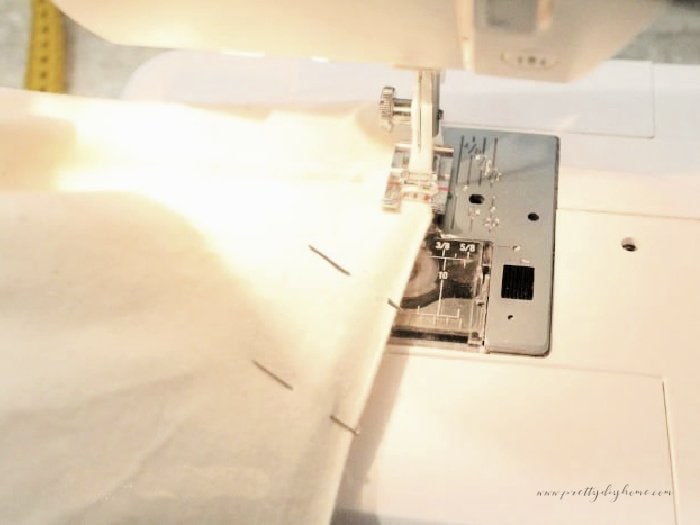
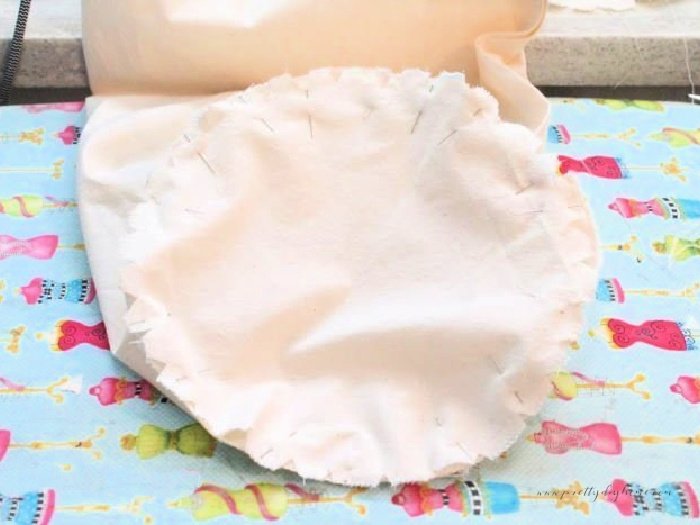
Pin the pieces of fabric right sides together.
Sew the fabric on three sides. Use a 1/2 inch seam allowance and sew a straight line seam on three sides. (remember to backstitch at the beginning and end of each seam.
Sew the remaining side, leaving six inches open to insert the pillow stuffing.

Once sewn turn right side out.
Adding Stuffing
Stuff the pillow with your stuffing of choice. If you’re using feather stuffing you will want to have a vacuum nearby, trust me somehow it was snowing feathers everywhere. Stuff the cushion well, you want fluffy pillows, once you get the desired look pin the opening together well.
Once the cushion inserts are filled the last step is to sew the opening closed. You can do this by hand with a needle and thread, or push the edge of the cushion through the sewing machine.
Before using the sewing machine, make sure to pin the seam well. The thick weight and bulk of the full cushion tend to pull at the seam. The pins help to keep your seam together. Sew a seam about 1/4 inch from the edge. Either method takes less than 5 minutes.
Once sewn together I used the vacuum to remove any feathers from the outside of my DIY pillow insert.

How to Sew a Bolster Cushion Insert
I made a bolster cushion cover for my guest bedroom, so I need a custom-sized bolster cushion to fit inside. This is a good example of creating your own pillow forms to fit a non-standard pillow shape. You may know this kind of cushion as a neckroll cushion.
Supplies for Bolster Cushion Insert
Filler – I used polyester fiberfill stuffing from two 20″ by 26 ” inch cushion inserts.
Fabric – 1 1/2 meters (yards) of muslin 36 inches wide.
Needle and thread (optional)
Cutting the Pillow Insert Fabric
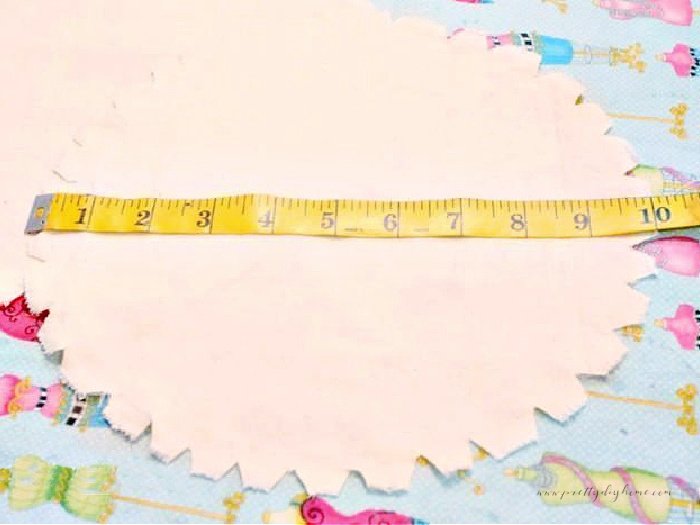
Two 10-inch circles. I used a cake pan placed a 10 ” cake pan on the muslin and traced the outline with chalk, so easy. Use anything you have on hand that’s round and the right size. Other ideas include a pot lid, an embroidery hoop, or a bowl . Or a string and chalk.
To use string and chalk, tie a string around your chalk. Make your string 5″ long (the radius of a 10″ circle). Drawing directly on the fabric, hold the string end firm at the center of your circle. Pull the string tight and draw a chalk mark in a circular motion until you have the circle.
Cut a rectangular piece of fabric 31.5″ (circumference of a 10″ circle) and 30 inches (width).
If you want to make a different size decide on the diameter of the end circles first and then do a quick calculation to figure out the circumference for the rectangle. The formula is 3.14 x the diameter of your circle =πd
So in this case 31.4 x 10 = 31.4″
Assembling the DIY Bolster Cushion Insert
Iron all your cut-out fabric pieces.
Seal all the outer edges of the rectangle and circles with a zig-zag stitch.
On the circle fabric pieces sew a second circle of zig-zag stitches 1/2 inch in from the edge.
Using the second circle of zig-zag stitches as a guide cut out little 1/4 inch notches every inch or so around the outside edge. You will be cutting through your outer zig-zag seam. You don’t want to cut through the inner circle of stitches. Set the circular pieces aside.
Sew a tube by folding the rectangular piece in half, along the circumference edge right sides facing each other.
Once folded measure to be sure, your fabric will still be 30″ wide. (if it’s 31.5″ you need to fold it the other way).
Line up the two edges and pin them in place. Sew a 3/4 inch seam, leaving the middle six inches open to add the filling.
Once sewn iron the two seam allowances flat. This will give you a nice edge for sewing closed.
Now that the rectangular piece is sewn into a tube, let’s attach the two end circles.
Attach the two circles to the tube. Place one end into the circular end of the sewn tube. Pin in place, start by pinning the circle in equal quarter sections. It’s best to do it this way as you will be making small gatherings in the fabric as you fit the two pieces together.
Once you have four sections, divide each of the four sections in half so you get eight sections, repeat until your circle end is very well pinned.
Repeat the process with the second circle. Make sure to do the even sections on each end, this prevents any twists you may get by simply working your way around each end. Having it so well pinned makes sewing it together super easy.
Sewing the DIY Bolster Cushion Insert
Sew the pillow insert DIY together with three simple seams. Fit the circle ends into your sewing machine and sew a half-inch seam around the edge. Repeat on the other end.
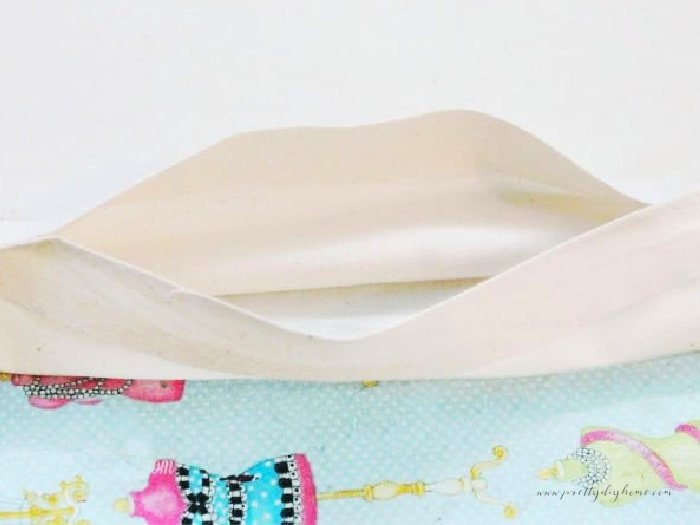
Once sewn turn the insert right side out.
Stuff with feathers just like the European cushions and sew shut either by hand or with your sewing machine.
Fit the circle ends into your sewing machine and sew a half-inch seam around the edge. Repeat on the other end.
Once sewn turn the insert right side out. The opening should look like the following with a neat crisp edge.
Adding Stuffing
Stuff the pillow with your stuffing of choice, sourcing the stuffing just like you did for the European pillow insert. If you’re using feather stuffing you will want to have a vacuum nearby. Stuff the cushion well, you want fluffy pillows, once you get the desired look pin the opening together well.
Once the cushion inserts are filled the last step is to sew the opening closed. You can do this by hand with a needle and thread, or push the edge of the cushion through the sewing machine.
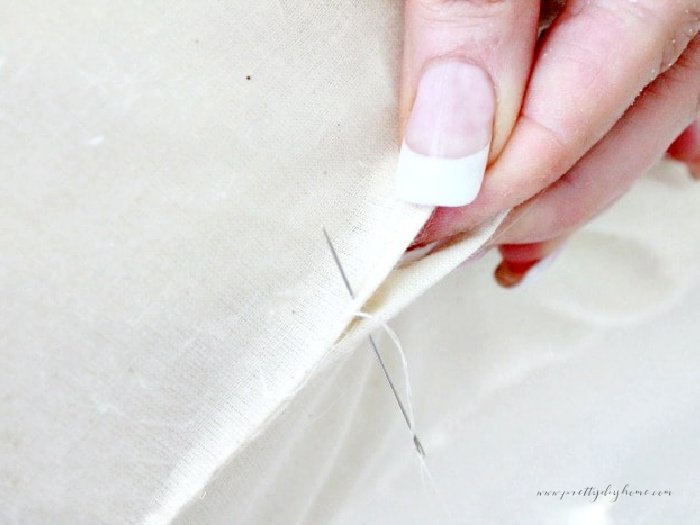
To machine stitch closed, pin the opening together well as it helps to keep the seam together while fitting it through the machine. Sew a seam about 1/4 inch from the edge.

DIY Cushion Covers with DIY Pillow Inserts
Hit the Hay DIY Cushion
A playful DIY cushion cover for a bedroom, the cushion cover has its own custom-sized pillow insert to go with it.
Easy Layered Cushion Covers
Farmhouse style stenciled DIY cushion covers, for a beautiful layered look.
I’ve always wondered how to make a bolster pillow. We have a king size day bed upstairs and I’ve been struggling to find a cushion that will fit the whole length so your tutorial is going to be so helpful. Thank you
Absolutely Michelle, and if you make your own insert, you can have it the entire width if you like.
I love that you repurposed your old cushions. It is something that I would absolutely do too!
Oh, I know you would my thrifty friend. You find a repurpose for so many things its amazing.
You did such a great job! I’m a big fan of repurposing and using things you already have at hand!
We are working really hard at downsizing. It’s a challenge when you enjoy having stashes, but worth I think its worth it. Glad you like them.
These are so pretty. I think like these best of all.
Thank you Debra. I really love European cushions.