Macrame Plant Hanger DIY for Beginners
If you have ever bought a hanging flower basket, you already know the problem. The plant is pretty, but the plastic hanger it comes with is not.
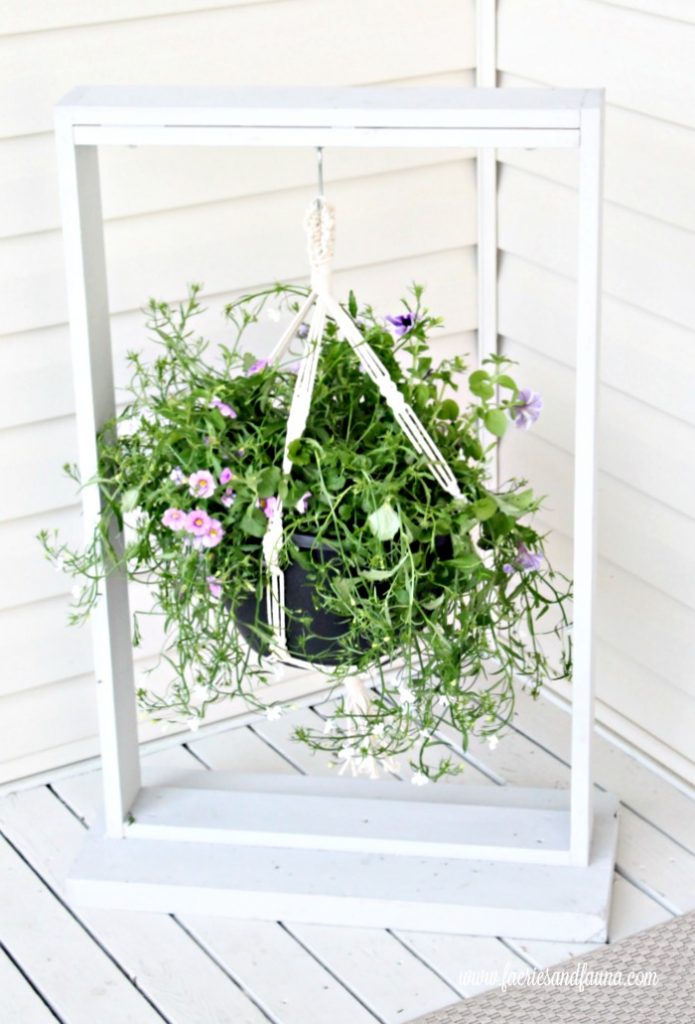
That is exactly what happened to me. I had just finished putting together a wooden plant hanger for the front of the house, and the black plastic hook that came with the planter completely stood out against the light siding.

So instead of replacing the plant, I made a simple macrame plant hanger to swap it out.

This macrame plant hanger DIY is a beginner friendly project that uses only three basic knots. Once you learn them, the rest is just repeating the same pattern, which makes it relaxing to work on.
The finished hanger has a softer, more cottage style look and works perfectly for outdoor planters on a porch, patio, or garden stand.
How to Make a Macrame Plant Hanger
Supplies Needed for a Macrame Plant Hanger
To make this macrame plant hanger you will need:
- Cotton macrame cord (about 50 yards)
- Ruler or measuring tape
- Scissors
- A hook, doorknob, or rod to hang your work while knotting
I like working with cotton cord because it is easier on the hands than rougher hemp cord. I used a simple cotton macrame cord from Michaels.

Macrame Knot Tutorials
Before starting the macrame plant hanger, let’s go over the three basic knots used in this project.
The hanger only uses three simple knots:
- square knot
- half square knot
- noose knot
Once you learn these three knots, the rest of the pattern is mostly repetition.
Macrame Square Knot
This is the most commonly used macrame knot. If you learn this one, you can make a wide variety of macrame projects.
Start with four cords. The two center cords stay still and act as anchor cords, while the two outer cords are used to tie the knot.
- Step 1: Take the left outer cord and move it over the two center cords.

- Step 2: Take the right cord, bring it over the left cord, then pull it through the loop on the left side. Pull snug.

Now repeat the same steps in the opposite direction.
- Step 3: Take the right cord and move it over the two center cords.

- Step 4: Take the left cord, bring it over the right cord, then pull it through the loop on the opposite side. Pull snug.
As you continue repeating these steps, you will create a flat row of square knots.

Half Square Knot
The half square knot is simply the first half of a square knot repeated over and over.
Instead of alternating sides, you will always begin from the same side, which creates a natural twist in the cords.
- Step 1: Take the left outer cord and move it over the two center cords.
- Step 2: Take the right cord, bring it over the left cord, then pull it through the loop on the opposite side. Pull snug.
Repeat these same two steps, always starting from the left side.
As you continue, the knots will begin to spiral around the center cords, creating a twisted effect.
Noose Knot
Cut a separate piece of cord about 1 foot long. This shorter cord is easier to control while tying.

- Step 1: Shape the cord into an “S,” creating one loop at the top and one at the bottom.
- Step 2: Pinch the three strands together in the middle.
- Step 3: Using the longer end of the cord, wrap it tightly around the grouped cords from bottom to top. When you reach the top, pull the end through the loop and tighten the knot by pulling both ends evenly.
Pattern for DIY Macrame Hanger
Cutting the Cord for Your Macrame Plant Hanger
To create the hanger, you will need a total of 16 working cords.
Cut the following lengths:
- Cut 8 cords, each 16 feet long
- Cut 2 cords, each 1 foot long (for the noose knots)
- Cut 1 cord, 4 feet long
You will have a small amount of cord left over.
Starting the Macrame Plant Hanger
Fold the 8 long cords in half and hang them over a secure support such as a coat hanger, doorknob, or chair.

Make sure all 16 cords are even, neat, and untangled before you begin.
As it was a beautiful day outside, I hung mine over the patio door handle and worked in the sunshine. Use whatever works best for your space as long as you can remove the cords easily once you are finished.
Using the 4-foot cord, tie a simple knot around all 16 cords near the top. This creates the main hanging loop and leaves two short ends to work with.
Using those short ends, tie about 10 square knots around the grouped cords. The exact number does not need to be perfect.

Once finished, leave the ends as they are.
Now create a noose knot around all the cords, including the short ends, to secure the top of the hanger.

Creating the Hanging Sections
The most important part of this step is gathering the cords into groups of adjacent cords. This keeps the top neat and tidy so you don’t have any cords crossing over the center.
Divide the cords into four equal groups, with four cords in each group. Each group will form one section of the hanger.
Work with one group of four cords at a time, leaving the others hanging.
Measure 7 inches down from the noose knot to add length without extra knots. Use the two outer cords for tying, and let the two center cords act as anchor cords.
Start the first square knot at the 7-inch mark, then tie two more square knots directly below it.

Measure about 4 inches down, leaving a gap, then tie about 12 half-square knots to create a small twist.
Repeat this process for the remaining three sections.
After completing the first section, you can use it as a guide for spacing instead of measuring each time.
Forming the Pot Holder
The most important part of this step is continuing to work with adjacent cords so the hanger forms evenly around the pot.
Take two adjacent sections and set aside the outer cords. Work only with the four center cords.
Measure about 3 inches down from the last knots and tie two square knots.

Repeat this process with the remaining sections to form the top of the pot holder.
Now switch the cord groupings by pairing adjacent sections together. Measure another 3 inches down and tie one square knot with each new group.
Gather all the cords together and secure the bottom with a noose knot.
Update: A reader commented about how to resize the hangar to fit your pot. The easiest and quickest way is to shorten or lengthen the spaces between the macrame knots that fit around the pot. The following picture shows the lengths of cord I am referring to.

Finishing the Macrame Plant Hanger
Once all the knots are complete, hang your planter and check how it sits.
Make any small adjustments by sliding the knots or spacing if needed so the pot sits evenly.
When you’re happy with the placement, trim the ends of the cords to your desired length.

More Ways to Use and Display Plants

DIY Plant Hanger
This simple DIY wooden plant stand is a great way to display your macrame hanger. It’s made from scrap wood and pairs really well with your macrame hanger..

Easy Flower Drying Racks
This simple flower drying rack is also made from scrap wood and features little fork hooks for hanging herbs and flowers.
How do you make different sizes depending on the size of the pot?
Hi Joanna. Thank you for asking. I updated the post to answer the question, a great point. Once you have tied the macrame cording, and have gotten to the portion of the hangar that goes around the pot the easiest way to increase or decrease the size of the hangar is to lengthen or shorten the strips of cording between the knots.
I hope this helps.
What a neat idea!! I haven’t macramed in years!!! I love the little stand that you have your hanger in! Such a lovely way to add some pretty to your front porch and so very welcoming!!
Thank you Sam. It startled me that macrame came back. I use to make so much of it a long long time ago. I decided to do one as they are so easy and much nicer than the ones I saw for sale. I need to do some more.
You made it so easy to follow with the detailed tutorial. Thank you Leanna
Thank you Michelle. I often wonder about the amount of detail to put in a tutorial. When in doubt I add it. I am glad you like that level of detail, I thank you for the feedback.
I haven’t macrame in years. Thanks for sharing this great tutorial to refresh my memory of the knots.
Hey Debra. The hardest part was finding the macrame cotton. I finally found it in Michael’s jewelry section. I am sure you will do one square knot and it will all come back to you.