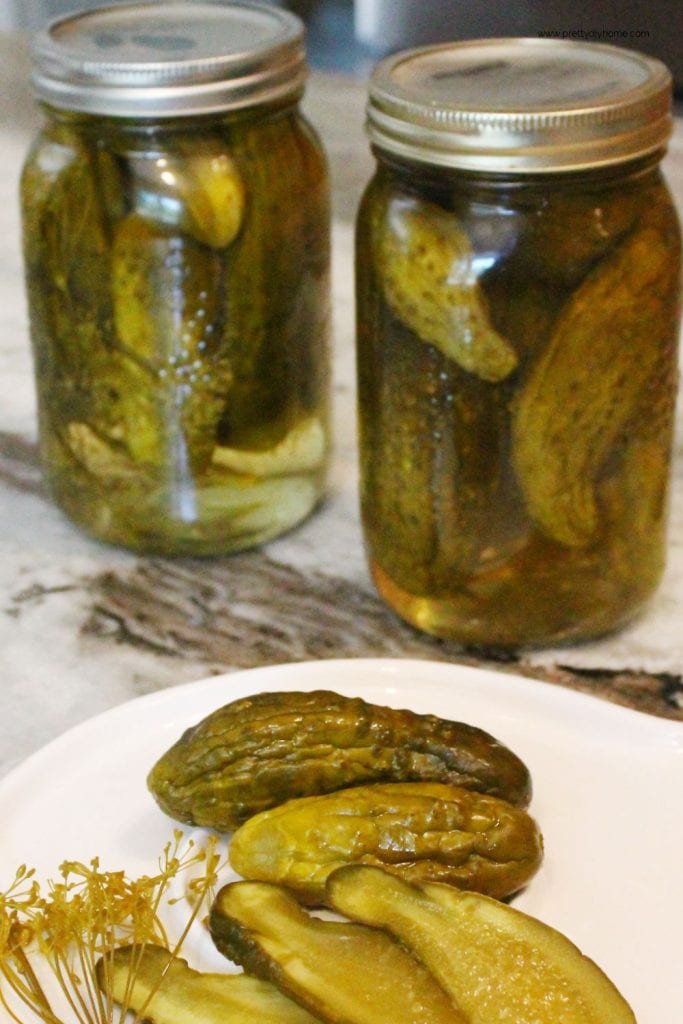
Dilled Pickled Carrots and Beans
You will often see dill pickled carrots or dill pickled bean recipes online, but I have always made them together as Dilled Pickled Carrots and Beans. Pickling them together gives you the best of both worlds in one jar and adds a little extra variety to your pantry.
If you have never tried dilled carrots or dilled beans before, you are missing out on a simple, fresh-tasting homemade pickle that pairs well with everyday meals. The carrots stay crisp and slightly sweet, while the beans take on that classic dill pickle flavor that makes them hard to stop snacking on.

This recipe is flexible. You can use it to make only dilled pickled carrots or only dilled pickled beans if you prefer. I like doing both together because it saves time, space, and effort. Instead of opening two jars, you get a mix of flavors and textures in one.
Pickles are a great place to start if you are new to canning. They are high in acid, which means they can be safely processed using a boiling water bath instead of a pressure canner. As long as you work cleanly and follow the steps, homemade pickles are straightforward and very rewarding to make.
Canning Pickles of Any Kind
Canning foods generally falls into two categories: high-acid foods and low-acid foods. Pickles are considered a high-acid food, which means they can be safely processed using a boiling water bath and do not require a pressure canner.
This makes pickles one of the easiest and most forgiving foods to can at home. If you can boil water, you can make homemade pickles.
As with all canning, cleanliness and care are important. Jars, lids, utensils, work surfaces, and hands should be clean, and the jars must be properly sterilized. Taking a little extra care at the start helps ensure safe, shelf-stable pickles you can enjoy later.
Ingredients
This recipe makes enough for six pints.
Vegetables
- 2 pounds fresh carrots
- Bunch of Dill (2 sprigs per jar)
Brine Ingredients
- 4 cups pickling vinegar
- 2 cups water
- 2 pounds green beans
- 2/3 cup pickling salt
- 2 cups granulated sugar
How to Make Dilled Pickled Carrots and Beans
Step 1: Sterilize the Jars and Lids
You can sterilize canning jars in the oven, dishwasher, microwave, or on the stovetop. The method you choose often depends on how many jars you are preparing. This Dilled Pickled Carrots and Beans recipe makes six pint jars, so the simplest method is sterilizing the jars and lids in boiling water on the stovetop.
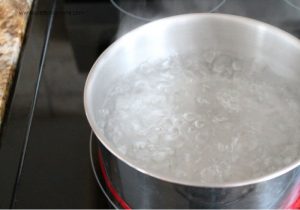
Wash and rinse the jars well. Place them open-side up in a very large pot and fill with hot (not boiling) water until the jars are covered by at least one inch. If there is room, add the rings and lids to the same pot. If not, place them in a second pot and prepare them the same way.
Bring the water to a full boil and boil for ten minutes. Once boiling, reduce the heat slightly but keep the water simmering until you are ready to use the jars.

While the jars are sterilizing, prepare the carrots and beans. Along with sterile jars, it is important that your hands, counters, sink, and work area are as clean as possible when canning.
Step 2: Prepare the Vegetables
Start by purchasing fresh carrots. My carrots are from a local market garden. Wash the carrots well, trim off the tops, and remove any small stringy roots.
If you are pickling baby carrots, the skins are thin and do not require peeling. Scrub them with a vegetable brush or a clean pot scrubber, which removes most of the skin. Wash again in clear water and set aside.
If using large carrots, peel them and cut them into 4-inch fingers. Wash well in clear water and set aside.
You will need two sprigs of dill for each jar. Wash the dill and set it aside.
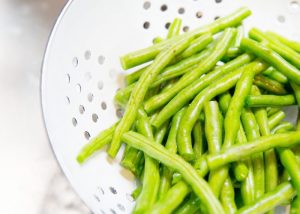
Wash the green beans, trim the ends, and cut them into pieces about 4 inches long so they will fit neatly into the jars.
Step 3 – Fill the Jars
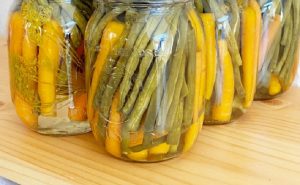
Place one sprig of dill in the bottom of each jar. Lay the jar on its side and fill it with alternating layers of carrots and beans. This helps create a nicer-looking mix once the jars are sealed.
If any piece of carrot or bean reaches into the top half inch of the jar, trim it shorter. Keeping everything below the rim is important for proper sealing.
Once the jar is full, stand it upright and add more carrots or beans wherever there is space. Finish by placing a second sprig of dill on top.
Step 4: Make the Dill Pickle Brine
Note: Do not substitute pickling vinegar or pickling salt with everyday table vinegar or table salt. Pickling vinegar is more acidic, and pickling salt is purer than table salt. Using table salt can change the color of your pickles and cloud the brine.
Place all of the pickling brine ingredients into a large pot over medium-high heat. Stir to dissolve the salt and sugar. Bring the mixture to a boil, then reduce the heat and let it simmer.
Slowly pour the hot pickle brine over the carrots and beans, leaving a 1/2-inch headspace at the top of each jar. Wipe the rim of the jar with a clean cloth. Place a hot lid on the jar, add the ring, and tighten until finger tight.

Repeat this process with the remaining jars.
Processing and Sealing
Do not touch the jars while they are cooling. As the jars cool, you will hear the lids “pop,” which indicates that a seal is forming.
Once the jars are completely cool, test the seals by gently pressing down on the center of each lid. If the lid moves up and down, the jar did not seal properly.
A jar may fail to seal for several reasons, such as the jar not being hot enough or not having enough brine. Any jar that does not seal should be stored in the refrigerator and used first.
For best results, allow the pickles to age for about six weeks before using them.


Dilled Pickled Carrots and Beans
Ingredients
Vegetables
- 2 lbs carrots
- 2 lbs green beans
- 1 bunch fresh dill (2 sprigs per jar)
Brine Ingredients
- 4 cups pickling vinegar
- 2 cups water
- ⅔ cup pickling salt
- 2 cups granulated sugar
Instructions
Step 1: Sterilize the Jars and Lids
- Sterilize canning jars, lids, and rings using your preferred method. For six pint jars, sterilizing them in boiling water on the stovetop is the simplest option. Keep jars hot until ready to fill.

Step 2: Prepare the Vegetables
- Wash and prepare the carrots, dill, and green beans. Trim and cut the vegetables so they fit neatly into the jars.
Step 3: Fill the Jars
- Place one sprig of dill in the bottom of each jar. Fill jars with alternating layers of carrots and beans, keeping all vegetables below the rim. Add a second sprig of dill on top.
Step 4: Make the Dill Pickle Brine
- Combine brine ingredients in a large pot and bring to a boil. Reduce heat and simmer. Pour hot brine over vegetables, leaving 1/2-inch headspace. Wipe rims, apply lids, and tighten rings finger tight.
- Pour hot brine over vegetables, leaving 1/2-inch headspace. Wipe rims, apply lids, and tighten rings finger tight.

Step 5: Processing and Sealing
- Allow jars to cool undisturbed. Once cool, check seals by pressing the center of each lid. Refrigerate any jars that do not seal properly. Allow pickles to age for about six weeks before using.
Notes
More Homemade Pickle Recipes
Crunchy Dill Pickles
A classic dill pickle recipe with plenty of crunch and traditional flavor, perfect for everyday snacking and sandwiches.
Sweet Pickle Relish
A classic homemade sweet pickle relish with a balanced sweet and tangy flavor, perfect for hot dogs, burgers, and salads.