DIY Christmas Tree Collar with Free Crochet Pattern and Video
Crocheted Tree Collar on a Budget
Its that time of year when we find ourselves starting to think about the upcoming holiday seasons and I am excited to share my quick-to-make crocheted Christmas tree collar Making a Christmas tree collar that looks good, folds for easy storage, and won’t break the bank took some thinking and this crocheted tree collar hits all the check marks.
What you’ll love about this DIY collar:
My favorite thing about this Christmas craft is I could do it quietly amidst all the other Christmas preparations and there was no cleanup, paint, glue, or sawdust to deal with.
What is a Christmas Tree Collar?
Christmas tree collars are a modern twist on Christmas tree skirts over the last few years, the Christmas tree collar has replaced the traditional Christmas tree skirt in popularity. The tree collar not only looks beautiful it’s also a great way to hide the ugly tree stand and fake green tree trunk at the bottom of the tree.
How Big Should a Christmas Collar Be?
The typical tree collar is 26 inches across, so I started there and then placed the first chain stitch row around my tree bottom to make sure it would fit. Once I had the first chain row done, I placed it around my Christmas tree stand to make sure it would encircle my tree stand. To cover the entire tree stand I crocheted my tree collar to be 12 inches high. Here is the simple tree collar crochet pattern.
Crocheted Christmas Tree Collar Tutorial
Christmas Tree Collar Supplies
- 6 skeins of chunky wool – The yarn weight is #7 giant.
- 25.00 mm crochet hook. (It’s a very large crochet hook size, butt craft stores that sell the yarn typically sell the hooks as well.).
- Stitch marker (optional I used a safety pin)
Here is the wool I chose. It is a very big chunky wool that is easy to crochet and greatly reduces the time needed to finish any project. You don’t have to use this soft cream, but I recommend a solid color.

How Big Should a Christmas Collar Be
The typical tree collar is 26 inches across, so I started there and then placed the first chain stitch row around my tree bottom to make sure it would fit. Once I had the first chain row done, I placed it around my Christmas tree stand to make sure it would encircle my tree stand. To cover the entire tree stand I crocheted my tree collar to be 12 inches high. Here is the simple tree collar crochet pattern.
Crochet Stitch Guide for Beginners
If you have never crocheted before I recently created a very thorough step-by-step guide on everything you need to know to become confident with crochet. If you find this blog post confusing you can check out this Beginners Guide to Crochet – How to Get Started.
Tree Collar Free Crochet Pattern
Here is the easy pattern, the step-by-step stitch tutorials are farther down the post.
Ch 60, connect to the first stitch in the chain with a slip stitch (sl st), ch 1. Mark the end of the row with a stitch marker (I used a simple pin in the stitch). The circle should be about 26″ across depending on tension.
Be very cautious and double-check not to twist the chain.
Starting with the second chain from hook, single crochet in the next st, and then every stitch for two continuous rounds.
Start the third round using the waistcoat stitch. Repeat the waistcoat stitch for 13 rounds.
Continue until the tree collar is the height you want. My tree collar is 12 inches high and fits right up into the branches of my tree. Pull through and knot. Weave in any ends.
Here is the crocheted tree collar standing all on its own.

Adding the Tree Collar
We have an artificial Christmas tree, so we placed the crochet collar on the floor first, then added the base of the tree, then the branches, etc. As the collar is a complete circle it’s impossible to put on the tree once decorated.
The collar stands up on its own because of the weight of the wool, but to make it more secure when adding gift boxes I wired the collar to the bottom branches using florist wire.

Crochet Stitch Guide for Beginners
If you have never crocheted before I recently created a very thorough step-by-step guide on everything you need to know to become confident with crochet. If you find this blog post confusing you can check out this Beginners Guide to Crochet – How to Get Started. There is also a tutorial of me crocheting the collar further down the post.
Chain Stitches
This stitch is how a wide variety of crochet patterns start. Some patterns will call it a foundation row.
First, make a slip knot loop. Feed the crochet hook through the loop. Wrap the yarn around the hook and pull through. First chain stitch made. Confused yet? Here is an image to help you.

The tree collar pattern starts by doing the first chain loop and then doing it 60 more times.
Connect the long string of 60 chain stitches into a loop. Place your crochet hook into the first chain stitch you made, yarn over hook and pull through. Do it once more yarn over hook and pull through. Your first row is done.
Single Crochet Stitches
After you form the foundation chain of stitches, insert the hook through the first chain. Yarn over hook, pull through. You will now have a large loop. Take a pin and mark this stitch, (just so you know when you’re done on the very last row.)
To start the first round of single crochet begin by inserting the crochet hook in the second space from the hook as shown.

Slide the hook under both loops on the top of the chain.
Wrap the yarn over your crochet hook, and grab it with the hook. Pull through one loop, yarn over hook, You should now have two loops on your hook.

Yarn over hook again, and pull through both loops. Single crochet stitch done.
Repeat this in every stitch for two rows. Use the pin marker to let you know when you’re done with the first two rounds of single crochet stitches.
Waistcoat Stitch
I chose the waistcoat stitch because it is very strong and the reason the tree collar stands up on its own. As a bonus, it’s almost identical to doing the single crochet stitch.
The only difference between the single crochet and waistcoat stitch is the placement of the crochet hook in the previous row. the difference with the waistcoat stitch is that you place the stitch between the V on the previous row.
Insert hook at the V, there will be two threads on each side (love the big yarn for this) yarn over hook, pull through. There will be two loops on hook. Yarn over hook, pull through both loops. Repeat.

This heavy gauge wool is heavier to work with and so is the crochet hook than the regular sized yarn is. I found it easier to place the tree collar over my lap while working it and using my finger to find the specific hole before inserting the crochet hook.
It only took a couple of hours to make the crochet the whole thing.
Tree Collar Tutorial Video
If you don’t find the images enough to help make your DIY Christmas tree collar, I did a video with a simple tutorial of me making this tree collar for you.
This collar is a fun project to keep your hands busy while watching a Christmas Hallmark. I hope you’re enjoying preparing for the Christmas season like I am. I love making and putting up all the different Christmas decorations. As long as I manage to be organized, preparing for Christmas is as enjoyable for me as the holiday season is.
Happy Christmas Crafting, Leanna
Want to Try This Christmas Tree Collar? Pin it!

Other Christmas Tree Decorations to Try
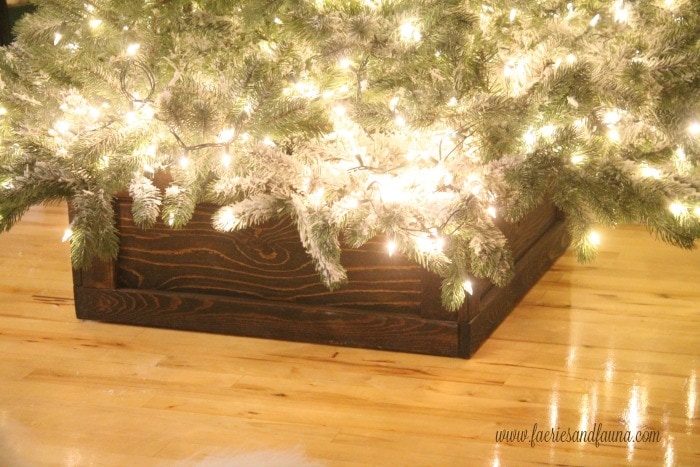
DIY Rustic Wood Tree Bottom
This rustic wood Christmas Tree collar is beautifully made with wood and then stained dark walnut.

DIY Dollar Store Christmas Garland
Instead of buying $200 worth of beautiful garlands for the tree, I used a dollar store garland and embellishments to recreate the look for less.

DIY Christmas Balls with Crocheted Macrame Cord
These DIY Christmas balls have an elegant homespun look. They are made with crocheted macrame cords.
Thank you Marie. It really is easy to do, and it crochets up so well while sitting in a chair. Its much quicker than trying to do it on the table for video. Hugs and Happy Holidays back at your and your family as well.
Hi Leanna, it’s been a while since I popped over for a visit. Happy Holidays! Girl, I am kicking myself for buying a galvanized tree collar after seeing this. What a pretty alternative and I love how easy it is to make. Too late for my tree but I’m definitely showing this to my crochet-loving daughter who might love to make one of these for her tree.