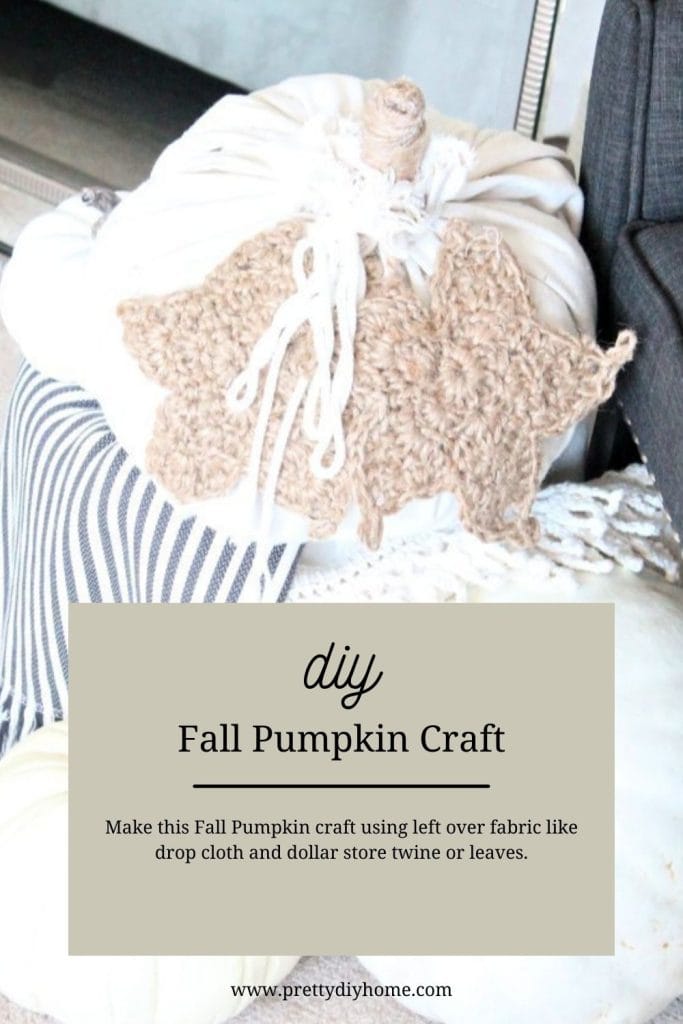
DIY Fabric Pumpkin with Crocheted Leaves
This DIY fabric pumpkin is designed for neutral Fall decor on a budget. I adore the look of drop cloth fabric but you can use any fabric you like to make this stuffed fabric pumpkin. Its an easy to do, inexpensive Fall craft idea you can make quickly.
DIY Fabric Pumpkin Craft
What is your favorite kind of Fall decor, every year I go and look at all the beautiful orange and rust Fall decor, I like it, but not as much as the softer neutral colours. The light soft colours appeal to me, and as I am adding various drop cloth crafts to our home, diy fabric pumpkin for Fall is a perfect fit.
This pumpkin is so easy to make, I first tried to make the pumpkin by sewing a hem around the top for a draw string, but it wasn’t snug enough at the top. I recut the fabric a little bit smaller and started over.
Decide how large you want the fabric pumpkin to be, this one has a diameter of 14″.

Cutting the Drop Cloth Fabric
Iron the neutral drop cloth fabric and fold in half. Using a pencil and string tie a pencil at one end. Measure the distance from the pencil to the end of the string (14″). Place the string end along the draw an arch with the pencil onto the drop cloth. Cut along the edge. I sewed a zigzag stitch along the cut edge of my fabric to seal the edge but its not necessary.

Making the Pumpkin Stem
The stem is wrapped in burlap, so I used a toilet paper roll.
Stuff a little polyfil into a roll of toilet paper. fold the cardboard over so its about an inch around and secure with tape. Set aside.
Sewing the DIY Fabric Pumpkin
Take a large needle with a large eye. Thread with burlap string and sew long stitches along half the outside of the pumpkin about an inch from the edge. Make sure to leave a long tail of burlap thread, to tie off at the end. Pull tight to gather the fabric together.

Once half the fabric is gathered, add the stem. Place the stem in the middle, and sew through it with the string.

After the needle goes through the other side, start gather the rest of the drop cloth around the outside edge of the fabric. Gathering the fabric will finally start to make it look like a pumpkin.

Add your stuffing, I used polyfil. I actually had to go purchase some for the pumpkin. Instead of buying polyfil, I always go to Walmart and purchase a set of cheap polyfilled pillows. You get twice as much polyfil, for less money, win win, and of course the casing is a nice way to store and control the polyfil.

I am not impressed with the amount of loose fly away string I am getting along the fabric edge, so I gave the edge a haircut with scissors.
Once you have the pumpkin stuffed and shaped the way you like, pull the burlap thread through the remaining fabric.
Pull the needle back through the toilet paper stem. Pull the fabric closed and tie off a knot with the other end of the thread.
I then took a small clear elastic and wrapped it around the gathering.

Making the Pumpkin Stem
Starting at the very top of your stem. Glue the end of your twine into the center of the stem. Wrap the twine evenly in a circle until you reach edge of the stems top. Add hot glue as needed. Once you reach the edge of the stem top, add glue along the sides and continue wrapping the twine. Make the twine snuggle into the twine from the round before. Continue until you reach the bottom of your stem. It is hidden behind the top of the drop cloth. Keep gluing before wrapping the twine, careful not to burn your fingers. Once you reach the end cut the twine.
Crocheting Leaves for your DIY Fabric Pumpkin
The leaves for this pumpkin are made using the pattern from this crocheted autumn leaf pin video. The Pin leads to a video that shows you step by step how to make the leaf. There was no written pattern so I wrote down Her pattern for you.
Pattern
I crocheted two leaves using dollar store burlap twine, but I think it would be really nice in crochet cotton as well.
Abbreviations: Chain – ch, Slip stitch – sl st, Single crochet – sc, Half double crochet – hdc, Double crochet – dc, Treble crochet- tr
Size 5 mm crochet hook and twine. The leaves end up about 4 inches across.
Form a ring.- Ch4, sl st into first stitch to form a ring.
Round 1 – ch1, 10dc in center of ring, sl st into first dc.
Round 2 – ch 1, in next stitch *sc,hdc,dc,hdc,sc all in the same stitch. Skip the next stitch*. Repeat from * to *, until you reach the last dc of the previous row. Then sl st in the first ch 1.
Round 3 – ch1, sc in next stitch, hdc in next stitch, 3dc in next stitch, hdc in next stitch, sc into next stitch. Repeat around all five leaf petals until you reach the end. Then sl st in the first ch 1.
Round 4. – Start this row by making the leaf stem. ch 8, sc in second ch from hook. 1 sc in each of the next 6 stitches.(stem finished) *sl st into first ch 1 again, sl st into next stitch, then sc in next stitch, 2hdc into next stitch, in center dc of previous row put in 2dc, make picot (ch3, sl st in first ch,) dc all in the same stitch, in next stitch 2hdc, 1sc in the next, sl st into next stitch*, repeat from * to *. For the third leaf petal increase the size of the stitched to make it a little bit taller. Sl st into next stitch, hdc into next stitch, 2dc in next stitch, 2 tr, picot(ch3,sl st second stitch) 1 tr in same stitch, 2 dc in next stitch, hdc into next stitch, sl stitch in next. Repeat from * to * for the next two leaf petals. To end place a sl st next to the stem. Pull the yarn and tie off.

Check out some other DIY Pumpkin Crafts

DIY Velvet Pumpkin Tutorial
Velvet pumpkins are very popular with the price tag to match. I made these DIY Velvet Pumpkins with real stems for a tiny fraction of the cost.
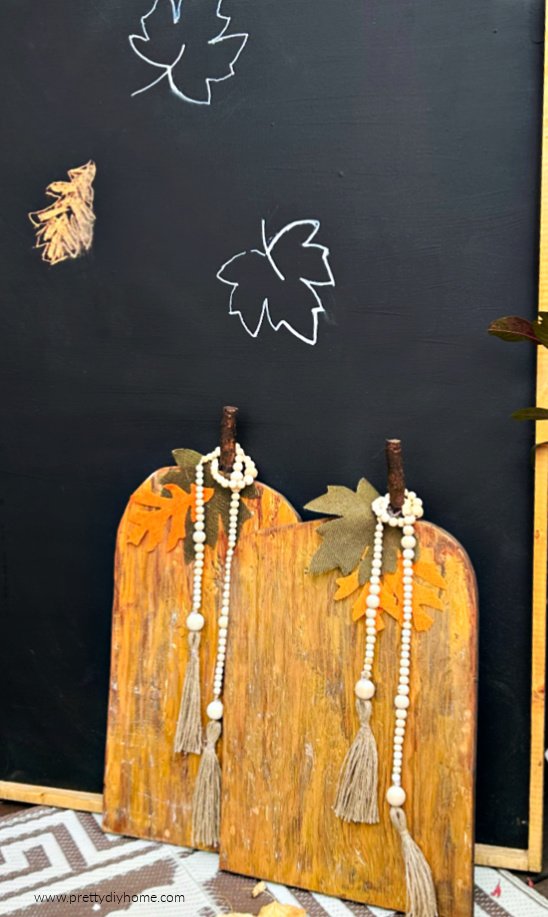
Scrap Wood Pumpkins with Farmhouse Beads
These scrap wood pumpkins are so pretty live, you can see a shimmer of metallic that the picture doesn’t do justice to. They are easy to make and if you have any wood or paint laying around its a great way to use them.
We don’t find real pumpkins here easily so the fabric version sounds lovely, love the leaves you added too
These pumpkins are so cute! I love the crocheted leaves.
Very cute! So happy you decided to join us this month; it’s fun isn’t it? I tend to prefer pumpkins in neutral and muted colors myself too. Pinned.
I’m so glad you joined the Pinterest Challenge fun! Your pumpkin is gorgeous! I love to sew with drop cloth, but haven’t in ages. This project is a lovely inspiration for me! -Marci @ Stone Cottage Adventures
I’m so glad you finally joined us! It really is a lot of fun every month. I was just looking at some fabric and thinking of whipping up some cloth pumpkins, love yours!
OH, I love me a good drop cloth project! Such a fun idea and would love to give this a try! Pinned.
What a beautiful pumpkin! It is neutral and would work anywhere!
The pumpkin is so adorable! I wish I could sew, I love anything dropcloth 🙂
What a lovely fall look, Roseann! And the crochet leaves add a special touch and takes your pumpkin decor to the next level!
What a pretty addition to your fall decor!
This is a lovely way to give a pumpkin a farmhouse makeover. I’m loving neutrals this year for fall. It’s great to have you join in the Pinterest Challenge! It’s always a fun one.
These came out so cute. I really like the neutral fall decor too. Great idea to use a drop cloth.