
DIY Fabric Flowers with Printable Vintage Centers
I think these DIY fabric flowers are absolutely adorable. I did make a similar version with torn strips of fabric that are cute for a rustic fall theme, but these cottage-style fabric flowers feel softer, more refined, and a little more vintage inspired.
This time, instead of using tattered fabric strips, I created simple blossom-shaped fabric pieces and added fusible interfacing to the back of the fabric to help reduce fraying. The finished flowers have a cleaner look while still keeping all the texture and charm of handmade fabric flowers.
The real difference is the flower centers. Rather than using plain fabric circles, I designed printable center collections featuring cottage garden bees, prairie barns, and heirloom letters. Each collection gives the flowers a completely different personality, allowing you to customize them for different seasons, decorating styles, and displays.
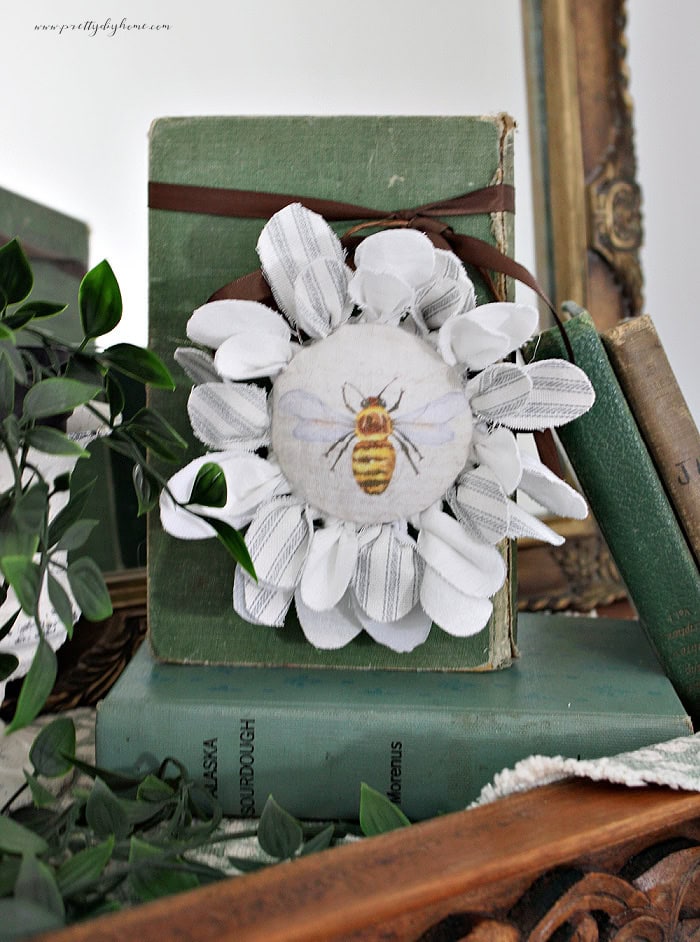
How to Make Fabric Flowers with Mason Jar Rings
In this tutorial, I’ll show you how to make fabric flowers using simple blossom-shaped fabric pieces and mason jar rings. Each flower comes together surprisingly quickly, and once you’ve made one, it’s easy to create several for seasonal displays, wreaths, baskets, or decorative hangers.
For those who prefer using a Cricut machine, I’ve also included a short section on cutting the blossom pieces with a Cricut Maker and Rotary Blade.
Supplies
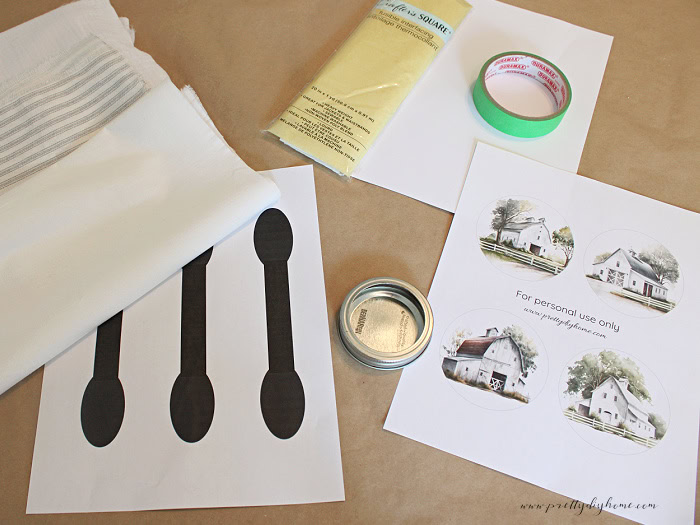
- Jam jar sized mason jar rings and lids (1 set per flower)
- Cotton fabric, ticking fabric, or muslin
- Lightweight fusible interfacing
- Printable flower center designs & blossoms pattern
- Small amount of stuffing or batting
- Paper covered wire or recycled wire hanger pieces
- Hot glue gun and glue sticks
- Scissors
Printing Supplies
- Letter-size printer paper
- Green painter’s tape
- Inkjet printer
- Sewing machine (optional)
Optional Cricut Supplies
- Cricut Maker
- Rotary Blade
- FabricGrip mat
Step 1: Prepare the Fabric
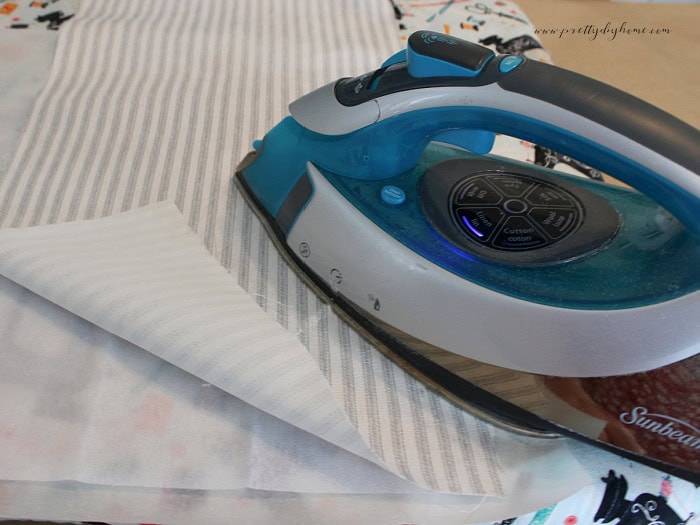
To reduce fraying, apply lightweight fusible interfacing to the back of your fabric with an iron. Make sure to use lightweight interfacing so the fabric remains soft enough to twist around the mason jar ring.
I tested a heavier interfacing first, but it made the blossom pieces too stiff and difficult to shape. Once the interfacing is attached and completely cool, you’re ready to cut the blossom pieces.
Step 2: Cut the Blossom Pieces
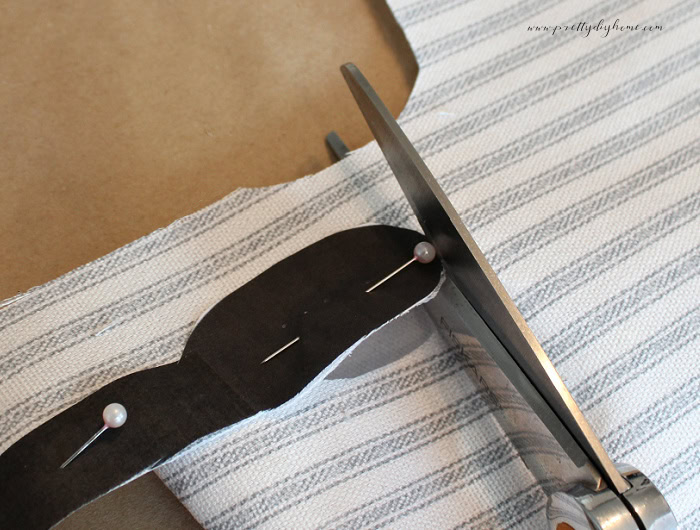
Print and cut out the blossom template. Pin the template to the fabric and carefully cut around each blossom shape.
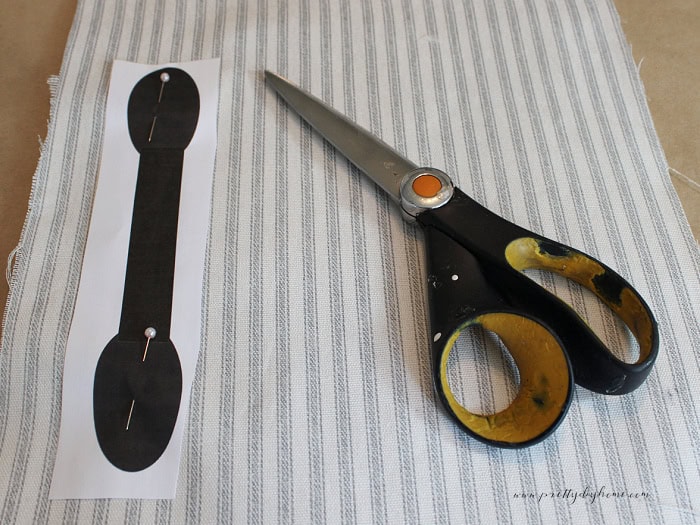
You will need 14 blossom pieces for each flower. Don’t worry if the edges aren’t perfectly smooth. Trim away any loose threads as you go. The petals will be folded and layered during assembly, so minor imperfections won’t be noticeable in the finished flower.
Optional: Cut the Blossom Pieces with a Cricut Maker
If you plan to make several flowers, a Cricut Maker can speed up the cutting process. To cut fabric, you will need a Rotary Blade and a FabricGrip mat.
Upload the blossom template to Cricut Design Space, remove the background, and resize the template to 7.5 inches. Set the image to a single layer and choose Fabric as the material setting. Place the bonded fabric on the FabricGrip mat and cut 14 blossom pieces for each flower.
Trim away any loose threads before assembly.
Step 3: Print and Cut the Flower Centers
I designed three different printable flower center collections for these DIY fabric flower centers. Choose from Prairie Heritage barns, Pollinator bees, or Heirloom Letters. Each collection includes four different designs, giving every flower its own unique look.
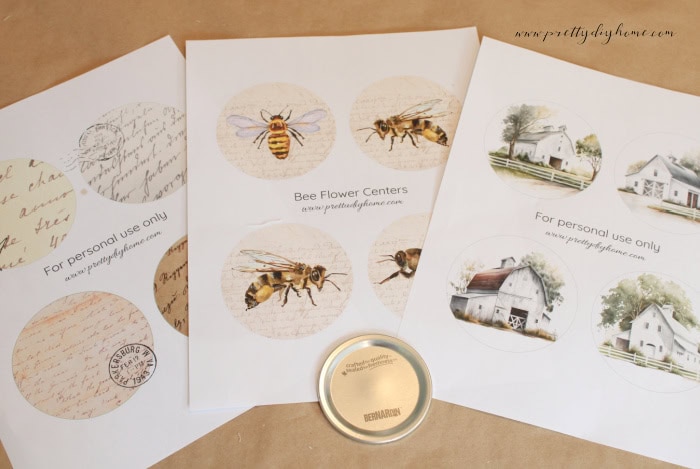
The designs are printed directly onto fabric using a regular inkjet printer. As with any printable fabric project, printer types and inks vary, so test at your own discretion. I have used this method successfully several times, but I always recommend printing carefully and checking your printer settings before pressing the print button.
To prepare the fabric, cut a piece of letter-size paper measuring 8.5 x 11 inches and a piece of fabric measuring approximately 7.5 x 10 inches. Place the fabric right side up on the paper and secure all four edges with green painter’s tape.
You can feed the prepared sheet through your printer as is, but I prefer taking an extra couple of minutes to stitch a quick seam around the outer edge of the fabric before printing. This helps ensure the fabric remains securely attached to the paper as it passes through the printer.
Test which side of the paper your printer prints on before printing your fabric sheet. My printer prints on the underside of the paper, so I loaded the fabric facing down. I also selected the best print quality setting to produce the clearest images before printing the flower center designs.
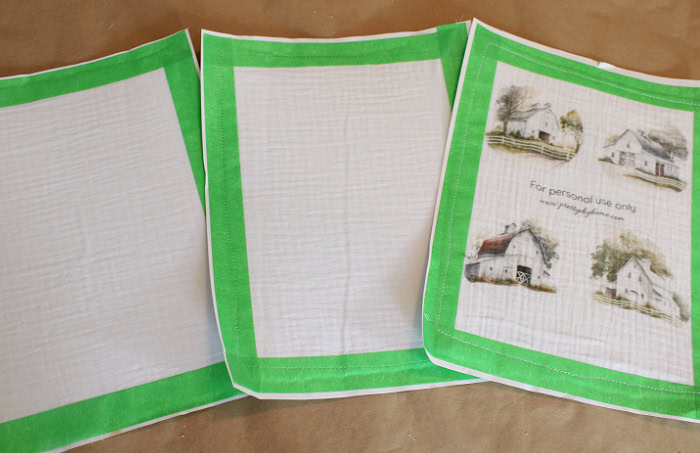
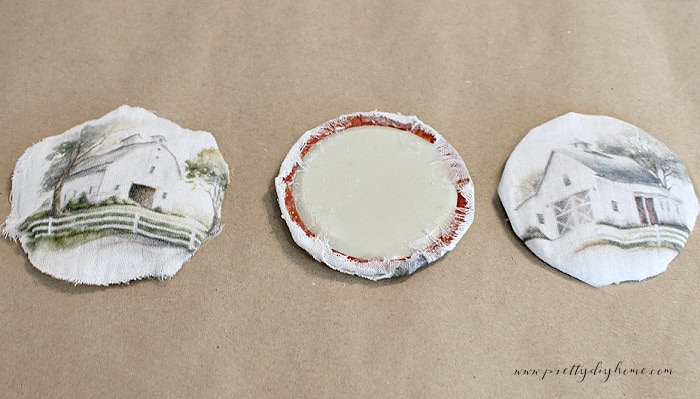
Cut out the printed center circles, leaving a small border around each design if desired. The circles do not need to be cut perfectly because the fabric edges will be wrapped around the back of the insert.
Attach a small amount of batting to the jar lid insert with hot glue. Apply a thin bead of hot glue around the outside edge of the insert, then center the printed fabric circle over the top, making sure the image is positioned where you want it. Press gently to hold the fabric in place. Working from the back, fold the fabric edges over the insert a little at a time, gluing as you go until the back is completely covered.
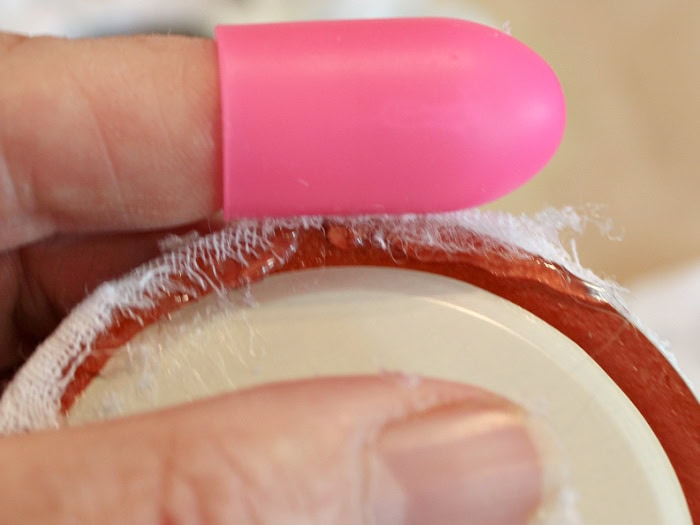
Once the batting is attached and the fabric is wrapped around the insert, you will have a finished padded flower center ready to add to your fabric flower.
Step 5: Assemble the Flower Petals
Before we start assembling the flowers, don’t let the number of photos fool you. The process is quite simple. I’ve included extra close-ups and variations so you can see exactly how each step is done and choose the methods that work best for you. Once everything is prepared, the flowers are quick and easy to do.
Fold a fabric blossom with the interfacing side facing upward, leaving the two ends slightly staggered rather than perfectly aligned.
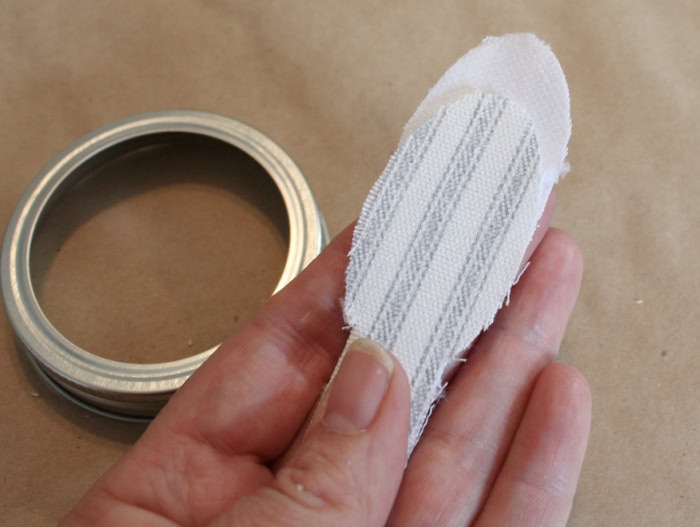
Slide the folded blossom under the jar ring, leaving the folded loop on one side of the ring and the blossom ends on the other.
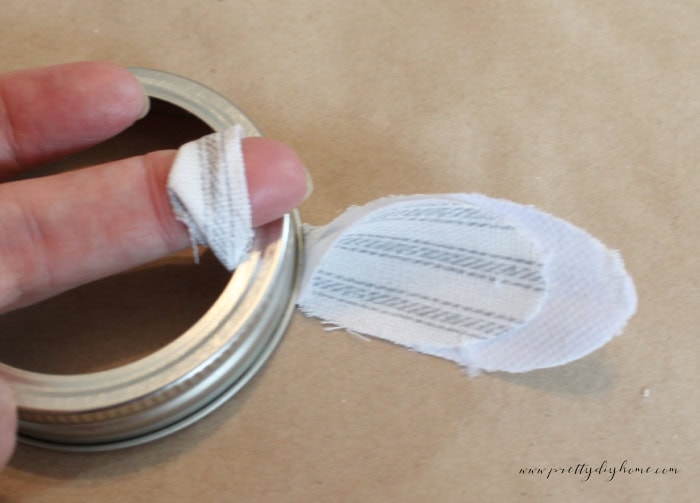
Pull the blossom ends through the loop and snug them lightly. Twist the back blossom in a counterclockwise direction until the patterned side faces forward. When the petal is positioned where you want it, tighten the loop completely to secure it to the ring.
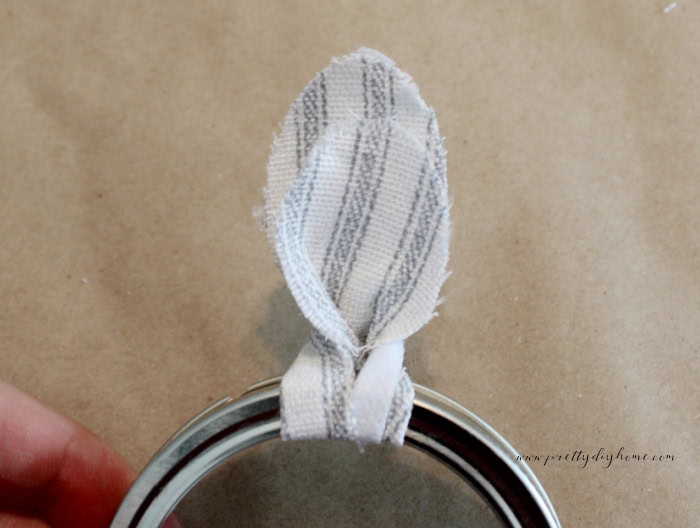
Continue adding blossoms around the ring one at a time. I used fourteen blossoms for each flower, alternating fabrics and adjusting the petals as I worked. Don’t worry if the flower looks sparse at first. It will fill out quickly as additional blossoms are added. If a few stray threads appear, simply snip them off as you go. It doesn’t happen often, but I like my finished flowers to be as neat and thread-free as possible.
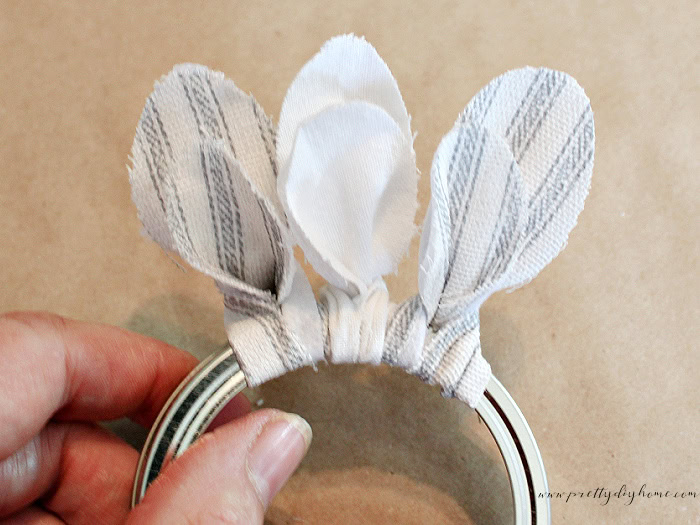
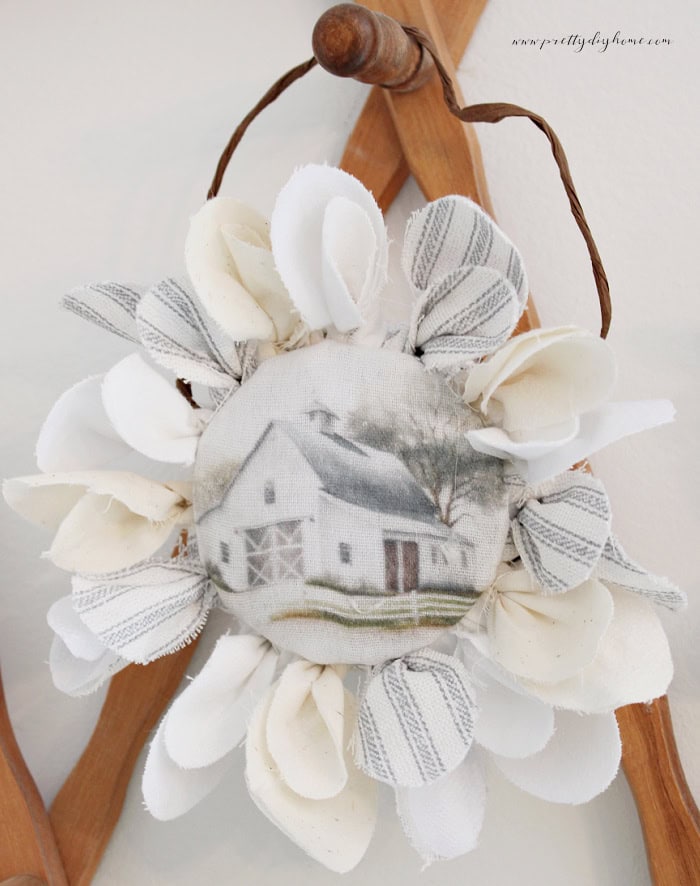
Once all the blossoms are attached, take a few minutes to fluff and adjust the petals until you’re happy with the shape of the flower. Don’t worry about making it perfect at this stage. The flower can be fine-tuned and styled after the center is added and the hanging wire is attached.
Step 6: Add the Flower Centers
There are two ways to add the flower centers, and both work well. For the bee and barn designs, I prefer to glue the finished center directly to the front of the flower. This keeps the printed image fully visible and allows the artwork to remain slightly raised above the petals.
For the vintage letter centers, I used a different method. Instead of gluing the center to the front, I gently pushed the covered insert through the back of the flower ring and into the center opening. You may need to bend the metal insert slightly to get it started, but don’t worry if it feels a little awkward at first. Once the insert is inside the ring, use the back of a spoon to gently press and flatten it into place. The batting on the front helps disguise minor dents and makes the process surprisingly forgiving.
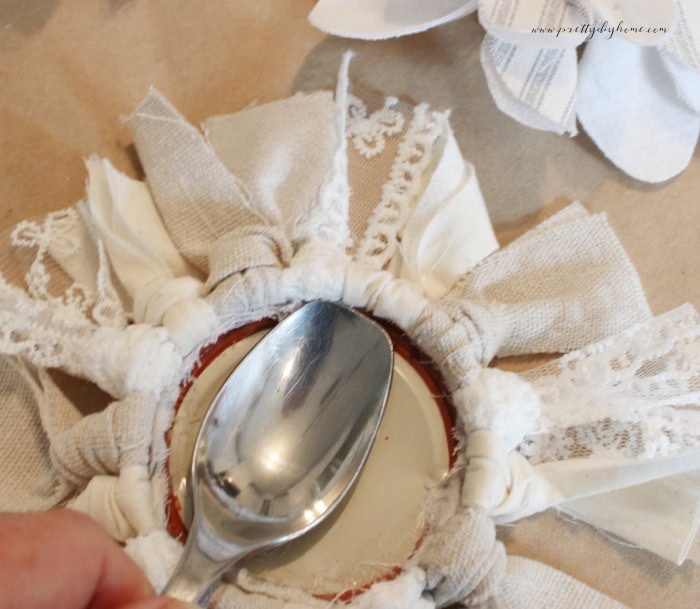
Choose whichever method you prefer. Both create beautiful finished flowers, but each gives a slightly different look.
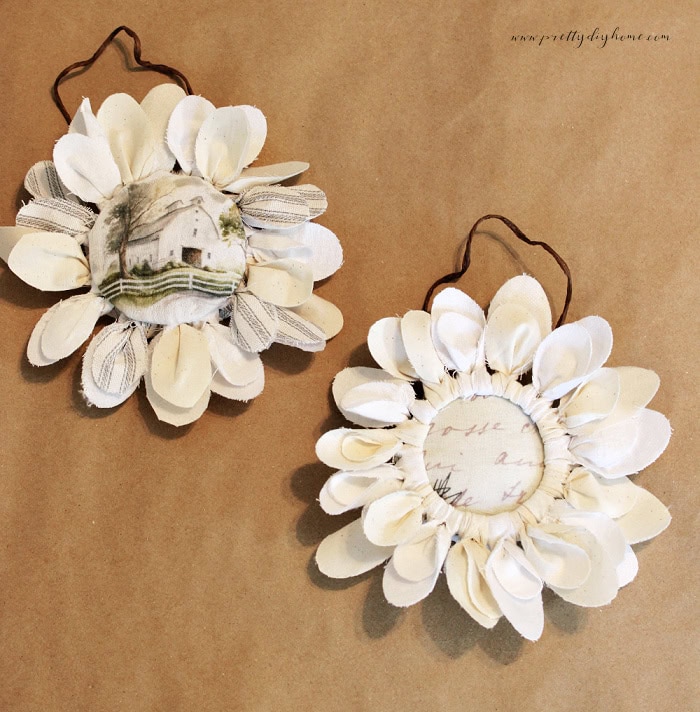
Finishing the Back and Adding a Wire Hanger
To finish my flowers, I cut a paper circle the same size as the jar ring and glued it to the back using hot glue. This step is completely optional, but it gives the flowers a more finished appearance while hiding any visible threads, glue, or the rubber sealing ring that may show on the back.
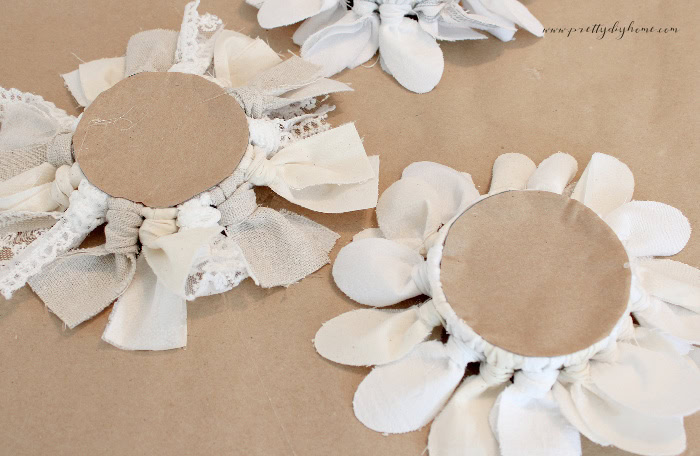
As a final touch, I added a paper-wrapped wire hanger. Cut a piece of wire about 12 inches long and wrap the center around your finger to create a whimsical curl. Thread one wire end underneath a flower knot on one side of the ring and the other wire end underneath a flower knot directly across from it. Adjust the wire until the flower hangs straight and the wire is even on both sides.
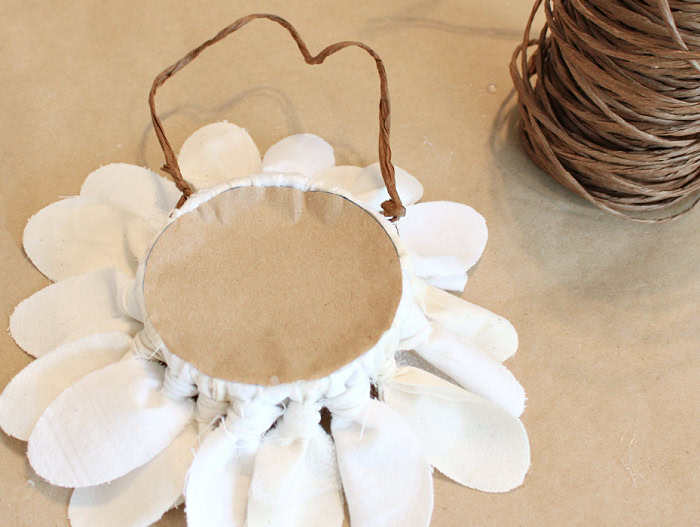
The wire hanger makes it easy to display the flowers on cupboard latches, hooks, baskets, wreaths, and seasonal arrangements.
Finished Fabric Flowers with Printable Vintage Centers
Here are some different ways you can use these flowers in your home.
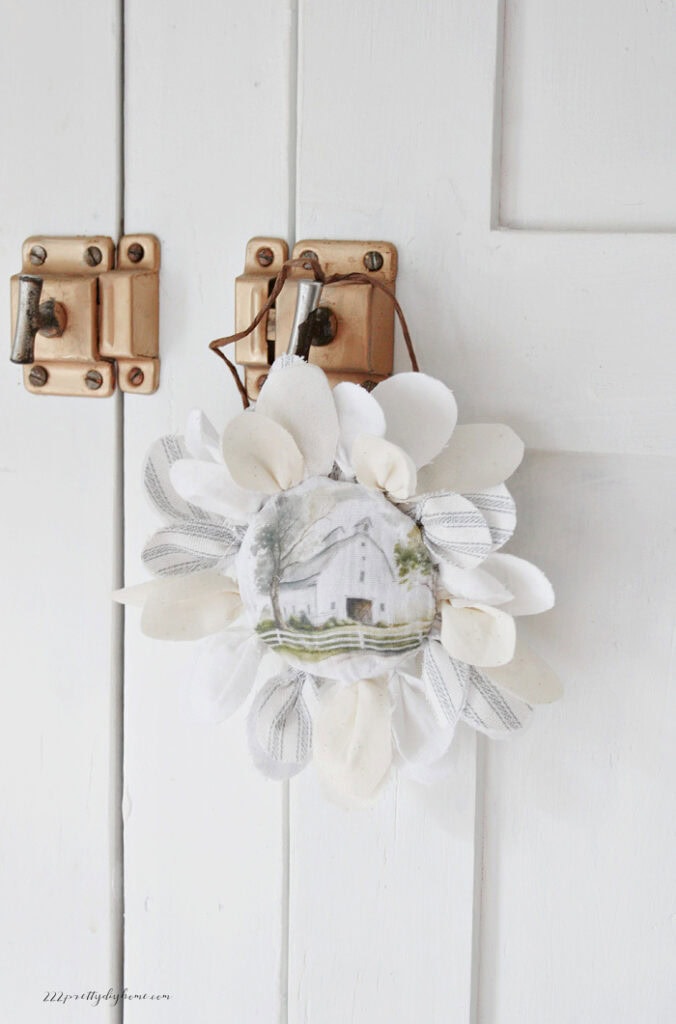
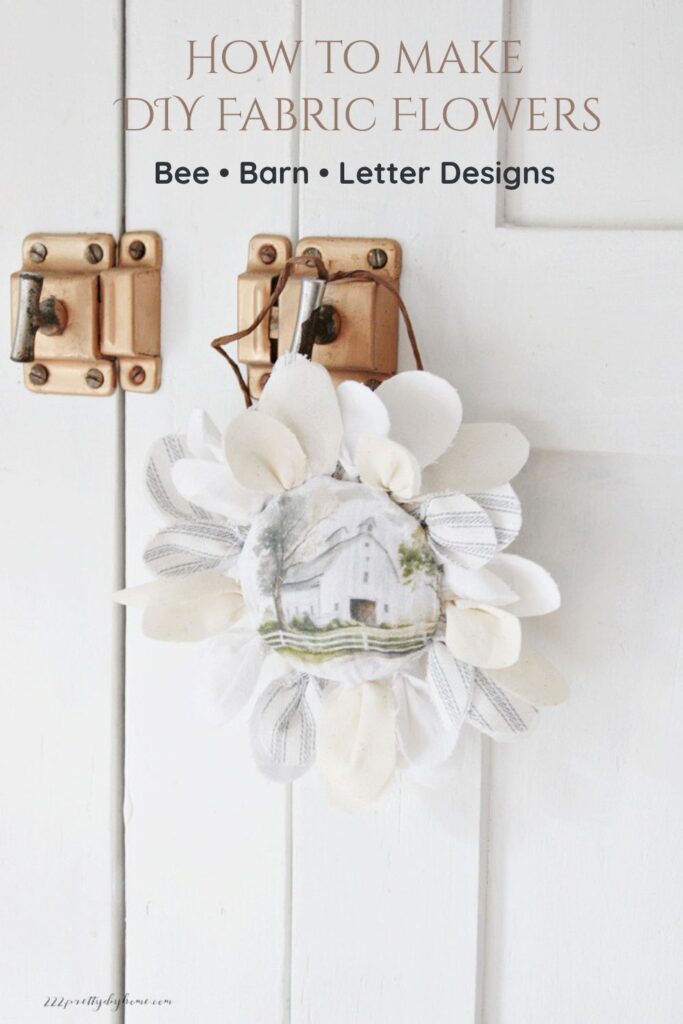
The paper-wrapped wire hanger makes it easy to display the flowers on cupboard latches, hooks, baskets, and seasonal arrangements.
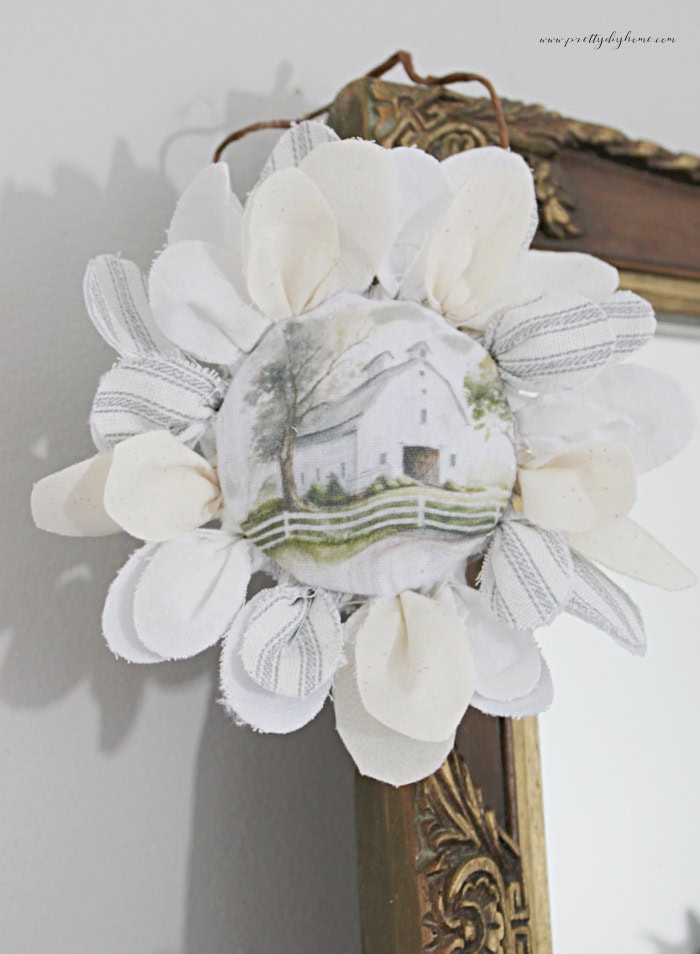
The barn center design pairs beautifully with farmhouse and vintage decor. Here, I simply hung the flower from the edge of an old frame in our living room.
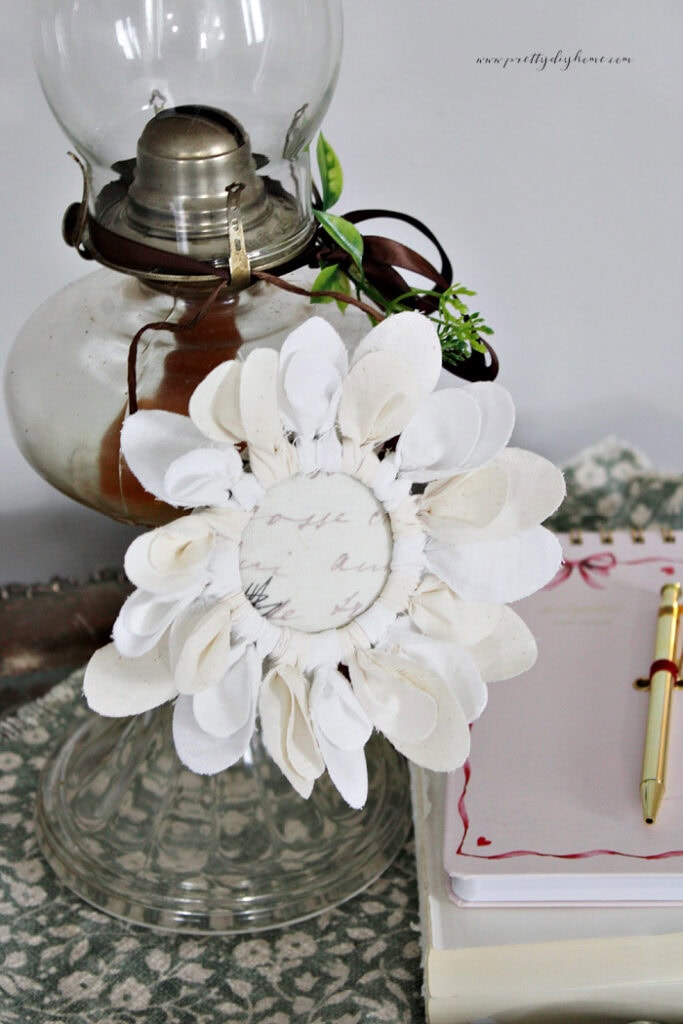
I could never quite figure out how to decorate with this old oil lamp, but adding the vintage letter flower gave it enough detail to make it feel special. Paired with a small notepad and a few old books with the covers removed, the whole display took on a soft, romantic feel that fits perfectly with cottage and vintage-inspired decor.
These DIY fabric flowers with printable vintage centers are one of those projects that can be customized endlessly. Simply changing the center image creates a completely different look, from cheerful bee flowers to farmhouse-inspired barns and romantic vintage letters. By mixing different fabric colors, textures, and patterns, you can easily adapt them for every season. Soft florals and ticking fabrics are perfect for spring and summer, while plaids, homespun fabrics, velvet, and rich autumn colors create beautiful flowers for fall decorating. Whether you hang them from cupboard latches, tuck them into wreaths, decorate baskets, or use them in seasonal displays, they are an easy way to add handmade cottage charm to your home.
Pin It for Later
Looking for a creative way to use fabric scraps, vintage printables, and mason jar rings? Save these DIY Fabric Flowers with Printable Vintage Centers to your favorite DIY, cottage decor, farmhouse, or Cricut crafts Pinterest board so you can make them later. With bee, barn, and vintage letter designs, they’re easy to customize for every season and decorating style.
You May Also Like

Repurposed Vintage Linen Hanger Covers
This craft uses vintage linens and simple sewing to create decorative hanger covers with cottage charm. They are easy to do, and the pattern is drawn.

Pretty DIY Tea Towels for Spring
Another beginner-friendly sewing project that adds handmade style to your kitchen and makes a wonderful gift.
DIY Rustic Pumpkin
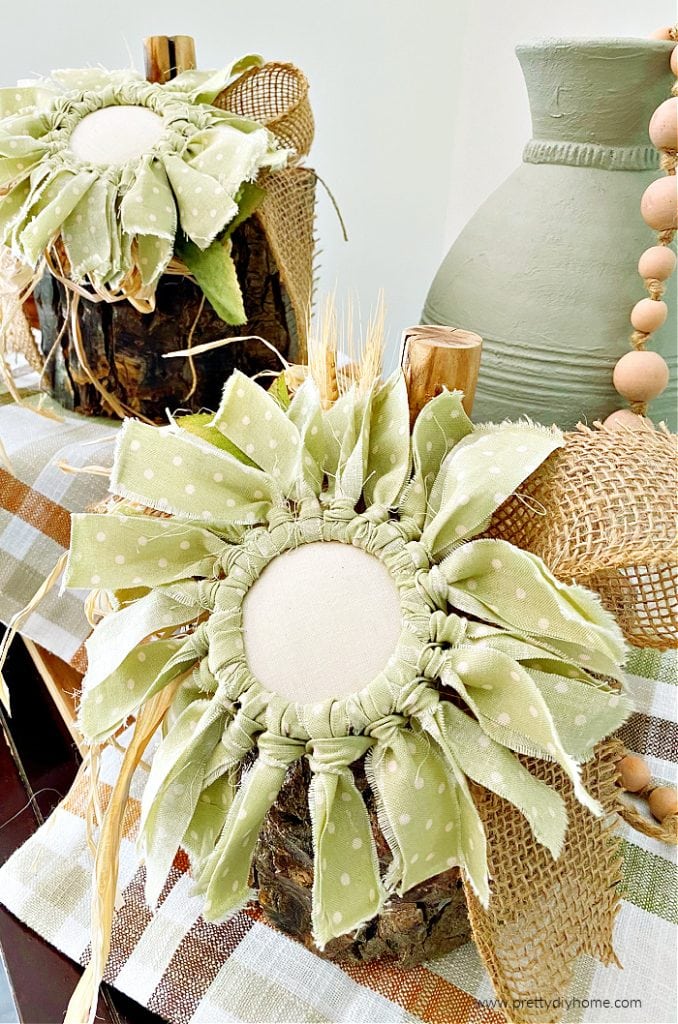
This unique pumpkin craft features a variation of the fabric rag flowers used in this tutorial and shows how they can be adapted for fall decorating.