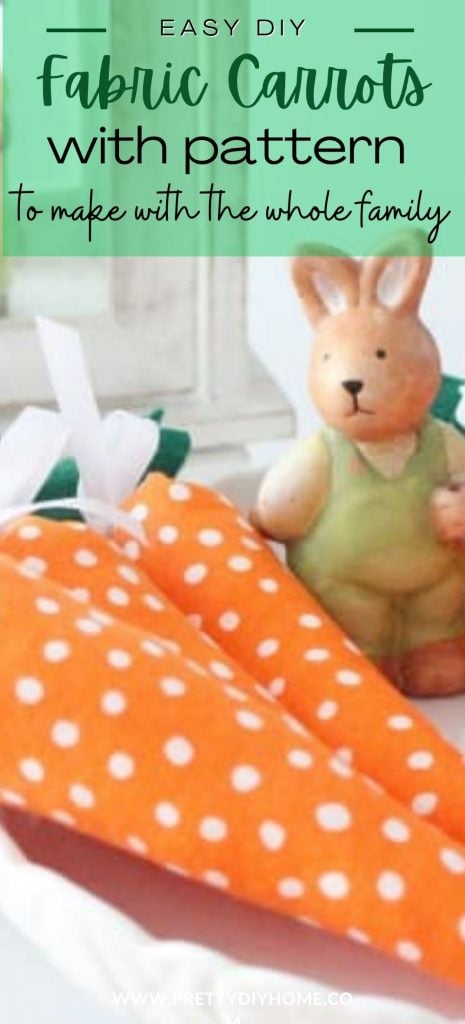
DIY Miniature Carrots for Spring Decor
These DIY miniature carrots are both adorable and useful for Spring decor. They make a sweet Spring or Easter craft that you can create on your own or with teens.
This is one of my oldest and most loved projects on Pretty DIY Home. I was one of the early bloggers to share fabric carrot ideas years ago, and this post has always been a reader favorite.
These little fabric carrots are quick to make, affordable, and easy to customize with different fabrics. Half a meter of fabric can make a generous batch, and each carrot takes only about fifteen minutes to sew.
This year, I plan to create a new set using vintage and heirloom style fabrics, but first, I want to share the original tutorial so you can make your own classic fabric carrots for Spring decorating.

Half a meter (yard) of the fabric cost $4.00 and made 15 of these little fabric carrots. It takes 15 minutes to make each carrot. You don’t necessarily need 15 mini carrots, but I would make at least three.
l

How to Make DIY Fabric Carrots
Step 1: Gather Fabric Carrot Supplies
You can use a wide variety of fabrics for these DIY carrots, including fat quarters, scrap fabric, or leftover ribbon. Have fun with fabric choices and pick something that suits your Spring decor style.
- Cute cotton fabric
- Green felt
- Polyester stuffing or filling
- Seam ripper
- Needle and thread
- Sharp scissors
Step 2: Cut the Fabric and Felt Pieces
Using the hand drawn fabric carrot pattern and the leaf pattern, cut out your fabric and felt pieces. You can cut two layers at a time to save time, including when cutting the felt leaves.
Typically when I sew, I use a zig-zag stitch to seal fabric edges. I skipped that step for these DIY carrots since they are seasonal, and I plan to replace them rather than wash them.

Step 3: Sew the Carrot Body
Fold a narrow section along the top of the carrot piece and sew to create a finished edge.
Fold the carrot in half lengthwise and sew a narrow seam along the side, tapering toward a point at the bottom.

Turn the carrot right side out. Use a seam ripper or a blunt tool to gently push out the tip so the carrot point looks neat.
Step 4: Stuff the Carrot
Add polyester stuffing to fill the carrot. I found it helpful to start with a small grape sized amount and push it into the tip first so the carrot keeps a nice pointed shape.
Continue adding stuffing until the carrot feels full but still soft.

Step 5: Close the Top and Add Felt Leaves
Using a needle and thread weave stitch the top of the fabric carrot.

Roll the felt into leaf shapes and insert them into the opening. Pull the thread tight to gather the fabric, then stitch securely through the top, making sure the leaves are held in place.
Step 6: Tie Ribbon and Add Decorative Details
Tie a ribbon, ric rac, or twine around the top of the carrot. If you like, add a button or a small decorative flower for extra charm.

Ways to Decorate with Fabric Carrots
hese DIY fabric carrots are sweet little accents that can be styled in many ways around your home. Lay them on a shelf or countertop, tuck them into a Spring basket, or use them as part of an Easter centerpiece.
They also look charming hung from a mantel, draped across a tray, or styled in a small vignette with bunnies, books, and florals. I love using them as gentle seasonal touches that feel playful without being over the top.

Save this DIY Miniature Carrots for Spring Decor tutorial so you can make your own sweet fabric carrots for Spring and Easter decorating.
Other Spring Craft Ideas

DIY Carrot Cushion
This fun DIY Carrot Cushion makes a sweet Easter gift. Pair it with the world’s happiest Easter bunny toy for a whimsical and cheerful Easter present idea.
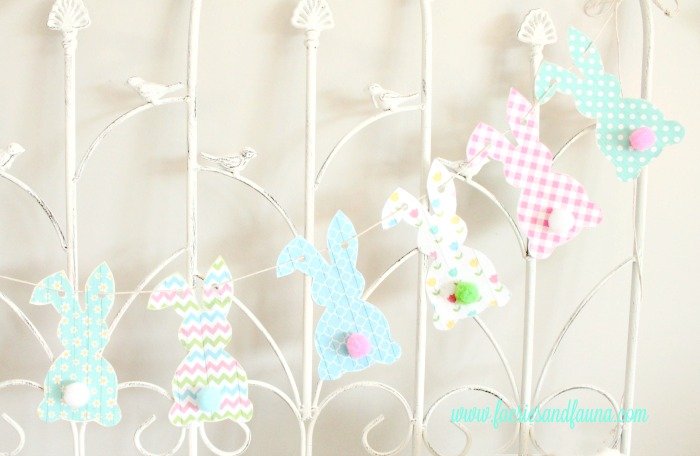
Print and Cut Bunny Banner
No special paper is needed for this fun bunny craft. Just print, cut, and string together this easy DIY Bunny Banner Spring Craft
Hi Leanna! This DIY Carrots for Spring Decor idea is amazing! I love how you transformed a simple piece of fabric into an adorable Easter decoration. Your step-by-step instructions make it easy for anyone to recreate this craft. I can’t wait to try it out and add a pop of color to my home this spring. Thank you for sharing!
These miniature carrots are adorable. I’m all about cute Spring and Easter crafts these past weeks 🙂
You are so talented Leanna
Hi Leanna! I am featuring your Fabric Carrots at Totally Terrific Tuesday today. I also wanted to feature your vintage dress garland but I chose the carrots for Easter. Please link up the vintage dress garland after Easter. Both of these projects are fabulous! You are so talented.
Wow Sherry thank you so much! I was so happy with your comment I read it out to Hubs. Looking forward to the link party.
Your miniature carrots are adorable, Leanna – love the fabric you used! Pinned
Hi Marie. Thank you. I made quite a few of them to use in different ways, but they were easy, fast and inexpensive, so why not! Happy Spring eventually my friend.
I remember that huge carrot pillow of yours. It’s always been one of my favorites and now these polka dot ones too. So cute Leanna and I love how easy they were to make.
Your carrots are adorable, Leanna! What a fun touch for spring decor. I love polka dots, too! Pinning.
Thank you for letting me know Beverly. It is funny how something as simple as a polka dot can make you feel happy. I appreciate the pin very much.
Oh my goodness, these are so cute! Pinned!
Thank you very much Amy. I am happy to hear you like them. Thanks for telling me.
Soooo sweet, you found the perfect orange fabric for these.
Thank you, Julie. I have a soft spot for polka dot anything.
These carrots are cute and they look eas to make too. I am pinning.
Thank you very much for the pin. These little carrots are super easy to make they only take a few minutes to put together.
Those carrots are so darn cute I can’t stand it! Pinned so I can try this later. Have a good day!
Thank you very much for the pin. I love these little carrots, especially when paired with a bunny.
These are so cute and could be filled with mini eggs for Easter, what a treat to wake up to.
Great idea! I should try and design something similar, where the middle had a pull string closure.
Few weeks ago I organized all my fabric (accumulated over several years),seem to think might have some orange fabric to make 3 of these anyway for cute basket gotten yesterday at Walmart. Great tutorial so ought to be able to make them, hope so as they are so cute. Love the felt leaves also. Love your orange polka dot fabric for the carrots.
Happy week
That’s great JaneEllen. The leaf pattern is done so that you can just roll it up instead of having to attach individual leaves. Isn’t a fabric stash wonderful? Especially once its all organized.
These polka dot carrots are TOO CUTE! I just made some twine wrapped carrots for some stuffed bunny hangers. I think your version would have saved me some time. Great tutorial. Pining to my sewing board. Thank you!
Thank you, Audra. I am going to go check out your carrots. They really are great for updating existing Easter decor.
These are just adorable. Spring seems such a long ways away that I feel an urge to make a few of these:)
Hi Milena. Easter arrives here before Spring does so I am used to just enjoying Spring indoors before outdoors. These were really handy for updating decor I already had.
Very cute! I can’t wait to do this project!
That’s great. They go together so quickly and I am certain you will enjoy them.
These are adorable. Especially since I also have been thinking about carrots. And creating a carrot craft. Great minds as they say 🙂
I look forward to seeing yours Debra. Over the next one or two posts, I am going to show how I am using them. So much cheaper than buying a bunch of a faux carrots.