Vintage Style Paper Dress Banner
Origami Paper Vintage Dress Banner
This paper vintage DIY dress banner is designed for a little girl’s room. It’s hanging up on the mantel for the photos then it’s going into an envelope as an Easter gift. It’s perfect for hanging over a closet or a bed frame. This one is going to hang in a dress-up playroom for my granddaughters.

Like most paper crafts this banner is very inexpensive to put together. I considered making it with pretty fabric using an iron to make the creases but decided to do it with pretty cardstock so the dresses would stay crisp.

How to Make a Dress with Paper
The little vintage dress banner only takes an hour to fold the dresses once you have practiced. I have done a video that you can follow if you prefer, it’s at the end of the post. But I have also included a step-by-step tutorial here as well.

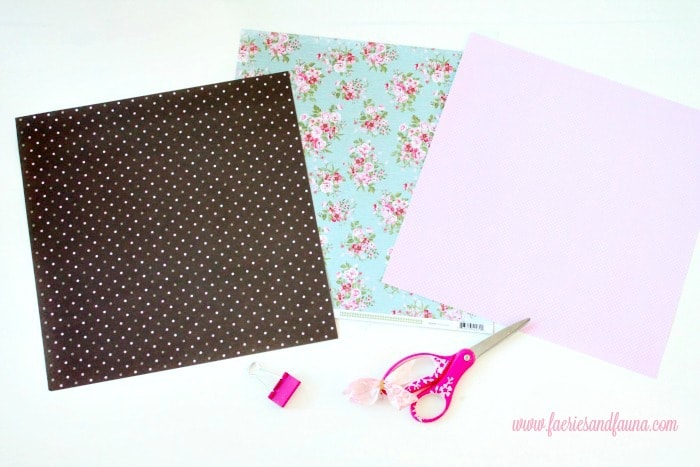
Paper Dress Banner Supplies
- 3 – 12 by 12 pieces of cardstock (1 makes four dresses)
- Scissors to cut the cardstock into squares
- Glue and accessories (optional)
- Miniature clothespins
- Thread, bakers twine, or mini lights to hang the dresses
It’s better to use 12″ by 12″ cardstock as you get four miniature vintage paper dresses for each piece. My initial plan was to use up some 8″ by 11″ cardstock I had, but it would use too much paper.
Take a 6-inch square piece of cardstock, place the pattern side down, and fold it in half.


Open and fold the outside edges into the middle on both sides.

Open and flip the paper over the pattern side will be face up.

Take the outside FOLD and fold it into the middle, do it on both sides.
Flip over, the pattern will be facing downwards.

k
Fold from the bottom almost in half leaving 1/3 inch (cm) at the top.
Now take the same piece and fold it down back onto itself leaving another 1/3 inch (cm) fold.


Flip over the pattern side will be facing you.
k
You can see how the dress is starting to form with two parts, the smaller top will form the blouse area and the longer part will become the skirt.

Starting at the top, fold down the two inner corners to form a collar.

Next, take the bottom two portions and pull up and outwards a little bit to form the A-line of the skirt portion. Gently pat it down and form the second creases. Do it on both sides and flip the dress over.


Be very careful. Bring the back of the upper portion back and unfold the upper portion to form the V neckline. It will be almost square on the back.
Fold the two sides of the upper portion over to narrow the top part.

Fold over the edges of the skirt making sure to crease it into an A-line. Do it on both sides and flip over. You’re almost done.

Two little paper tabs are showing on the top of the v-neck, fold them outwards making the little cap sleeves.

If you prefer here is the link to the vintage banner video.
For this banner, I made a dozen dresses for a 12-foot battery-operated light string.

The dresses are finished and can be used as is. Decorating the dresses is optional, they look adorable and vintage just as they are. I chose to dress mine up a little bit with some odds and ends from my craft room.
Play around and see what you like, just be aware of the proportions of the dress. For example, I wanted to put rick rack on my pink dress but even though my rick rack was small it did not look proportional when placed on a miniature paper dress.

These little dresses received some glue on buttons and little bits of paper lace.
Hanging the Origami Dresses
To make sure the dresses hold together and lay flat glue some of the folds into place on the back of the dress. Let dry.


Other Paper Banner Crafts to Try
Easy Print and Cut Bunny Banner
Create the adorable bunny banner you just print the bunnies and hang them. The free printable bunnies are included.
Oh I am in so love with this banner!
What an adorable, creative idea! Lucky granddaughters! I’m tucking this idea away until I have grandchildren.
Hi Debbie. I am glad to hear you like them. Although I made these with my little ones in mind, some of my readers have suggested using them for wedding showers or birthday parties.
Oh my gosh, these are so adorable!
Thank you very much, Toni. I enjoy how absolutely feminine they obviously are.
OMW Leanna, that’s soooooooo amazing. Those dresses are gorgeous and the paper you chose fits the theme perfectly
Hugs Michelle, I have a soft spot for polka dots, and if I could decorate my home just for me, it would be brown and pink. It’s my favorite colour combination.
Oh my goodness! These are so cute and amazing! Pinning!
Thank you very much for the pin. I am happy you like them.
This is seriously so adorable! I can just imagine it for a bridal shower, or a little girls’ tea party!
It would wonderful for a little girls playroom, I am sure they still play tea parties with their dolls. Thank you for the feedback, it is much appreciated.
Oh my goodness, these are absolutely adorable, Leanna! Your granddaughters are going to squeal with delight when they see this. Pinned
Thank you, Marie. I really hope that they do. Their little playroom will be amazing once we get started on it for them.
This is absolutely adorable and SO creative!!! I could totally see this being a cute decoration for a little girls birthday party or a baby shower!! Such a great idea. You are so creative!
Thank you Marci. I really enjoy banners, they are fun and different and don’t take up much room. I am glad to hear you like this one, thank you for taking the time to let me know.
Oh my gosh! This is so precious! These would be perfect for a bridal shower or a tea party! What a brilliant craft! Thank you for sharing on #YourWhimsWednesday
Thank you so much. Your right and thank you for mentioning it. I had only considered it for a little girl’s room.
These are gorgeous what a lovely sweet idea. I’d like to make one using old maps as the paper.
Hi Claire: Absolutely you could make them using maps. You could make a larger centerpiece using them if you used maps.
Wow, so cute! My wannabe fashion designer 8 year old would love this garland. Visiting from Wonderful Wednesday.
Thank you, Michelle. These little dresses are super fun to put together. Origami is always fun to do because it’s like a big surprise when you get to the finish,
Wow! This is simply adorable! Perfect for a little girls room!
This is so beautiful, I’ve seen these as card toppers in the past but never thought to make a banner. Such a lovely idea.
Thank you, Julie. I wanted a banner that would go with my little one’s dress up area, so the dress theme was the perfect fit.
Such a pretty idea. The tutorial is brilliant, thank you
Thank you Caroline. The dresses are very simple to do. I learn best with a step by step instruction that I can do at my own speed. Glad you like the tutorial that way.
I usually visit earlier in the week, but I’m so glad I got here. This is so unique and so cute. I love it!
Hi Trish. My granddaughters are still very girlish, so its fun to make and gift them all of these soft feminine crafts. I love this style of project, I am glad to know you love it as well. Thanks for telling me.
Leanna this is so, so adorable. How do you come up with these great ideas!!
Hi Mary. Lately I seem to be on a paper craft kick, I would love to create labels etc but the techie part of figuring out cut setting etc bores me. Folding is much more my speed lol.
I just love, love buntings. My sister made a beautiful one out of fabric when we brought our daughter home from the hospital.
This one with the dresses is absolutely adorable. I have to make it for her next bday party!
It would work for that, you could even do it as a craft during the party depending on how old she is. Thank you for commenting.
That’s very kind Laura, I am glad you like the banner.
Your sweet garland is so clever and creative. I have never seen anything so cute!
This is such a sweet pretty garland! I love the paper you chose and would have loved to have made them for my bridal shower gift bags a few years ago!! Will be pinning to make for my daughters big day one day!
That’s a really cute idea. You could do them in the wedding colours even. Thanks for pinning.
Leanna,
Oh gosh, you had me at origami! Those papers are so pretty and the dresses are adorable!!! What a great project and I love that you used the light cord as part of the garland, that is a fantastic idea. Why didn’t I think of that?!!! Thanks for being a part of our blog hop this month!
Thank you Janine, I really love all the other blogs that participate and it challenges me each month to create some really nice. I love your paper flowers.
So so pretty Leanna! I love those cute little dresses, they are just perfect. Great tutorial too!
Thank you, Katrin. I am enjoying crafting with paper, there are so many different styles colours and patterns to experiment with.
Now that……is impressive. Wow!!!!! How fun would that be for a girls party? Love this
That would be a wonderful use for them, my daughter in law is very into vintage dishes etc. so these will fit right with her decor for my grand daughters.
This is so precious. I know you said it is great for a little girl’s room but us big girls would love one too.
Thanks Debra. I bet you could use them as a sign in your shop. Just add letters to them. I am glad you like them my friend.