DIY Natural Tree Branch Centerpiece for Spring
Where I live, it often stays cold well into May, so I like to bring the feeling of spring indoors early. Creating a DIY tree branch centerpiece is an easy way to add a fresh, seasonal touch to your home, even while it is still chilly outside.
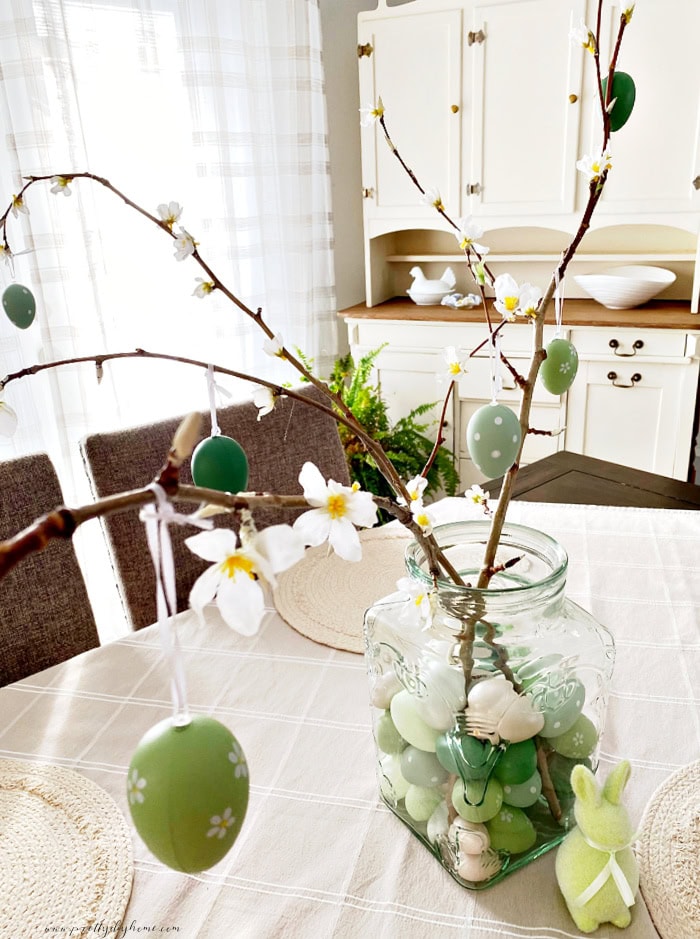
A natural tree branch centerpiece is a simple and beautiful way to decorate a spring or Easter dining table. I have seen large branch displays used in corporate settings, and they always look elegant, but buying oversized faux branches can be expensive.
With a quick trip outdoors, you can make your own centerpiece for just a few dollars. Real branches are often larger, stronger, and more natural looking than artificial ones, and they can hold hanging decorations without drooping.
Right now, my branches are decorated for Easter using pom pom bunnies and eggs from the Dollar Store. Once Easter is over, the decorations can be removed, and the same branches can be used throughout Spring and Summer.
How to Make a DIY Tree Branch Centerpiece
Here are the supplies I used to make my DIY tree branch centerpiece. Even if you need to purchase everything, the cost should be only a couple of dollars per branch. Most of my supplies came from the Dollar Store.
Materials Needed
- Natural bare branches
- Large vase
- White and yellow craft paint
- Small paint brush
- Sand, or rocks (optional for weight)
- White or pink cherry blossoms (Dollar Tree)
- Pruning shears
- Hanging seasonal ornaments
- Hot glue gun
Step 1: Prepare the Branches
Grab some fresh branches at least 1/3 inch thick, with little buds on them. The little buds look very similar to pussy willows once painted.
If the weather is warm and bugs are a concern, give the branches a quick wash or soak in a tub. Because of cold temperatures, I simply wiped mine down with a cloth and a bit of Dawn dish soap.
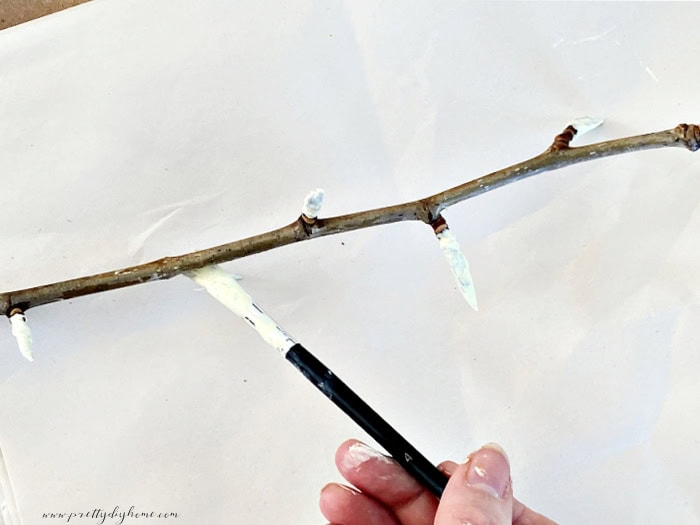
Step 2: Paint the Buds
I used leftover craft paint in yellow and white, mixing about a 1:3 ratio of yellow to white to create a soft pastel yellow. You can use plain white or yellow if you prefer.
Using a small paint brush, paint all of the buds on the branches. Let them dry, then check for any thin or missed spots and repaint as needed. Allow the second coat to dry fully.
Step 3 – Add Blossoms
Pull the blossoms from the Dollar Tree cherry blossom stems. Using hot glue, attach blossoms to the branches, placing them on about every second painted bud.
Once those were in place, I used the remaining blossoms to fill in any areas that needed a little extra fullness.

Step 4: Arrange the Branches in a Vase
I found a large, heavy vase at a thrift store that was sturdy enough to hold the branches on its own. If your vase feels lightweight, add sand or small rocks to keep it stable.
Place the branches in the vase and trim them as needed, just like you would with fresh flowers, until the arrangement feels balanced.
This spring, I added a couple of pom pom bunnies and green Dollar Store Easter eggs to my branches. Once Easter is over, the decorations can be removed and the branches restyled for the rest of the season.

Video Tutorial
This is a quick and easy spring craft, and I love how these branches turned out. Here is a short video showing the process.
The latest on Youtube:
More Ways to Style Your Branches
You can decorate these branches in many different ways for special occasions:
Fairy lights for patios or outdoor gatherings
Handwritten notes for birthdays or bridal showers
Crystals for wedding centerpieces
Photos for anniversaries or family reunions
Tea light lanterns for Christmas or winter decor
Want to make this DIY tree branch centerpiece later? Save this post to Pinterest so you can keep it handy for spring decorating.

More Spring Centerpiece Ideas

DIY Planter Centerpiece with Moss and Terracotta
This simple Terracotta Spring Centerpiece begins with preplanted daffodils. These planted bulbs last much longer than the usual cut flowers do.