DIY Pantry Labels
Being organized is always a good thing. Our kitchen cupboards were somewhat organized, I had everything in jars, or plastic containers but the labels were chalkboard, and green painters tape I had on hand. Chalkboard labels worked for awhile, but the chalk rubs off, and lets face it the green painters tape meant I was glad to have cupboard doors.

Sam @ Raggedy Bits | Facebook | Pinterest | Instagram | Google + | Twitter
Leanna @ Pretty DIY Home | Facebook | Pinterest | Instagram | Google + | Twitter
Welcome back to Waste Not Wednesday! For those who have been following along for a while, you’ll know Waste Not Wednesday as a linky party. But Leanna and I have decided to change things up a bit. Each Wednesday we will be bringing you fun projects not only from us but some of our favourite bloggers. This week’s theme is label organization!
I had been wanting to create some pretty labels and tackle the pantry and when Sam agreed to do a post about labels it was just the nudge I needed to quit procrastinating.
Declaring today as the day, I hauled out my old Silhouette Cameo 2 cutting machine, spent several hours fiddling with different fonts, vinyls and cut settings and created these DIY Pantry Labels svg files. It took some fiddling but once the settings were tweaked the cutting and weeding worked for me on all the cuts I finished. Let me show you how.

DIY Pantry Labels Supplies
651 Orocal Gloss Vinyl
Cricut Regular Transfer Tape
Green Painters Tape
Silhouette Weeding Tool
Tweezers
Baking Labels Cut Files
Opening the Cutting File
There are two types of files, one for glass jars, and larger pantry category labels for plastic bins. The glass jar labels have a flower in the corner, and the bin labels are a little bit larger. Here are the links to all the different Pantry Label SVG files.
Pantry Baking Labels 1 includes: Apricots, Icing Sugar, Brown Sugar, Oatmeal, Chocolate Chips, Coconut, Currants, Cranberries, Walnuts, Raisins, Pecans and Graham Crumbs.
Pantry Baking Labels 2 includes: Cocoa, Unsweet Choc, Semi Choc, Bran, Almonds, Sugar, Flour, Caster Sugar, Self Rising Flour, Large Oatmeal
Pantry Cooking Labels 1 includes: Basmati, Rice, Sweetener, Risotto, Coconut Flour, Steel Cut Oats, Granola, Popcorn, Couscous, Almond Flour
Larger Pantry Bin Labels 1 includes: Sugar, Flour, Pasta, Salad, Dog Treats, Soup, Baking Mixes, Condiments, Crackers, Snacks.
Larger Pantry Labels 2 includes Cooking Mixes, Coffee & Tea, Soup, Cookies, Snacks, Mexican, Italian, Chinese, Drinks, Salads
Cutting the Vinyl
They are designed to cut out on the typical 12 by 12 mat with vinyl.
The font used is Dahlia script, and the size is 60 the larger bin labels are in size 72. I have already fixed and welded the text and grouped each word with the flower. The larger bin labels don’t have a flower.
I have included various words for you, just pull any wording you don’t want on to the side off the 12 by 12 work surface in Silhouette studio.
Tape the very edge of the vinyl to the mat on both sides with green painters tape. This helps the rollers on the cutting machine roll evenly to avoid twisting the vinyl and ruining your cutting.

I spent an entire day fiddling with different fonts, vinyls, and settings and finally came up with the following settings that worked 100% of the time on my Silhouette 2, using glossy 651 vinyl
Set the send cutting settings to: Needle 1 . Speed 5. Force 8. Pass 1. Then cut the file.
Some Tips for Weeding the Vinyl
Small labels using script fonts are difficult to weed. While weeding these labels I found some hacks that helped make it easy.
Trim the individual words out from the 12 by 12 with scissors before starting to weed.
Use the weeding tool to hold down narrow portions of lettering while gently pulling the vinyl away. before weeding. If the 12 by 12 before weeding. Hold the piece your working on in your hand and start by weeding off the bottom portion first. For whatever reason it makes that portion easier to remove. As you remove the vinyl snip off excess pieces of the vinyl.

The cuts can be difficult to see on the white glossy vinyl. Place the vinyl in the light so you can see the outline on the reflection. Once the bottom vinyl is weeded out, its much easier to see the remaining portion and the lettering.
The letter o has two holes in to weed out, for the inside weeding I used the Silhouette weeding tool to hook the centers out. But I found it very handy to have tweezer handy when little bits readhered themselves to the vinyl.
Using the Transfer Tape
I do not like Cricut vinyl, but I do like Cricut transfer tape. Just make sure to buy the regular transfer tape, instead of the strong, and avoid the extra trip to the craft store like I had. The Cricut transfer tape does a great job of adhering to the lettering while being easy to remove from the glass.
Once the word is weeded, remove the backing from the transfer tape and attach to the front of the lettering. If you have a hard time detaching the backing from the transfer tape. Hook it with the silhouette tool and pull it away.

Press along the letters to help it adhere. I found pulling along the width of the wording make the tape come off easily.

Attaching the Vinyl to the Jar
Place the label where you want it on the jar.

Pull off the corner of the transfer tape and pull it across the lettering. Be careful when you first reach the start of the lettering, if it lifts use the weeding tool to hold the vinyl to the glass. This is where I really loved the Cricut transfer tape, it worked exactly like I wanted it to without any struggles at all..
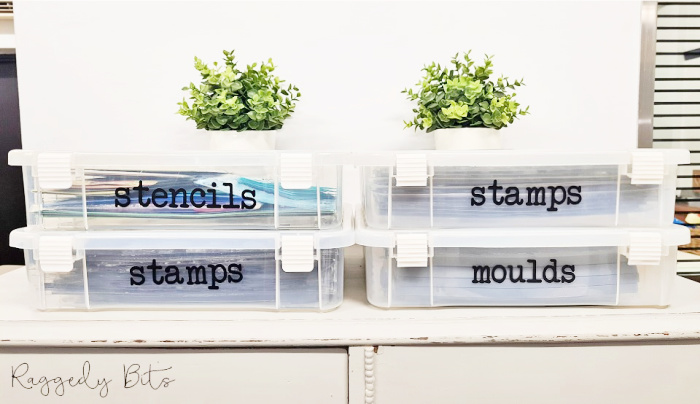
Raggedy Bits – Organise & Label Moulds, Decor Stamps & Stencils

How to Organise & Label Moulds, Decor Stamps & Stencils
Other Really Nice DIY Pantry Labels
I know not everyone owns or wants to use a cutting machine, so I spent some time curating some really gorgeous DIY Pantry Label ideas for you. I know you will find something here to inspire you, so many pretty ideas and methods.
This post from Lia Griffith shares two different kinds of farmhouse label printables, these pretty vintage brown labels and chalkboard labels.

Printable Farmhouse Pantry Labels in Two Styles | Lia Griffith
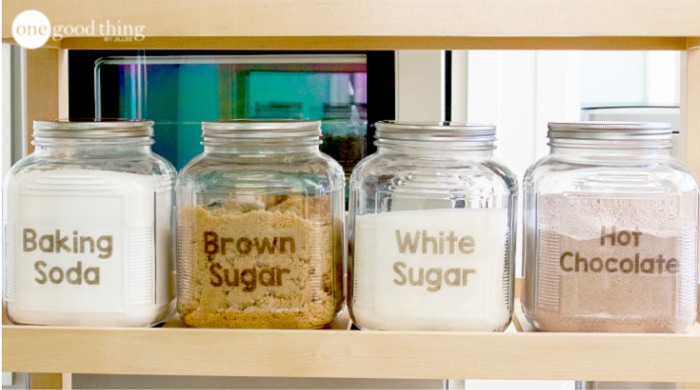
Jill fro, One Good Thing got tired of cupboard full of bright garish and cluttering food packaging, and decided to make these simple labels with beautiful jars. I love the vintage look of her jars, with the clean simple lettering of her labels that allows the pretty jars to shine.

How to Make Your Own Custom Print Labels | One Good Thing by Jilliee
These simple printable DIY pantry labels from Making Lemonade Blog are great as you likely have everything you need on hand.

Printable Pantry Label to Organize Your Kitchen | Making Lemonade Blog


I have an apothecary and need something wonderful to label my jars and drawers, I am seriously going to look into these ideas as they would fit in with my aesthetic.
Your pantry labels turned out so beautiful Leanna! I love the little flower accent!