DIY Washable Paper Bags for Storage and Decor
Every once in awhile I get super excited about a post. And I do mean super excited, so Excited I find myself skipping details in a rush to share it with you. Today’s post of this DIY washable paper bag is that kind of post.
Seriously who else gets excited about a craft like that? I hope you do, otherwise my geek crown is going to fit only too well.
Have you ever seen Uashmama bags? They are these amazingly gorgeous washable paper bags that look like leather. AND have the bonus of not smelling like leather. Edmonton doesn’t have any but I stumbled upon some in a store in BC closed my eyes and rang it up before Hubs could see the $53 price tag. Its so trendy and fashionable I had to have at least one. When I got home I started looking for washable paper to make my own. I made one bag so far and will share some more as soon as I get them finished.
Kraft Tex Washable Paper
This is not a sponsored post although I would be honest if it was. I purchased some small sheets and two large rolls of Kraft Tex washable paper through Amazon and absolutely love this stuff. The directions say to wash it first, so I tested it. I washed and dried it with a load of dark clothes and it came out fine. I also ironed it, and that worked as well.
Kraft tex is like working with a thick canvas fabric. Its thick and stiff but my machine had no problem sewing it. The package comes with lots of helpful information that I read and followed.
Folding the Kraft tex
This stuff is stiff and strong, it stands up on its own. As it is so strong it requires some hacks to fold it neatly.
When folding kraft tex, measure and mark like you do for regular paper. Then fold and crease as you usually do.
Once folded, take an alligator clip or a wood dowel and press firmly along the folded crease really well.
Once its folded and creased open up the fold, use a long ruler lined up to the crease, run a pointed edge along the crease.
I had wood skewers, but if you don’t have those, use a knitting needle. Creasing the paper on both sides gives it a nice firm fold that holds.


The package warns you not to pin kraft tex instead they suggest holding it in place using alligator clips. I found this worked very well.
Uashmama Copycat Bag Tutorial
A roll of Kraft Tex washable paper fabric comes in rolls 19″ wide and 1.5 yards (54″ ) long. One roll is more than enough for a tall bag.
My real Uashmama bag has a square bottom and one corner seam. I am using the original bag as a guide, but making my bag taller and thinner so I can use it as a tall floor vase.
Cutting the Fabric
Cut an 9 inch slice of fabric along the short side of the fabric roll. Set the rest aside and cut out a 9 inch square.
Cut a second piece of fabric 19 by 30 inches. It will be the entire width of the Kraft tex roll.

There is only two pieces of washable paper to make this bag. Instead of cutting and sewing the corners the paper is strong enough to just fold to hold the shape,
Folding the Fabric
You will make a total of 5 folds along the narrow edge of your fabric. Remember to measure, fold, press the crease, open and run along the inside of the crease with a pointed skewer.
The crease marked folds are easy to see, and make a perfect guide for sewing the bag together.
Make the first fold at one inch. The second fold at 8 inches from the end, the Third fold at 15 inches, 22 inches. 29 inches leaving one inch on the end.

To make the bottom seam allowance fold an one inch seam along the entire width of the washable paper.


Remember to turn the bag good side down before lining up the seam edges.

Sewing the Washable Paper Bag
Instead of sewing the bottom to the bag side in one large seam, I found it easier to do each side at a time. To start I line up the corner of the bottom to the corner of the open seam leaving the one inch allowances.
Even being very particular about how my seams lined up, and stopping to take pictures, this bag only took 20 minutes to sew together. You don’t want to be ripping out seams if you make an error so line everything up before sewing. Its easy to do as long as you take the time to line it up first.
Starting at the corner I used the sewing machine needle to plunge the corner and hold the starting point in place. Making sure the other end of the square bottom lined up to the first fold before sewing the seam together.

Its easier if you remove the bag from the sewing machine before starting the next seam. Line up the second edge of the square bottom to the next section of the side piece. Return to the sewing machine by plunging the needle into the corner, lineup the next seam and sew.

Repeat the process with the next two sides.
Time to close the long seam. Because of the stiffness of the fabric, I chose to sew the long seam starting from one end towards the center. Then I removed the bag from the sewing machine, realigned the seams making sure they were straight and then finished sewing.
To turn the bag right side out, start by rolling the top down, one side at a time. Once you get the rolled sides down almost to the bottom square you will be able to push the bottom up through the top.

Once the bottom is through, unroll the sides and stand up the bag.
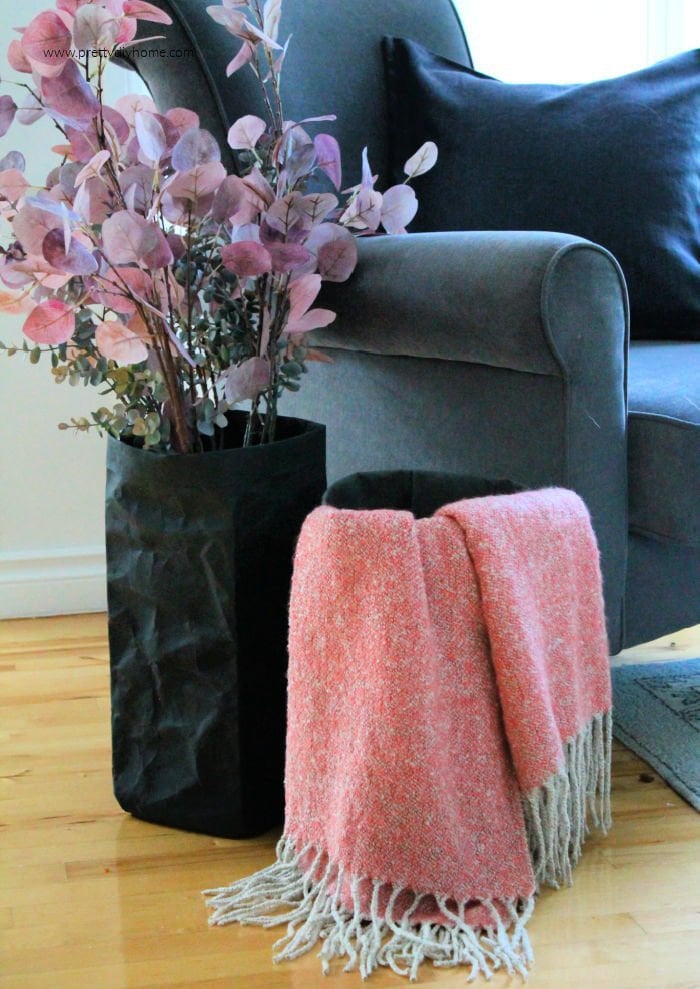


This DIY washable bag has a purposely rumpled finish. I also made a clutch style cushion cover and kept the washable paper smooth. I just love both finishes. Which do you prefer?

I must say… these are pretty awesome! I may have to try this myself!